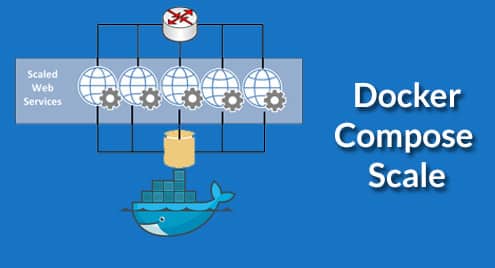
Horizontal scaling refers to spinning up more computers, i.e, VMs, containers or physical servers in order to accommodate any surge in demands. This is in contrast to scaling ‘vertically’, which usually refers to replacing a slower machine (with smaller memory and storage) with a faster ‘larger’ one.
With the containers scaling of both kinds has become very dynamic. You can set quotas for specific applications setting the amount of CPU, memory or storage that they may have access to. This quota can be changed to scale up or down as needed. Similarly, you can scale horizontally by spinning up more containers that will accommodate an uptick in demand, and later scale down by destroying the excess of containers you created. If you are using cloud hosted services that bills you by the hour (or minute) then this can substantially reduce your hosting bills.
In this article we will focus only on horizontal scaling which is not as dynamic as the above description, but it is a good starting point for someone learning the basics. So let’s start.
Scale via the docker-compose CLI
When you start your application stack by passing your compose file to the CLI docker-compose you can use the flag –scale to specify the scalability of any particular service specified in there.
For example, for my docker-compose file:
services:
web:
image: "nginx:latest"
ports:
- "80-85:80"
$ docker-compose up -d --scale web=5
Here, the service is called web in the yml declaration but it can be any individual component of your deployment, i.e, web front-end, database, monitoring daemon, etc. The general syntax requires you to pick one of the elements under the top-level services section. Also depending on your service, you may have to modify other parts of the script. For example, the 80-85 range of host ports are given to accomodate 5 instances of Nginx containers all listening on their internal port 80, but the host listens on ports ranging from 80-85 and redirects traffic from each unique port to one of the Nginx instances.
To see which container gets which port number you can use the command:
CONTAINER ID IMAGE COMMAND CREATED
d02e19d1b688 nginx:latest "nginx -g 'daemon of…" About a minute ago
34b4dd74352d nginx:latest "nginx -g 'daemon of…" About a minute ago
98549c0f3dcf nginx:latest "nginx -g 'daemon of…" About a minute ago
STATUS PORTS NAMES
Up About a minute 0.0.0.0:83->80/tcp project_web_1
Up About a minute 0.0.0.0:82->80/tcp project_web_3
Up About a minute 0.0.0.0:81->80/tcp project_web_2
...
To scale more than one service, you need to mention them individually with the scale flag and number parameter to ensure that the desired number of instances are created. For example, if you have two different services you need to do something like this:
This is the only way to do this, since you can’t run the docker-compose up –scale command twice one for each service. Doing so would scale the previous service back to a single container.
Later we will see how you can set scale value for a given image, from inside the docker-compose.yml. In case there’s a scale option set in the file, the CLI equivalent for the scale option will override the value in the file.
Scale
This option was added in docker-compose file version 2.2 and can technically be used, although I don’t recommend using it. It is mentioned here for completeness sake.
For my docker-compose.yml file:
services:
web:
image: "nginx:latest"
ports:
- "80-85:80"
scale: 3
This is a perfectly valid option. Although it works for Docker Engine 1.13.0 and above.
Use Replicas in Production
Instead of using the scale command or the outdated scale value in your compose file you should use the replica variable. This is a simple integer associated with a given service and works pretty much the same way as the scale variable does. The crucial difference is that Docker Swarm is explicitly meant for distributed system.
This means you can have your application deployed across multiple nodes VMs or physical servers running across multiple different regions and multiple different data centers. This allows you to truly benefit from the multitude of service instances that are running.
It allows you to scale your application up and down by modifying a single variable moreover it offers greater resilience against downtime. If a data center is down or a network link fails, the users can still access the application because another instance is running somewhere else. If you spread your application deployment across multiple geographical regions, e.g, EU, US and Asia Pacific it will reduce the latency for the users trying to access your application from the said region.
Conclusion
While docker-compose scale is useful for small environments like a single Docker host running in production. It is also very useful for developers running Docker on their workstation. It can help them test how the app will scale in production, and under different circumstances. Using scale command circumvents the hassle of setting up a new Docker Swarm.
If you have a Docker Swarm instance running, feel free to play around with replicas. Here’s the documentation on that matter,