When working with Docker, you might encounter an instance where the command returns a “permission denied” error. This error occurs when you attempt to run the Docker without sufficient permissions for the command.
Docker requires sudo or root permissions to execute the associated commands by default. Attempting to run any command without the required privileges leads to the infamous “permission denied” error.
This tutorial provides the various methods and techniques that you can use to fix the “permission denied” error when attempting to run the Docker commands.
Keep in mind that it does not cover the process of running Docker in a rootless environment. You can check our tutorial on rootless Docker in the following resource:
Requirements:
As you can guess, to follow along with this post, you are required to have the following:
- Docker version 20.0 and above
- Sudo or root permissions on the host system
What Is the “Permission Denied” Error?
When the “permission denied” error occurs in Docker, it means that the host system cannot establish a communication with the Docker daemon due to insufficient permissions. An example is shown in the following:
![]()
If you encounter the given error, you can use some of the following methods to learn how to fix it.
Method 1: Run the Docker as Root
The first and most obvious method of solving Docker’s “permission denied” error is using the “sudo” command. If you have sudo privileges, you can fix it by running the associated command using sudo.
For example, to fix the said error, we can append sudo before the command as follows:

As you can see, Docker successfully pulls the required images and runs the container.
Method 2: Restart the Docker Daemon
Sometimes, you can get the “permission denied” error in Docker if the engine has a problem. Instead of manually tracking down the issue, you can attempt a quick restart of the Docker daemon to reload it.
Start by checking the status of the Docker daemon as follows:
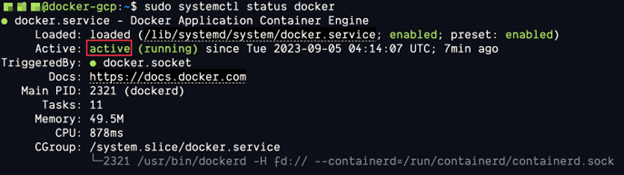
Once you ensure that Docker is running, restart the service with the following command:
This should boot up the Docker daemon and fix any potential issue that might be preventing you from running any command.
Method 3: Enable the Non-Root User
Another method that you can use to resolve the “permission denied” error in Docker is allowing the non-root users to execute the Docker commands.
To enable this method, log into the host system and create a new group for Docker.
Next, add any user that you wish to the Docker group as follows:
The previous command should add the linuxhint user to the Docker group.
Finally, apply the group changes to the current session using the following command:
Once completed, you can run any Docker command without using sudo for any user in the Docker group.
Method 4: Reconfigure the Docker Permissions
The next method that you can use is resetting the permissions for Docker sockets. Start by changing the ownership of the Docker Unix socket by running the following command:
Next, take ownership of the hidden Docker directory in your home directory using the command as follows:
Finally, assign the group with the read and write permissions to the directory as follows:
The provided methods should set sufficient permissions for essential Docker files and directories.
Conclusion
In this tutorial, we learned how we can use the four main methods to resolve the Docker “permission denied” error when invoking a Docker command.