Docker Compose uses YAML configuration files (i.e., docker-compose.yaml) for your Docker projects. In the YAML configuration file, you define your containers, their configurations, port maps or exposed ports, volumes, networks, links, and so on. Once the YAML configuration file is ready, you will be able to run all the containers that you’ve defined on the YAML configuration file with a single Docker Compose command. You will also be able to stop all the defined containers with a single Docker Compose command. Docker Compose is a must-have tool for every Docker user.
This article will show you how to use Docker Compose on your Synology NAS. So, let’s get started.
Table of Contents:
- Installing Docker on Synology NAS
- Enabling SSH on Synology NAS
- Connecting to the Synology NAS via SSH
- Using Docker Compose on Synology NAS
- Where to Go Next? 1
- Conclusion
Installing Docker on Synology NAS:
Luckily, Docker Compose is installed alongside all the Docker components when installing the Docker app from the Package Center of your Synology NAS. So, you must have Docker installed on your Synology NAS to use Docker Compose.
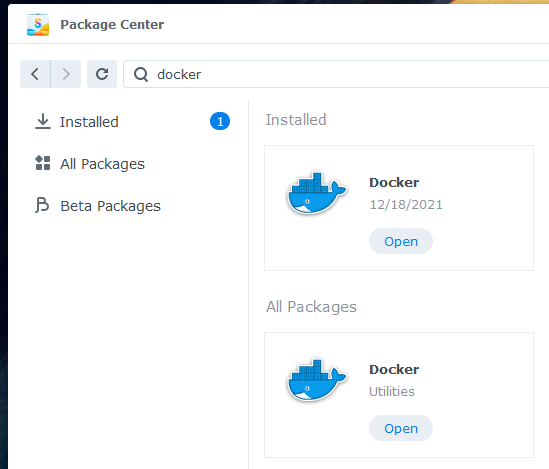
To install Docker, open the Package Center app1 and search for docker2. Once you find the Docker app3, click on Install4.

The Package Center app will download all the required files from the internet. It will take a while to complete.

Once all the required files are downloaded, the Package Center app will install it on your Synology NAS.
NOTE: You may be asked to select a storage volume from your NAS if multiple volumes are available on your Synology NAS.

At this point, Docker should be installed.
Enabling SSH on Synology NAS:
Docker Compose is a command-line tool. So, you will have to access the terminal of your Synology NAS to use Docker Compose.
To access the terminal of your Synology NAS, you will have to enable the SSH service of your Synology NAS.
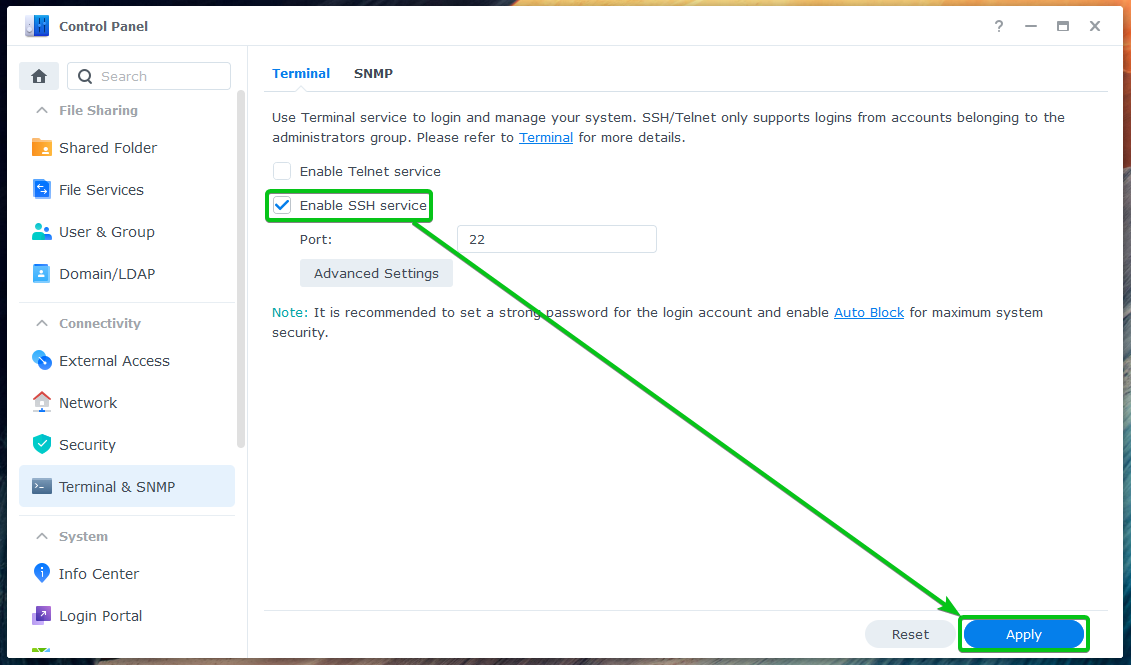
To do that, open the Control Panel app and click on Terminal & SNMP as marked in the screenshot below.

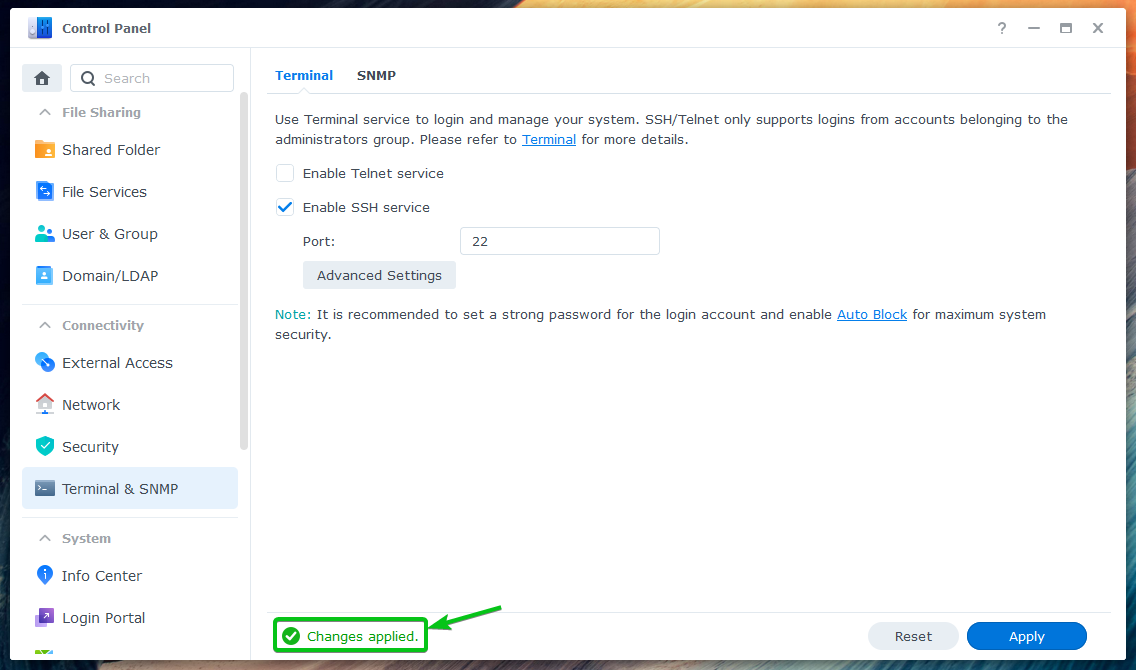
From the Terminal tab, check Enable SSH service and click on Apply.
Click on OK.

The SSH service of your Synology NAS should be enabled.
Connecting to the Synology NAS via SSH:
To access the terminal of your Synology NAS, you will need to know the IP address of your Synology NAS.
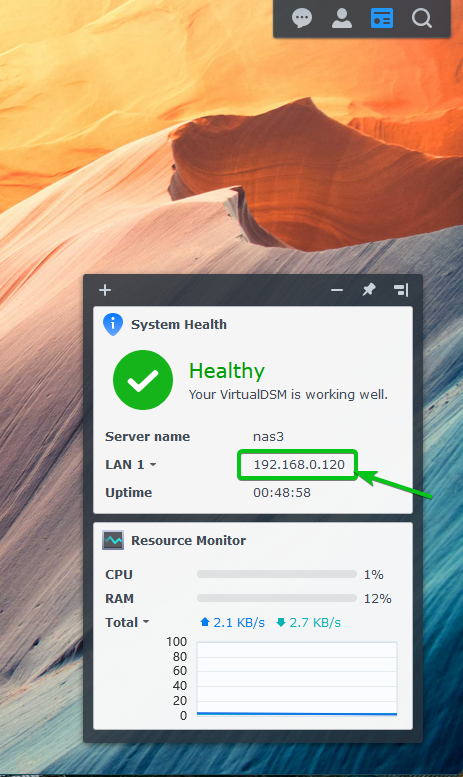
You can find the IP address of your Synology NAS in the System Health widget as marked in the screenshot below. There are other methods of finding the IP address of your Synology NAS. For more information, read the article How Do I Find the IP Address of My Synology NAS.
To access the terminal of your Synology NAS via SSH, open a terminal program on your computer and run the following command:
Here, <username> is your Synology login username, and <ip-address> is the DNS name or IP address of your Synology NAS.
In my case, the command is:

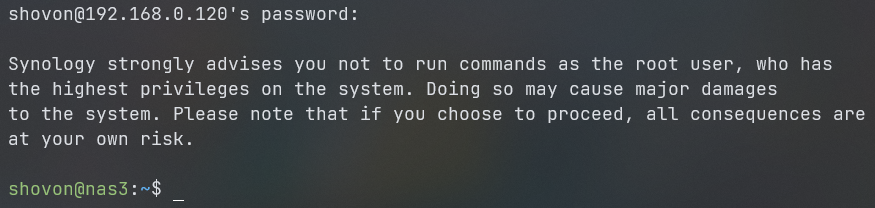
As you’re accessing the terminal of your Synology NAS via SSH for the first time, you will be asked to verify the fingerprint of your Synology NAS. Type in yes and press <Enter> to verify the fingerprint.

Type in the login password of your Synology user and press <Enter>.

You will be logged in to the terminal of your Synology NAS via SSH. You can run any command you want here.
For example, to test whether Docker Compose (the docker-compose command) is installed and accessible, run the following command:
![]()
As you can see, I am running Docker Compose v1.28.5. You may have an updated version of Docker Compose at the time you’re reading this article.

Using Docker Compose on Synology NAS:
This section will show you how to use Docker Compose on your Synology NAS to manage Docker projects. To demonstrate that, I will show you how to create a MySQL server and access it via phpMyAdmin frontend using Docker Compose.
NOTE: Once you install Docker on your Synology NAS, it will automatically create a docker shared folder. I will use the docker shared folder to store the Docker Compose project files in this article. You don’t have to use the docker shared folder. You can use any other shared folders as well. Just make sure to do the necessary adjustments depending on the shared folder you’re using.
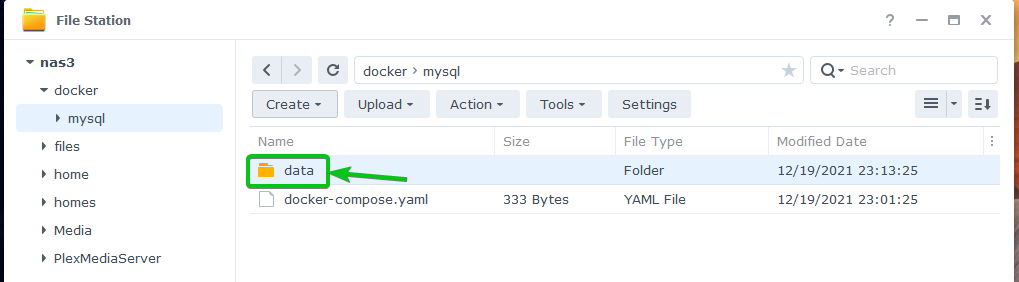
Create a new project folder mysql in the docker shared folder.

In the mysql folder, create a new folder data and create/upload the docker-compose.yaml file.
In the docker-compose.yaml file, type in the following lines of codes:
phpmyadmin:
image: phpmyadmin:latest
restart: always
ports:
- 8080:80
environment:
- PMA_HOST=mysql
- PMA_ARBITRARY=0
mysql:
image: mysql:latest
restart: always
environment:
- MYSQL_ROOT_PASSWORD=secret
volumes:
- /volume1/docker/mysql/data:/var/lib/mysql
Once you’re done, the docker-compose.yaml file should look as shown in the screenshot below.
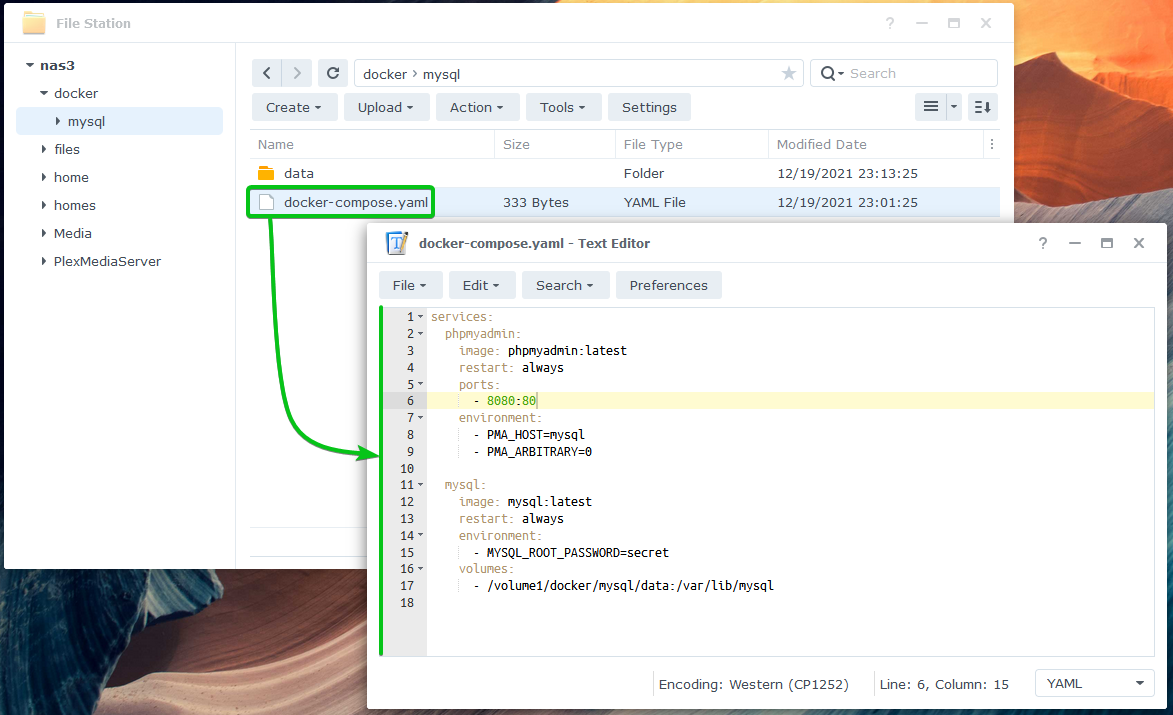
Here, lines 2-9 are used to create a phpmyadmin container using the latest version of the phpmyadmin image.
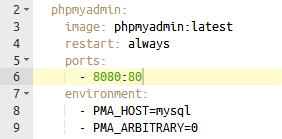
The phpmyadmin container forwards port 80 of the container to port 8080 of your Synology NAS.
![]()
Here, lines 11-17 are used to create a mysql container using the latest version of the mysql image.
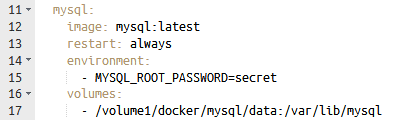
The root password of the mysql container will be secret.
![]()
The data folder (that you’ve just created) is linked to the folder path /var/lib/mysql of the container. So, the mysql container will store all the database information in the /volume1/docker/mysql/data folder of your Synology NAS.

Notice that I have used the folder path /volume1/docker/mysql/data because the docker shared folder uses Volume 1 for data storage in my case. It may be different for you. So, make sure to replace it with yours from now on.

Now, navigate to the project folder mysql from the terminal as follows:

The docker-compose.yaml file should be in this folder, as shown in the screenshot below.

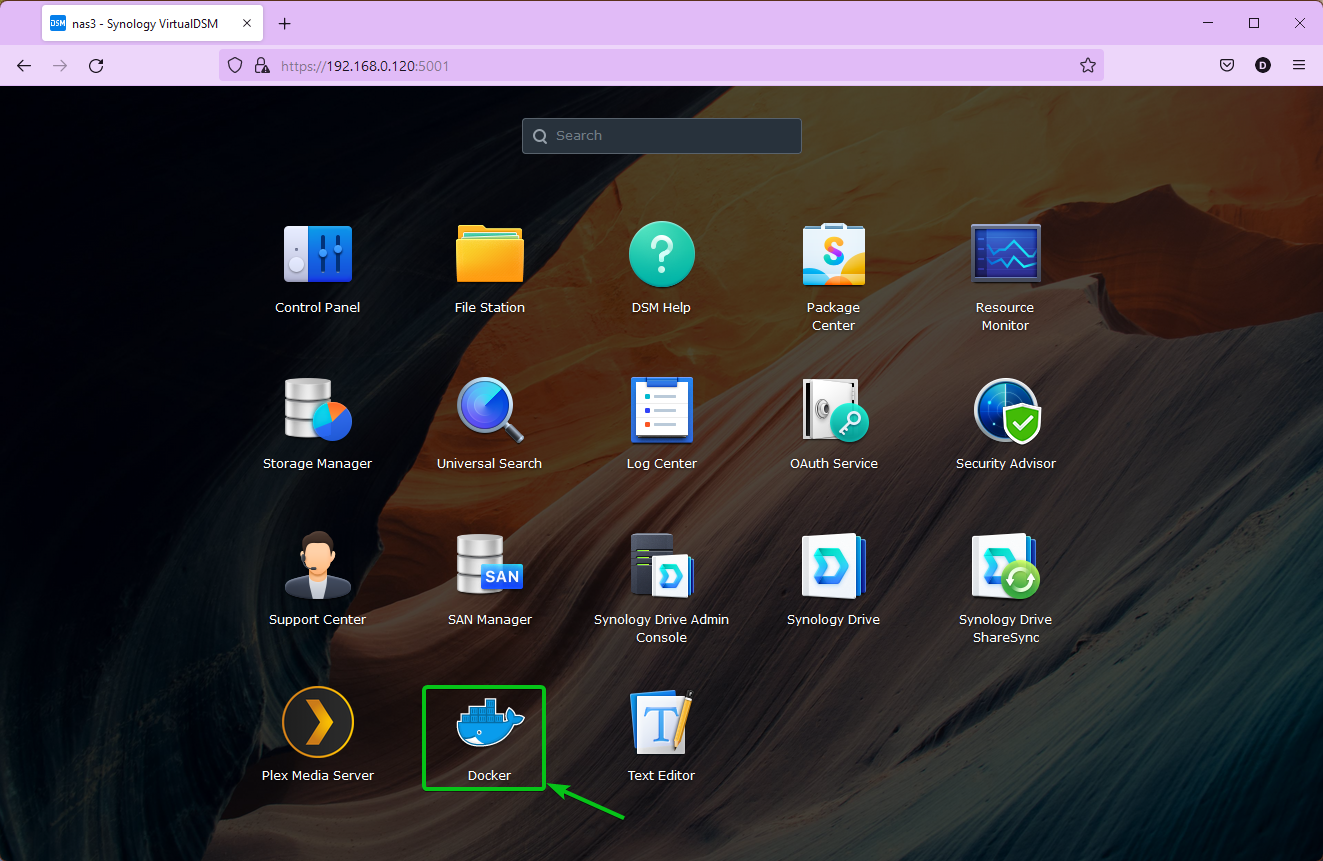
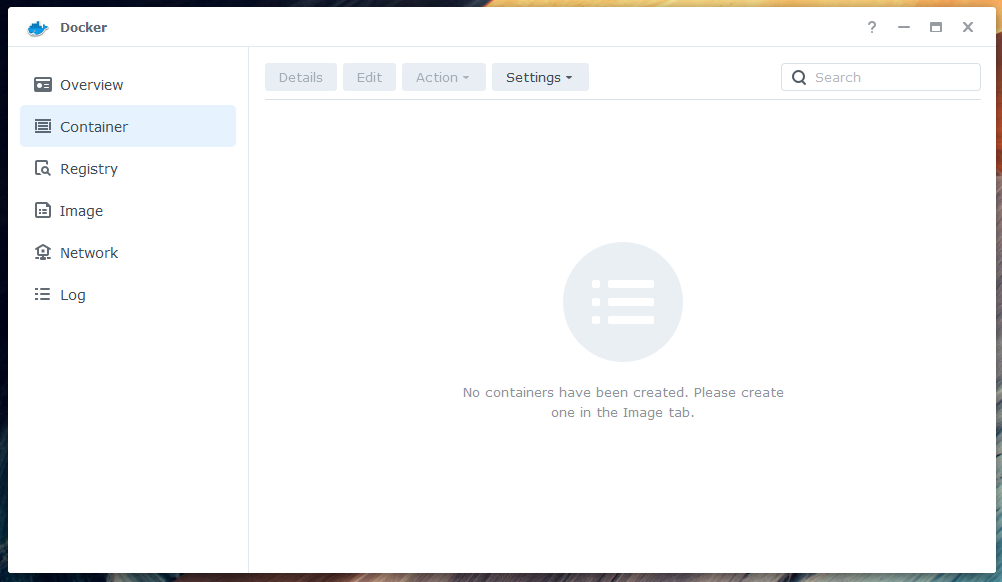
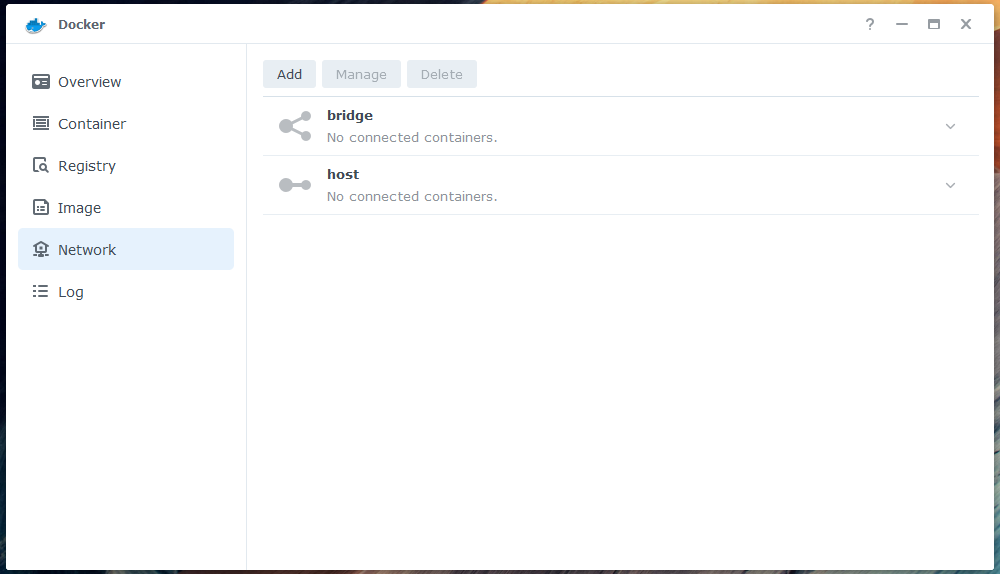
Before you run the Docker project with Docker Compose, open the Docker app on your Synology NAS.
Notice that I don’t have any running containers.
I don’t have any Docker images downloaded on my Synology NAS.

I only have the bridge and host network interfaces.
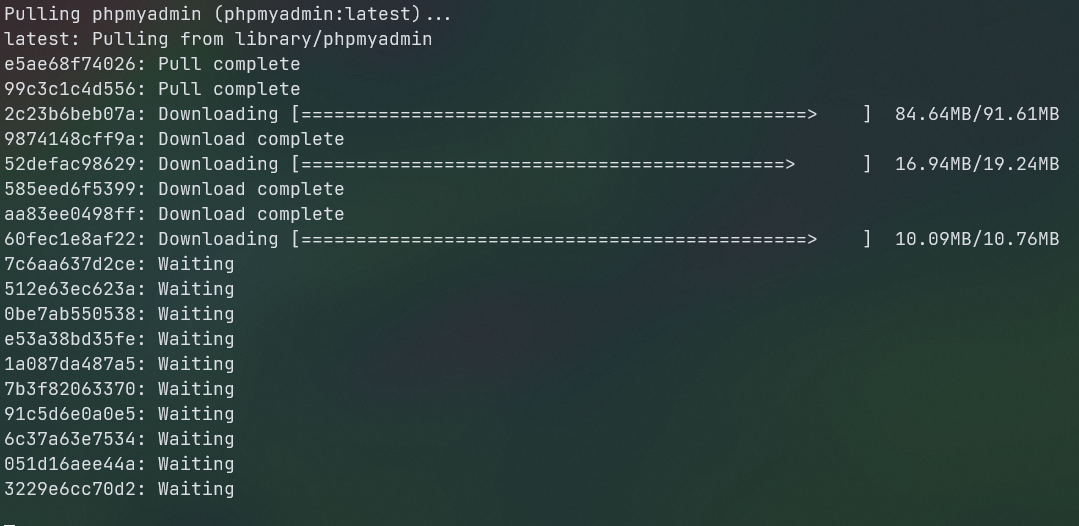
Now, run the project with Docker Compose using the following command:
![]()
Docker Compose will download all the necessary images from Docker Hub.

It will take a while to download all the necessary images from Docker Hub.
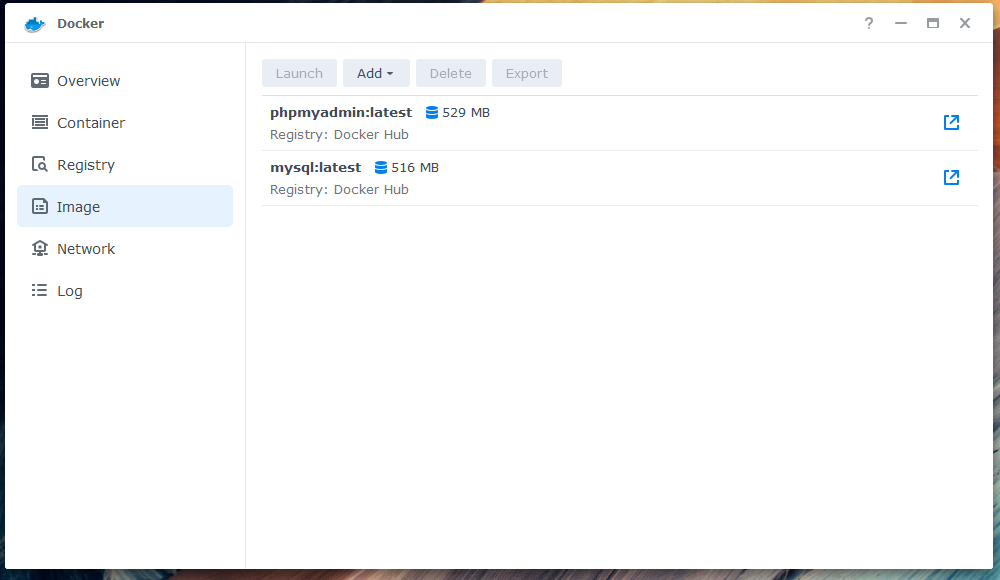
Once all the necessary images are downloaded, Docker-compose will create all the containers that you’ve defined in the docker-compose.yaml file.

Notice that two new containers – mysql_mysql_1 and mysql_phpmyadmin_1 are created, and the containers are running.

The latest version of the phpmyadmin and mysql images are downloaded from Docker Hub.
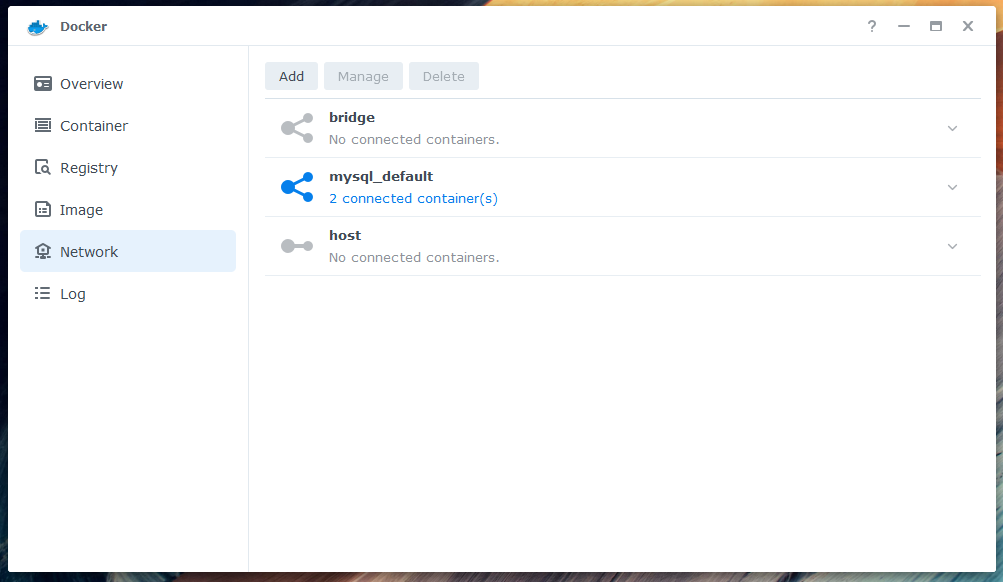
A new network mysql_default is also created.
You will also see a lot of files in the data folder as well.
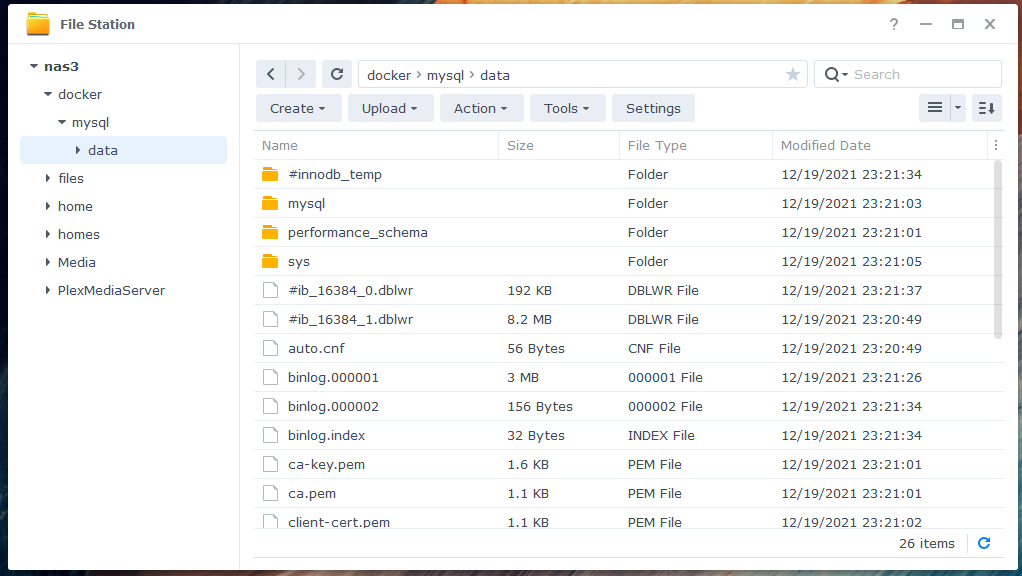
You can visit the URL http://192.168.0.120:8080 from any web browser to access phpMyAdmin, as you can see in the screenshot below. Type in root as the Username, secret as the Password, and click on Go to log in.
NOTE: Replace 192.168.0.120 with your NAS’s DNS name or IP address.
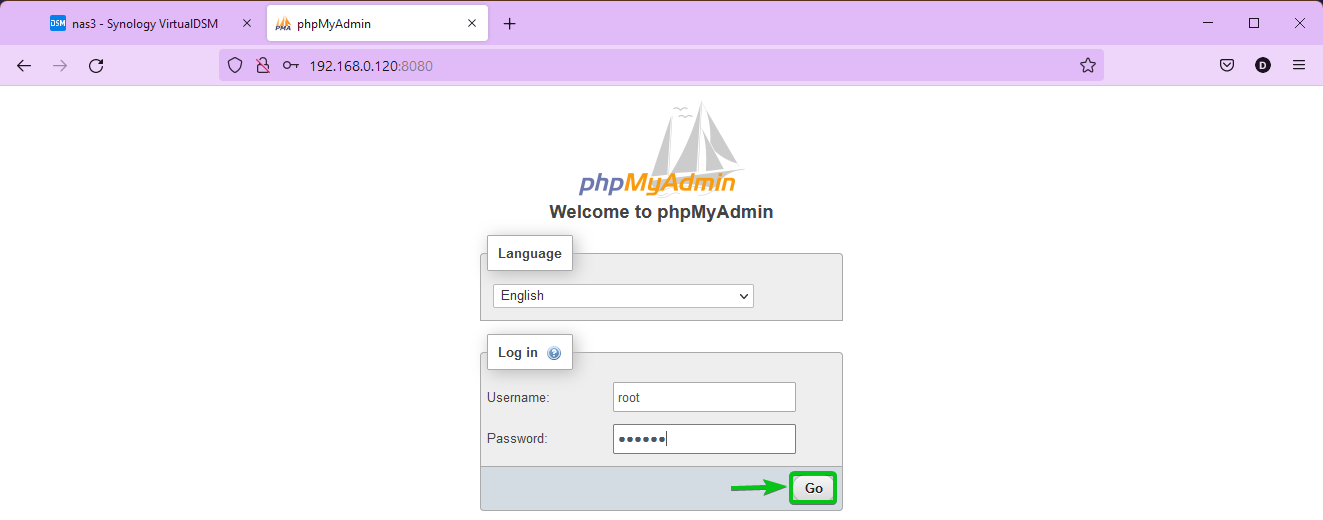
You should be logged in to phpMyAdmin. You can manage your MySQL database from here.

Once you’re done working with your Docker project, run the following command to stop and remove all the containers:
![]()
All the containers that you’ve defined on the docker-compose.yaml file will be stopped and removed.

Where to Go Next?
I have shown you the basics of Docker Compose in this article. To learn more about Docker Compose, read the official Docker Compose documentation and the official Docker Compose File Reference.
We also have many articles on Docker Compose at linuxhint.com. The list is continuously growing. You may check them out.
Conclusion:
This article shows you how to install Docker and Docker Compose on your Synology NAS. I have also shown you how to enable the SSH Service and access the Terminal of your Synology NAS via SSH. I have shown you how to use Docker Compose to create a MySQL server and access it with phpMyAdmin as well.