Example # 1:
We’ll start writing code right and execute it in Visual Studio Code. To begin, we create a new file and choose HTML as the language. Now put “!” and hit the “Enter” key. All the HTML necessary tags can be displayed here. We won’t have to write all these tags. After that, we just use the “link” tag in the “head” to insert the name of the CSS file which we want to link with this HTML file. In this code, we first put the heading and then a div with the name “square”. Inside this “square” div, we have another div in which we are inserting the image by utilizing the “img” tag.
After putting the image in the second div close this div and generate a paragraph below this div. When we complete this paragraph and close it. Then, we close the first “div” tag. We will wrap this text around this image which we have inserted. For wrapping text, we will go to the CSS file, where we will use the “float” property for wrapping text.
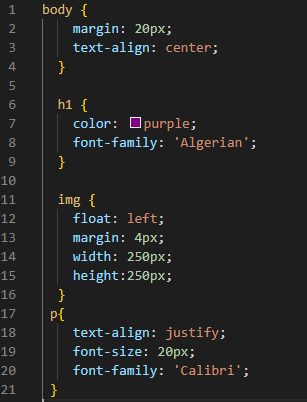
First, we have to set the “margin” of the body to “20px” and also align all the body to the “center”. The heading “h1” is also decorated using “purple” as the “color” of this heading. We use the “font-family” and adjust it to “Algerian”. Then, we are utilizing the “float” property for the image which we have inserted in the HTML code. And set this “float” property value to “left”, as for the image to move to the left side. We also adjust the “margin” of the image to “4px”. The “width” and “height” of this image are “250px”. We also have a paragraph, so we set this paragraph as well. We align the paragraph’s text and set it to “justify”. We set the “font-size” of this paragraph and adjust it to “20px”. The “font-family” for this paragraph is “Calibri”.
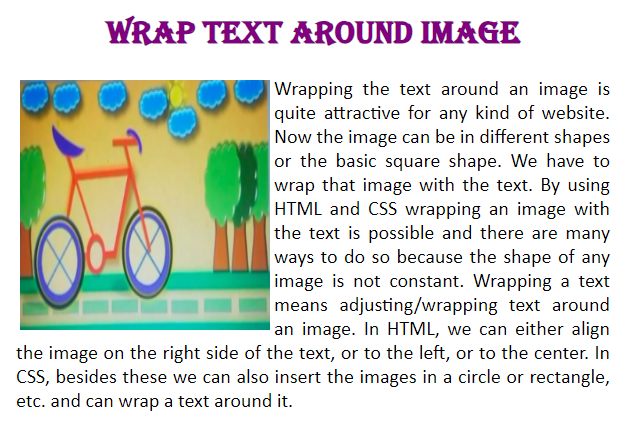
Below is the screenshot of the above code and you will see that the image is floating to the left side and the text is wrapped to this image on the right side. We wrap the paragraph text around this image using the “float” property in CSS.
Example # 2:
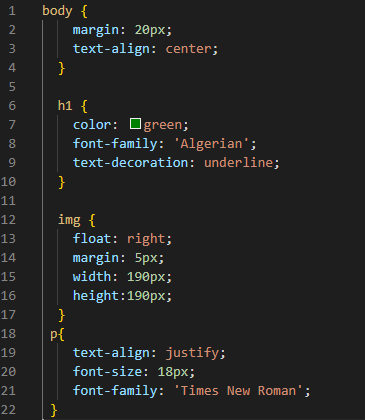
We are using the above example’s HTML code for this example but this time we will set the image to the right side by utilizing the “float” property. In this CSS code, we set the margin of the body to “20px” and the “text-align” property is adjusted to the “center”. The “color” is “green” for the heading and the “font-family” is “Algerian”. Also, use “text-decoration” and place “underline” as the value of this property. We are floating the image to the “right” so that the paragraph’s text will appear on the left side of this image. The “margin” of the “img” is “5px”.
We also set the “width” to “190px” and also the “height” is “90px”. Below this, we use the “text-align” property for the “p” and this “p” is describing the paragraph. We set the “text-align” property to the “justify” keyword and the “font-size” for this is set to “18px”. The “Times New Roman” is utilized as the “font-family”.
You can see in the screenshot below that the image appears on the right side because of the “float” property and the text is wrapped around this image.
Example # 3:
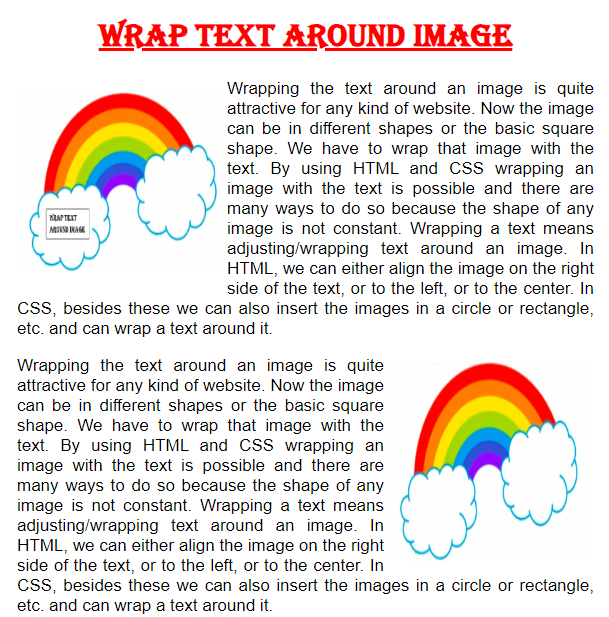
We are going to use two different images here. We put the first image inside the div and then place a paragraph. After this paragraph, we again insert an image inside another div and again add a paragraph below this image. We will adjust the text around both images in the CSS code. Look at how we will wrap text around both images in CSS below.
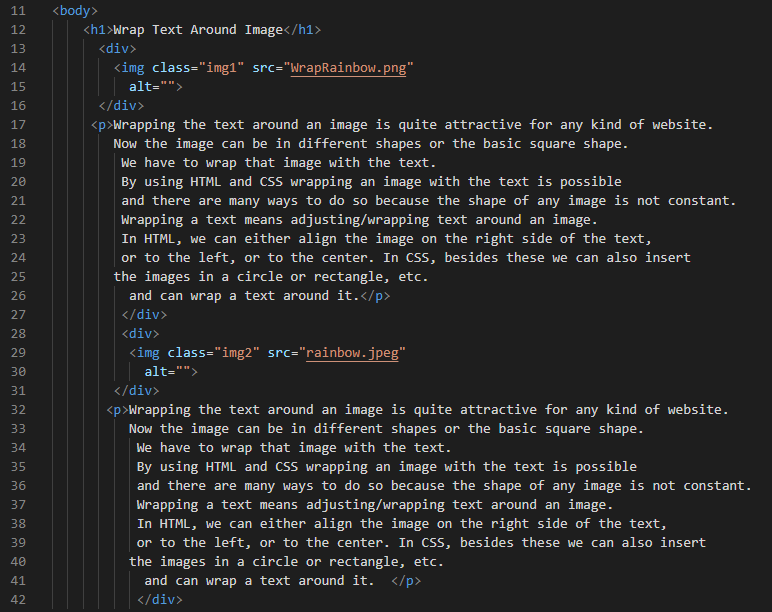
The “margin” and the “text-align” property for the body are the same as we have used in the above examples. The “color” is changed to “red” this time for the heading. The “font-family” is selected as “Algerian” and also “underline” this heading. We are setting the “float” property for the first image by mentioning the name of the first image class and setting the “float” property to the “right”. The “margin” we are using for the first image is “5px”. We also utilize the “width” and “height” property and set both to “200px”.
Then, we also adjust the second image and “float” this second image to the “left” and its “margin” is the same as we have set for the first image. Now, we “justify” this paragraph and set its “font-size” to “17px”. “Arial” is utilized as the “font-family” for “p”.
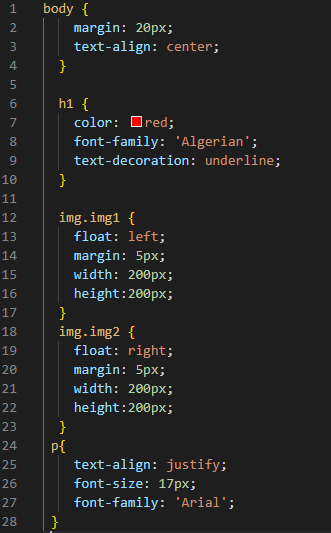
Two images are rendered in the output. The first image is rendered on the “left” side and the second image is rendered on the “right” side of the output screen and all the text is wrapped around both images.
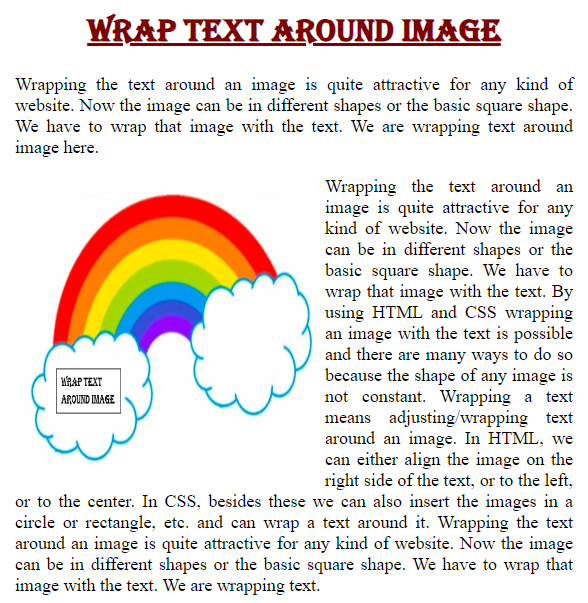
Example # 4:
In our last example, we put a paragraph and then a div. Inside this div container we insert an image and a paragraph as well. Now, look at how we utilize all these paragraphs and adjust the image and also wrap the text around the image.

We are using “20px” “margin” and “center” values for “text-align” for the body. Then, we set the color to “maroon” for the heading and the font, “Algerian” font-family. We also “underline” the heading. We define the “float” property for the image by specifying the name of the image class and setting the “float” property to “left”. For this image, the “margin” we’re using is “5px”. The “width” of this image is “300px” and its “height” is “300px”.
Now, we are applying some properties to the paragraph to make it more appealing. We set the “color” of the paragraph’s text to “black”. We also set the align property of the text to “justify” and set “18px” for the “font-size”. We also adjust the “Times New Roman” “font-family” for the paragraph.
You can notice that there is a paragraph above the image, a paragraph below the image, a paragraph text on the right side of the image, and the image is floating to the left side. The paragraph’s text wraps around this image because we set this in the CSS code.
Conclusion
The focus of this article is to explain to you how to wrap text around the image in CSS. We studied this concept in-depth in this article and explained what is wrapping text and what we should do for wrapping the text around the image. We have used the “float” property for floating the image to “left” or “right” and wrapping text around this image. We’ve also included multiple examples here in which we have wrapped the text around the image, including the outcomes of all the article’s examples. I hope you will have a pretty good understanding of the wrap text around the image concept in CSS after reading this article and applying these examples into practice on your own.