Example 01
Let’s get started with the first example of CSS read-only attribute usage in the HTML code. We have started this first example with the standard format of HTML tags. Starting from the html opening tag, it has been following the head and style tag opening. Within the style tag, we have been styling the body of our HTML page. For a while, let’s take a look at the body of this HTML code first. We have added a total of 2 paragraphs in the HTML webpage body. The paragraphs contain simple texts within them. Both the paragraph openings are followed by their text, <br> tag to add a link break in the webpage, and the <input> tag to add some input elements to the webpage.
Both the input tags contain the “value” attribute with the value “Read and write TextBox” and “Read-only textbox”. Also, the second input tag of the second paragraph contains the attribute “read-only” within it. After this, both the input tags contain the inline styling via the style tag used within them. Both the input text boxes will be of 30px height and 250px width. The paragraph tags are closed here, along with the body tag of the HTML code. Within the style tag, we have been styling the <input> tag of the paragraph that contains the title read-only, i.e., second text box. The background for the particular read-only textbox has been set to orange-red. This is about the style and head tag. This code is now complete and ready to be executed on the Chrome browser via the Visual Studio code.

After the execution of this code, we got the two text boxes with two paragraphs on our browser’s new tab. The first textbox is the read and writes textbox, i.e., you can write on it and read whatever you have written. On the other hand, the read-only orange-red text box can only be seen and is not editable.

Example 02
Let’s get started with another example of HTML to create read-only elements using CSS styling. Within this code, we have added the same <DOCTYPE html> tag along with the <html> tag, followed by the main head and body tags. The body tag of this simple code contains simple text within it without the use of any tag. After this text, we have been using the <input> tag to create some dynamic elements like text-box within our HTML webpage. This input text box has been classified with the class “disablePointerEvents”. The input element has been named “input” with the value “read-only text”. The inline styling has been used to set the height of 30px and width of 250px for this text box.
The body of our HTML page is now complete, and we are going to look at the style tag of this HTML code now. We have been using the class “disablePointerEvents” of the “input” tag to style it. The property pointer-events have been set to none. The background color for the textbox has been set to hotpink. This is about the styling of the HTML webpage. Let’s save and run it within the Visual Studio Code followed by the browser.

After running this code, the browser tab shows us the simple text followed by the pink textbox. After clicking on the text-box text area, we are unable to write anything. This is because we have used the pointer-events properly set to none in the style tag.

Example 03
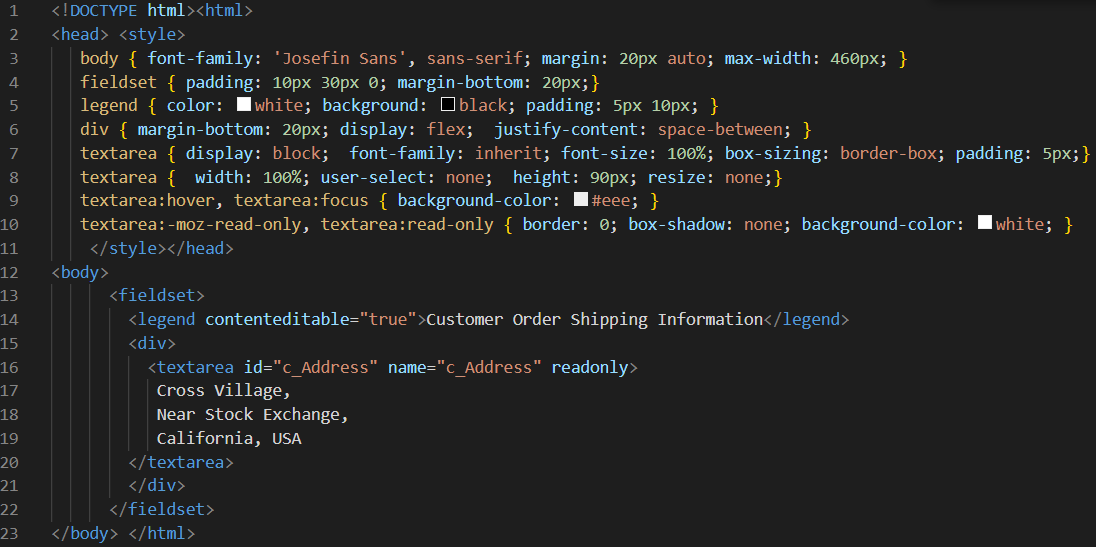
Let’s take a look at the last but not the least examples of this article. Within this article, we will be making an element writable while the other one is readonly by the use of some properties. This HTML script has been started with the html tag followed by the head tag containing a long list of styling properties within its style tag. The body tag of this HTML script contains the “fieldset” property here, groups the similar elements in one set, and styles them accordingly. This fieldset element contains the legend tag and the div tag. We have been using the contenteditable property set to “true” for this tag, i.e., its caption would be editable, and used the caption “Customer Order Shipping Information” in it.
The div tag contains a new textarea within it that will be identified by the ID “c_address” followed by its name “c_address,” and we set it to read-only. This text area contains text information within it that is only readonly and cannot be editable. The textarea tag along with the div container has been completed here. We have been closing the fieldset tag here as well, i.e., that is holding the div section within it. The body of our html page has been completed here, so we have been closing the body and html tag.
The style tag of the main head tag has been using many properties for body elements. We have been setting the width, margins, and font family of the whole body of this HTML page via the use of the “body” keyword. The padding and margins have been set for the fieldset element, i.e., containing other elements within itself. The legend element has been using color property to set the color of a caption to white with the black background and some padding as well. The inner div container element is used to set its margins, display, and justify-content property. The textarea element within this container has been styled with the use of display, font-family, font-size, box-sizing, padding, width, user-select, height, and resize properties.
The user-select property for text-area and resize has been set to none, i.e., not editable nor resizable box. The hover and focus offset has been used for textarea to use white color background on hovering and focusing. For the read-only tags of textarea, we have been setting box-shadow to none and background color to white with 0 borders. This is it about this code. Let’s run it now.
The output has been showing the fieldset with the caption “Customer Order Shipping Information” along with a container containing a text within its textarea.
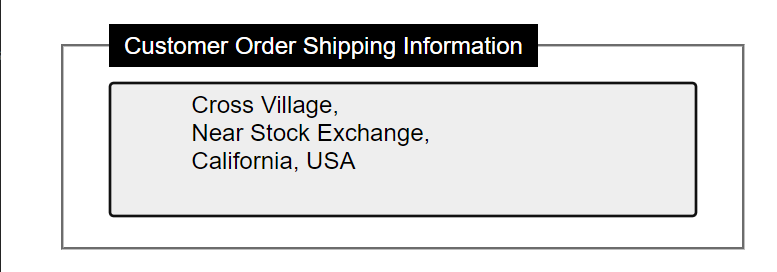
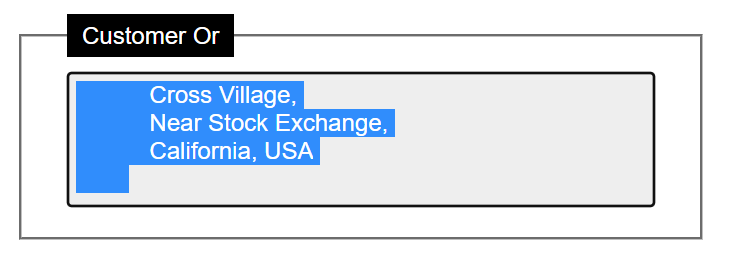
You can see that the caption of the fieldset is editable, while the text can be copied and is not editable.
Conclusion
This article’s introductory paragraph is all about the use of CSS readonly selector in HTML codes and explains its usage. Along with that, we have discussed a total of three different examples to make an element simple a read-only via the use of different properties over the use of a readonly selector, i.e., readonly offset, pointer-events property usage, and the use of contenteditable offset value within the particular element tag.