Example 01:
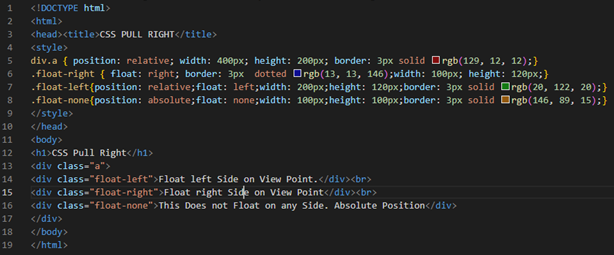
Within our first example, we will use the float property to pull the different elements to the right, left, and nowhere. Also, we will compare these properties to each other for a better understanding. We start our first example with the standard HTML document format used for the creation of any HTML-based webpages. The head tag contains the title of the HTML page to be created with the help of an internal “title” tag. After this, we have a style tag and the main body tag. Before looking at the CSS styling of an HTML page, we have to take a look at the body that is going to be styled. The body of this HTML page contains the simple size 1 heading and the main “div” tag to create a section within the HTML page. This “div” tag is specified with the “a” class for the differentiation while styling. Within this section, we have 3 more “div” elements that are used here.
All the three div sections are specified with three different classes – float-left, float-right, and float-none. After closing these three “div” sections, we close the main “div” section as well. The closing of the main div section is followed by the “body” tag of this HTML. The body and its elements part is now complete. To make some sections pull to the right or left, we need to style them accordingly. Thus, within the style tag of the HTML code, we use the “a” class for the first “div” section to position it relative to the HTML page via the “position” property.
Also, this main section is 400 pixels in width and height with a solid border of 3 pixels in brown color. After this, we utilize the float-left, float-right, and float-none classes for the inner “div” sections to style them accordingly. The float property is used for the first inner div section to pull it to the exact right of the HTML page. Also, this section contains 100-pixel width, 120-pixel height, and a dotted border of 3px in solid blue color. The second inner “div” is positioned to relative and pulled towards the left of the HTML page using the float property. It has 200px width, 120px height, with the 3px solid green border. The last inner section contains an absolute position with no pull property specified. Also, it has 3px solid brown border, 100px width, and 100px height. This code is ready to be used on the Chrome browser via the Visual Studio code to see the styling.
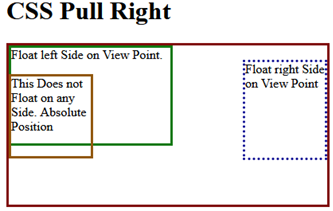
Upon executing it within the chrome browser, we get the following output. The main div section is displayed with a solid red border and its position is relative to the HTML page. While the blue-colored div section of the dotted border is pulled to the right with the use of the “float” property in the CSS of this code as shown in the image. The green-colored div section is pulled to the left using the “float” property and it’s relative to the HTML page. The position of the brown “div” section is specified as relative and is displayed in the image.
Example 02:
Let’s get started with another example of using the float property of CSS to pull the elements of the HTML to the right or left. This code starts with the same html tag following the “head” tag that contains the title for this HTML page, i.e. “CSS PULL RIGHT”. For adding a title for this page, we utilize the title tag. We have to take a good look at the body section of our HTML script first. We add a heading to the body of the HTML page using the “h1” heading tag, i.e. large size heading.
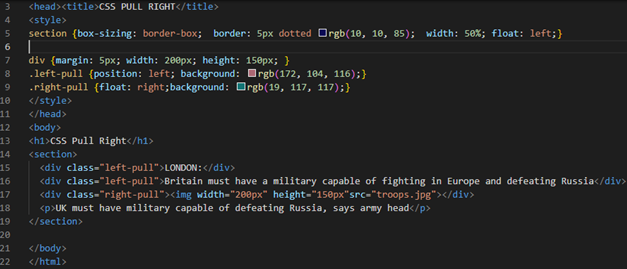
After this, we try a “Section” tag within this HTML code. This section tag is used to create a section within the body of the HTML page. Within this section, we use three new “div” elements and one paragraph element. Both the first div tags utilize the same class “left-pull” while the third div tag uses another class “right-pull” in its opening tag. The first two div tags contain simple texts within them while the third div tag contains an image “img” tag to add the image in this div section. The source of this image is our local system and it is in “jpg” format. The paragraph also contains a simple line of text in it.
After the ending of all 3 div tags and the paragraph tag, our section tag ended here with its closing. The body of this HTML page is completed now. Close the “body” tag. Within the “style” tag of this HTML code for styling, we specify the element “Section” to style its inner elements combined at a time. This section size is defined by the “border-box” format and it contains the dotted 5-pixel border around it. The width of this section is 50 percent while it is pulled to the left via the “float” property. The “div” elements are styled with 5px margin, 200px width, and 150px height for all. The div elements containing the “left-pull” class is displayed in the left position with the tea pink background.
While the div elements with the “right-pull” class are pulled to the right with the use of the “float” property and the background is set to near sky-blue color. Our code is completed and is ready for use in the Visual Studio Code via the “Run” menu following the “Start Debugging” option.
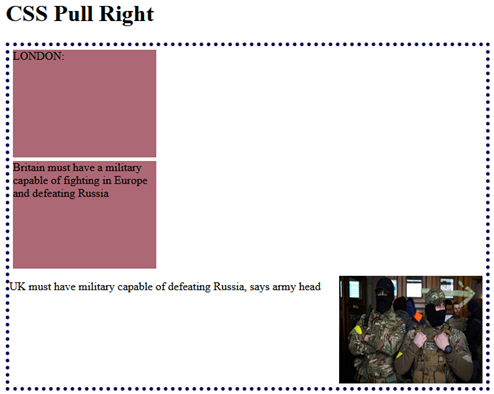
The output for this code shows the simple heading and a new dotted section generated within the HTML page. This section contains three different div sections within it. The first two div sections are pulled to the left with the tea pink background color. While the third div section contains an image pulled towards the right of this HTML page.
Conclusion
We discussed the need and the use of pulling the elements in the HTML page within our introductory paragraph. This article shows a very clear demonstration of pulling the CSS elements to the left, right, or none via the CSS “float” property. It is used in all the examples to pull those elements in some specific direction with the use of classes in the div sections. All the examples covered in this article are quite simple and easy to understand for any beginner and expert CSS user.


