
Loosely speaking, Docker is becoming more and more like a universal package manager which works across all possible Linux platforms. It takes containers and uses them to solve a completely different problem that developers face. The problem is that developers use their desktop operating system (like Windows, macOS or Linux with a tonne of desktop related packages) to write applications. The application they write often run on a completely different operating system on a server somewhere with some Linux distribution completely different than that of the developer’s laptop.
With Docker the idea is that your application comes packed as a Docker image. It is the job of Docker to take this image and run it as a containerized application for you. Being containerized means that the application, and its dependencies, will run in an isolated environment which may differ completely from the developer’s laptop and even the production server. As long as they both support Docker, they both can run the same application in the exact same way.
Anatomy of a Docker Image
As mentioned earlier, a Docker app will run on an agreed upon environment. Now the question is how do we create that environment? Most application images would import a Docker base image and build their application on top of it.
Applications are made from layers of software. A wordpress container image is built using an httpd container image which, in turn, is built on top of a Ubuntu image. The image upon which a newer image is built is known as the PARENT IMAGE in Docker terminology. In Dockerfile (we will get to what a Dockerfile means, a little later), this parent image is mentioned on the top of the file as shown below:
## Rest of the Dockerfile
This Dockerfile when executed converts your application into a Docker image (a binary of sorts) which you can then push to a registry from where it can be pulled to create new containers elsewhere. However, they will all have Ubuntu:18.04 as their base image, and run as if it is a Ubuntu system they are running in.
You might have noticed this when trying to pull a new docker image.
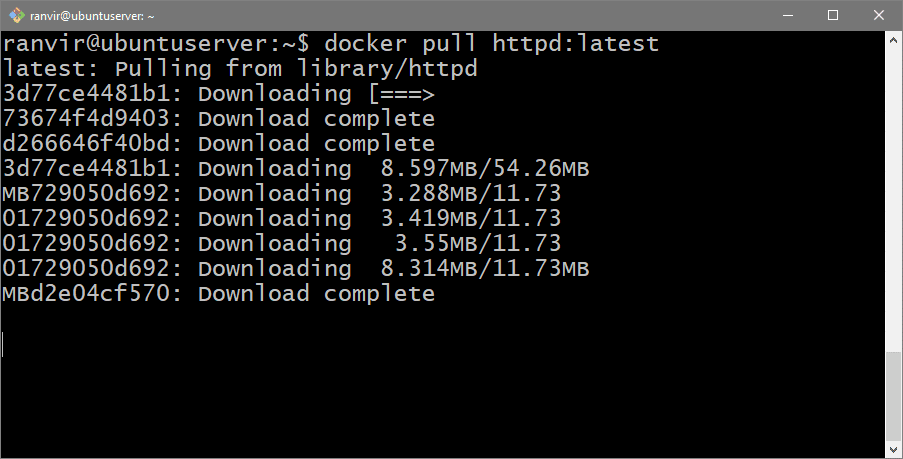
This shows how many layers are pulled before the actual application (which might be only a few Megabytes in size) is brought in.
For this reason, we would like to create what is known as a base image. Which is not built on top of anything else. The keyword “scratch” is used to indicate that this layer is not built on top of anything else. Like so:
## Rest of the Dcokerfile
We will first create a simple hello-world application and then figure out what the rest of the Dockerfile is going to be. The host system is Ubuntu:18.04 LTS and we are using Docker version 17.12.1-ce for the experiment.
Creating a static binary
Docker containers are a collection of processes running isolated from the rest of the operating system. The only thing that process is in touch with is the Kernel. Kernel is responsible for scheduling these processes on the CPU, doing memory management and a few other basic booking keep tasks.
But most high level applications depend on a lot of system libraries (like glibc, musl, klibc, etc) and a lot of runtime dependencies like Python or Node.js or Java Runtime. The application binary doesn’t have all the libraries available inside it, but when it starts execution it calls those libraries from the host operating system.
Because we are trying to create an image from scratch, we would not be getting these niceties. So our application needs to be a static file or a standalone executable.
Let’s start by creating a folder called MyDockerImage and creating a file hello.cc inside it.
$ cd MyDockerImage
$ touch hello.cc
Open hello.cc using your favorite text editor and add the following lines inside it.
using namespace std;
int main(){
cout << "Hello! This message is coming from a container \n ";
return 0;
}
This is a simple C++ program which prints “Hello! This message …”
For reasons discussed earlier, we will compile this using the static flag. The compiler being used is g++ (Ubuntu 7.3.0-16ubuntu3) 7.3.0.
To compile the program, in the same directory run the following command:
This creates a binary executable file “hello” in the same directory. That’s our static file. Test if it is running as intended by mentioning the filename in the terminal.

Now we are ready to containerize this simple program.
Dockerfile
The Dockerfile consists of a set of rules that takes your application files (like binaries, source files, etc) along with various configuration parameters like file system layout, exposed ports, etc and turns them into a Docker image file. You can then share the image file with anyone who wants to run that application.
We won’t be digging into every option available for Dockerfile, instead we will write a very minimalistic Dockerfile. In the same directory, where your hello executable resides, create an empty file named Dockerfile.
Open it with your favorite text editor, and write the following lines to it:
ADD hello /
CMD ["/hello"]
scratch is not a parent image. Rather it indicates Docker that the image is not built on top of any other image. It is built from scratch. ADD command would take the static binary named hellofrom the current directory and add it to the root directory of the image file. When we would finally run a container based on this image, the hello executable will be seen inside the root directory itself at /hello.
Lastly, the CMD line has a string “/hello” this string will be executed as a shell command whenever a container is created from this image, thus the binary file that we added to our container and print the message that we wrote in our app.
Let’s build the image by invoking the docker build command which would go through the Dockerfile’s contents and generate the image. Run the following command in the same directory as the Dockerfile and the executable binary.
The –tag hello flag sets the image name to hello and the dot ( “.” ) at the end tells docker build to look into the current directory for Dockerfile and related contents.
Running the Docker container
To check if the image we just created shows up in the list of images, run:

Notice how small the hello image is when compared to other images. In any case, it is ready to be run as a container,

That’s it! You created your first minimalistic container from scratch.
Other options
While creating images from scratch is always an option, people often tend to create images from other lightweight Linux distros. For example images like alpine and busybox are really lightweight environments with smaller libraries like musl instead of glibc.
Using them as your parent image by using “FROM alpine:latest” would result in smaller images as well. Since the base images are only 2-5 MB in size. Let us know if there’s any Docker related topic that you might want us to cover next. You can reach us on Twitter, Facebook or subscribe to us via email.