This article will cover:
- What are Docker Networking Types?
- How to Create Custom Docker Networks?
- How to Run a Container on a Custom Docker Network?
What are Docker Networking Types?
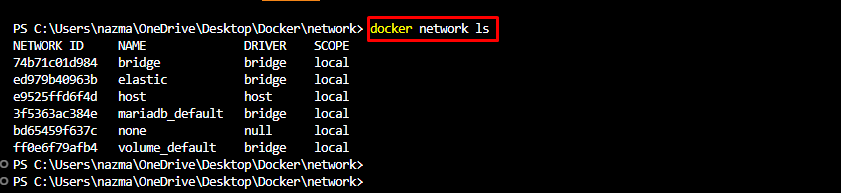
Docker networks are used for communicating between containers and to expose the Docker container ports to the host system. There are different types of Docker network drivers for each purpose, such as:
- bridge is the default network with a subnet and gateway utilized for enabling communication
among containers on the same host internally.
- host network utilized host system ports for communicating among the containers.
- none network disables communication between containers.
How to Create Custom Docker Networks?
To create custom Docker networks, first, list all the networks through the docker network ls command:
Then, execute the docker network create command to build a new Docker network:
Below output shows that the new Docker network has been created successfully:

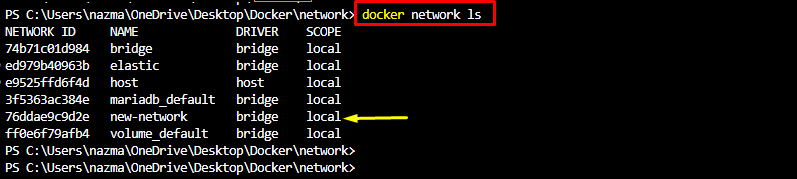
Now, list the available networks by running the following command:
As you can see, the new network has been created successfully:
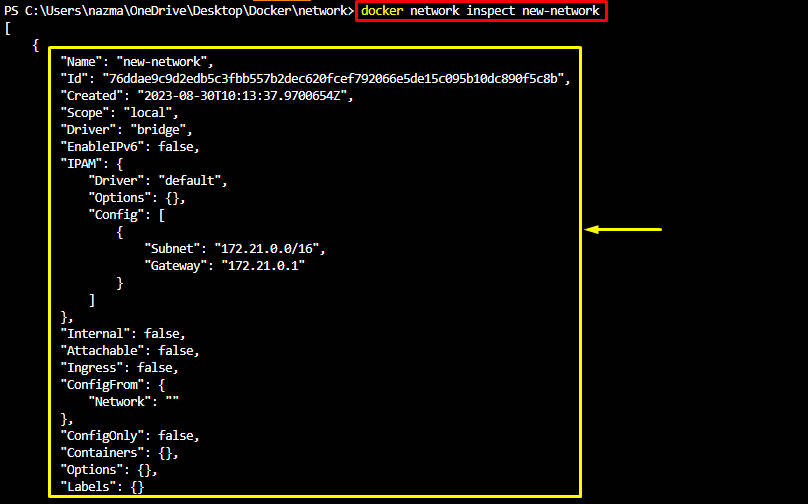
Afterward, inspect the newly created network to get the detailed information by using the docker network inspect command:
How to Run Container on a Custom Docker Network?
To execute the Docker container on a custom network, initially, create a .html and add the below-provided code. Here, we have created a sample.html file:
<head>
LinuxHint Website
</head>
<body>
<h1> Welcome to my Website!! <h1>
</body>
</html>
Next, generate a Dockerfile and paste the following code:
COPY sample.html /usr/share/nginx/html/index.html
ENTRYPOINT ["nginx", "-g", "daemon off;"]
Here:
- FROM is used to specify the built-in ngnix base image.
- COPY is utilized for copying the coding file into the specified path.
- ENTRYPOINT is used to describe the starting point for running the container.
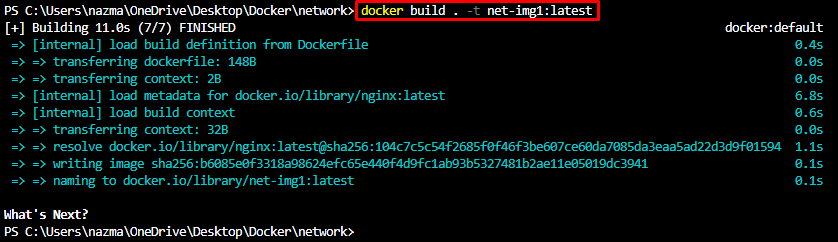
Now, build the new Docker image by running the provided command:
Then, list the Docker images and check the existence of the newly created image:
As you can see, the new Docker image has been created and exist in the list:

Finally, run a container using the custom Docker network with the help of the below-mentioned command:
In the above-provided command:
- -d tag used for running the container in the background.
- -p option denotes the port.
- –name flag used for specifying the container name.
- –network option used for adding the custom network name.
- net-img1 is our build Docker image:

Lastly, list the currently running containers and check the existence of the newly created container:

Note: If you want to verify, whether your built application working properly or not, open the endpoint http://localhost on your desired web browser. In our case, we have opened on Firefox browser:

That’s it! We have described the simple process for creating custom Docker networks.
Conclusion
To create custom Docker networks, the docker network create <network-name> command is used. To retrieve detailed information, inspect the container by executing the docker network inspect <network-name> command. To run containers with a custom network, the docker run -d -p –name <container-name> –network <network-name> <image-name> command is used. This blog demonstrated a way to generate custom Docker networks.