This guide demonstrates the conversion steps from SVG to HTML.
How to Convert SVG to HTML?
The SVG image is converted into HTML to make it compatible with a broader range of browsers. It provides greater flexibility and improves the SEO of a website as search engines can easily read the HTML code.
Follow the below step-by-step guide for converting SVG to HTML:
Step 1: Open The SVG File in Text Editor
First, select the SVG file from the file directory that the developer wants to convert into an HTML file. Next, drag down that SVG image inside any text editor.
The text editor that is utilized in this example is Sublime:
The above-displayed gif shows how to open the SVG file/image inside the text editor.
Step 2: Copy the Content of the SVG File
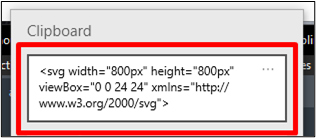
Next, copy the code in the clipboard that occurred while inserting the SVG in the text editor. The code that needs to be copied starts and ends with the “<svg>” tags.
For instance, the following code of SVG is placed is being copied:
<title/>
<g id="Complete">
<g id="align-justify">
<g>
<polygon fill="#ffffff" points="20 18 4 18 4 18 20 18 20 18" stroke="#000000" stroke-linecap="round" stroke-linejoin="round" stroke-width="2"/>
<polygon fill="#ffffff" points="20 14 4 14 4 14 20 14 20 14" stroke="#000000" stroke-linecap="round" stroke-linejoin="round" stroke-width="2"/>
<polygon fill="#ffffff" points="20 10 4 10 4 10 20 10 20 10" stroke="#000000" stroke-linecap="round" stroke-linejoin="round" stroke-width="2"/>
<polygon fill="#ffffff" points="20 6 4 6 4 6 20 6 20 6" stroke="#000000" stroke-linecap="round" stroke-linejoin="round" stroke-width="2"/>
</g>
</g>
</g>
</svg>
The above code snippet is just the codec form of the SVG file. The user can check whether the code is copied or not by checking the clipboard history. It can be checked by pressing the “Window + v” keys:
The above snapshot shows that the code has been copied to the clipboard.
Step 3: Create an HTML File
To create an HTML file in which the SVG image is going to embed/utilize. The HTML file is created by setting the file format to the “.html” as shown in the below gif:
The above gif illustrates the procedure for the creation of an HTML file.
Step 4: Insert SVG Code
The SVG code that is already copied to the clipboard, now simply paste it inside the HTML file at the required place. After that, the SVG code is converted into an image when the rendering of the webpage occurs. And the image gets displayed on the webpage:
<center>
<svg width="800px" height="800px" viewBox="0 0 24 24" xmlns="http://www.w3.org/2000/svg">
<title/>
<g id="Complete">
<g id="align-justify">
<g>
<polygon fill="#ffffff" points="20 18 4 18 4 18 20 18 20 18" stroke="#000000" stroke-linecap="round" stroke-linejoin="round" stroke-width="2"/>
<polygon fill="#ffffff" points="20 14 4 14 4 14 20 14 20 14" stroke="#000000" stroke-linecap="round" stroke-linejoin="round" stroke-width="2"/>
<polygon fill="#ffffff" points="20 10 4 10 4 10 20 10 20 10" stroke="#000000" stroke-linecap="round" stroke-linejoin="round" stroke-width="2"/>
<polygon fill="#ffffff" points="20 6 4 6 4 6 20 6 20 6" stroke="#000000" stroke-linecap="round" stroke-linejoin="round" stroke-width="2"/>
</g>
</g>
</g>
</svg>
</center>
</body>
In the above code snippet, the SVG image is placed inside the HTML “<center>” tag element.
After the execution of the code, the webpage appears like this:
The output shows that the SVG image has been placed on the web page.
Conclusion
The conversion of SVG into HTML involves converting vector graphics in SVG format into HTML markup. The developer first opens the SVG file in any file editor and then copies code from the “<svg>” opening tag


