Why Does a MacBook Pro Don’t Have Ethernet Ports?
Following are different reasons why MacBook don’t have an ethernet port:
- People have switched to WiFi these days, and they don’t prefer ethernet cable connections.
- Due to the portability factor, people prefer lightweight laptops, and if the laptop has fewer ports, it will be lighter in weight.
Connect Ethernet Cable with MacBook Pro
You can connect the ethernet cable to the MacBook Pro by using different adapters:
1: USB-C to Ethernet Adapter
You can use the USB-C to an ethernet cable to connect the ethernet cable with the MacBook Pro:
Step 1: Buy USB-C to ethernet adapter.
Step 2: Connect the USB-C side of the adapter with the MacBook pro.
Step 3: Next, connect the ethernet cable to the adapter

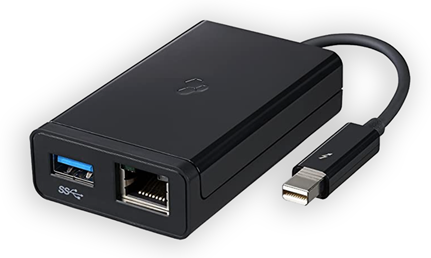
2: Thunderbolt 2 to Ethernet Adapter
Thunderbolts are an adapter that connects your devices to the laptop, it was invented by Intel in collaboration with Apple, so that’s why thunderbolts are compatible with Apple devices. Connect one side to the MacBook Pro and plug the ethernet cable with the other side of the thunderbolt adapter.
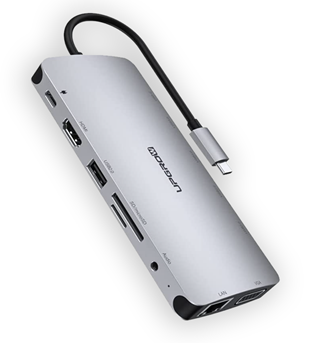
3: Docking Station
Docking stations are used to connect multiple external devices to your laptop. The docking station also has an ethernet port in it, simply connect one end of the docking station with the USB C port of your MacBook Pro and connect the ethernet cable in the ethernet dock of the docking station.
Configure the Ethernet Setting on the MacBook Pro
First, connect the ethernet cable using an adapter with your MacBook Pro; once the Ethernet cable is connected, the internet will automatically connect. But sometimes, you must make some changes after connecting the ethernet cable to the internet:
Step 1: Connect the ethernet cable using an adapter with your MacBook Pro.
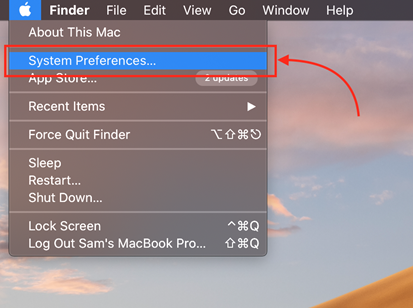
Step 2: Tap on the Apple icon to select System Preferences.
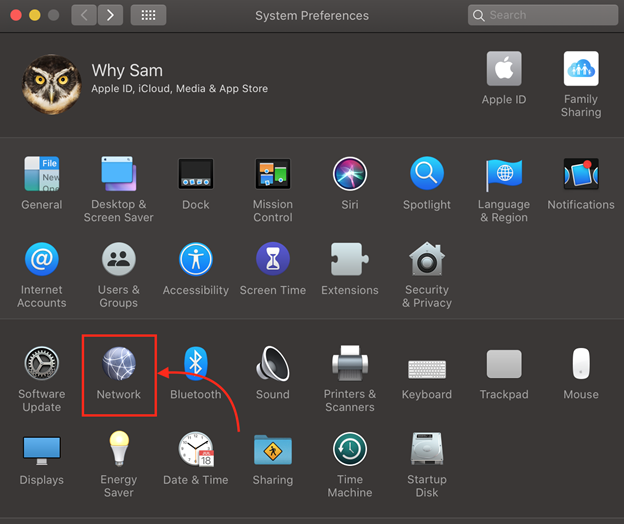
Step 3: Select the Network option; now click on the Plus icon to add a new interface or select OK if it shows up.
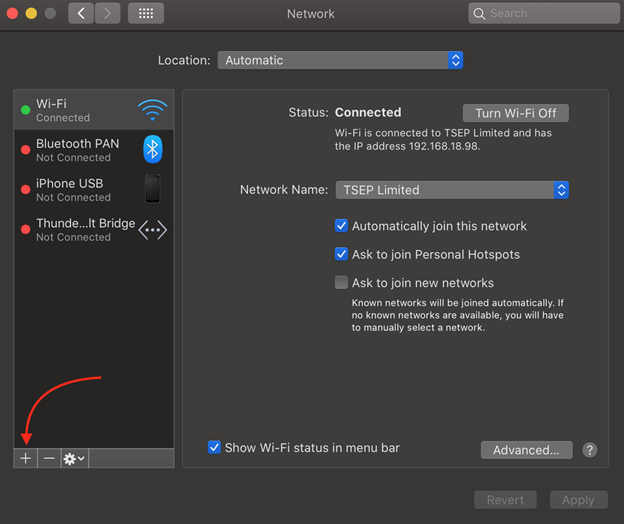
Step 4: Add the interface by selecting the port i.e., Thunderbolt 1, Thunderbolt 2. It will automatically detect the interface anyway.
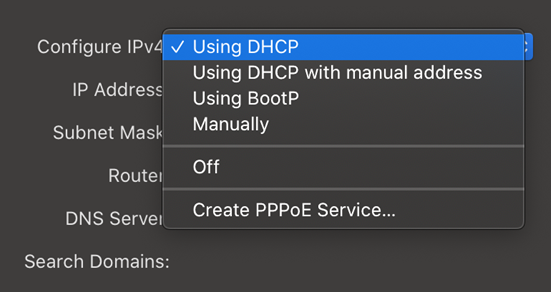
Click on the interface and choose the option according to your preference:
- DHCP: Choose this option; if you receive an IP address from your ISP automatically
- DHCP with manual address: Choose the DHCP with manual address if you have a defined IP address and enter your IP
- BootP: Select this option only if your ISP uses BootP.
- Manually: Choose this only enter the received IP address values from your ISP address.
Step 5: Tap on Apply button to save the Modified changes. Open the browser on your MacBook Pro and start using the internet.
Why Is the Ethernet Cable Not Working with the MacBook?
There can be several reasons if the ethernet cable is not connecting with the MacBook:
- Faulty ethernet adapter.
- There is some issue with the ethernet cable or the ethernet settings of the MacBook, due to which the ethernet is not working.
- The internet connection is down, so it will also not work properly.
Conclusion
With the growing technology, MacBooks are getting slimmer, smaller, and lighter in weight. There is no ethernet port in the latest MacBooks, but you can still connect to the internet using an ethernet cable in multiple ways for a better internet speed. Buy the best ethernet adapters according to your budget now and enjoy the fast-speed internet on your MacBook