
“PXE is a protocol used to boot operating systems over the network. You can use this method to install your favorite Linux distribution on your laptop, desktop, or server via PXE over the network.
In this article, I am going to show you how to configure Ubuntu 22.04 LTS as a PXE boot server, and PXE boot Ubuntu Desktop 22.04 LTS Live installer on a computer on the network so that you can install it without needing a CD/DVD drive or USB thumb drive. So, let’s get started.”
Table of Contents
- Network Topology
- Setting Up a Static IP Address on Ubuntu Server 22.04 LTS
- Setting Up a Static IP Address on Ubuntu Desktop 22.04 LTS
- (Optional) Preparing Ubuntu Desktop 22.04 LTS for Installing a DNS Server
- Creating the Required Directory Structure
- Downloading iPXE Source Code and Compiling iPXE on Ubuntu 22.04 LTS
- Copying the Compiled iPXE Firmwares to /pxeboot/firmware Directory
- Installing and Configuring a DHCP and TFTP Server on Ubuntu 22.04 LTS
- Installing and Configuring NFS Server on Ubuntu 22.04 LTS
- Configuring iPXE to PXE Boot Ubuntu Desktop 22.04 LTS Live Installer
- PXE Booting Ubuntu Desktop 22.04 LTS Live Installer
- Configuring iPXE to PXE Boot Other Linux Distributions
- Conclusion
- References
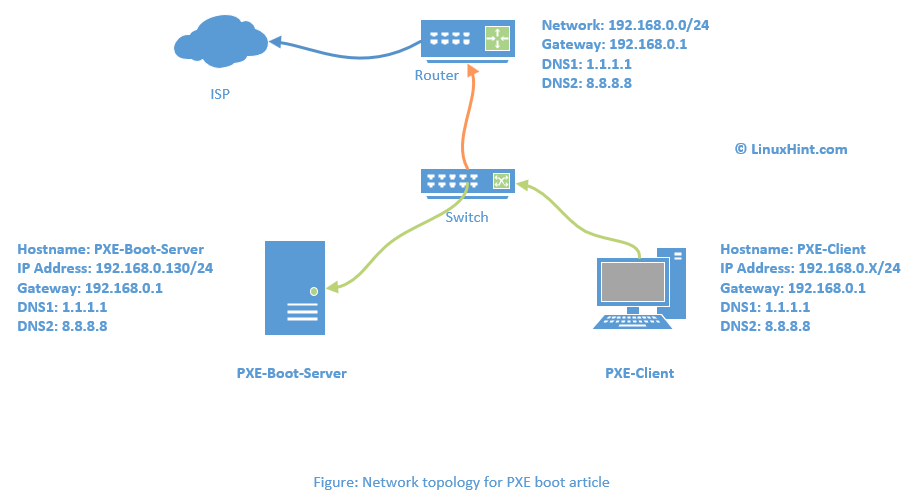
Network Topology
I will configure an Ubuntu 22.04 LTS machine (PXE-Boot-Server) as a PXE boot server using the iPXE firmware. The PXE boot server will also work as a DHCP and TFTP server. These are required for the PXE boot to work. Just to demonstrate how everything works, I will show you how to configure the PXE boot server to PXE boot Ubuntu Desktop 22.04 LTS Live installer on a computer (PXE-Client) so that you can install Ubuntu Desktop 22.04 LTS on it without needing any CD/DVD drive or USB thumb drive.
Setting Up a Static IP Address on Ubuntu Server 22.04 LTS
Before you go any farther, it’s best to configure the PXE boot server with a fixed/static IP address. In this section, I am going to show you how to set up a static/fixed IP address on Ubuntu Server 22.04 LTS.
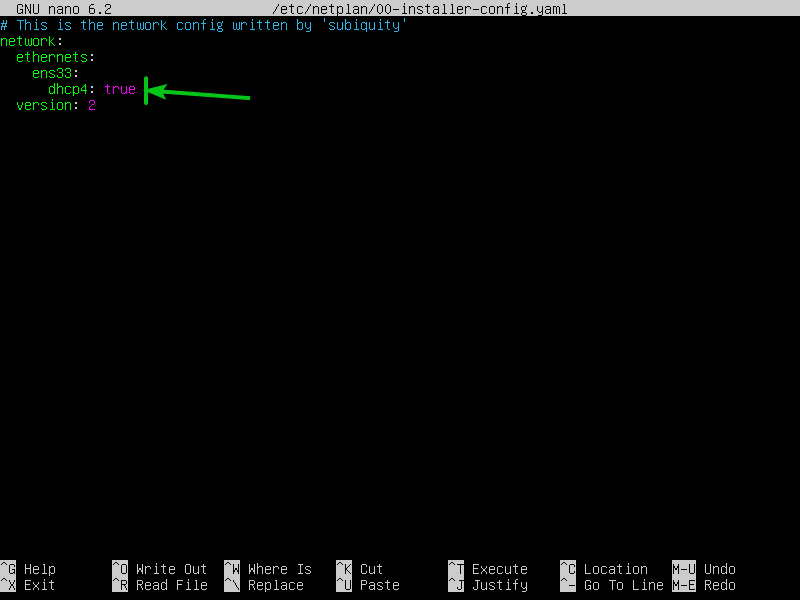
To configure a fixed/static IP address on Ubuntu Server 22.04 LTS , open the netplan configuration file /etc/netplan/00-installer-config.yaml with the nano text editor as follows:

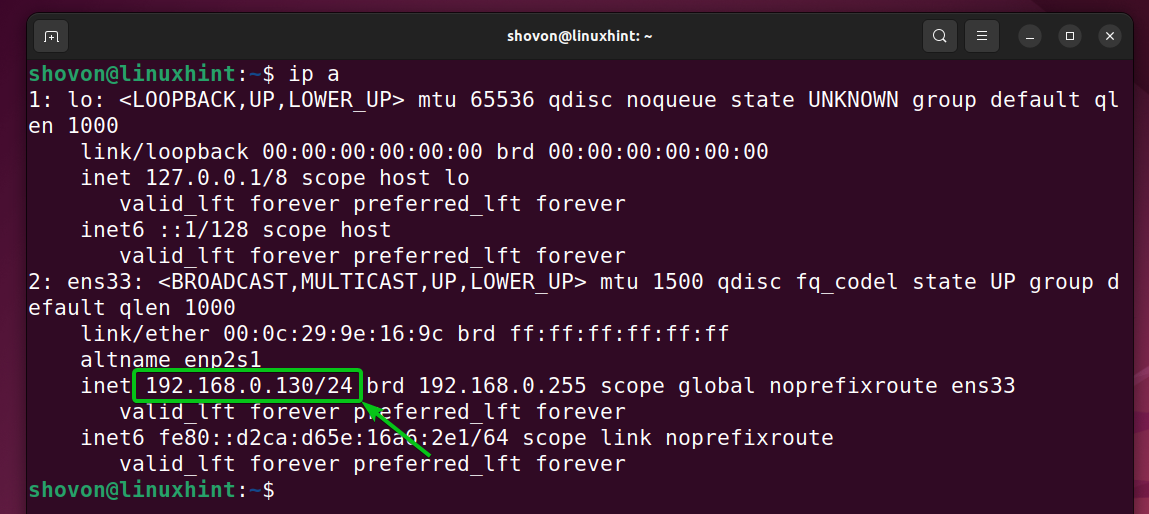
By default, DHCP is enabled for the network interface ens33, as you can see in the screenshot below.
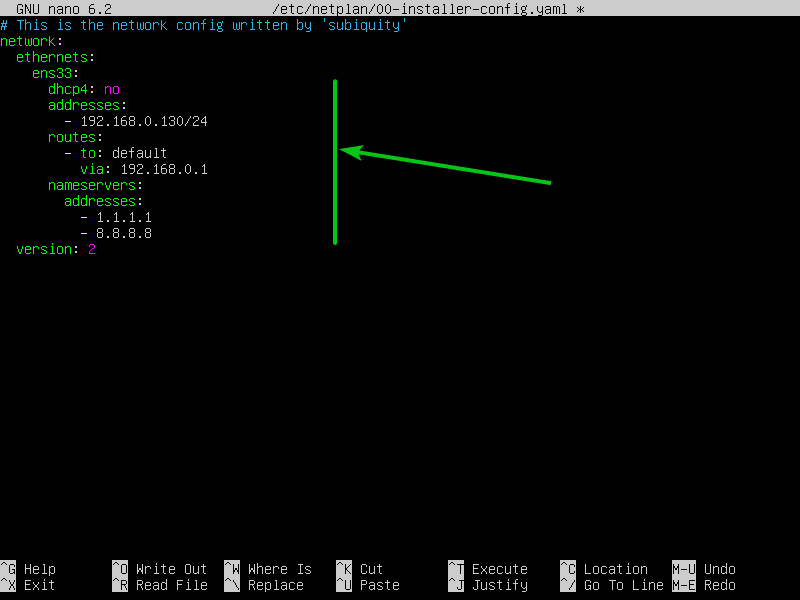
To set a static/fixed IP address 192.168.0.130 (also /24 netmask, gateway address 192.168.0.1, and DNS nameservers 1.1.1.1 and 8.8.8.8), change the configuration of the ens33 network interface as follows. Once you’re done, press <Ctrl> + X followed by Y and <Enter> to save the netplan configuration file.
To apply the changes, run the following command:

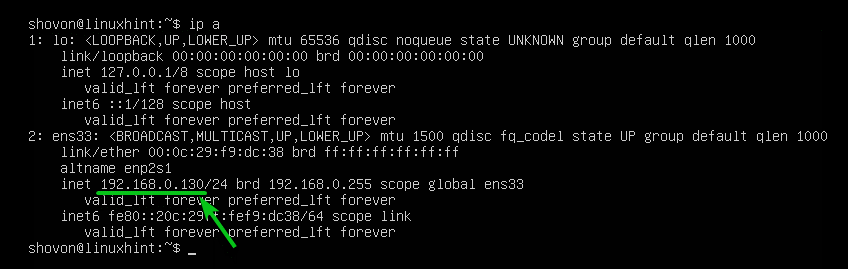
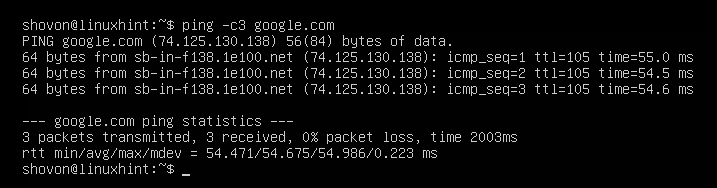
A static/fixed IP address 192.168.0.130 should be set on the ens33 network interface, as you can see in the screenshot below.
You should also be able to resolve DNS names to IP addresses, as you can see in the screenshot below.
Setting Up a Static IP Address on Ubuntu Desktop 22.04 LTS
Even if you’re using Ubuntu Desktop 22.04 LTS instead of Ubuntu Server 22.04 LTS for setting up a PXE boot server, it will still be a good idea to set up a fixed/static IP address on your computer. In this section, I am going to show you how to set up a static/fixed IP address on Ubuntu Desktop 22.04 LTS.
To find the name of the currently active Network Manager connection, run the following command:

The name of the currently active Network Manager connection is Wired connection 1.

To set a static/fixed IP address 192.168.0.130 (also /24 netmask, gateway address 192.168.0.1, and DNS nameservers 1.1.1.1 and 8.8.8.8) for the Network Manager connection Wired connection 1, run the following command:

For the changes to take effect, run the following command:

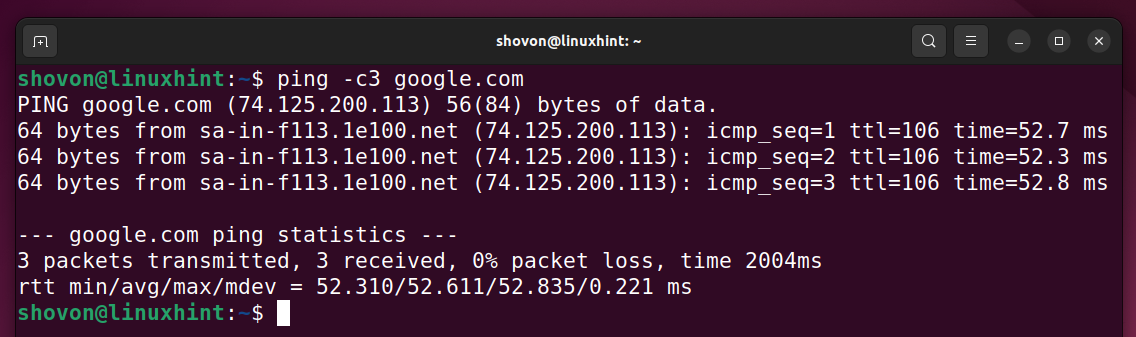
A static/fixed IP address 192.168.0.130 should be set on the ens33 network interface, as you can see in the screenshot below.
You should also be able to resolve DNS names to IP addresses, as you can see in the screenshot below.
(Optional) Preparing Ubuntu Desktop 22.04 LTS for Installing a DNS Server
On Ubuntu Desktop 22.04 LTS, NetworkManager will run a systemd-resolved service which will act as a local DNS cache server. The systemd-resolved service uses the UDP port 53, the same as dnsmasq. So, as long as the systemd-resolved service is running, dnsmasq will not work. If you’re using Ubuntu Desktop 22.04 LTS for setting up a PXE boot server, you have to disable and stop the systemd-resolved service before installing/running dnsmasq.
To stop the systemd-resolved service, run the following command:

Also, remove the systemd-resolved service from the system startup so that it does not start automatically at boot time anymore.

Remove the symbolic link of the /etc/resolv.conf file with the following command:

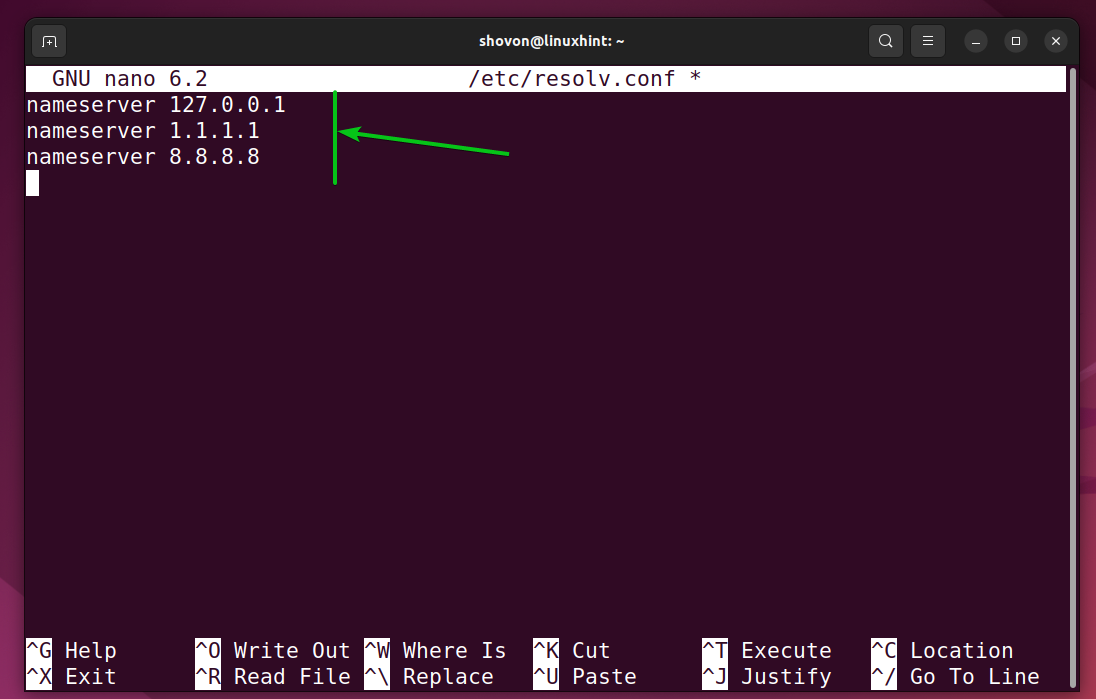
Create a new /etc/resolv.conf file with the nano text editor as follows:

Type in the following lines in the /etc/resolv.conf file.
Once you’re done, press <Ctrl> + X followed by Y and <Enter> to save the /etc/resolv.conf file.
You should also be able to resolve DNS names to IP addresses again, as you can see in the screenshot below.

Creating the Required Directory Structure
In this section, I will create all the required directories for PXE booting (using the iPXE firmware) to work.
I have planned the directory structure as follows:
- config/
- firmware/
- os-images/
In the /pxeboot/config/ directory, I will store all the iPXE boot configuration files.
In the /pxeboot/firmware/ directory, I will store all the iPXE boot firmware files.
In the /pxeboot/os-images/ directory, I will create a separate subdirectory for each of the Linux distributions (that I want to PXE boot) and store the contents of the ISO images of these Linux distributions there. For example, for PXE booting Ubuntu Desktop 22.04 LTS, you can create a directory ubuntu-22.04-desktop-amd64/ in the /pxeboot/os-images/ directory and store the contents of the Ubuntu Desktop 22.04 LTS ISO image in that directory.
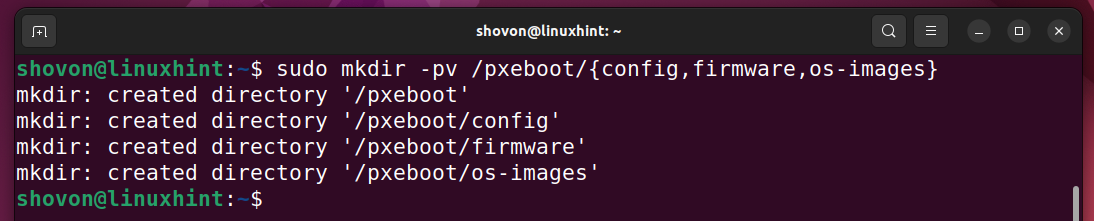
To create all the required directory structures, run the following command:

All the required directory structures for PXE booting should be created.
Downloading iPXE Source Code and Compiling iPXE on Ubuntu 22.04 LTS
In this section, I am going to show you how to download the iPXE source code and compile it on Ubuntu 22.04 LTS so that we can use it for PXE booting.
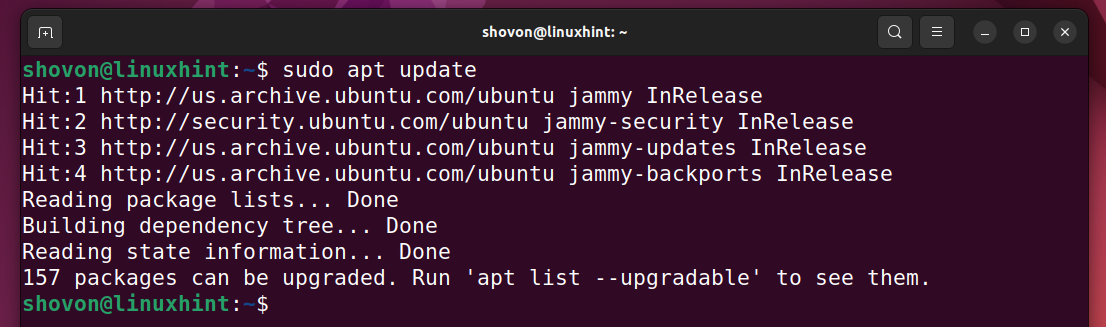
First, update the APT package repository cache with the following command:
To install the required build dependencies for iPXE, run the following command:

To confirm the installation, press Y and then press <Enter>.

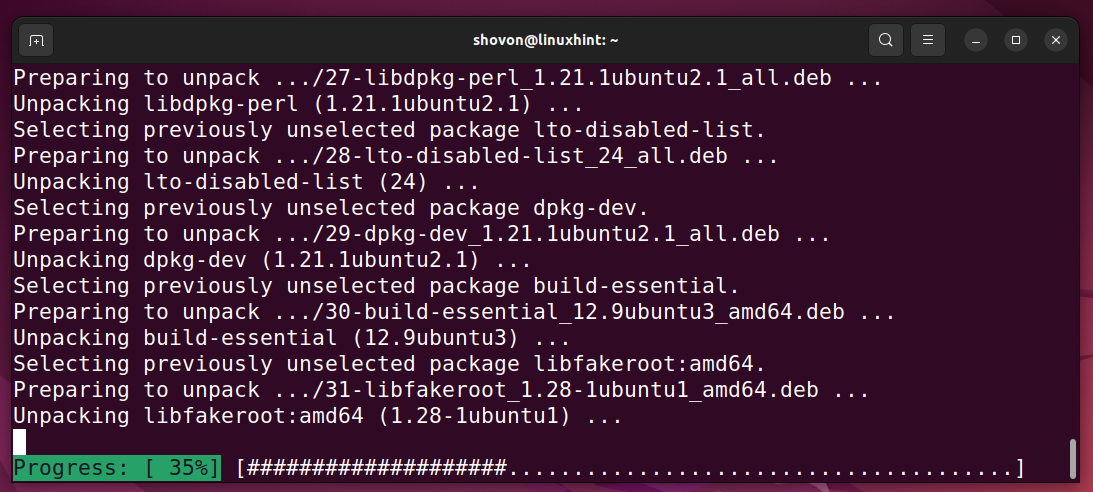
All the required packages will be downloaded from the internet. It will take a while to complete.

Once the packages are downloaded, they will be installed one by one. It will take a few seconds to complete.
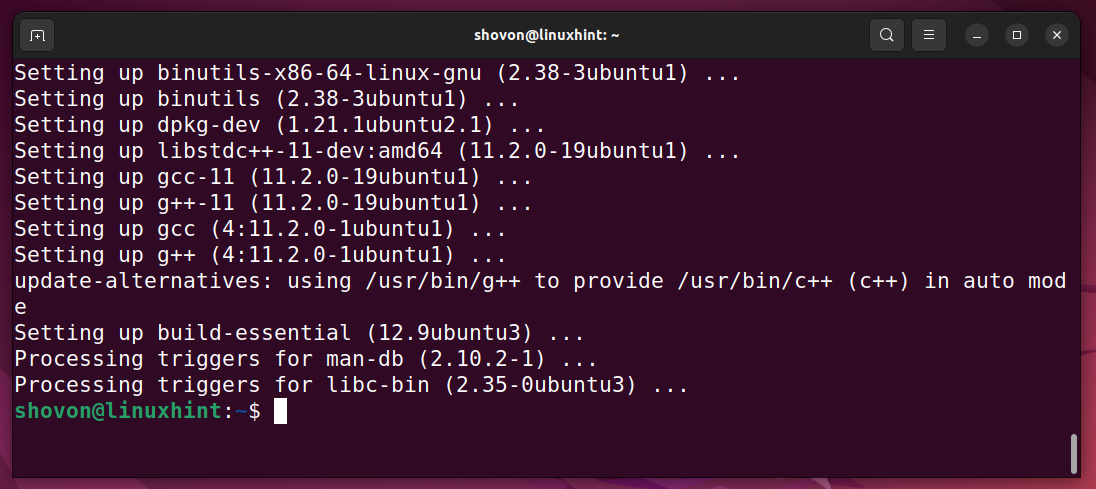
At this point, all the required dependency packages should be installed.
Now, navigate to the ~/Downloads directory as follows:
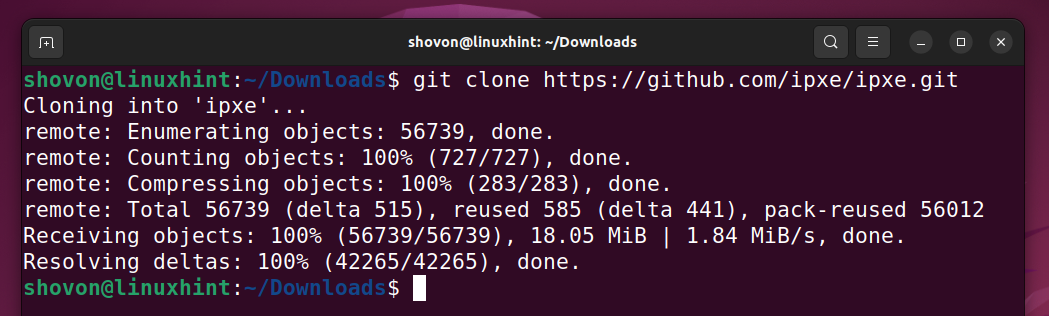
Clone the iPXE GitHub repository on your Ubuntu 22.04 LTS machine as follows:

The iPXE GitHub repository should be cloned.
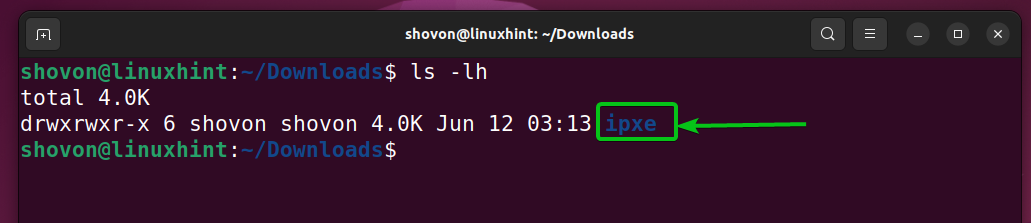
A new directory ipxe/ should be created in the ~/Downloads directory, as you can see in the screenshot below.
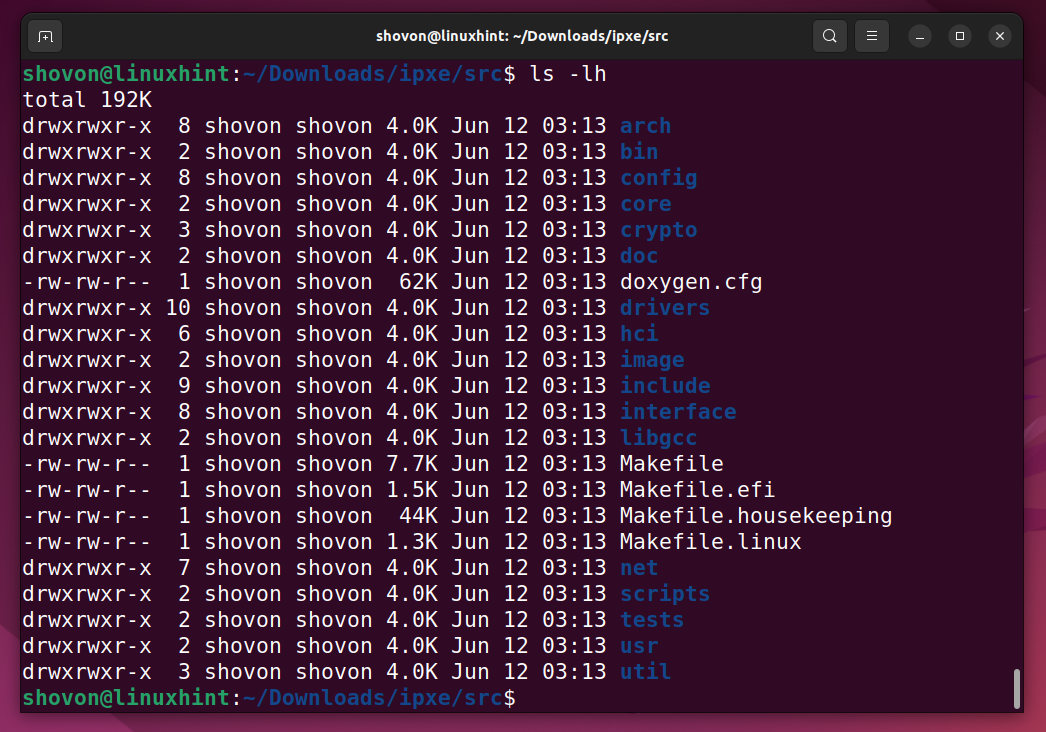
Navigate to the ipxe/src/ directory as follows:

You should see a lot of directories there containing the iPXE source code.
To configure iPXE to automatically boot from an iPXE boot script stored in the /pxeboot/config/ directory of your computer, you will need to create an iPXE boot script and embed it with the iPXE firmware when you compile it.
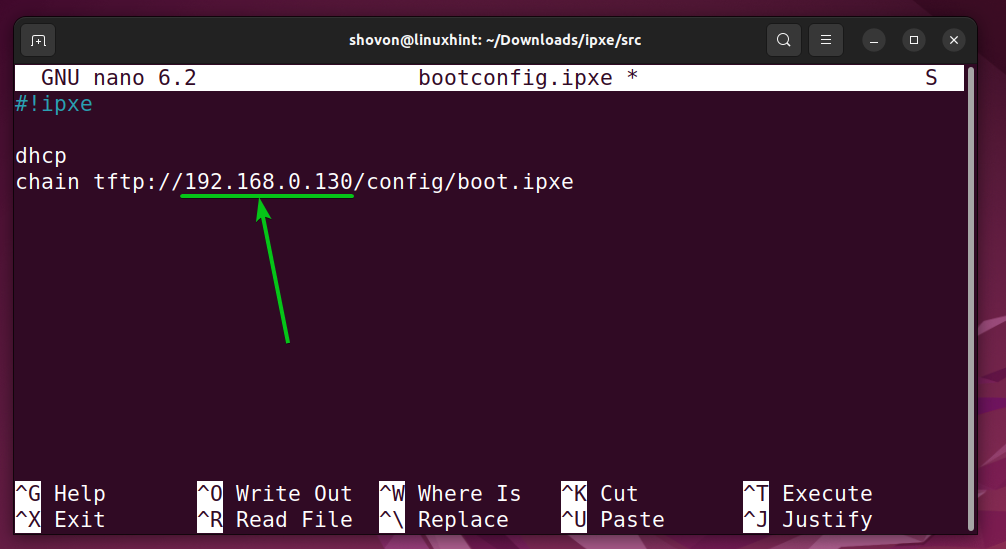
Create an iPXE boot script bootconfig.ipxe and open it with the nano text editor as follows:

Type in the following lines of codes in the bootconfig.ipxe file.
dhcp
chain tftp://192.168.0.130/config/boot.ipxe
Once you’re done, save the file by pressing <Ctrl> + X followed by Y and <Enter>.
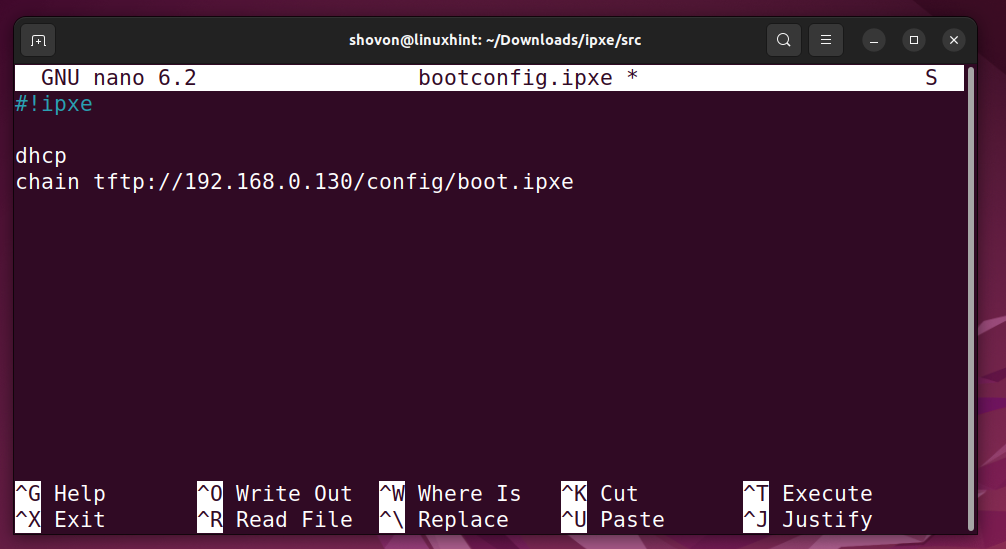
NOTE: Here, 192.168.0.130 is the IP address of my Ubuntu 22.04 LTS machine that I am configuring as a PXE boot server (PXE-Boot-Server). It will be different for you.
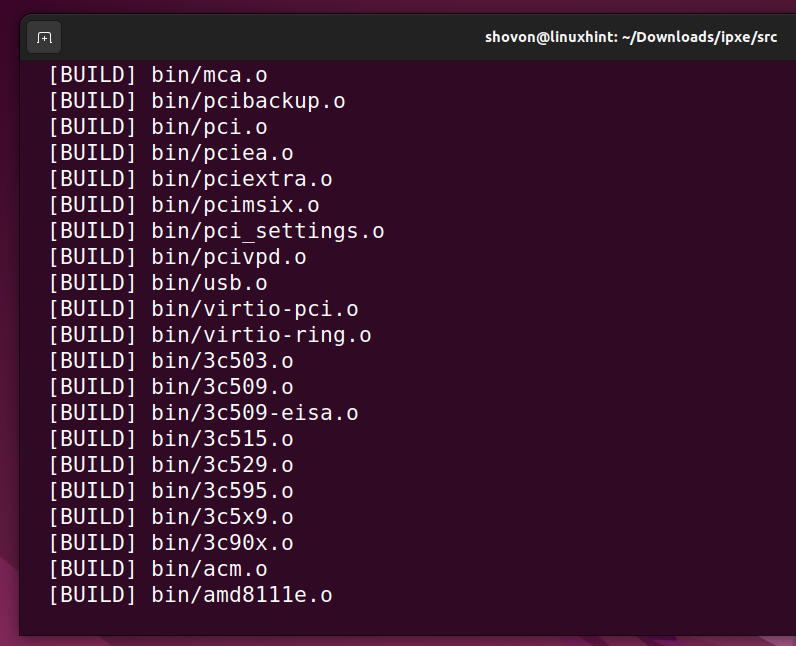
To compile iPXE BIOS and UEFI firmwares and embed the bootconfig.ipxe iPXE boot script in the compiled firmwares, run the following command:

The iPXE boot firmware files for BIOS and UEFI systems are being compiled. It will take a few seconds to complete.
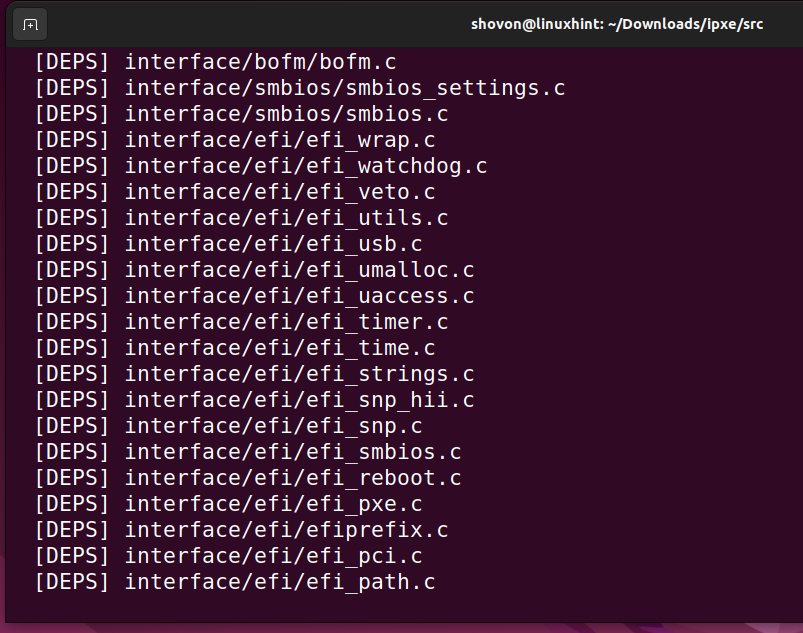
The iPXE boot firmware files for BIOS and UEFI systems are being compiled…
The iPXE boot firmware files for BIOS and UEFI systems are compiled at this point.

Copying the Compiled iPXE Firmwares to /pxeboot/firmware Directory
Once the iPXE boot firmware files are compiled, copy them to the /pxeboot/firmware directory of your Ubuntu 22.04 LTS PXE boot server so that the PXE client computers can access them via TFTP.

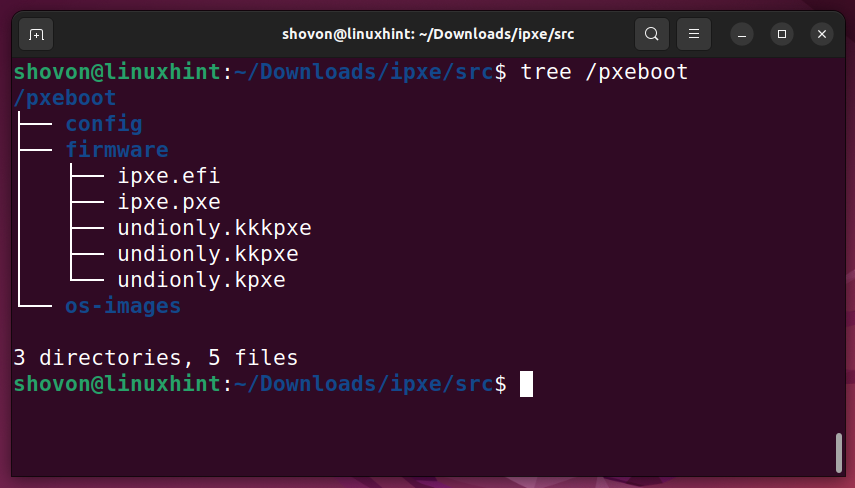
The iPXE boot firmware files should be copied to the /pxeboot/firmware directory.

Once the iPXE boot firmware files are copied to the /pxeboot/firmware directory, the directory structure of the /pxeboot directory should look as shown in the screenshot below.
Here, the iPXE boot firmware files ipxe.pxe, undionly.kpxe, undionly.kkpxe, and undionly.kkkpxe are for PXE booting on BIOS systems. The iPXE boot firmware file ipxe.efi is for PXE booting on UEFI systems.
For more information on the iPXE boot firmware files, read the Compiling iPXE for BIOS-Based Motherboards and Compiling iPXE for UEFI-Based Motherboards sections of the article How to Configure Synology NAS as PXE Boot Server for Netbooting Linux Installation Images with iPXE (BIOS and UEFI version) at linuxhint.com.
Installing and Configuring a DHCP and TFTP Server on Ubuntu 22.04 LTS
For PXE boot to work, you will need a working DHCP and TFTP server running on your computer. There are many DHCP and TFTP server software. But, in this article, I will use dnsmasq. dnsmasq is mainly a DNS and DHCP server that can also be configured as a TFTP server.
On Ubuntu 22.04 LTS, dnsmasq is not installed by default. But it is available in the official package repository of Ubuntu 22.04, and you can install it with the APT package manager very easily.
To install dnsmasq on Ubuntu 22.04 LTS, run the following command:

dnsmasq should be installed.

We will create a new dnsmasq configuration file. So, rename the original /etc/dnsmasq.conf file to /etc/dnsmasq.conf.backup as follows:

Create an empty dnsmasq configuration file /etc/dnsmasq.conf with the following command:

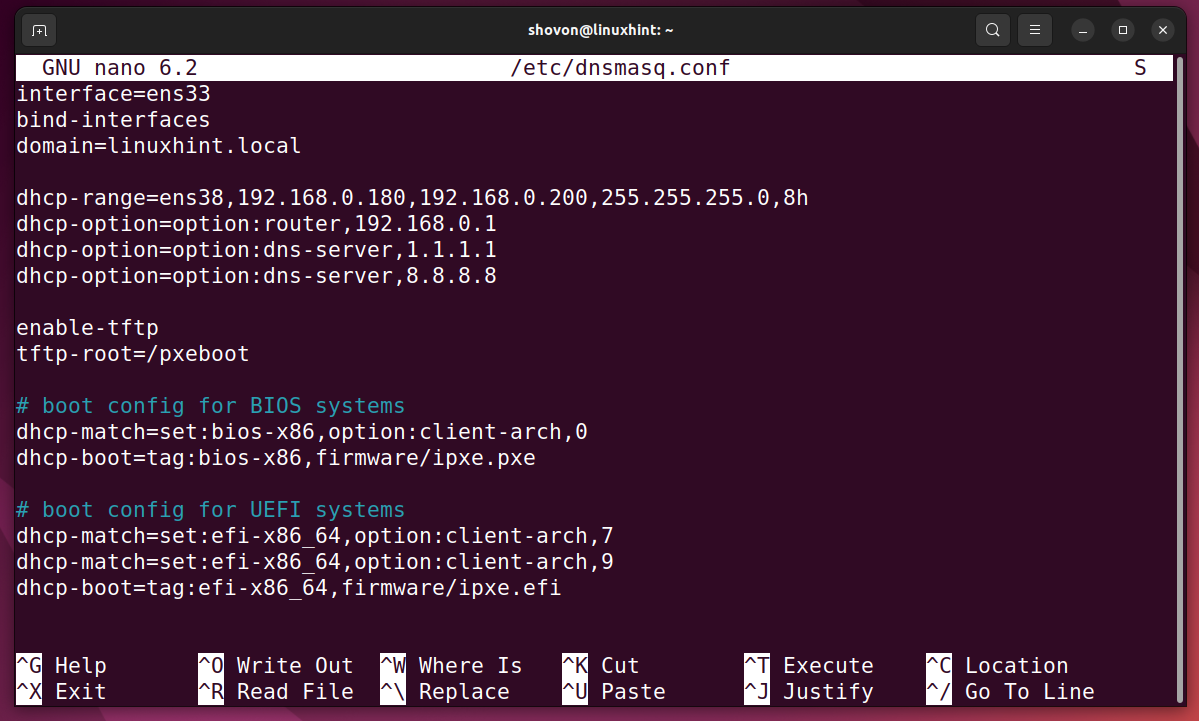
Type in the following lines in the dnsmasq configuration file /etc/dnsmasq.conf:
bind-interfaces
domain=linuxhint.local
dhcp-range=ens38,192.168.0.180,192.168.0.200,255.255.255.0,8h
dhcp-option=option:router,192.168.0.1
dhcp-option=option:dns-server,1.1.1.1
dhcp-option=option:dns-server,8.8.8.8
enable-tftp
tftp-root=/pxeboot
# boot config for BIOS systems
dhcp-match=set:bios-x86,option:client-arch,0
dhcp-boot=tag:bios-x86,firmware/ipxe.pxe
# boot config for UEFI systems
dhcp-match=set:efi-x86_64,option:client-arch,7
dhcp-match=set:efi-x86_64,option:client-arch,9
dhcp-boot=tag:efi-x86_64,firmware/ipxe.efi
The final configuration file should look as shown in the screenshot below.
To save the dnsmasq configuration file /etc/dnsmasq.conf, press <Ctrl> + X followed by Y and <Enter>.
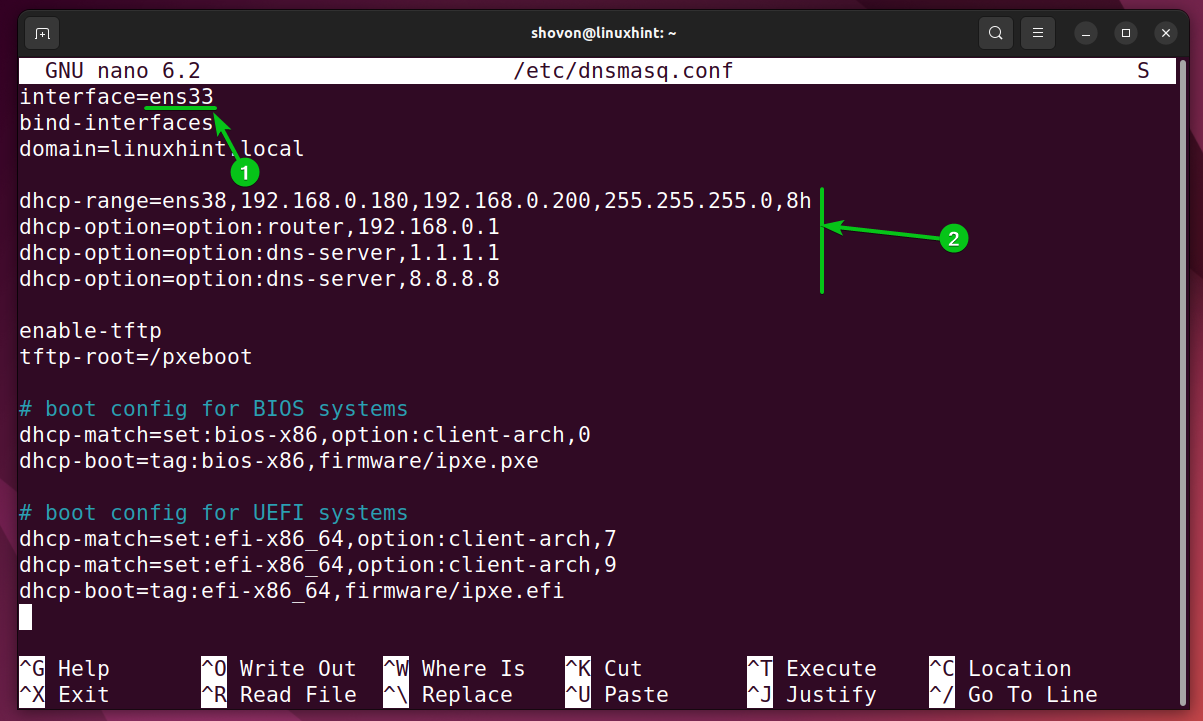
Here, ens33 is the name of the network interface for which DHCP is enabled¹.
I have configured the DHCP server to assign IP addresses in the range 192.168.0.180-192.168.0.200 on the PXE boot clients. The router/gateway address is 192.168.0.1. The DNS servers are 1.1.1.1 and 8.8.8.82.
NOTE: If you don’t know the name of the network interface of your Ubuntu 22.04 LTS machine, you can run the ip a command to find it out.
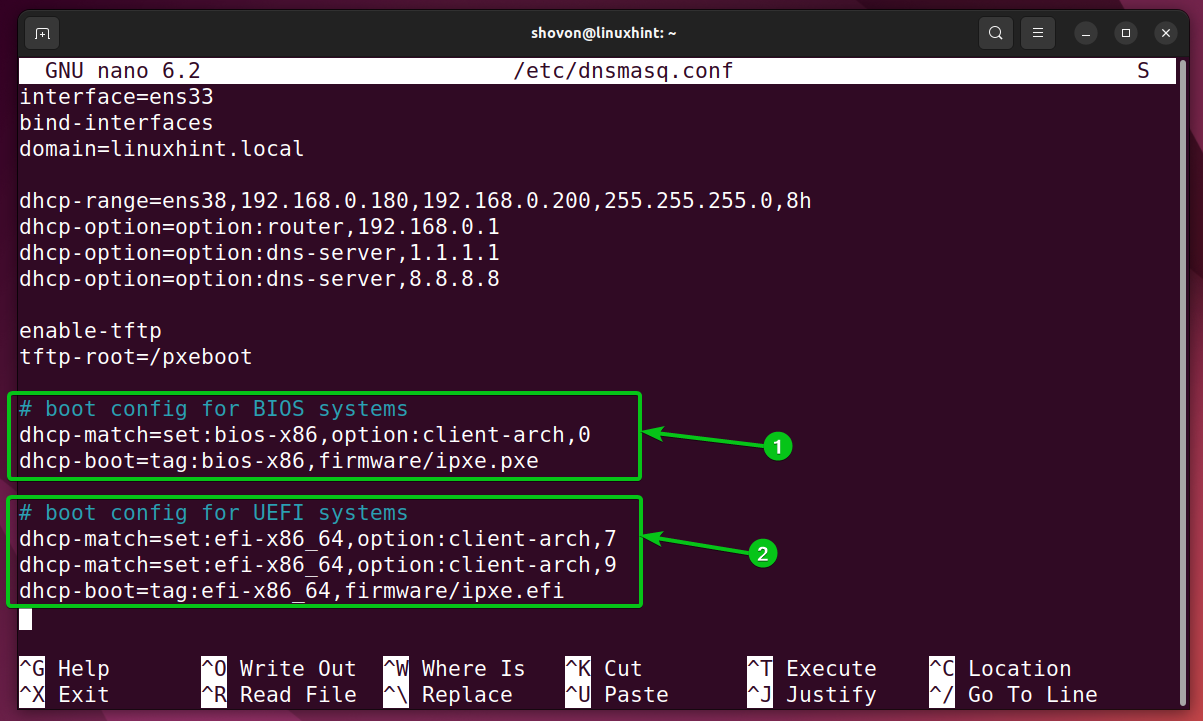
These 2 sections are used to detect whether a PXE client is BIOS-based or UEFI-based.
If a PXE client is BIOS-based, the DHCP server serves the iPXE firmware file /pxeboot/firmware/ipxe.pxe¹.
If a PXE client is UEFI-based, the DHCP server serves the iPXE firmware file /pxeboot/firmware/ipxe.efi².
For the changes to take effect, restart the dnsmasq server as follows:

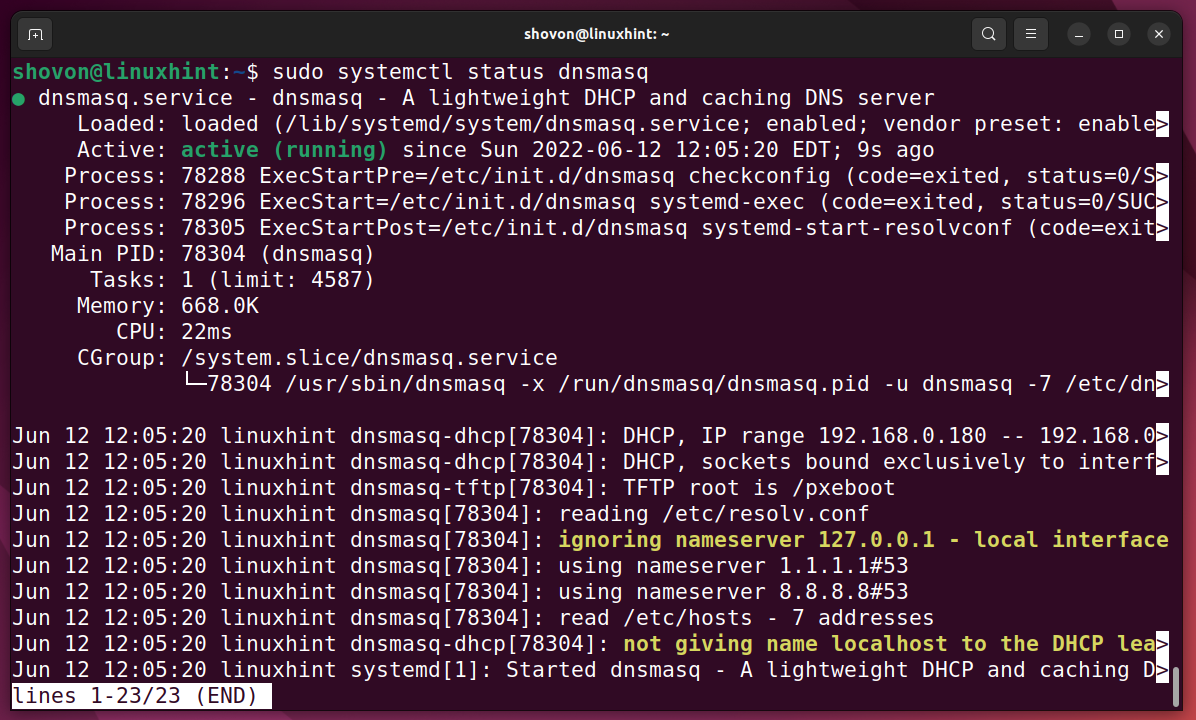
To check whether the dnsmasq service is running, run the following command:

As you can see, the dnsmasq service is running. So, it’s configured correctly.
Installing and Configuring NFS Server on Ubuntu 22.04 LTS
Ubuntu Desktop 22.04 LTS uses casper to boot into Live installation mode. casper supports PXE boot via the NFS protocol only. Other Linux distributions like Fedora, CentOS/RHEL also support PXE booting via the NFS protocol. So, to boot Ubuntu Desktop 22.04 LTS and many other Linux distributions via PXE, you need to have a fully functional NFS server accessible over the network.
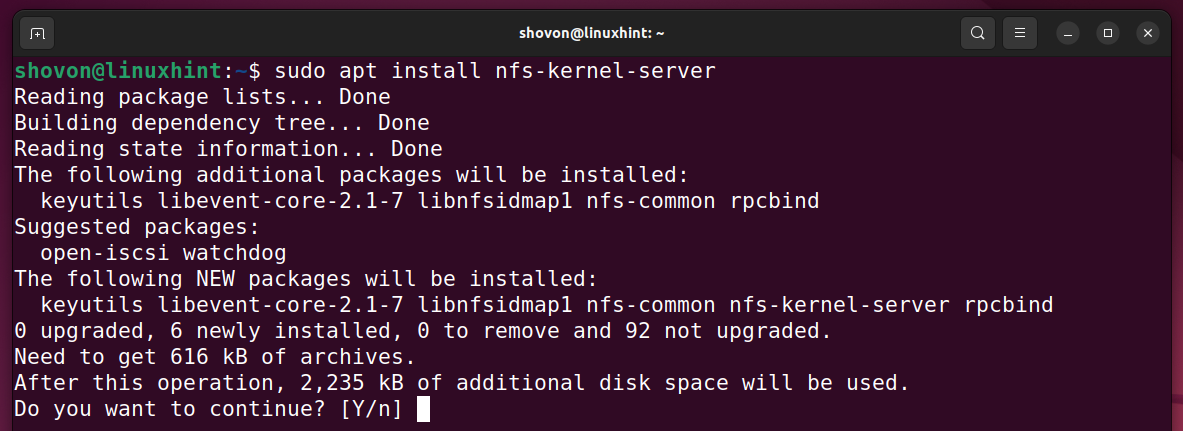
To install the NFS server on Ubuntu 22.04 LTS, run the following command:

To confirm the installation, press Y and then press <Enter>.
NFS server should be installed.

Open the NFS server configuration file /etc/exports as follows:

To share the /pxeboot directory via NFS, add the following line at the end of the /etc/exports file:
Once you’re done, press <Ctrl> + X followed by Y and <Enter> to save the NFS configuration file /etc/exports.

To make the new NFS share /pxeboot available, run the following command:

Configuring iPXE to PXE Boot Ubuntu Desktop 22.04 LTS Live Installer
In this section, I am going to show you how to configure iPXE on your Ubuntu 22.04 LTS PXE boot server to PXE boot Ubuntu Desktop 22.04 LTS Live installer on other computers (PXE clients).
NOTE: If you want to configure iPXE on your Ubuntu 22.04 LTS PXE boot server to PXE boot other Linux distributions, you will have to make the necessary changes. This shouldn’t be too hard.
First, navigate to the ~/Downloads directory of your Ubuntu 22.04 LTS PXE boot server as follows:

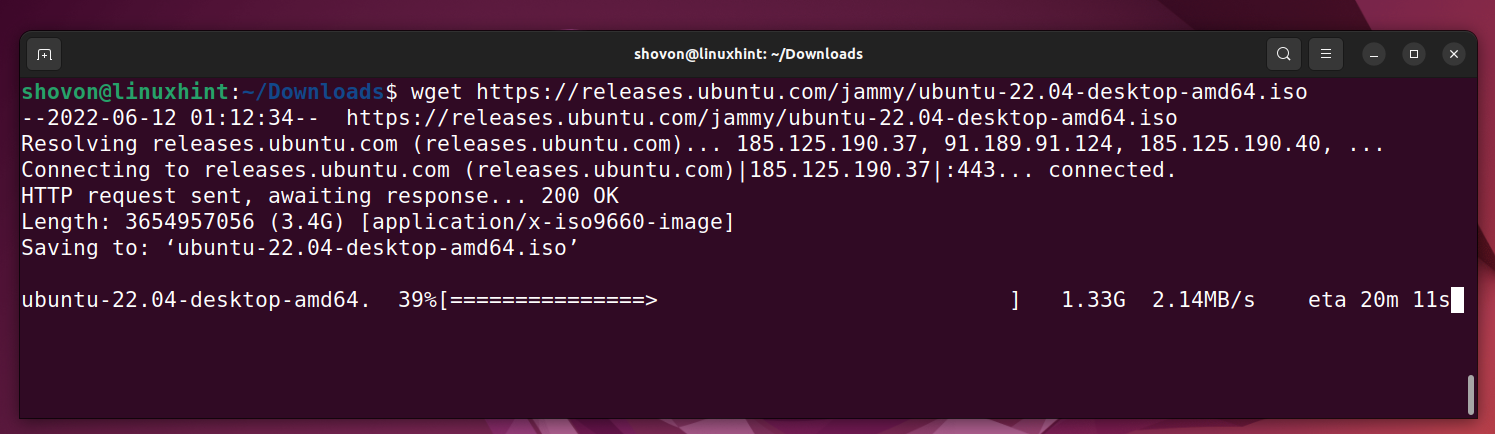
To download the Ubuntu Desktop 22.04 LTS ISO image from the official website of Ubuntu, run the following command:

The Ubuntu Desktop 22.04 LTS ISO image is being downloaded. It will take a while to complete. I have already downloaded it. So, I won’t waste my time redownloading it here.
Once the Ubuntu Desktop 22.04 LTS ISO image file ubuntu-22.04-desktop-amd64.iso is downloaded, you should find it in the ~/Downloads directory of your PXE boot server.

Mount the Ubuntu Desktop 22.04 LTS ISO file ubuntu-22.04-desktop-amd64.iso in the /mnt directory as follows:

Create a dedicated directory ubuntu-22.04-desktop-amd64/ for storing the contents of the Ubuntu Desktop 22.04 LTS ISO image in the /pxeboot/os-images/ directory as follows:

To copy the contents of the Ubuntu Desktop 22.04 LTS ISO image in the /pxeboot/os-images/ubuntu-22.04-desktop-amd64/ directory with rsync, run the following command:

NOTE: If you don’t have rsync installed on Ubuntu 22.04 LTS and need any assistance in installing rsync on Ubuntu 22.04 LTS, read the article How to Use rsync Command to Copy Files on Ubuntu.
The contents of the Ubuntu Desktop 22.04 LTS ISO image are being copied to the /pxeboot/os-images/ubuntu-22.04-desktop-amd64/ directory. It will take a while to complete.

At this point, the contents of the Ubuntu Desktop 22.04 LTS ISO image should be copied to the /pxeboot/os-images/ubuntu-22.04-desktop-amd64/ directory.

Unmount the Ubuntu Desktop 22.04 LTS ISO image from the /mnt directory as follows:

You can also remove the Ubuntu Desktop 22.04 LTS ISO image ubuntu-22.04-desktop-amd64.iso from the PXE boot server if you want.

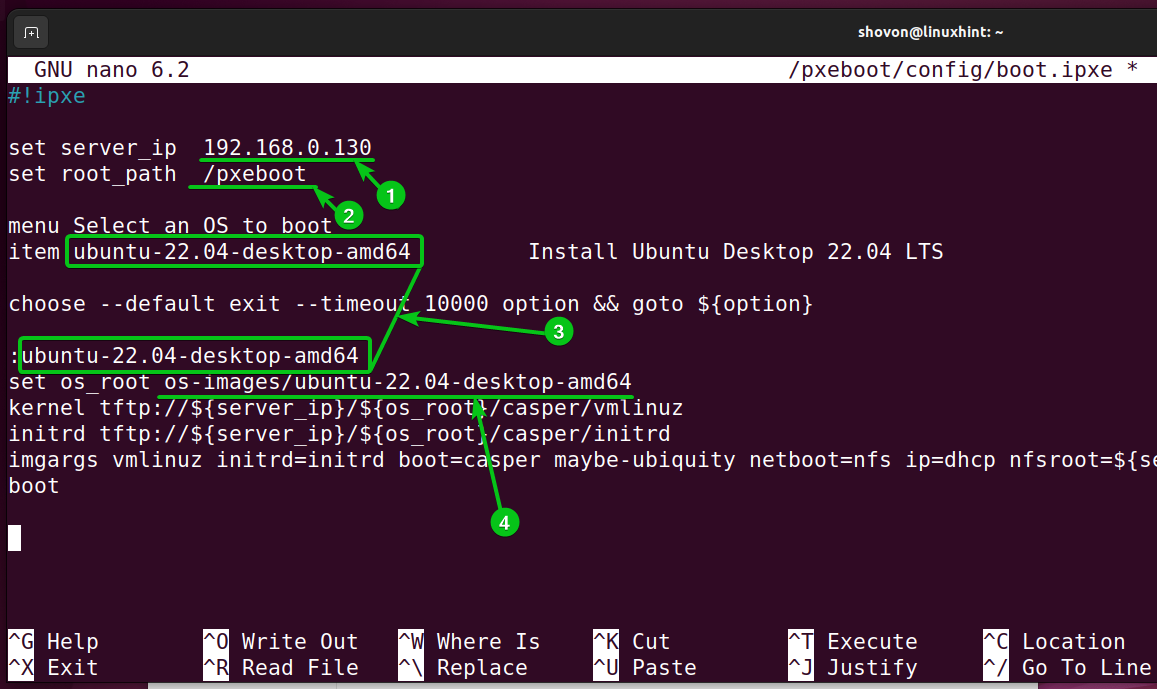
Now, create the default iPXE boot configuration file /pxeboot/config/boot.ipxe and open it with the nano text editor as follows:

Type in the following lines in the iPXE boot configuration file /pxeboot/config/boot.ipxe:
set server_ip 192.168.0.130
set root_path /pxeboot
menu Select an OS to boot
item ubuntu-22.04-desktop-amd64 Install Ubuntu Desktop 22.04 LTS
choose --default exit --timeout 10000 option && goto ${option}
:ubuntu-22.04-desktop-amd64
set os_root os-images/ubuntu-22.04-desktop-amd64
kernel tftp://${server_ip}/${os_root}/casper/vmlinuz
initrd tftp://${server_ip}/${os_root}/casper/initrd
imgargs vmlinuz initrd=initrd boot=casper maybe-ubiquity netboot=nfs ip=dhcp nfsroot=${server_ip}:${root_path}/${os_root} quiet splash ---
boot
Once you’re done, press <Ctrl> + X followed by Y and <Enter> to save the iPXE boot configuration file /pxeboot/config/boot.ipxe.
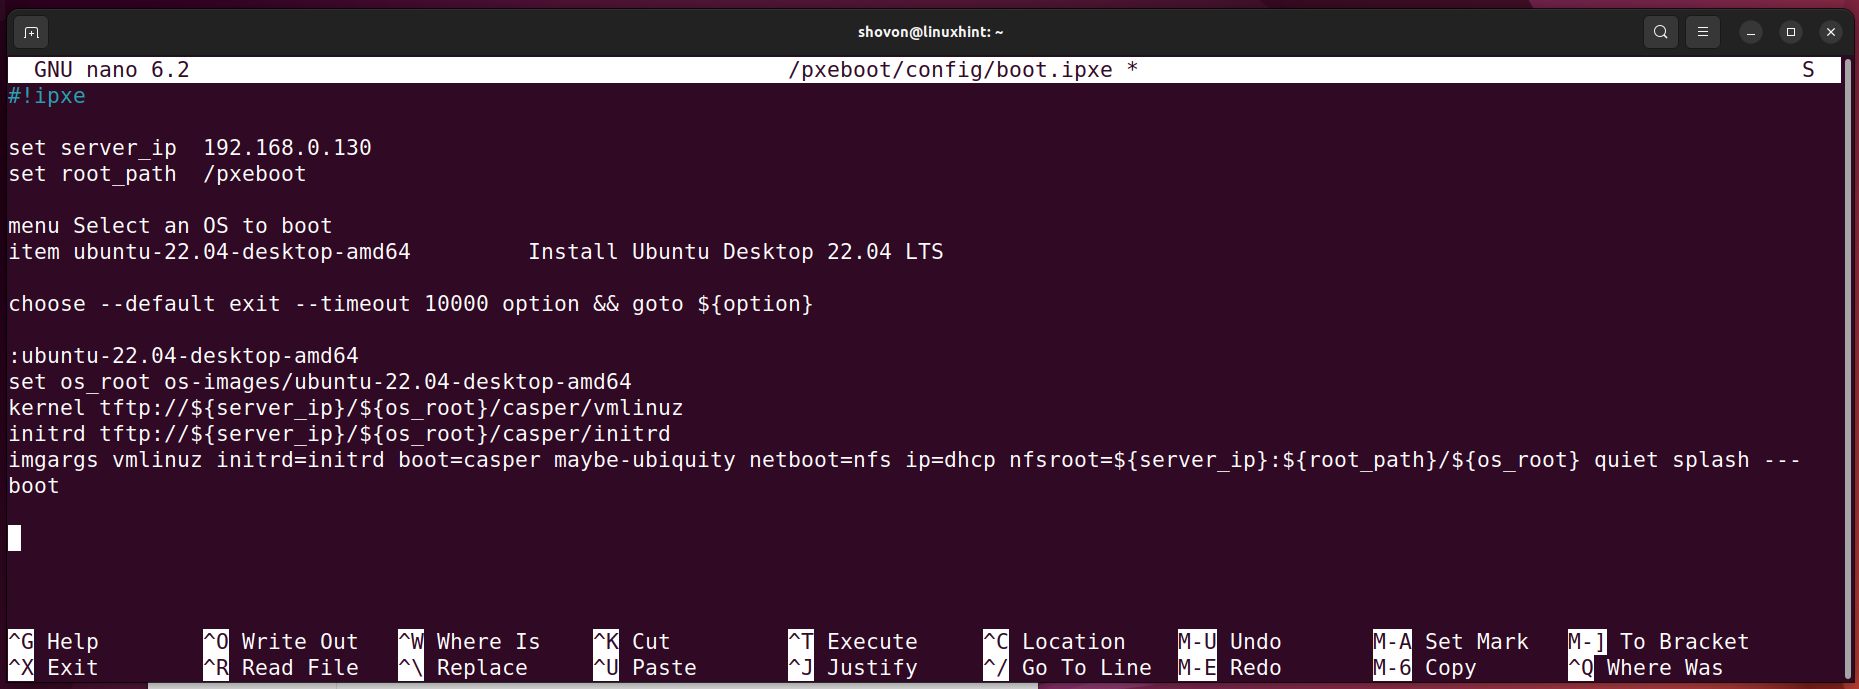
Here, server_ip is the IP address of the Ubuntu 22.04 LTS PXE boot server¹, and root_path is the NFS share path².
ubuntu-22.04-desktop-amd64 is the label for the boot menu entry Install Ubuntu Desktop 22.04 LTS, and the boot codes for PXE booting Ubuntu Desktop 22.04 LTS are also labeled with the same name³.
os_root is the name of the subdirectory in the /pxeboot/os-images/ directory where you’ve copied the contents of the Ubuntu Desktop 22.04 LTS ISO image⁴.
PXE Booting Ubuntu Desktop 22.04 LTS Live Installer
Now, boot any computer on the network via PXE, and you should see that the iPXE firmware is being used for the PXE boot process.
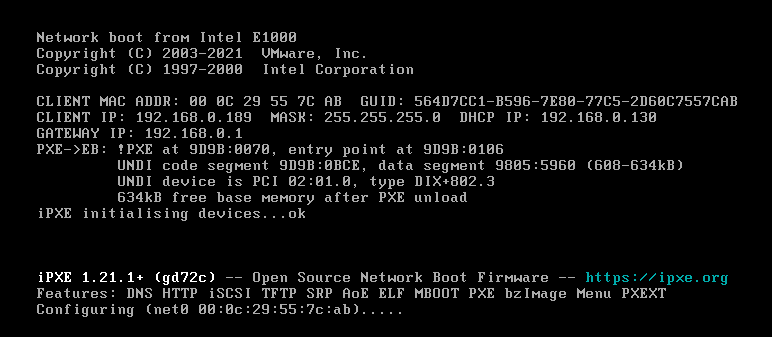
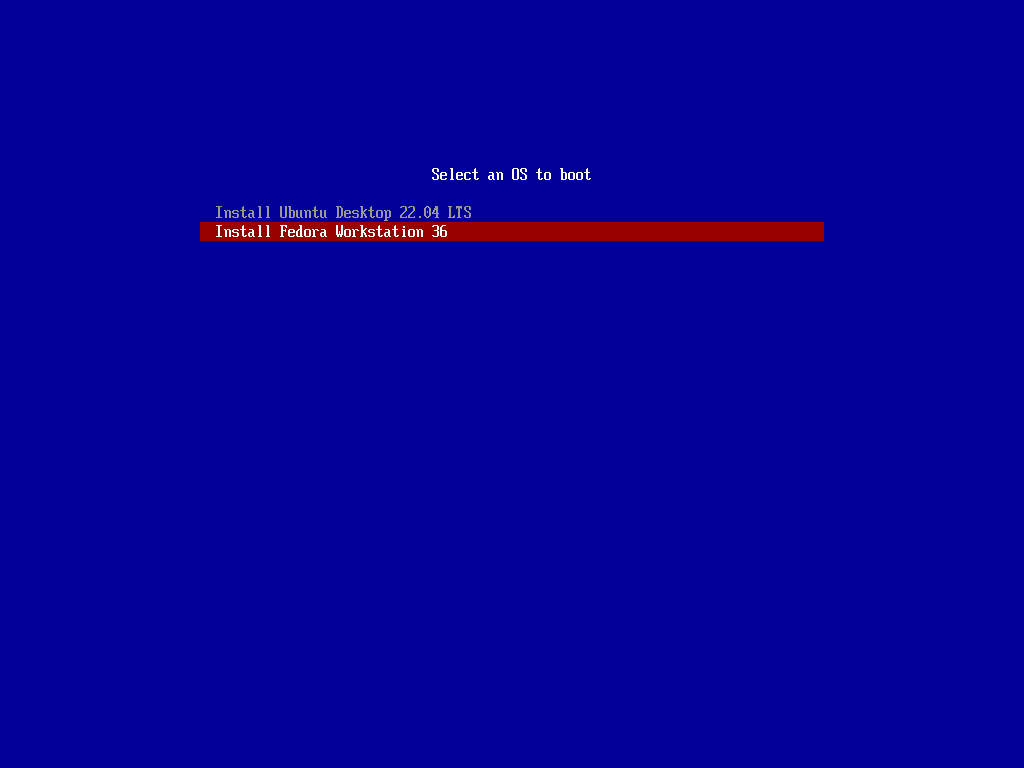
Once the iPXE firmware is initialized, you should see the following boot menu.
Select Install Ubuntu Desktop 22.04 LTS and press <Enter>.

You should see that iPXE is downloading the vmlinuz and initrd files from the PXE boot server.

Ubuntu Desktop 22.04 LTS installer is being booted…

Once Ubuntu Desktop 22.04 LTS installer is booted, you should see the following window. You can install Ubuntu Desktop 22.04 LTS on your computer as usual from here. If you need any assistance in installing Ubuntu Desktop 22.04 LTS on your computer, read the article Installing Ubuntu Desktop 20.04 LTS. Although the article is for Ubuntu Desktop 20.04 LTS, it may still be helpful.

If you want to try out Ubuntu Desktop 22.04 LTS in Live mode, click on Try Ubuntu.

Ubuntu Desktop 22.04 LTS should be PXE booted in live mode.

Configuring iPXE to PXE Boot Other Linux Distributions
In the same way, you can configure iPXE and the PXE boot server to boot other Linux distributions. Just create a new directory for your desired Linux distribution in the /pxeboot/os-images/ directory and copy the required files from the ISO image of your desired Linux distribution in the newly-created directory. Then, add a new menu entry and boot code for your desired Linux distribution in the iPXE boot configuration file /pxeboot/config/boot.ipxe.
Adding a new menu entry and boot code in the iPXE boot configuration file /pxeboot/config/boot.ipxe is really easy.
Just open the iPXE boot configuration file /pxeboot/config/boot.ipxe with the nano text editor as follows:

Then, add a new menu entry and the required boot code, as shown in the screenshot below.
Once you’re done, press <Ctrl> + X followed by Y and <Enter> to save the /pxeboot/config/boot.ipxe file.
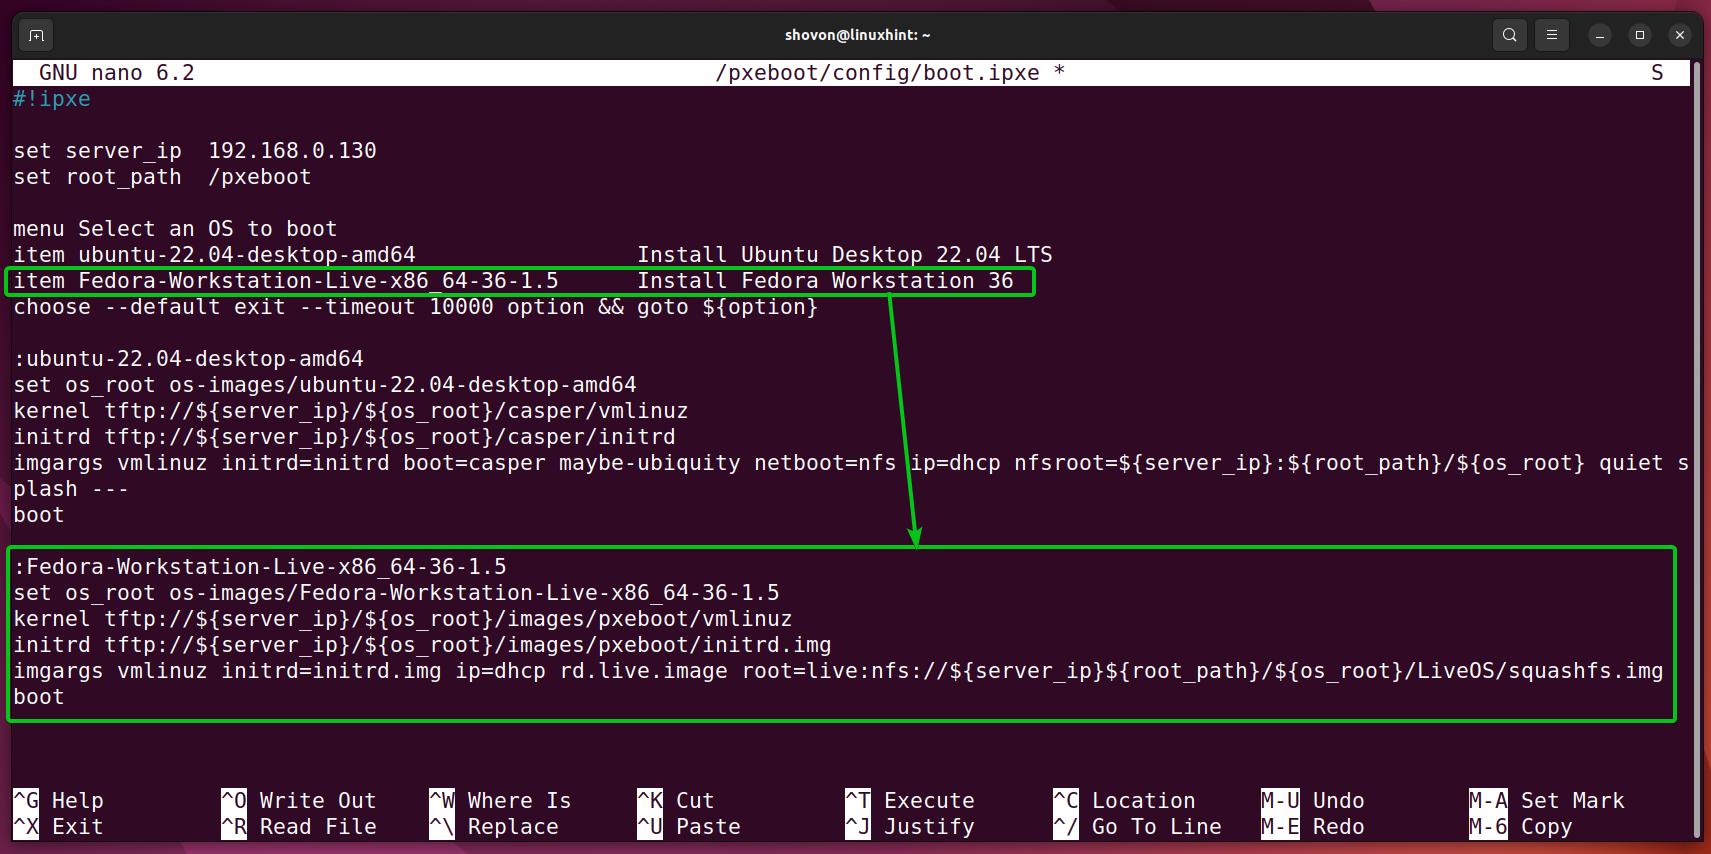
Now, if you PXE boot other computers on the network, you will see a new menu entry for your desired Linux distribution, and you should be able to boot from it.
If you need any assistance in configuring iPXE to PXE boot the following Linux distributions, make sure to read the article How to Configure Synology NAS as PXE Boot Server for Netbooting Linux Installation Images with iPXE (BIOS and UEFI version) at LinuxHint.com.
- Ubuntu Desktop 20.04 LTS
- Ubuntu Server 20.04 LTS
- Ubuntu Server 22.04 LTS
- Fedora Workstation 36
Conclusion
In this article, I have shown you how to configure Ubuntu 22.04 LTS as a PXE boot server with iPXE. I have also shown you how to configure the PXE boot server to PXE boot Ubuntu Desktop 22.04 LTS installer in Live mode so that you can install it on your computer without needing a CD/DVD drive or USB thumb drive.