
Virtualbox is a widely used virtualization platform for creating and managing virtual machines. Although it is an open-source platform, some closed-source components are also included in a different extension pack. It is free for use, but you can purchase an Oracle VM VirtualBox Extension Pack Enterprise license if you want to use it for commercial purposes and require standard official support.
When a new virtual machine is created in Virtualbox, the default networking mode is set to NAT or Network Address Translation. NAT mode has its own advantages and limitations over other networking modes. In essence, NAT is more secure but at the same time more complicated when it comes to setting up cross-communication with other virtual machines and the outside world. If you want the virtual machine to get both the security and access to specific services with NAT mode, you would require the help of Port forwarding. In this way, the VM will remain isolated from others but still access the specific services.
What will we cover?
This guide will see how we can set up port forwarding in Virtualbox using graphical and command-line methods. We will use a Ubuntu 20.04 virtual machine for this purpose. To check if the configuration is working, we will set port forwarding on our VM for SSH access from port 22 to port 9099 in the graphical method and from port 22 to port 2222 in the command line method. Let us move on with this configuration without further ado.
Prerequisite
- Virtualbox installed on the host machine.
- Ubuntu 20.04 virtual machine running inside Virtualbox.
- Openssh-server installed on the guest VM.
- Openssh-client installed on the Host machine.
Getting Started with Port Forwarding
Method 1. Port Forwarding Using Virtualbox Graphical Interface
Step 1. From the left pane of the Virtualbox main window, select the virtual machine from the list. Now right-click the virtual machine’s name and choose the option ‘Settings’ or select the ‘Settings’ icon from the right pane.

Step 2. In the new pop-up window, select the label corresponding to ‘Network.’ Now click on the arrow icon attached with the label corresponding to the ‘Advanced’ option.
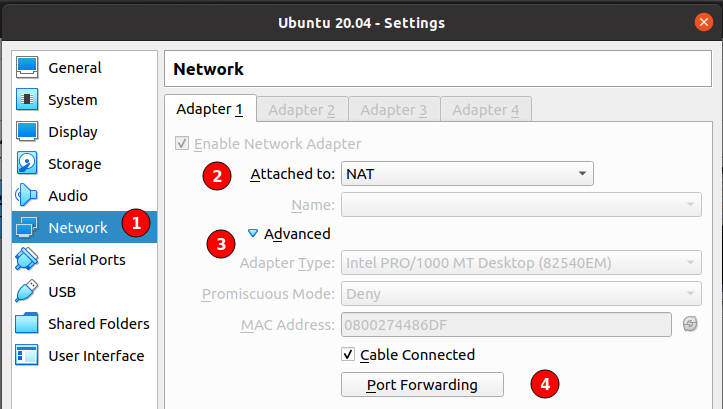
Step 3. Click on the ‘port forwarding’ button. A new pop-up window will appear. Here use the ‘+’ icon to add a new rule.
Step 4. In the textboxes corresponding to different labels, fill the various details for the new rule. We have used the following one:
Name (Service Name): SSH
Protocol: TCP
Host IP: IP address of host machine
Host Port: Port on the host machine to which the request from the guest will be forwarded.
Guest IP: IP address of the guest machine
Guest Port: Default port of a service running on the guest machine.

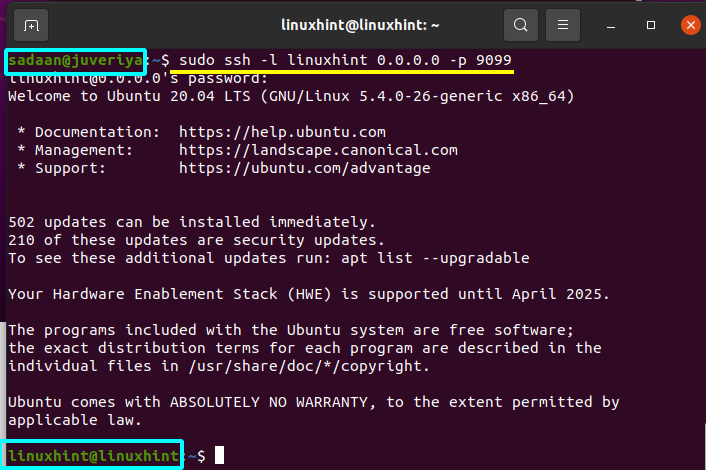
In this guide, since we use the ‘SSH’ service over the ‘TCP’ protocol, the guest port will be 22. Our host port, as already told, is 9099. We are leaving the guest IP blank to get the IP from Virtualbox automatically. In the same way, the Host IP column is left blank as this will be equivalent to 0.0.0.0; this means any machine that has access to your Host over port 9099 can also access SSH to your guest VM.
Once we are done with the above steps, save these settings by hitting the Ok button.
Testing the Setup
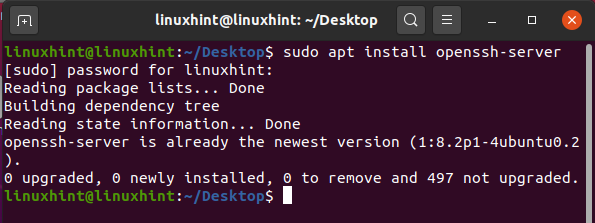
Before you try to ssh into the guest VM, ensure that the Openssh server is installed on it. If it is not, you can install it using the command:
Step 1. Try to SSH the guest VM from the host on port 9099. For this, use the command:
‘username’ is the name of the user on the guest vm.
Method 2. Port Forwarding Using Command Line Interface
Another way to configure Port forwarding is using Virtualbox’s VBoxManage command-line tool. Here we will show how it works:
Step 1. List all the virtual machines on your host machine with the command:

From the above figure, we can see that it is showing two VMs: i) Fedora 34 ii) Ubuntu 20.04.
Step 2. Now use the below format to do port forwarding if the virtual machine is powered on :
VBoxManage controlvm “VM name” natpf1 “guestssh,tcp,,2222,,22”

If the vm is shutdown then use:
VBoxManage modifyvm “VM name” –natpf1 “guestssh,tcp,,2222,,22”
Now again, try to log in with thye command:

Here “VM name” is the name of the virtual machine we obtained in the above step. ‘username’ is the user’s name on the guest vm.
Conclusion
Virtualbox is a good choice for development and testing as it can help you save both time and money. The VBoxManage command is convenient as we can control (start, stop, suspend) the VMs from the command line. This is particularly helpful when graphical access to the VM server is not available at the data center. This guide is tested on Ubuntu 20.04, but it should work on any machine that supports SSH access.