When we create a new machine in the VirtualBox and install an operating system, the VirtualBox sets a default screen resolution of 800×600(4:3). However, while working in a Virtual Machine, we often need to have a screen resolution of our own choice. Therefore, there are two ways to change the resolution of any Virtual Machine in VirtualBox.
- By changing the display settings of the Linux operating system
- By installing VirtualBox Guest Addition Image
We will be using the Ubuntu 20.10 operating system installed in VirtualBox and try both of the above-provided methods to change the screen resolution.
Method 1: Change Display Settings
The simplest and quickest way to have a screen resolution of your choice is to change the screen resolution from the display settings of the Linux operating system.
First, go to the settings of the operating system.
In Ubuntu or any other Linux-based operating system, open the application menu.
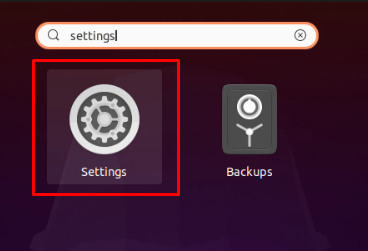
Search for “settings” and open the settings by clicking on the Settings icon from the appeared search results.
Scroll down through the left menu bar and click on the Display settings.
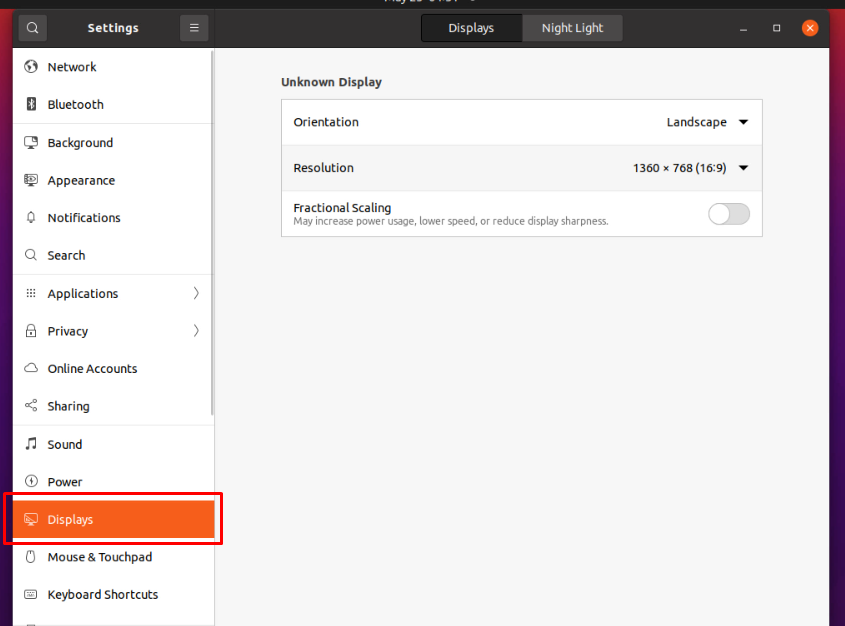
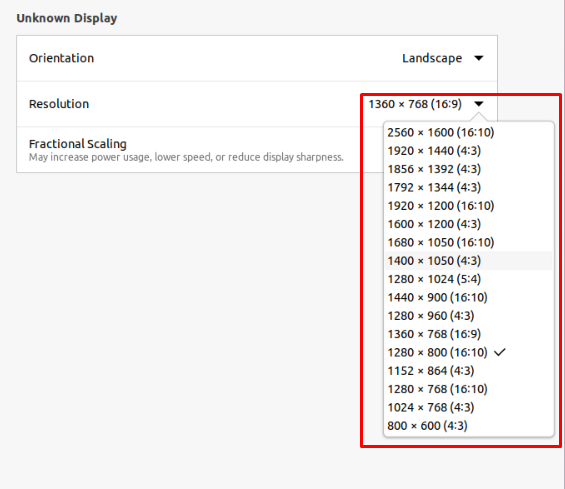
In the display settings section, click on the resolution drop-down menu.
From the drop-down menu, simply choose the resolution of your choice.
After choosing the suitable resolution of your choice, a green-colored “Apply” button will appear on the top right corner of the window.
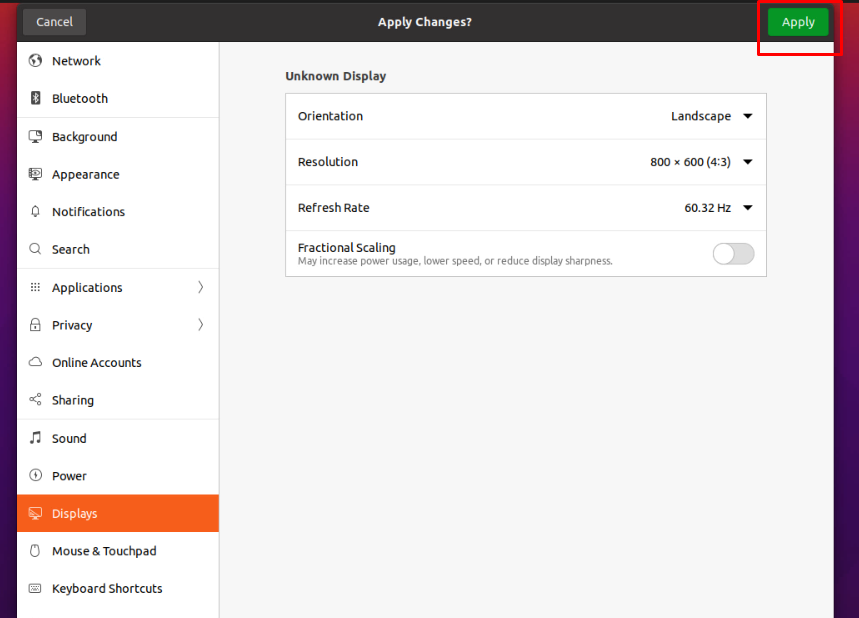
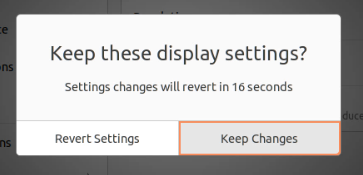
Click on the Apply button and confirm the changed resolution by clicking on the “Keep changes” button that appeared in the pop-up box.
This is it. You have changed the screen resolution of your own choice by changing the display settings of the Linux Operating system.
The limitation of this method is that we have a limited number of options available for changing the screen resolution.
For example, you want to have the screen resolution precisely equal to the screen size of your laptop, but that resolution is not available. In such a scenario, installing VirtualBox Guest Addition comes in handy.
Installation of VirtualBox Guest Addition Image
To install guest additional image in your Virtual Machine, follow the procedure given below:
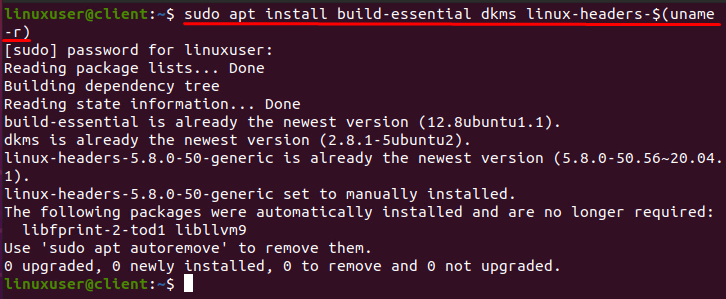
Step 1: Open the terminal of the operating system and execute the command provided below to install some necessary packages for installing Guest Addition Image:
For Ubuntu or Debian-based operating systems:
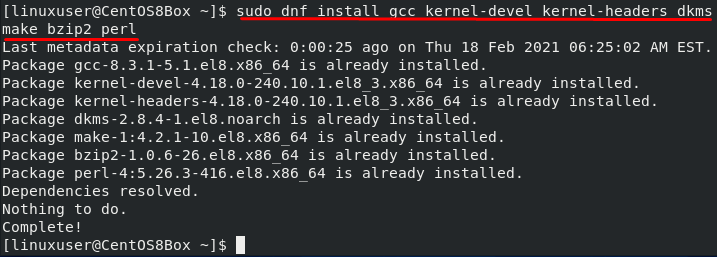
For CentOS or RHEL-based operating systems:
$ sudo dnf install gcc perl dkms make kernel-devel kernel-headers bzip2
After installing the required packages, insert the Guest Addition CD image.
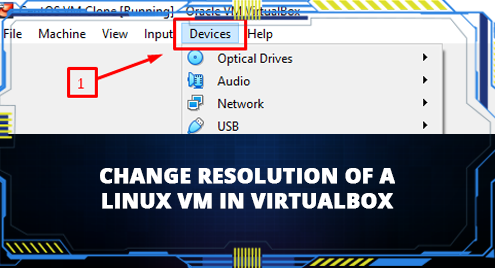
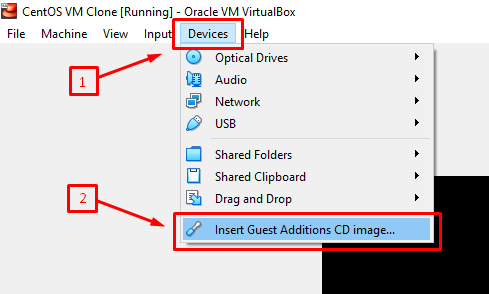
Step 2: Click on the “Devices” in the menu bar of the Virtual machine and select “Insert Guest Addition CD image” from the “Devices” menu:
The installation will complete in a while.
Once it gets completed, it will ask to reboot the system.
Step 3: Restart the machine, and if it gets successfully inserted and installed, the screen size will automatically be resized according to the size of the window.
But if it is not working for you, then it means that the guest Addition Image is not inserted successfully. You have to insert it manually.
Insert Guest Addition CD Image Manually
First, create a new /mnt/cdrom directory:
![]()
After creating, mount the image to the /mnt/cdrom:

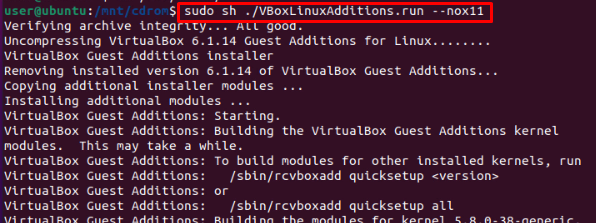
Change directory to the /mnt/cdrom and execute the “VBoxLinuxAddition.run” script:
![]()
Once the script has finished the execution, reboot the system using the command mentioned below:
![]()
After rebooting the machine, the screen size will adjust accordingly. However, it will work perfectly fine now.
You can now easily switch to the full-screen and work with ease on your Linux Virtual Machine.
Conclusion
This post has covered all the basic to pro-level concepts and methods to install the Guest Addition CD Image to change the resolution on any Linux operating system in the virtual machine using the simple way and manually from the terminal. In addition, we have learned to resize the screen resolution by changing the display settings of the operating system.