Table of Contents
- What is ESP32-C3
- Does Arduino Support ESP32-C3
- How to Program ESP32-C3 with Arduino
- How to Add ESP32-C3 in Arduino IDE
- Conclusion
What is ESP32-C3
The ESP32-C3 is a low-cost, low-power, Wi-Fi, and Bluetooth-enabled microcontroller that was released in 2021. It’s a successor to the popular ESP32 chip and is designed for Internet of Things (IoT) applications.
ESP32-C3 comes with a single-core 32-bit RISC-V-based CPU that can operate at up to 160 MHz. ESP32-C3 contains SRAM (400 KB) and ROM (384 KB). Moreover, the chip comes with a Wi-Fi transceiver already integrated, which supports the 2.4 GHz frequency band and is compatible with IEEE 802.11b/g/n standards. It also supports Bluetooth 5.0 and BLE (Bluetooth Low Energy).
The ESP32-C3 is designed to be low-power, making it suitable for battery-powered IoT devices. It also has a rich set of peripherals, including UART, SPI, I2C, ADC, DAC, and PWM interfaces.
Does Arduino Support ESP32-C3
Yes, Arduino supports ESP32-C3. We can program the ESP32-C3 using the Arduino IDE by installing the ESP32-C3 board package, selecting the appropriate board and port, and uploading the code.
However, the ESP32-C3 board core is not included by default in Arduino IDE, we have to manually install it using a package URL [As mentioned in step 2 below]. After adding the ESP32 board core we can easily select and program the ESP32-C3 board.
How to Program ESP32-C3 with Arduino
Now that we know Arduino supports ESP32-C3, let’s take a look at how to program the board using Arduino. To add ESP32-C3 in Arduino IDE, we have to manually install the board core in Arduino IDE. For that, we have two different links that are as follows:
Stable Release Link
The stable release link provides access to the latest stable version of the ESP32-C3 board package. This version is intended for general use and is recommended for most users.
Development Release Link
The development release link provides access to the latest development version of the ESP32 board package. This version is intended for users who want to test new features or improvements that are not yet available in the stable release.
It is important to note that the development release may contain bugs or be less stable than the stable release, so it should only be used by experienced users who are comfortable troubleshooting issues that may arise. Here, we will continue using the stable release link for the ESP32-C3 board core.
How to Add ESP32-C3 in Arduino IDE
To add ESP32-C3 to Arduino IDE, you need to follow these steps:
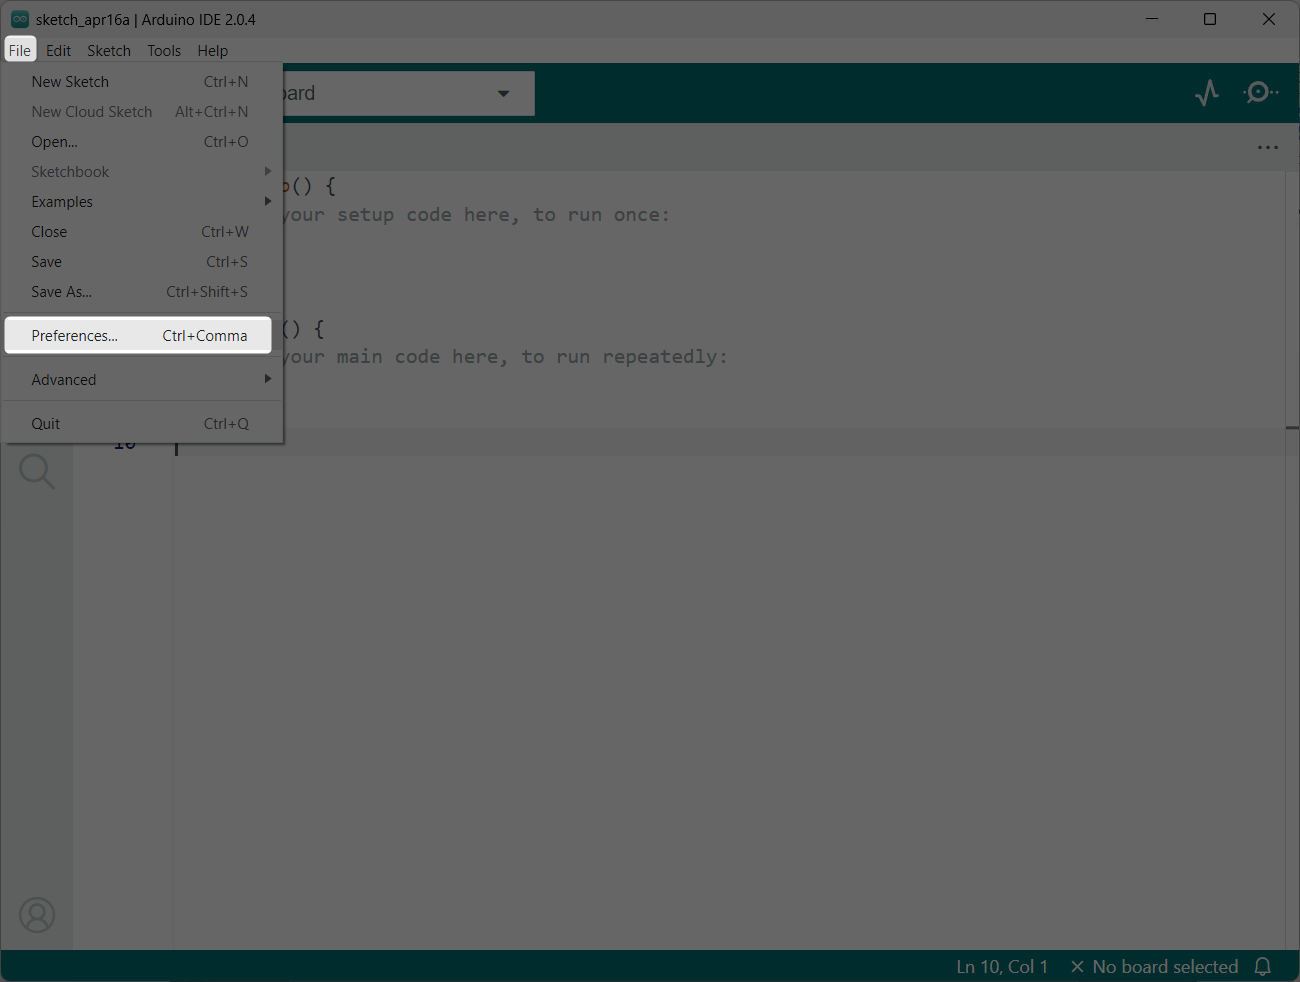
Step 1: Launch the Arduino IDE and select File > Preferences or press CTRL + Comma:
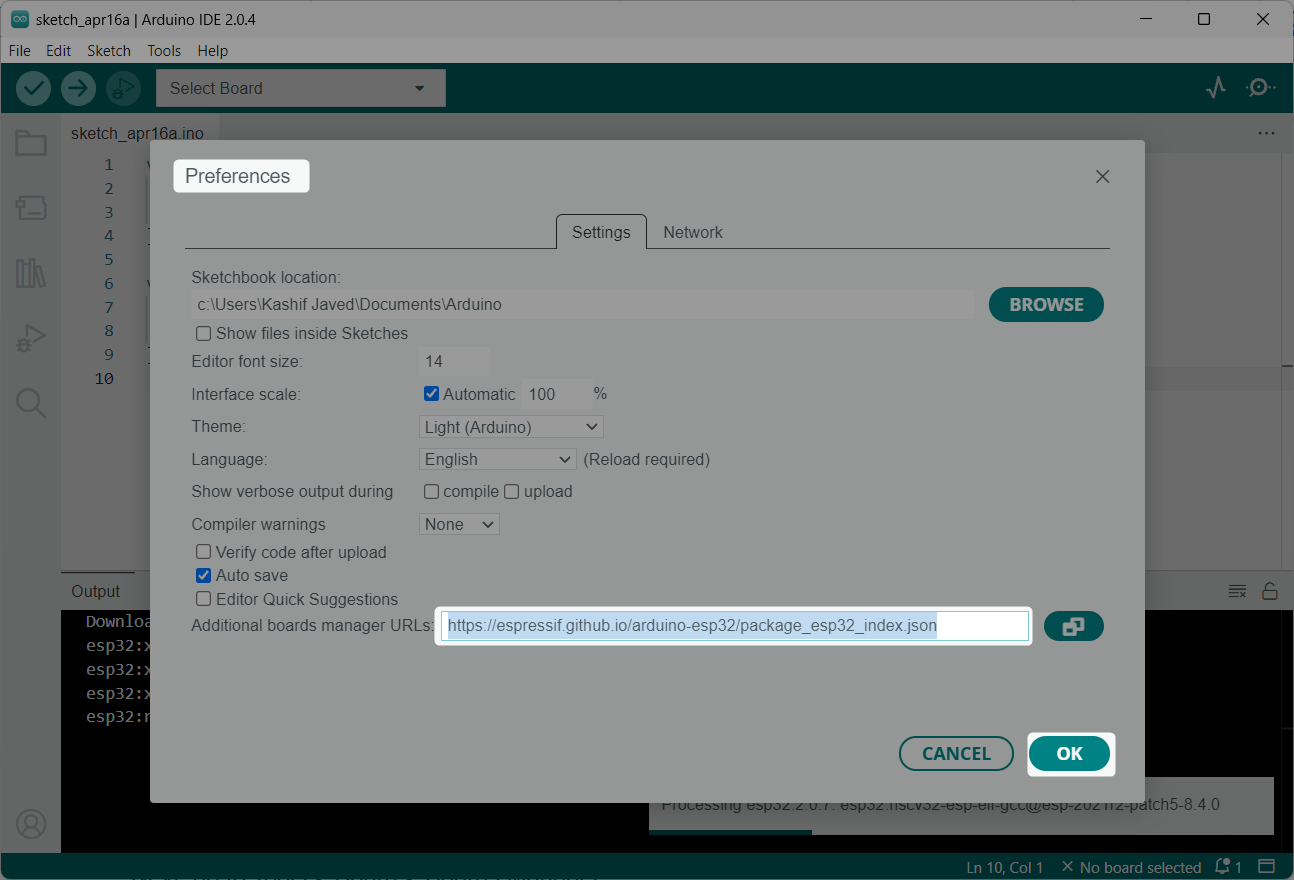
Step 2: In the Preferences window, find the Additional Boards Manager URLs field and add the following URL:
Click OK to save the preferences and close the window.
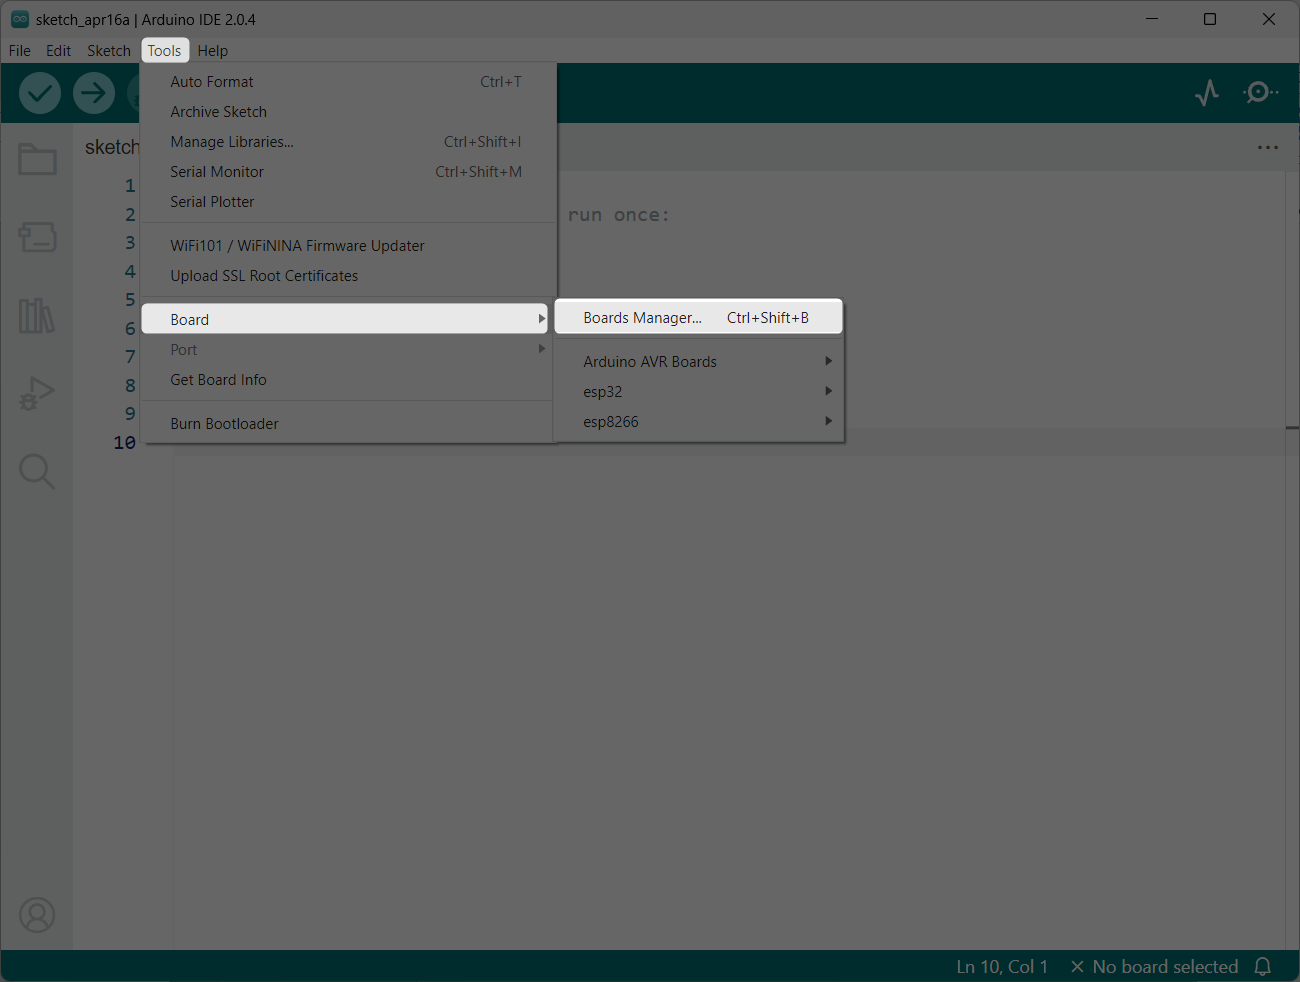
Step 3: Next, go to Tools > Board > Boards Manager:
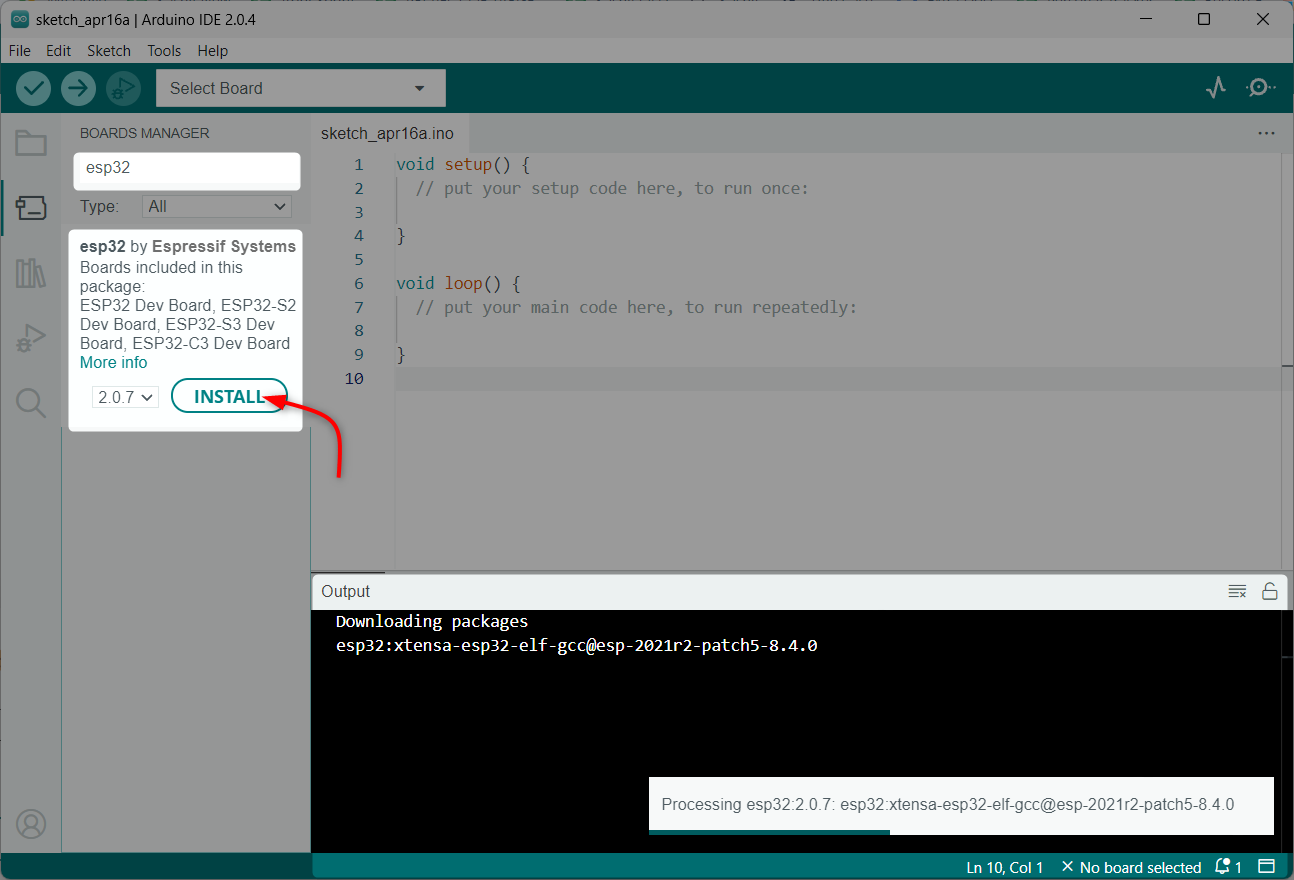
Step 4: You can now install esp32 by searching for it in the Boards Manager window and clicking Install. Ensure that the latest board core version should be installed.
Let the installation finish. Once done, the below-given output appears on the terminal:
Step 5: After the installation is complete, you can select the ESP32-C3 board from the Tools > Board menu:
After installing the ESP32-C3 board in the IDE, now we can program the ESP32-C3 board using Arduino IDE. Programming ESP32-C3 is like programming other Arduino boards, just select the right port and board and click upload.
Note: Make sure you have the latest version of the Arduino IDE installed to add ESP32-C3.
Conclusion
Arduino does support ESP32-C3. Although the Arduino core does not currently support the board, we have to manually add it using the ESP32-C3 package link. By installing the ESP32-C3 Arduino Core using the Arduino board manager, users can easily write and upload code to the board using the Arduino IDE. For details on each step of installing ESP32-C3 in Arduino IDE, read the article.


