This post elaborates on the complete procedure to add the gap between columns in Tailwind.
How to Add Gap Between Columns in Tailwind?
To add the gap between the columns in Tailwind, use the built-in “gap-{size}” utility. It specifies an integer value that represents the gap between the columns horizontally and vertically. Let’s do this task practically with the help of the stated examples.
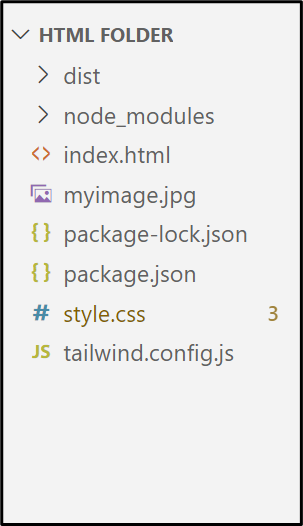
Project File Structure
The “gap-{size}” utility can be implemented in any of the Tailwind projects that follow the given file structure:
Let’s start with the first example.
Example 1: Use the “gap-{size}” Utility to Add the Same Gap Between Rows and Columns
This example applies the “gap-{size}” utility to add the same gap horizontally and vertically between the given columns.
HTML Code
Overview of the following code:
<link href="/dist/output.css" rel="stylesheet">
</head>
<body>
<h1 class="text-3xl font-bold text-center underline text-orange-600">Welcome to Linuxhint!</h1><br>
<div class="mx-2 grid grid-cols-3 gap-4">
<div class="border-2 border-orange-600">First Tutorial</div>
<div class="border-2 border-orange-600">Second Tutorial</div>
<div class="border-2 border-orange-600">Third Tutorial</div>
<div class="border-2 border-orange-600">Fourth Tutorial</div>
<div class="border-2 border-orange-600">Fifth Tutorial</div>
<div class="border-2 border-orange-600">Sixth Tutorial</div>
<div class="border-2 border-orange-600">Seventh Tutorial</div>
<div class="border-2 border-orange-600">Eighth Tutorial</div>
</div>
<body<
In the above code lines:
- First, link the main CSS file “/dist/output.css” with the existing HTML file “index.html” using the “<link>” tag in the “head” section.
- Next, the “body” section creates an “<h1>” element that uses the “Font Size”, “Font Weight”, “Text Align”, “Text Decoration”, and the “Text Color” Tailwind classes, respectively.
- After that, a “<div>” element is added that applies the “grid” utility to set its content in the stated number of grid layouts, the “margin” class to set the horizontal margin, and the “gap” utility to add the specified gap between columns.
- In the “<div>” element body section, further eight “<div>” elements are included that utilize the “Border Width” and the “Border Color” classes, respectively.
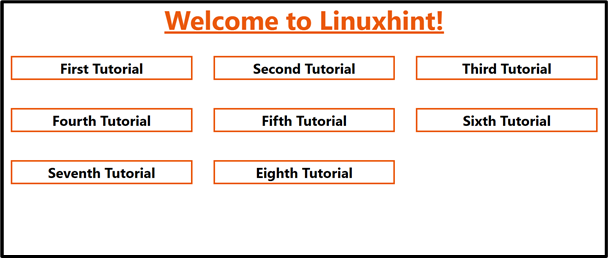
Output
Run the above HTML code in the live server and analyze the output:

As seen, the output adds the specified gap between columns in both the dimensions appropriately.
Example 2: Use the “gap-{size}” Utility to Add a Gap Between Rows and Columns Independently
The “gap-{size}” utility can also be implemented with “x(horizontal)” and “y(vertical)” dimensions as “gap-x-{size}” for rows, and the “gap-y-{size}” for columns to add the gap between them individually.
Let’s see its practical implementation.
HTML Code
Have a look at the given code:
<link href="/dist/output.css" rel="stylesheet">
</head>
<body>
<div class="mx-2 grid grid-cols-4 gap-x-4 gap-y-6">
<div class="border-2 border-orange-600">First Tutorial</div>
<div class="border-2 border-orange-600">Second Tutorial</div>
<div class="border-2 border-orange-600">Third Tutorial</div>
<div class="border-2 border-orange-600">Fourth Tutorial</div>
<div class="border-2 border-orange-600">Fifth Tutorial</div>
<div class="border-2 border-orange-600">Sixth Tutorial</div>
<div class="border-2 border-orange-600">Seventh Tutorial</div>
<div class="border-2 border-orange-600">Eighth Tutorial</div>
</div>
<body>
Here, the “gap-x-{size}” utility adds the gap between rows and the “gap-y-{size}” adds the specified gap between columns independently.
Output
The above outcome verifies that the gap between rows and columns is applied accordingly.
Conclusion
“Tailwind CSS” provides a built-in “gap-{size}” utility to add the gap between the columns. It can also be used to add the gap between rows and columns separately via the “gap-x-{size}” and the “gap-y-{size}” utilities. This post provided the complete procedure to add the gap between columns in Tailwind.