Portainer is a web-based graphical user interface (UI) for managing Docker images and containers. It provides an easy way to manage containers, images, networks, and volumes without using the command line. With Portainer, users can easily deploy, monitor, and manage containers, networks, and volumes from a single console.
This article will demonstrate the step-by-step instructions to install the portainer Docker UI Web Interface.
How to Install Portainer Docker UI Web Interface on Ubuntu 22.04?
In Ubuntu, the Portainer simplifies the process of managing Docker containers. Using this, users can run and manage their applications with less technical expertise. The steps are given below to install the Portainer Docker UI Web Interface:
Prerequisite: Install Docker on Ubuntu
To run Portainer, you must have Docker installed on your system. You can install Docker by following the link of official documentation.
Step 1: Start Docker
After installation, start the Docker service using the “systemctl” command with the “sudo” privileges:
The output shows that docker services have been successfully started.
Step 2: Pull Portainer Image
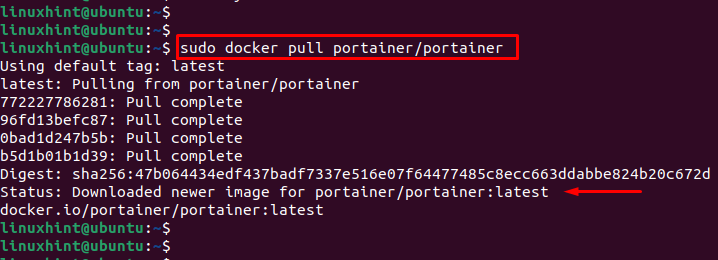
In this step, pull the Portainer image from Docker Hub. For instance, the below command pulls the “portainer/portainer” Docker image from the Docker Hub registry:
The output shows that the Portainer image has been successfully downloaded. After the image has been pulled, you can run a container from it using the “docker run” command.
Step 4: Create a Portainer Container
The below command runs a Docker container for Portainer which is a popular open-source management UI for Docker. Here are different options:
- –d: runs the container as a daemon process.
- -p 9000:9000: maps the host’s port 9000 to the container’s port 9000, allowing access to Portainer’s web UI through the host.
- –name portainer: it gives the name of the container such as “portainer”.
- –-restart always: automatically restarts the container if it stops or crashes.
- –v /var/run/docker.sock:/var/run/docker.sock: mounts the host’s Docker socket in the container, allowing Portainer to communicate with the host’s Docker daemon.
- portainer/portainer: specifies the image name and tag to use, in this case, “portainer/portainer” which is the official Portainer image from Docker Hub.
The output shows that a portainer container has been created.
Step 5: Verify the Portainer Container
To confirm the portainer container, execute the “docker” command with the “images”:
The above command confirms that the portainer container has image id “5f11582196a4” is existed.
Step 6: Access Portainer Web UI
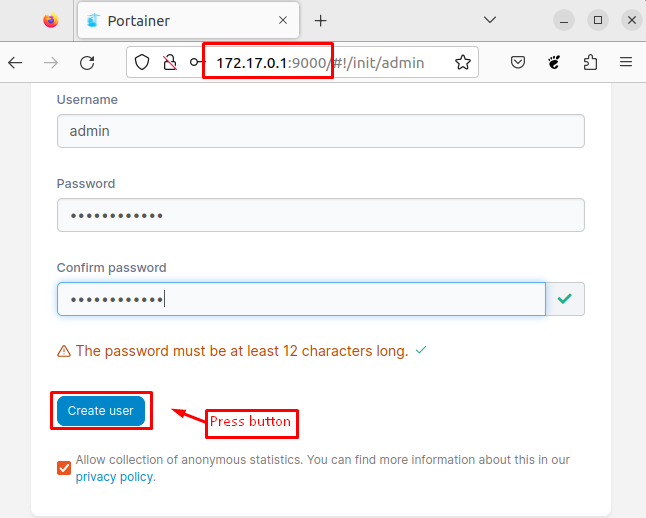
You can now access the Portainer web UI by visiting the “http://<your_server_ip>:9000” in your web browser. In our case, specify the IP address “172.17.0.1” with the port number “9000”:
The first time you access Portainer, you will be prompted to set up an admin user account. After that, hit the “Create user” button.
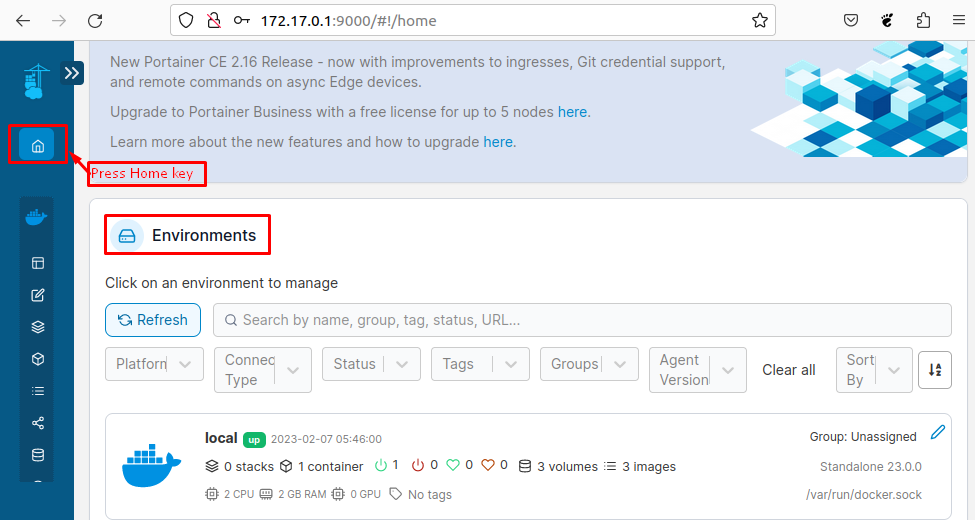
After creating a user, you can visualize the “Environments” by pressing the “Home” key that is located at the top left of the screen:
Display the Container List
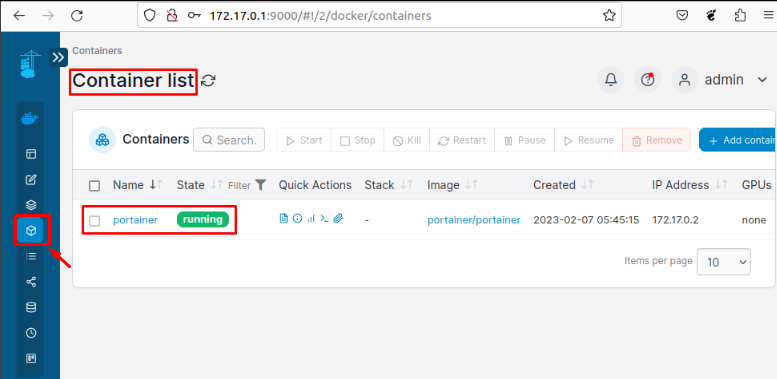
To display the list of containers, users can press the “Container” icon that is present in the left toolbar:
After pressing the icon, users can visualize the container name “portainer” that is in running state.
With these above steps, you have successfully installed Portainer on Ubuntu and can start managing your Docker containers and images through a user-friendly web interface.
Conclusion
To install Portainer Docker UI Web Interface on Ubuntu 22.04, pull the latest version of the Portainer image from Docker Hub by executing the “docker pull portainer/portainer” command. After that, execute the “docker run -d -p 9000:9000 –name portainer –restart always -v /var/run/docker.sock:/var/run/docker.sock portainer/portainer” command by specifying the port number.


