Databases are some of the most fundamental parts of any functional application. Although it can vary on the type of database that is appropriate for your app, if you want to store large volumes of unstructured data across multiple servers, Apache Cassandra is at the top of that list.
If you are unfamiliar, Apache Cassandra, commonly known as Cassandra, is a free and open-source, highly scalable distributed NoSQL database for storing and managing extensive volumes of unstructured data across multiple servers. Cassandra is mighty which provides high availability and scalability across multiple clusters.
On the other hand, Docker is a versatile containerization platform that allows us to package the applications and their dependencies into portable containers, making the deployment and management of software across different environments easier.
In this tutorial, we will walk you through setting up and running Cassandra in a Docker container, enabling you to harness the benefits of both tools in simple steps.
Requirements:
To follow along with this post, ensure that you have the following:
- A Unix or Windows host
- Installed Docker Engine on your target host
- Sufficient permissions to run the Docker commands
Running Apache Cassandra on Docker is supported on any machine with the Docker Engine installed.
Getting the Apache Cassandra Image
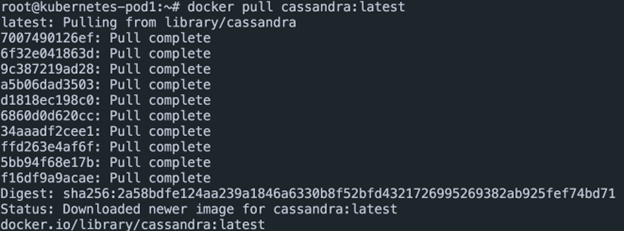
The first step is downloading the Apache Cassandra image from the Docker registry. We can use the “docker pull” command as follows:
This should download the latest version of the Cassandra image on your host.
Starting the Cassandra Container
Once we have the image downloaded, we can run the Cassandra container. We start by creating a Docker network that allows us to access the container ports without opening them to the host machine.
Run the following command:
Once we have the network created, we can go ahead and run the container and bind it to the created network using the command as follows:
This should start the container on the defined Cassandra ports in the Cassandra network. You can check the running container using the “docker ps” command:
Testing Cassandra
Once the cluster is running, we can use the Cassandra Query Language to create and add the data.
Create a new file called “sample.cql” and add the CQL script as provided in the following:
CREATE KEYSPACE IF NOT EXISTS my_keyspace
WITH replication = {
'class': 'SimpleStrategy',
'replication_factor': 3
};
-- Use the keyspace
USE my_keyspace;
-- Create a table
CREATE TABLE IF NOT EXISTS my_table (
id UUID PRIMARY KEY,
name TEXT,
age INT
);
-- Insert data into the table
INSERT INTO my_table (id, name, age) VALUES (uuid(), J Doe', 30);
INSERT INTO my_table (id, name, age) VALUES (uuid(), J Smith', 25);
INSERT INTO my_table (id, name, age) VALUES (uuid(), B Johnson', 40);
The previous example script creates a new keyspace called “my_keyspace” using the SimpleStrategy replication with a replication factor of 3.
Using the USE statement, we then set the keyspace context to the created keyspace.
Finally, we create a table called “my_ table” and insert a random data into the table using the provided “insert” statements.
If you are new to Apache Cassandra, we have a host of tutorials that will guide you through a lot of the features of Apache Cassandra in the following link:
https://linuxhint.com/category/cassandra/
Loading the Cassandra Script
Once the script is ready, we can use the CQL shell to interact with the database and load the data into the database from the previous script.
Run the command as follows:
This should load the data from the script into the database.
Querying the Data
We can log into the CQL Shell and query the data that is stored in the database as follows:
Query the data:
Conclusion
This post covered setting up a primary Apache Cassandra cluster using Docker and the Cassandra image.


