Like all development tools, a classic “hello world” iteration is one of the ways to get your footing into the door.
This tutorial teaches us how to spin up a Docker hello-world container quickly. This teaches us how to pull the images, use the downloaded images to start a container, and connect to a shell of a running container.
What Is Docker?
Let us start with the basics and define what Docker is. Docker is a tool that allows us to package an application and all the required dependencies into a single entity known as a container.
You can think of a Docker container as a single, lightweight, standalone executable unit that packages an application and everything required to run that application regardless of the host environment. This includes the application code, the runtime, system tools, the required libraries, configuration settings, and more.
This creates an isolated environment that can be moved and started on any environment without needing external dependencies and configurations.
What Is the Docker Hello World?
If you are not new to the development world, you are probably familiar with the concept of a “hello world” program.
A “hello world” program is a classic computer program that displays the “Hello, World!” message to the user. The role of this program is to illustrate the syntax and the most fundamental features of a programming language or technology.
In the context of Docker, a “hello world” refers to a simple image called hello-world that demonstrates how the Docker features work. Using this image, you can learn how to download the images from external sources and run a container from the downloaded image. It can also teach you how to configure a custom image using the Dockerfile.
Requirements:
Before we learn how to configure and run a hello-world in Docker, you need to ensure that you have the following tools and requirements met:
- Installed Docker Engine
- Sudo or root permissions to run the containers on the target system
- Network access to download the images from external sources
If you are on Windows or macOS, you can use the Docker Desktop which is a graphical application to interact and manage the Docker containers.
Running the Docker Hello World
Once you install the Docker Engine, we can proceed and learn how to configure a basic “hello world”.
Pulling the Hello World Image
The first step before running a Docker container is pulling the image on which that container is based. In this case, we are interested in the hello-world image.
To pull the image, open the terminal and run the command as follows:
The “docker pull” command tells the Docker Engine to download and save the image to the local machine.
By default, Docker downloads the latest version of the specified image. Keep in mind that the images are pulled from the Docker Hub.
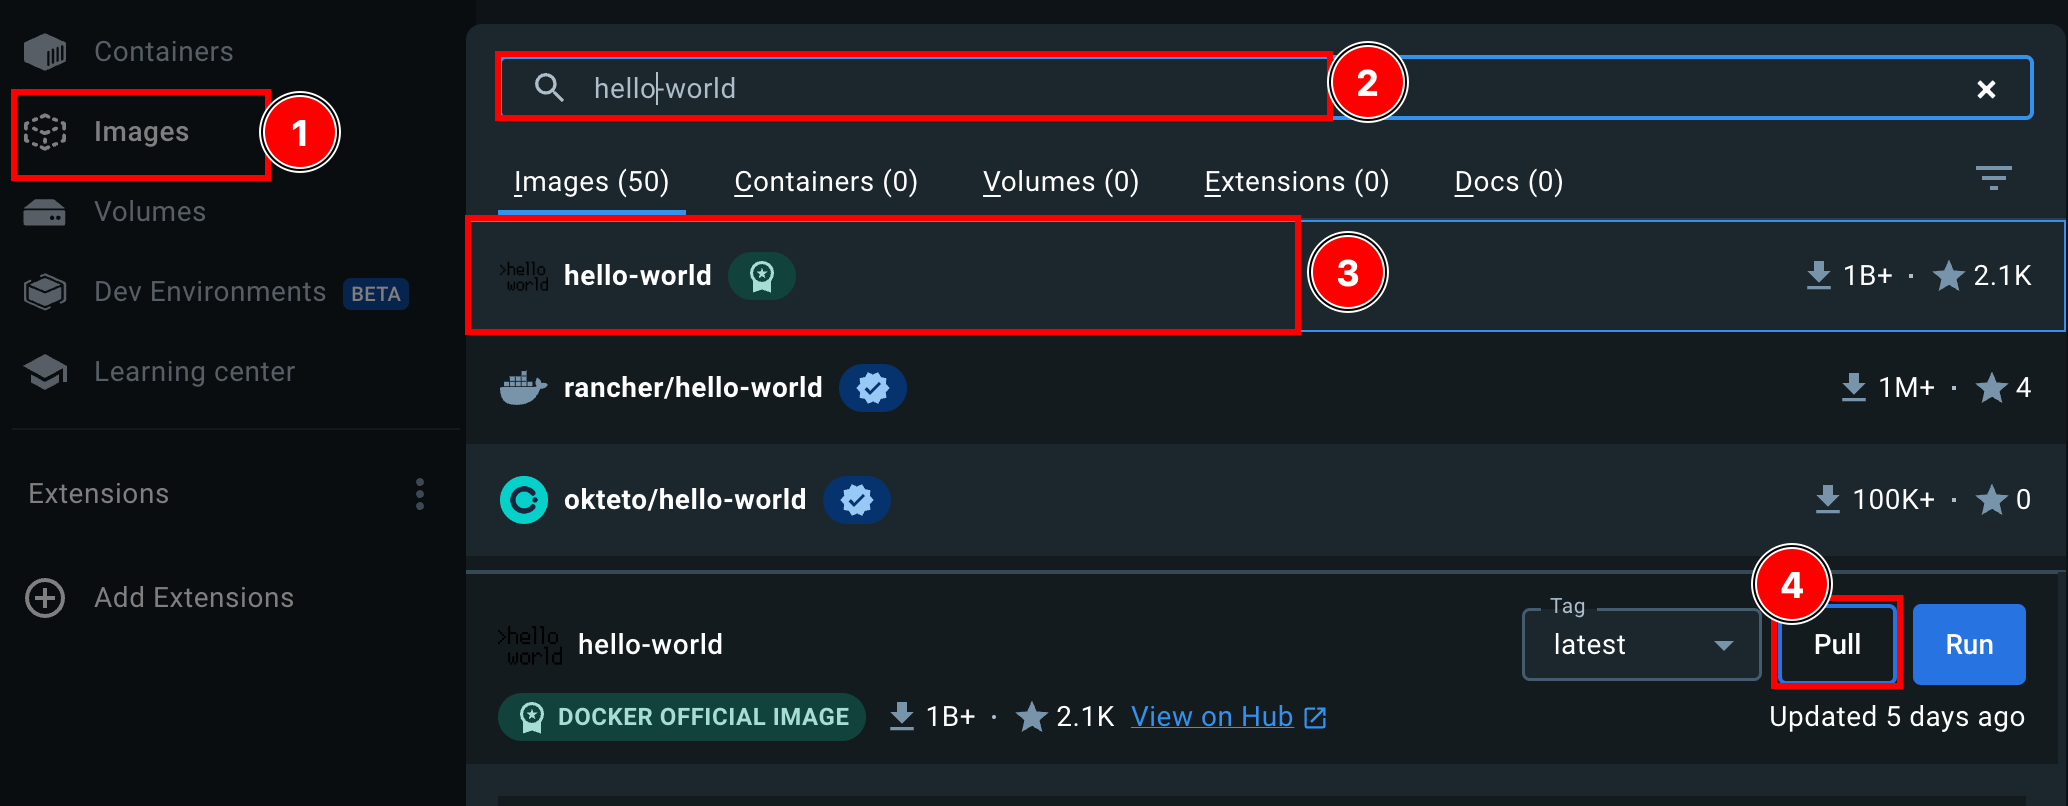
If you use the Docker Desktop, you can launch the dashboard and navigate to the “images” section.
Next, locate the search section and search for the hello-world image. You should see the official Docker hello-world image. Click on “pull” to download the image into your local machine.
Running the Docker Hello World Container
Once you downloaded the hello-world image, the next step is to run a container based on the download image. You can do this using the terminal command or using the Docker Desktop, whenever available.
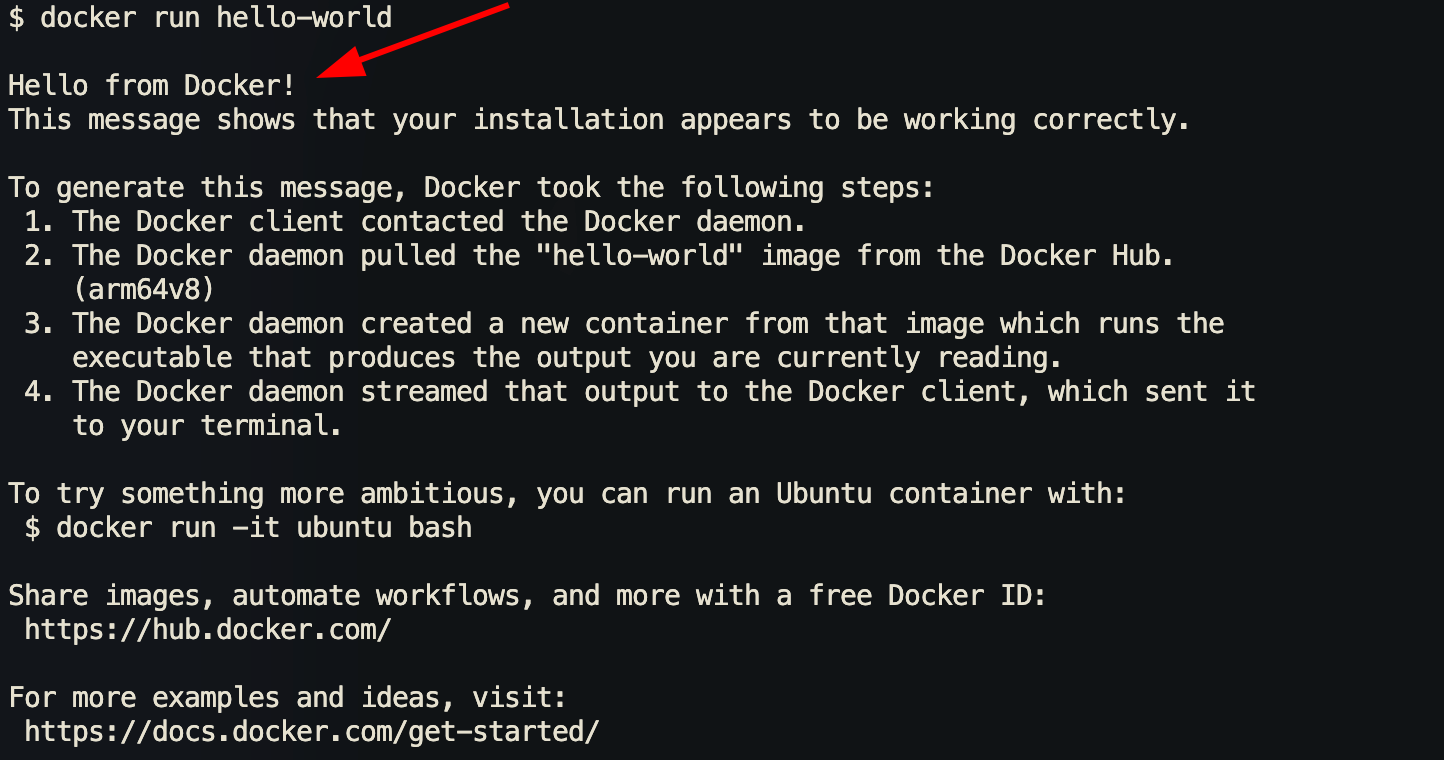
To run the hello-world container from the terminal, run the command as follows:
Once you run the previous command, Docker prints a message showing that you have successfully run the container and the details about how the Docker Engine was able to run the container. It also provides some instructions on the next steps that you can take to learn more about Docker and its capabilities.
Running a Hello World Using Dockerfile
Docker has another file called Dockerfile. A Dockerfile refers to a script that contains a set of instructions to automatically build a Docker image. We can use this feature to build a basic hello-world image which we can use to create a container that prints the hello-world message.
To do this, start by creating a directory to store the files:
Next, create the Dockerfile:
The next step is to edit the file with your editor of choice and the instructions as shown in the following example:
Add the instructions as follows:
CMD echo "Hello from my custom Docker container!"
In a Dockerfile, we start with the FROM block which defines the base image that we wish to use. In this case, we use the BusyBox image which is a lightweight Linux distribution that is easy to package and use even on old and non-powerful devices.
Next, we define the CMD line which specifies the command to execute once the container starts. We print a basic hello message from a custom image in this case.
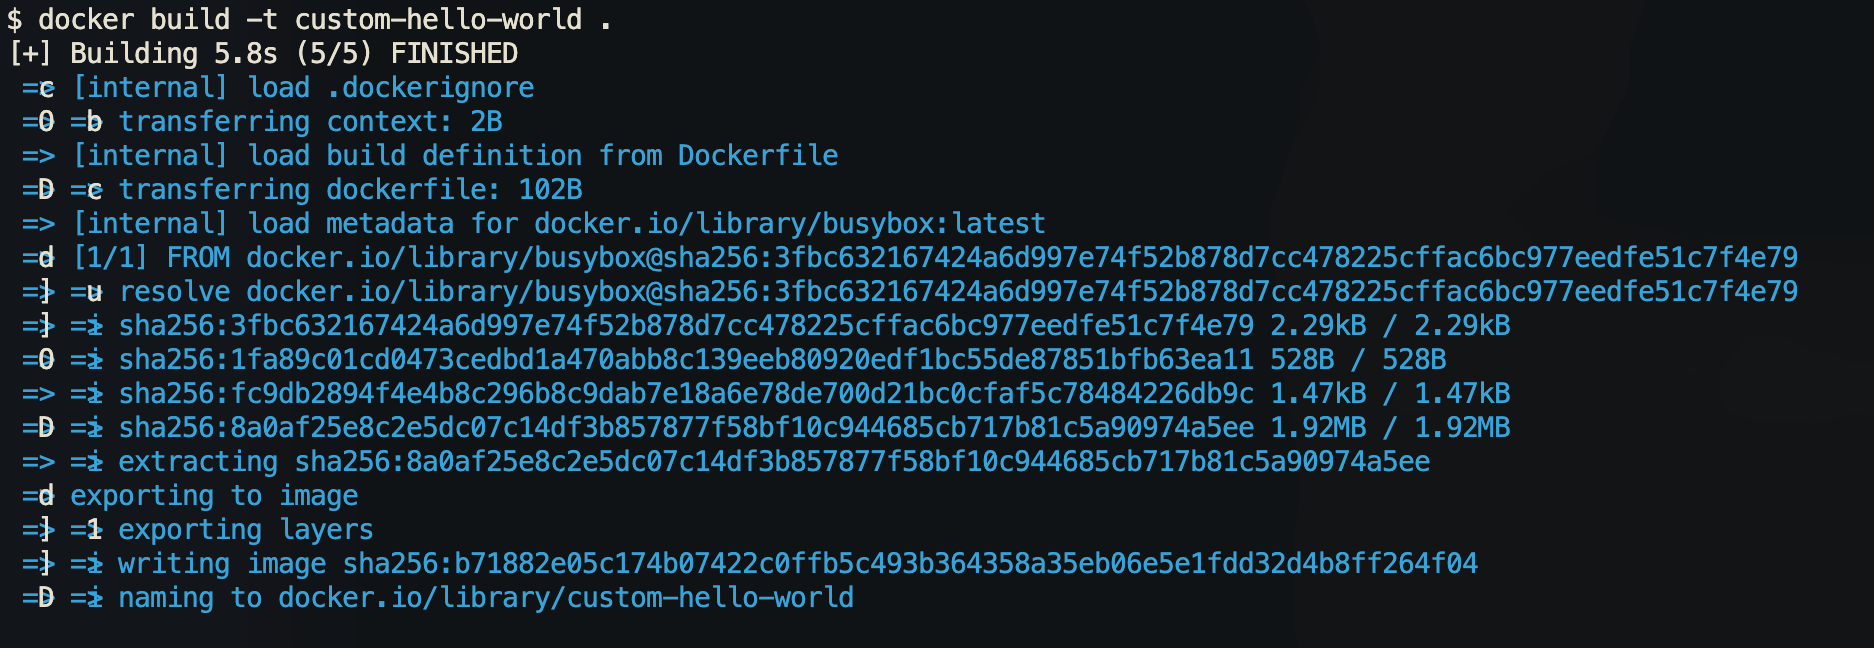
Once we are satisfied with the instructions of the Dockerfile, we can proceed and build the Docker image using the following command:
The previous command should build an image called “custom-hello-world” from the docker-basics desktop.
Finally, you can run a container using the custom image as shown in the following command:
Once you run the previous command, you should see the message that we defined in the Dockerfile as follows:
Conclusion
In this tutorial, we explored the fundamentals of working with the Docker hello-world image to learn the basics of Docker. We learned how to pull the images, run a container, and build a custom Docker image using the Dockerfile.


