WordPress is a free website-building forum. It is utilized to create and manage websites and blogs. WordPress can also be deployed as a Docker container. Users can easily package and distribute the entire WordPress application (including its dependencies and configuration settings) as a single unit. This makes it easier to manage, move, and deploy WordPress sites across different environments and infrastructures.
This article will demonstrate the step-by-step method to deploy WordPress as a Docker container.
How Can I Deploy WordPress as a Docker Container?
To deploy WordPress as a Docker container, look at the below-mentioned instructions:
- Create a compose file and define the required services.
- Start the compose services and build the project.
- View running containers.
- Access WordPress on Browser.
- Install WordPress by providing the required information.
- Log in to WordPress.
Step 1: Create Compose File
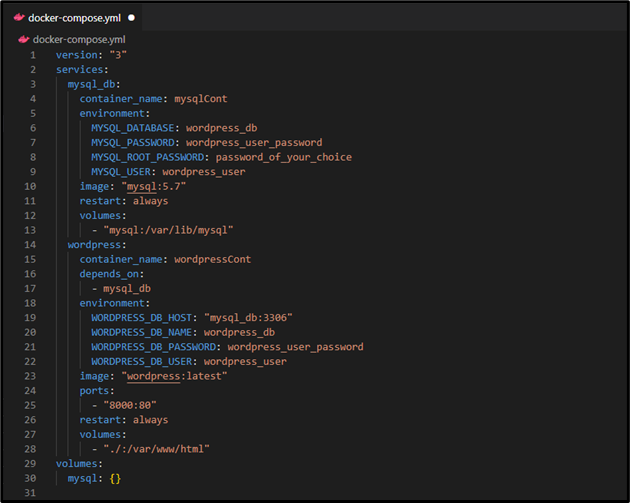
On Visual Studio Code, create a file named “docker-compose.yml” and define the services needed for WordPress and Database. For instance, we have defined the following services:
services:
mysql_db:
container_name: mysqlCont
environment:
MYSQL_DATABASE: wordpress_db
MYSQL_PASSWORD: wordpress_user_password
MYSQL_ROOT_PASSWORD: password_of_your_choice
MYSQL_USER: wordpress_user
image: "mysql:5.7"
restart: always
volumes:
- "mysql:/var/lib/mysql"
wordpress:
container_name: wordpressCont
depends_on:
- mysql_db
environment:
WORDPRESS_DB_HOST: "mysql_db:3306"
WORDPRESS_DB_NAME: wordpress_db
WORDPRESS_DB_PASSWORD: wordpress_user_password
WORDPRESS_DB_USER: wordpress_user
image: "wordpress:latest"
ports:
- "8000:80"
restart: always
volumes:
- "./:/var/www/html"
volumes:
mysql: {}
In the above code:
- The “version” specifies the version of Docker Compose i.e., “3”.
- The “services” is used to define services. Here, we have two services: “mysql_db” and “wordpress”.
- The “mysql_db” service sets up a MySQL database container. The “container_name” field specifies the name of the container, and the “environment” field sets up environment variables for the container including the database host, name, password, and user.
- The “image” field defines the Docker image to use, and the “restart” field specifies that the container should always be restarted if it stops unexpectedly.
- The “volumes” field sets up a volume to store the MySQL data.
- The “wordpress” service sets up a WordPress container. The “environment” field sets up environment variables for the container.
- The “ports” field allocates port “8000:80”.
- The “restart” field specifies that the container should always be restarted if it stops unexpectedly.
- The “volumes” field sets up a volume to store the WordPress files.
This Docker Compose file builds a simple WordPress website with a MySQL database backend. The website will be accessible on port 8000 of the host machine:
Step 2: Start the Compose Service
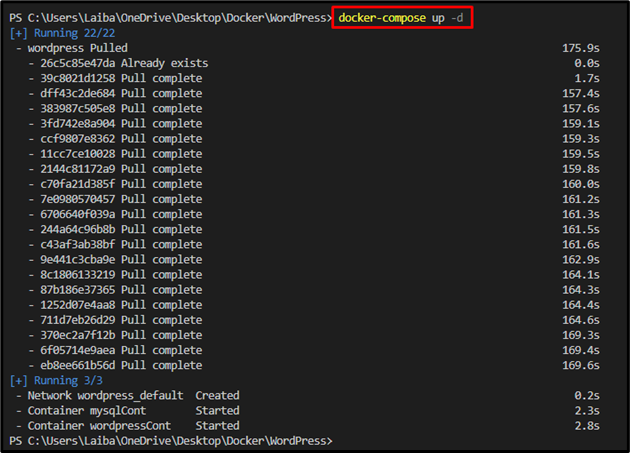
Then, execute the below-listed command and build the project by starting the compose service:
The above-executed command has pulled the WordPress image and started the WordPress and MySQL containers.
Step 3: View Running Containers
To verify whether the desired containers are running or not, write out the below-provided command:
In the above screenshot, WordPress and MySQL are running as containers successfully.
Step 4: Access WordPress on Browser
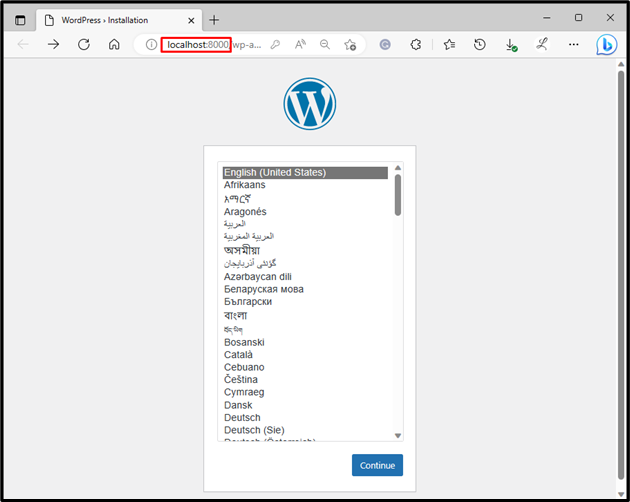
Now, open desired browser and navigate to the allocated port to access WordPress:
We have successfully accessed WordPress in a web browser.
Step 5: Install WordPress
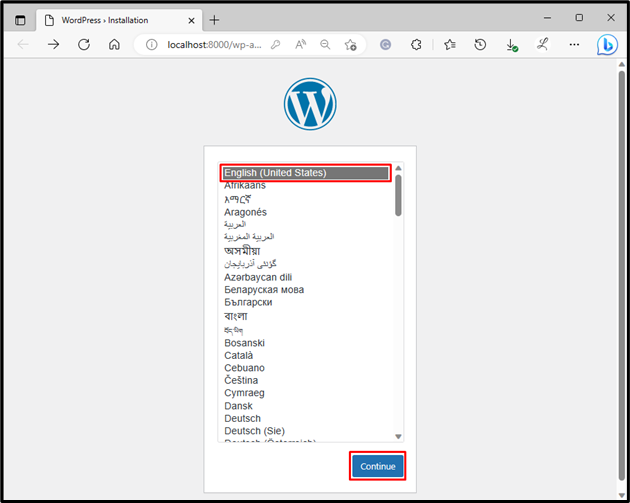
After that, select a preferred language and hit the “Continue” button:
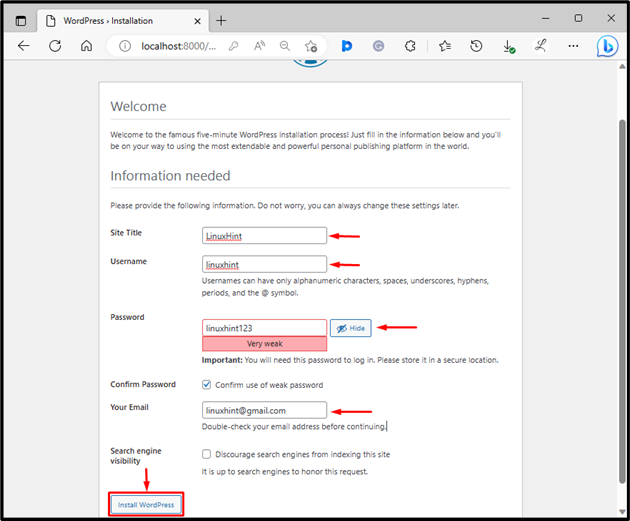
Upon doing so, another screen will appear. Provided the required information, such as site title, username, password, and email. Then, click on the “Install WordPress” button:
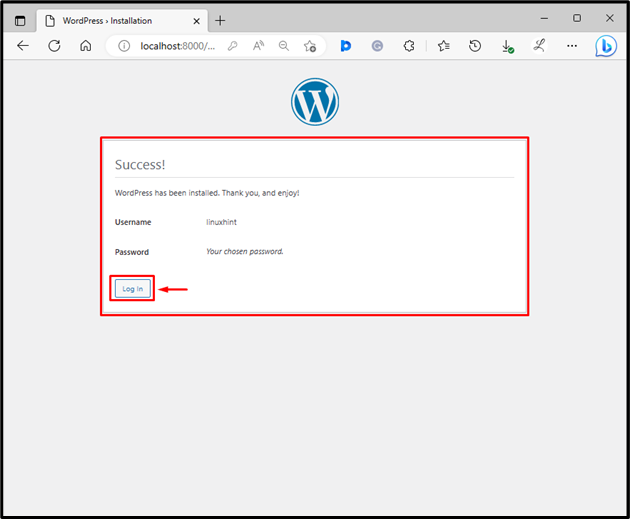
By doing this, WordPress will install, and you will get the success message. Then, hit the “Log In” button:
The above image indicates that WordPress has been installed successfully.
Step 6: Log in to WordPress
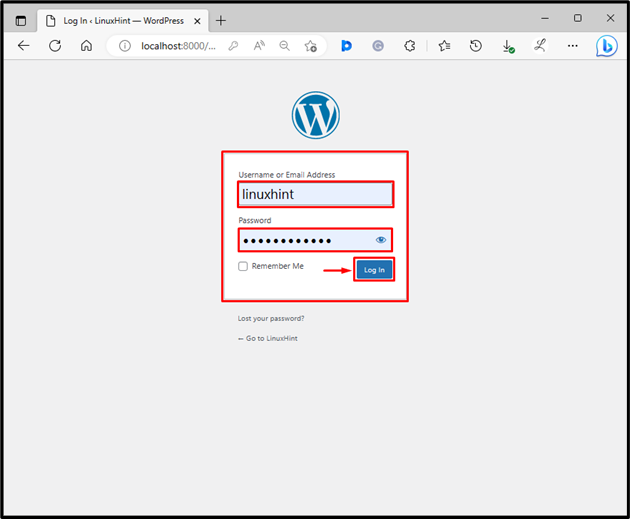
Now, provided the username and password that you have set previously, and click on the “Log In” button to log in to WordPress:
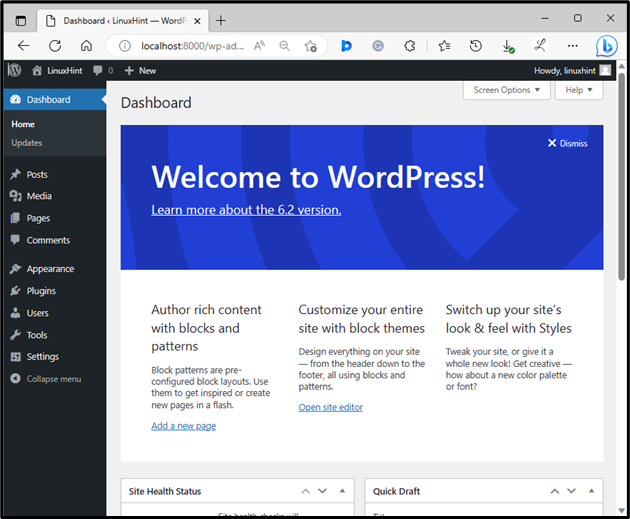
Upon doing so, the Dashboard of WordPress will open, and users can use WordPress:
We have successfully deployed WordPress as a Docker container.
Conclusion
To deploy WordPress as a Docker container, first, create a compose file and define the required services. Then, build the project by starting the compose services. Next, access WordPress on the browser. After that, install WordPress by providing the required information. Finally, Log in to WordPress. This article explained the step-by-step procedure to deploy WordPress as a Docker container.

