Introduction to ESP32 WiFi Station Interface Hostname
Host name is a label that is given to a device when it is connected inside a network. Hostname helps to identify devices so it can be managed easily and differentiate other similar devices from it.
Once ESP32 is connected inside a wireless network such as a WiFi router access point it shows a label that helps to identify it among other devices. We can also edit this host name inside the Arduino code and set a custom hostname to the ESP32 board. Now we will write a code for getting ESP32 host name when it is configured in station point mode.
Getting ESP32 Station Interface Hostname Using Arduino IDE
To get ESP32 hostname first we will connect ESP32 with a WiFi network. For that we need to configure ESP32 in station point mode first. Once ESP32 is connected with a network we will ping it with any other device that is connected to the same network such as mobile phone or laptops.
Code
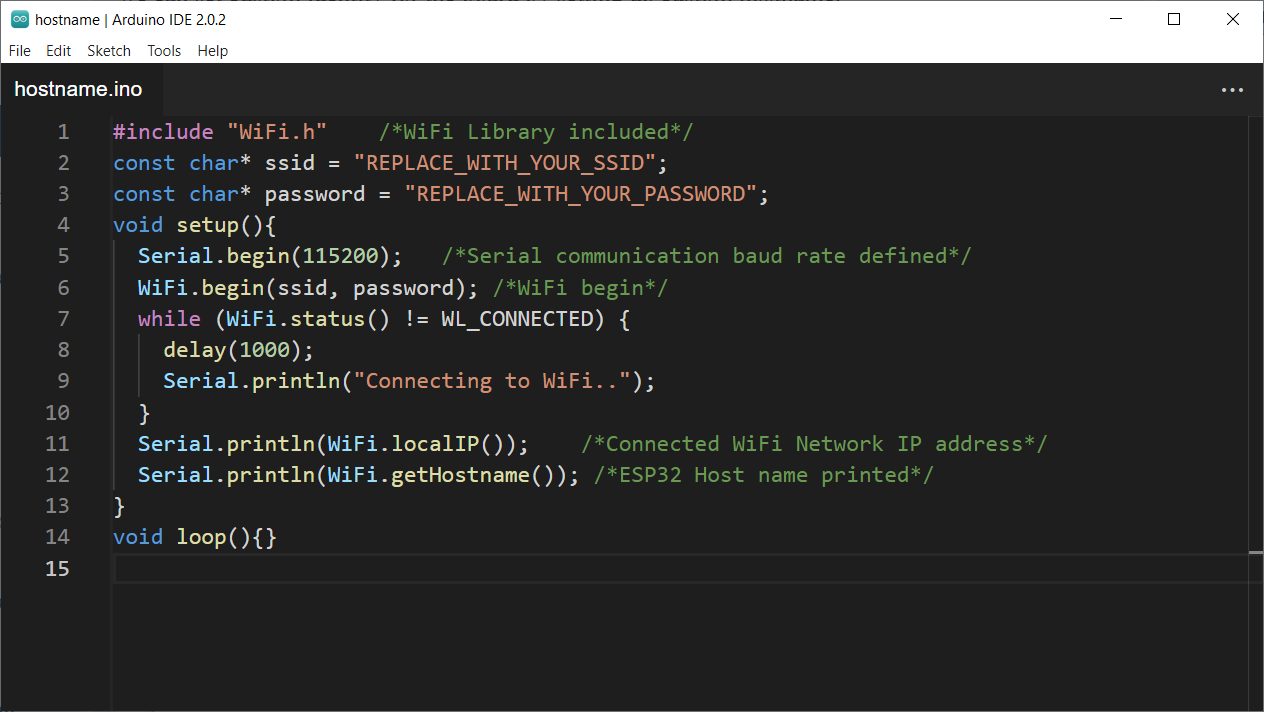
Connect ESP32 board with COM port of PC. Open Arduino IDE and upload the given code in ESP32 to obtain the default hostname assigned to your board.
const char* ssid = "Replace SSID"; /*Type your network SSID*/
const char* password = "Replace PASSWORD"; /*Type your network Password*/
void setup(){
Serial.begin(115200); /*Serial communication baud rate defined*/
WiFi.begin(ssid, password); /*WiFi begin*/
while (WiFi.status() != WL_CONNECTED) {
delay(1000);
Serial.println("Connecting to WiFi..");
}
Serial.println(WiFi.localIP()); /*Connected WiFi Network IP address*/
Serial.println(WiFi.getHostname()); /*ESP32 Host name printed*/
}
void loop(){}
This code will connect ESP32 to a WiFi network and print the local IP address and current host name of ESP32 board.
Code started by including the WiFi.h library. Using this library function, we can connect ESP32 to any wireless network and print the local IP address assigned to it.
Once the ESP32 is connected to a wireless network we will obtain the IP address assigned to it by calling the localIP method using the WiFi extern variable.
Finally, to get ESP32 hostname, we will call the getHostname() method of the WiFi variable. This function takes no arguments and returns ESP32 hostname as a string output:
Output
Once code is uploaded and ESP32 is connected to an access point we can see the IP address assigned to it by an access point on the serial monitor. After that code will print the current hostname and the IP address which in our case is esp32-4B3B20 and 192.168.18.48:
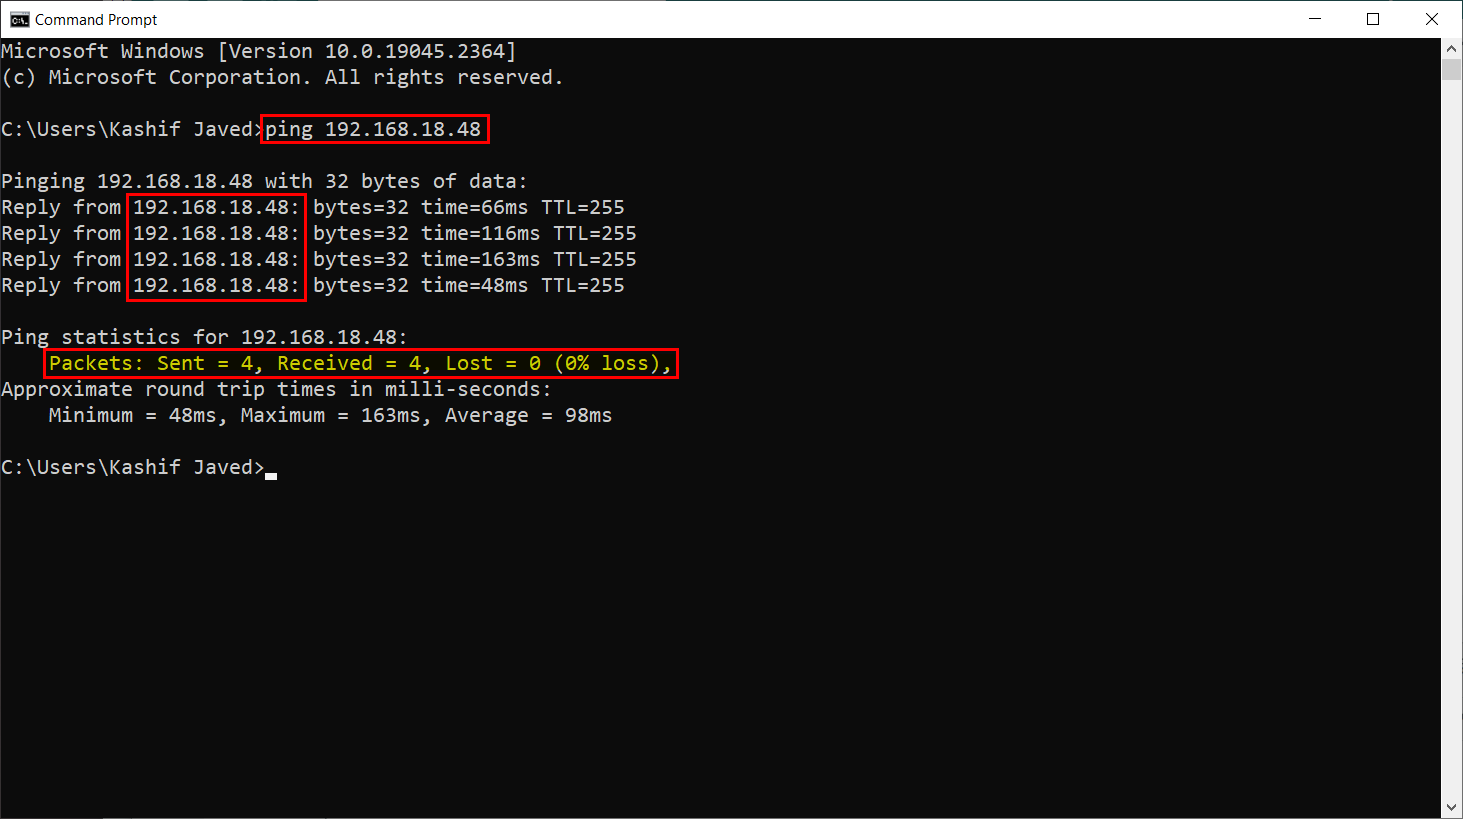
We have successfully checked the current hostname of ESP32. Now we will ping the ESP32 board using any other device. Make sure both the ESP32 and device are connected to the same network.
Now open the command prompt (CMD) and send the following command:
Replace the IP address with the one you got on the Arduino serial monitor.
Here we can see we have successfully ping the ESP32 board and all the data is transferred without any packet loss.
Note: Alternatively, we can also try the ESP32 hostname which we got on Arduino serial monitor. If the hostname did not work, try using the IP address.
Conclusion
Hostname is a kind of identification name assigned to ESP32 inside a wireless network. It helps to identify a specific device from other similar devices. By default, most of the ESP32 with the same model version have the same hostname. This article covers the Arduino code required to get ESP32 custom host name. Read more in this article.


