You can securely transfer files from one system to another by activating SSH. However, many users always need clarification about enabling the SSH server in Linux. So, in this tutorial, we will give you a brief about a simple process to enable SSH on a Pop!_OS system.
How to Enable the SSH Server On Pop!_OS?
By default, the SSH client is pre-installed in almost all operating systems. It allows the user to access other systems remotely from their computer. However, in case you want other users to access the system, install the “OpenSSH” server.
To install SSH on your system, start by running these commands:
sudo apt upgrade
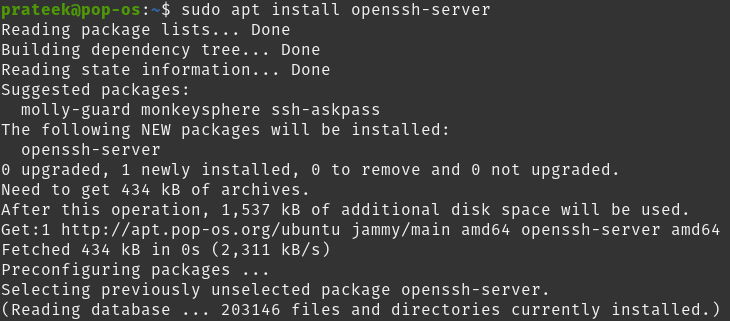
Now, proceed by installing the “OpenSSH” server:
The terminal will ask you to enter the password for installation. Finally, press the Y button on your keyboard to continue the installation:
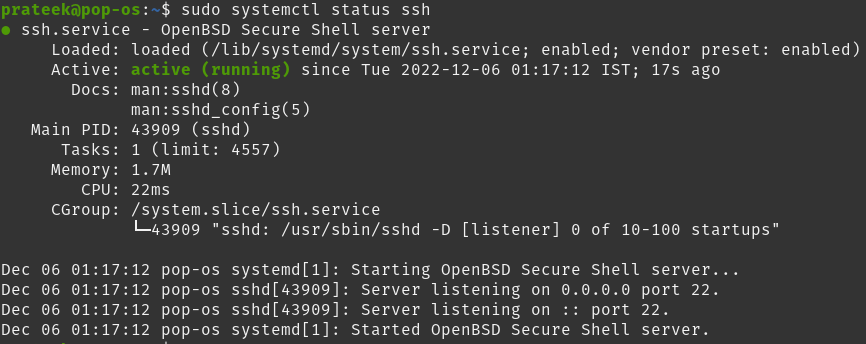
After the installation, the system will start the SSH service automatically. For verification, you can check the same using the status command:
If you see the status as active(running), you have successfully installed the ssh service in your system. Now you can use any SSH client/application to access your Pop!_OS system remotely.
You can verify this by connecting to localhost using ssh in your terminal. If you get a prompt to enter your system’s password, the installation is successful. You can access your system using ssh over port 22.
Here are helpful commands to stop, start and restart your ssh service if required. Now, use the following commands after installing the SSH successfully:
To start ssh service
To stop ssh service
To restart ssh service
Conclusion
This tutorial explains the easiest method to enable SSH server on Pop!_OS and other Ubuntu-based distros. Installing SSH on the system is straightforward and we have used simple commands. In case you want to know more about Pop!_OS, please visit our official website.


