Integrated vs Dedicated Graphics Cards
Integrated graphic cards do not have an extra processor, and they are built-in graphic cards. Being default graphic cards, they use the system’s CPU power and storage system, and thus they consume less power leading to more battery life and good performance.
Dedicated graphics are by choice, and they are extra graphic cards that you can add to your laptop with your specification demand. They have their own processor and RAM. They use more of the battery because they are designed to deliver huge graphical support, especially in gaming.
How to Find Your Laptop Has a Dual Card?
You can find out whether your laptop has a dual graphic card or not. To check that, follow these steps:
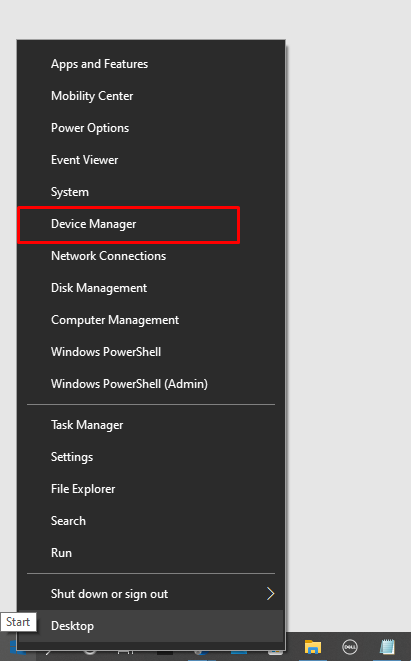
Step 1: Open the Device Manager:
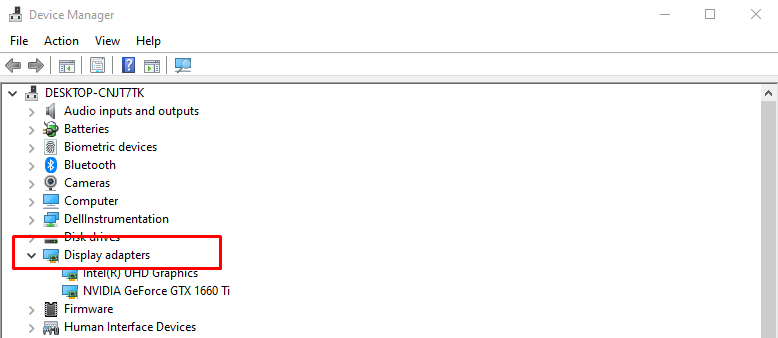
Step 2: Click on Display Adaptors:
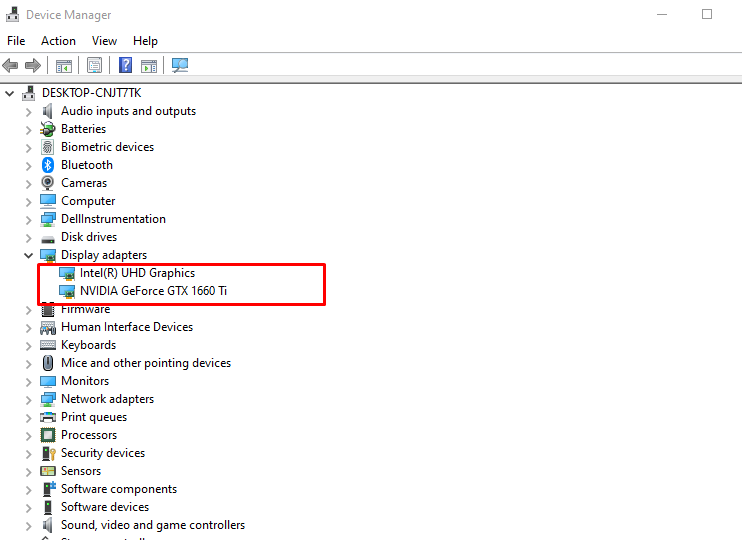
Step 3: Check whether multiple graphics cards showing over there or not:
What to Do if Your Nvidia Card Not Getting Recognized by Laptop?
The main reason why the Nvidia card is not getting recognized is that your graphics drivers are not up to date, or there might be a connection issue in the circuit. Follow these steps to get rid of this issue with your Nvidia graphic card:
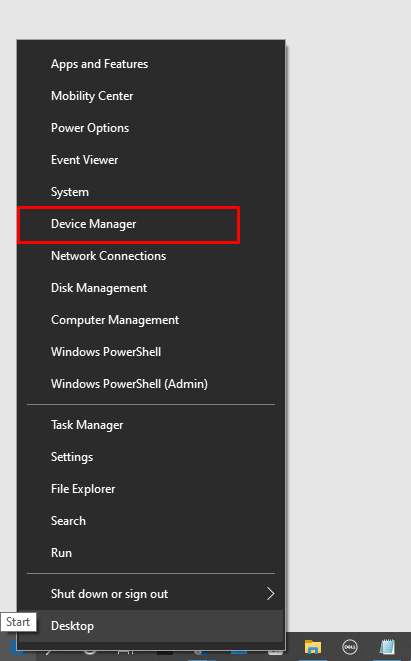
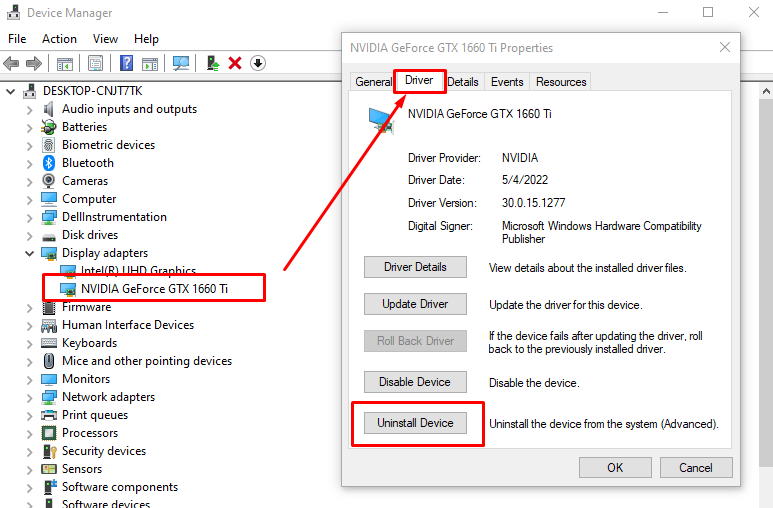
Step 1: Click on windows and open the Device Manager:
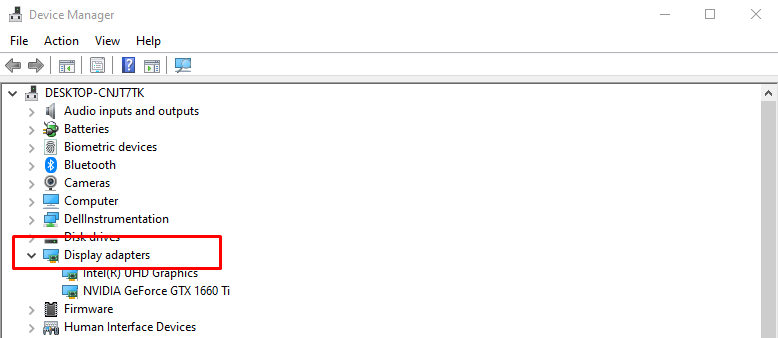
Step 2: Check the Display adaptor options:
Step 3: Right-click on the Nvidia card and click on uninstall the device:
Step 4: Now, open the official website of Nvidia and install the latest driver from there:
Switch From Intel Graphics to Nvidia Windows 10 Laptop
If you are facing any issue with an Intel graphic card or want some more graphical performance and have an additional Nvidia graphics card on your laptop, then you can switch between Intel graphics to Nvidia on a Windows 10 laptop for better graphical performance.
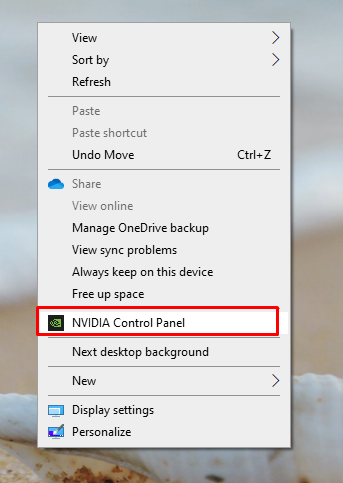
Step 1: First open the Nvidia Control Panel by right-clicking on your desktop:
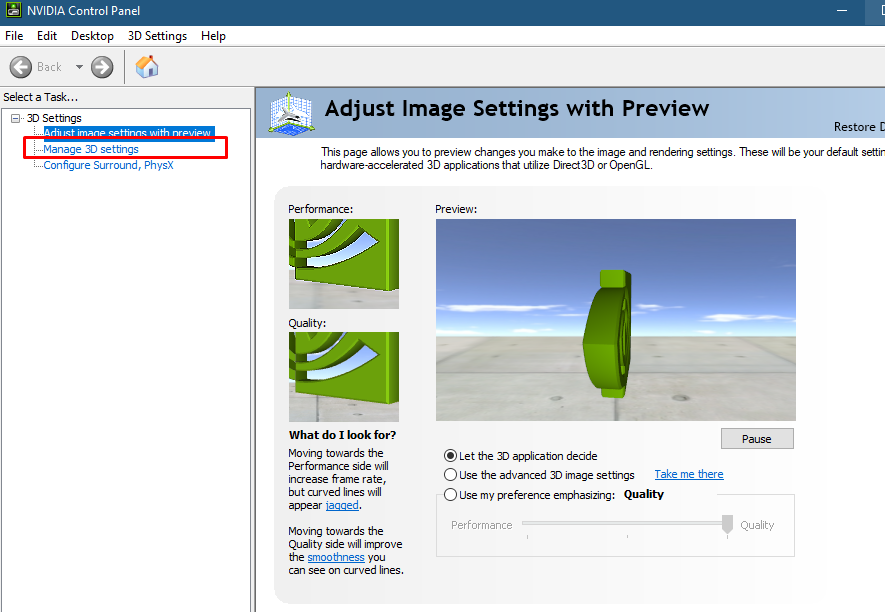
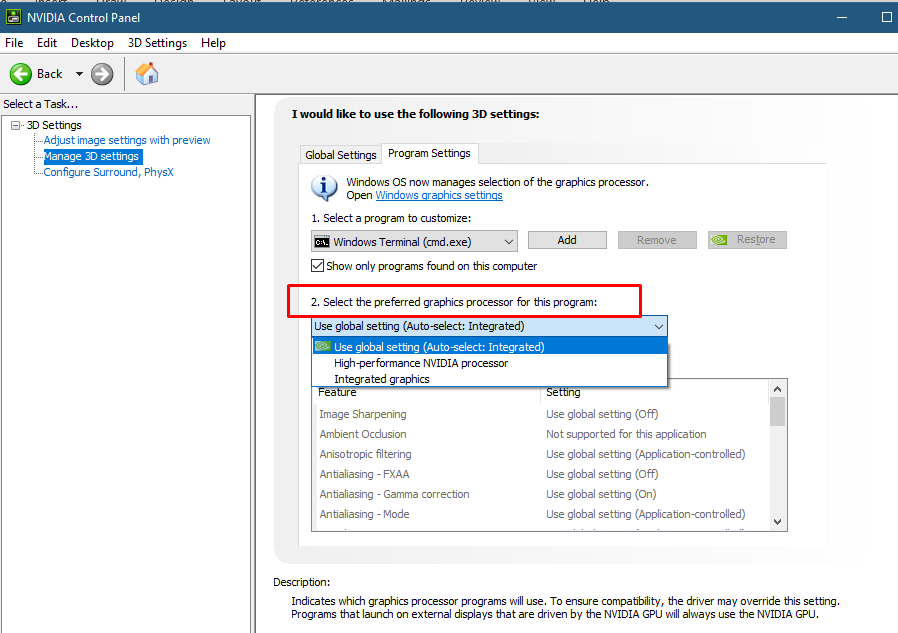
Step 2: Select the Manage 3D settings from the left side of the Nvidia control panel:
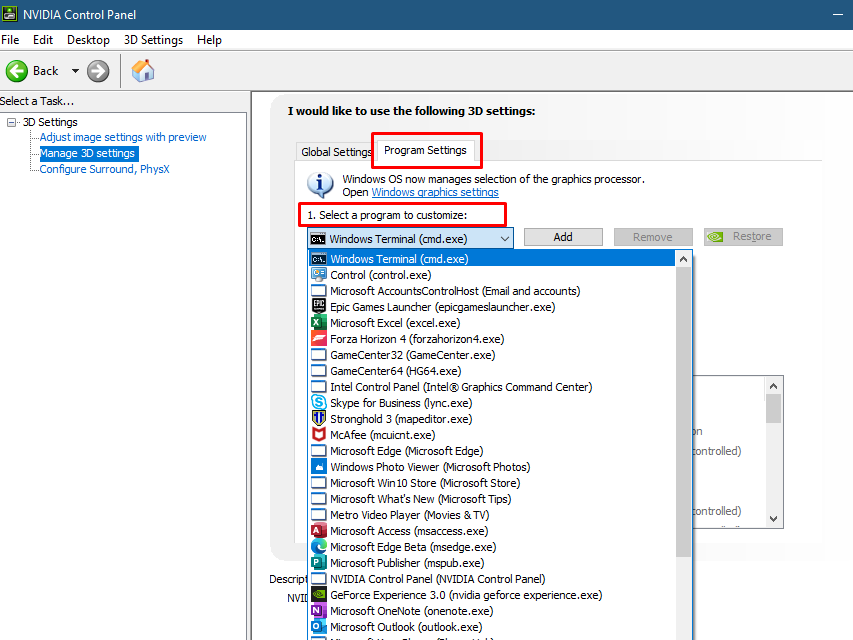
Step 3: Click on Program Settings tab and select the application of your choice:
Step 4: Now, select the preferred GPU for the selected application:
Tip: If you no longer need heavy graphics, switch from the dedicated GPU to an Intel HD graphics card to save your laptop battery.
Set Nvidia Graphics Card Default on Windows 10
To set the Nvidia graphic as a default card for specific applications, to set your Nvidia graphic card, follow these steps:
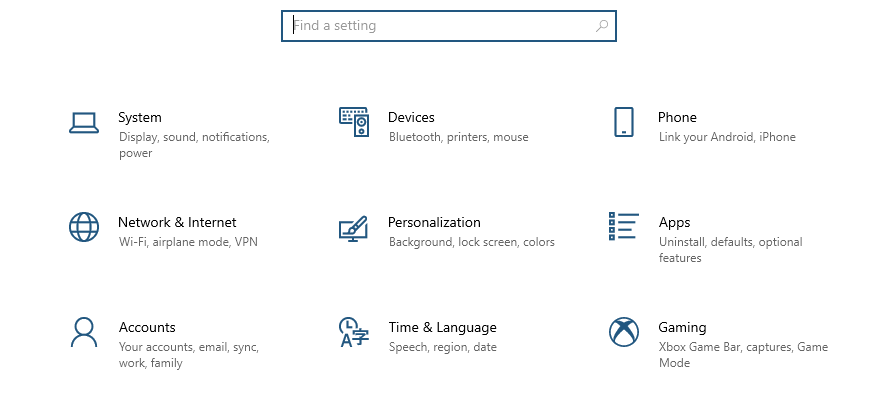
Step 1: Press the Windows+I key to open the laptop settings:
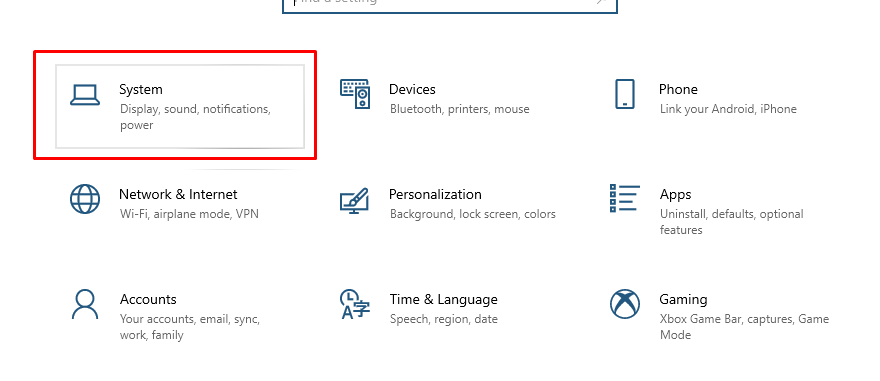
Step 2: Click on the System option:
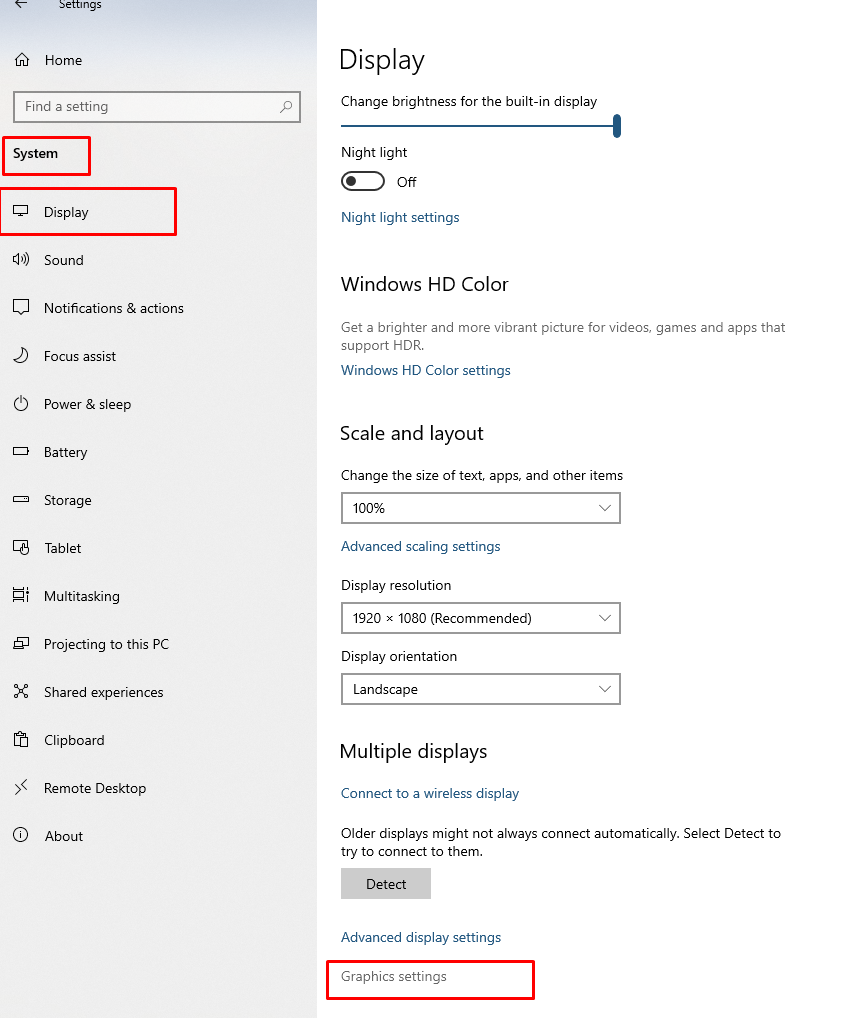
Step 3: Select the Display option, and click on the Graphics settings option:
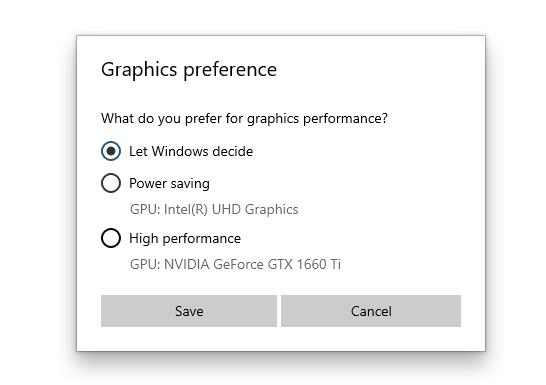
Step 4: Select the High performance option in the drop-down menu for the applications, and click on the Save button:
Conclusion
Many laptops have two graphic cards, integrated and dedicated, and if the integrated graphic card is enabled by default and you want some extra out of it beyond its capability, then you can add dedicated graphic cards like Nvidia to get the maximum graphical support; go through this article above to get to know more.

