Most modern computer programmers tend to use modern source code editors to create an HTML file. However, it can be created using a simple text editor. Here , we have demonstrated both methods to create an HTML file. The outcomes of this post are:
- Create an HTML file using text editor
- Create an HTML file using a source code editor
Method 1: Create an HTML File Using a Text Editor
As an example, we are using the default text editor of Windows 11. The following steps are carried out to create an HTML file using the text editor:
Step 1: Open the text editor
Firstly, navigate to the directory where you want to create a file. Right click and click on the New option to create a Text Document:
Step 2: Write HTML
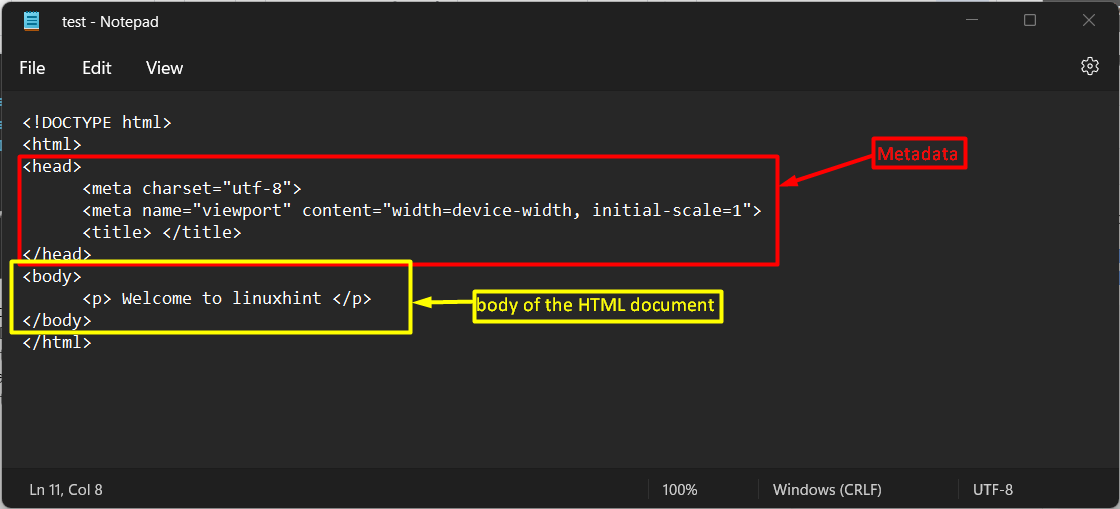
After creating a text file, write a few mandatory lines of HTML. As an example, we have used the following HTML code lines:
In the above code:
- The <!DOCTYPE html> defines that the file belongs to an HTML category.
- Inside the <head> tag, the character set and the size of the content is defined.
- Title can be defined inside the <title> tag.
- Inside the <body> tag, a paragraph is created in the <p> tag.
- Lastly, the <body> and <html> tags are closed.
The screenshot of the code is provided below:
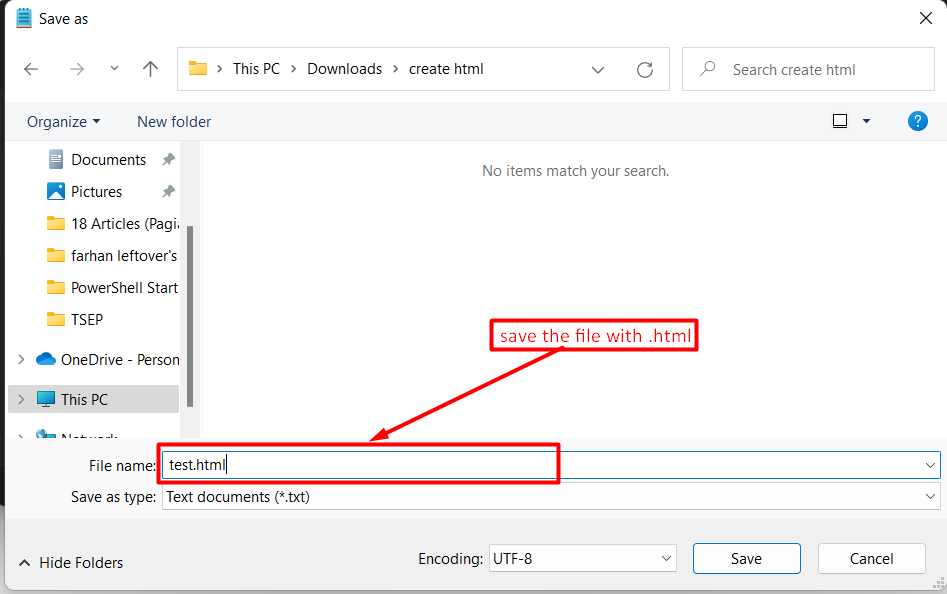
Step 3: Save the file
Lastly, save the file with any name but with “.html” extension:
As soon as the file is saved, the file icon (as of your default browser) will appear as shown below:
You can run the HTML file to observe what is inside it. By running the file, the following web interface appears:
Method 2: Create an HTML File Using Source Code Editor
As discussed earlier, an HTML file can be created using any source code editor. Here, we are using the Visual Studio Code editor to create an HTML file:
Step 1: Create an HTML file
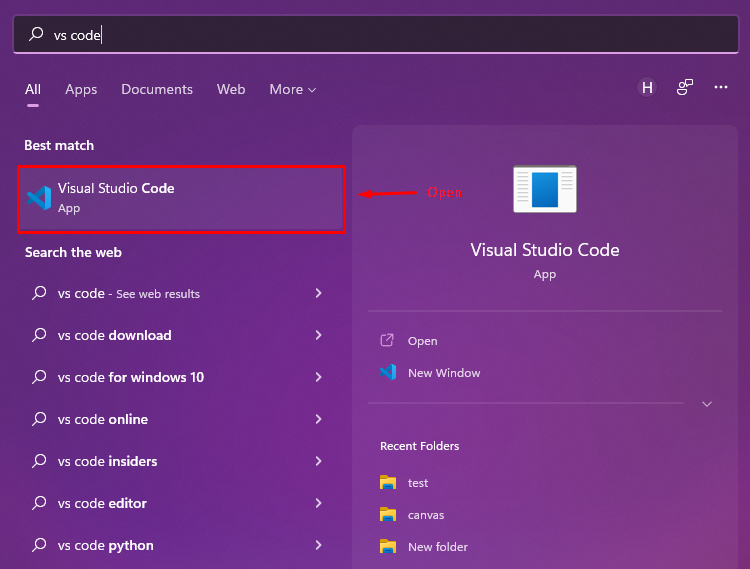
Open the editor by searching it from the windows search bar:
Step 2: Create a file
After opening the text editor, go to the File option and choose New Text File to create a text file:
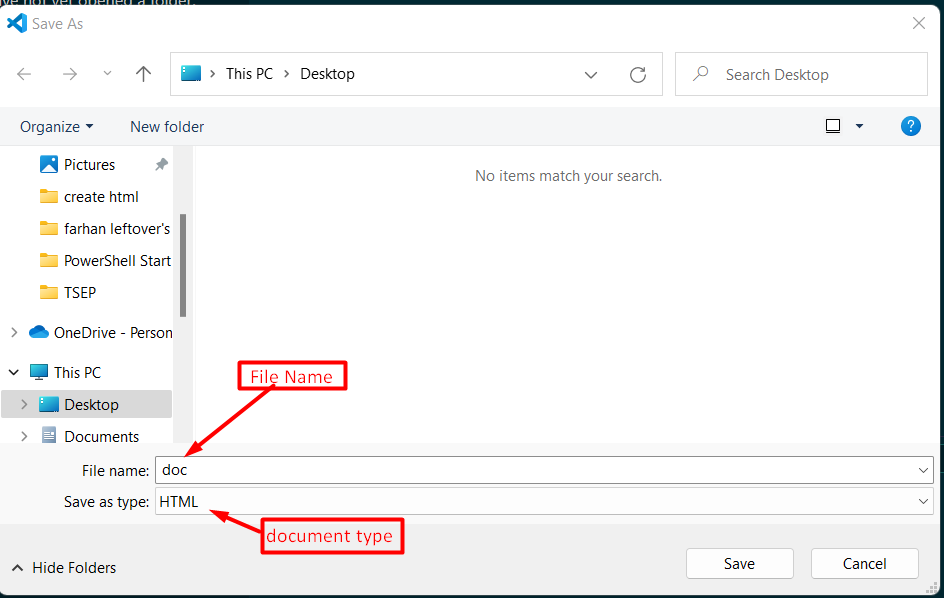
Now, save the file with any name. Make sure to change the file type to HTML:
Step 3: Write HTML
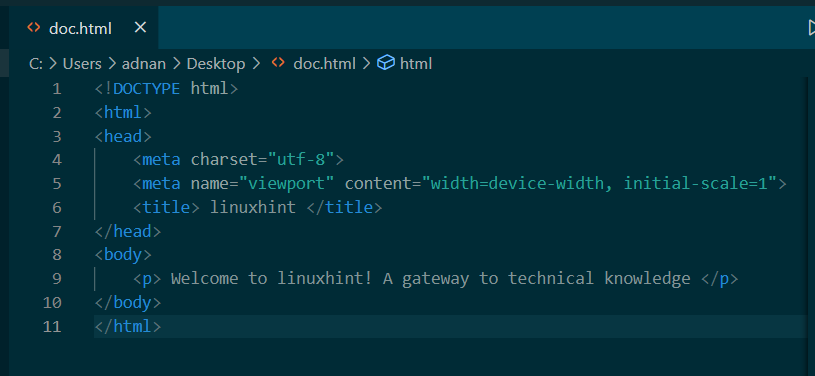
It’s time to write HTML code in the file. The pattern of writing the code is the same as we have described in the previous section. The following image represents the lines of code used to create an HTML file:
Here you go! The HTML file has successfully been created using a source code editor.
Conclusion
We can create an HTML file by writing the HTML code in any text editor or the source code editor. After that, the file needs to be saved as a .html extension. We have used the notepad (simple text editor) the Visual Studio (a source code editor) to create an HTML file.


