To save your work or to keep a record of your choices before submitting it online, instead of taking a picture of your laptop screen from your smartphone, you can take screenshots. You can also use screenshots to help others working on finding a solution for a specific problem as you can share the screenshots of the solutions you find on the internet. So, there are many ways through which you can take screenshots of your laptop’s screen among which we have given the 5 easiest ways for taking screenshots in HP laptop.
5 easy ways to take screenshot on an HP laptop
As mentioned above taking screenshots is a quick way to save your work or you can use screenshots to help your friends with the solution of any problem. Also, for teaching the kids in the classroom you can also use screenshots if you are unable to give them a live demonstration about any process. Here are the 5 easiest ways through which you can take screenshots on your HP laptop.
- Press Windows key + W key
- Press Windows key + PrtScn key
- Press SHIFT key + Windows key + S key
- Press Windows key + G key
- Use the built-in snipping tool
1 – Taking Screenshot by Pressing Windows key + W key
If you need to take a screenshot of your laptop screen, then this shortcut key is the best for you as it saves the whole screen of your HP laptop and then if you want to save a selective part of it provides you with the necessary tools. Then you can save your screenshot at your desired place. Once you press the Windows key and the W key simultaneously you will see a pop-up at the bottom of your screen as in the image below:
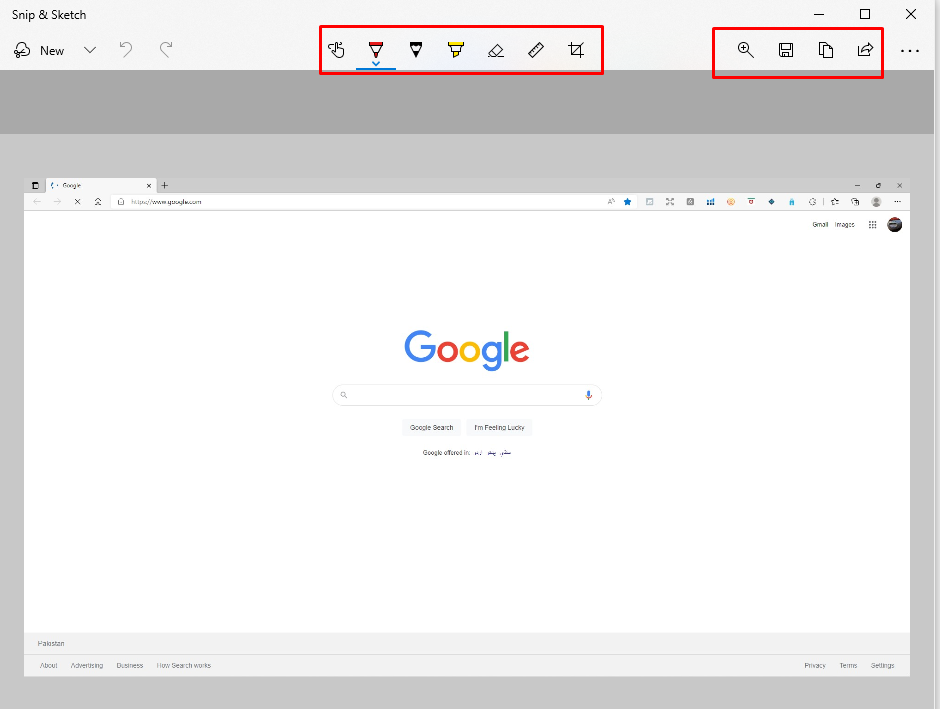
To take the screenshot click on the full screen snip and it will take the screenshot of your screen and open an editor in which you can edit the screenshot as you can seen in the image below:
You can customize your screenshot by using different color markers or highlighters or you can crop the image if you do not need the screenshot of the whole screen.
After you are done with the customization you can save the screenshot, copy it or you can share it to somebody else.
2 – Taking Screenshot by Pressing Windows key + PrtScn key
If you need to take a screenshot of the whole screen, then this might be the easy and quick way to take a screenshot on your HP laptop. Just press the Window key and the PrtScn (print screen) key simultaneously and your window brightness gets dull for a second and your screenshot is taken.
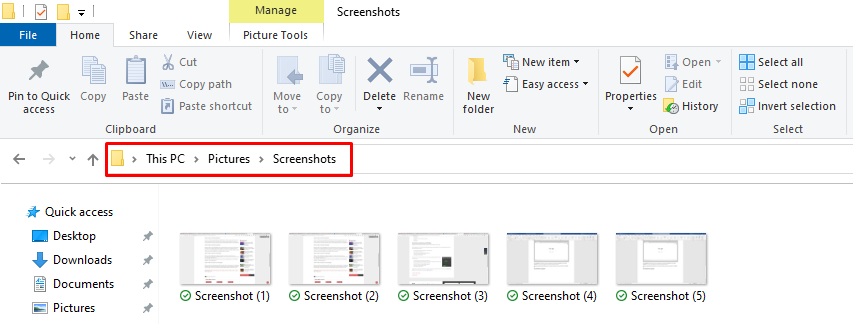
Next you can see your screenshots in the folder named screenshots in the pictures folder of your PC as in the image below:
3 – Taking Screenshot by Pressing SHIFT key + Windows key + S key
If you want to save only a selected part of your laptop screen, then this technique might get your attention. Unlike the first way we describe this set of short keys make it easier for you to take a screenshot of the selective part of your HP laptop.
You just have to press the SHIFT key, Window key and S key simultaneously to take the screenshot and when you press these keys simultaneously a small bar having some options will appear at the top of your laptop screen as in the image below:
From there you can select any desired area of your screen either in square or in round form and also you can take the screenshot of the whole screen as well.
Once you have taken the screenshot it will only copy it to the clipboard of your PC, and you can paste it in any document or send in an email to others.
Also, if you click on this pop-up as in the image below it will open the same set of options as you get by pressing the Window key and S key.
4 – Taking Screenshot by Pressing Windows key + G key
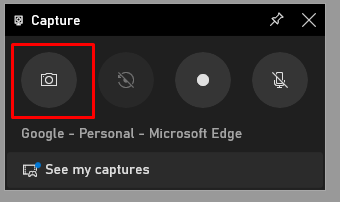
Another way for taking a screenshot on your HP laptop is by pressing the Window key + G key it will open the options if you want to make a live stream. One of the options you will see on the top left side of your screen will be the capture option and from there you will click on the camera icon to take the screen screenshot as in the image below:
The interesting thing about this method is that it saves the screenshot with the name of the application or webpage you are taking a screenshot of so that you should remember about which thing is this screenshot.
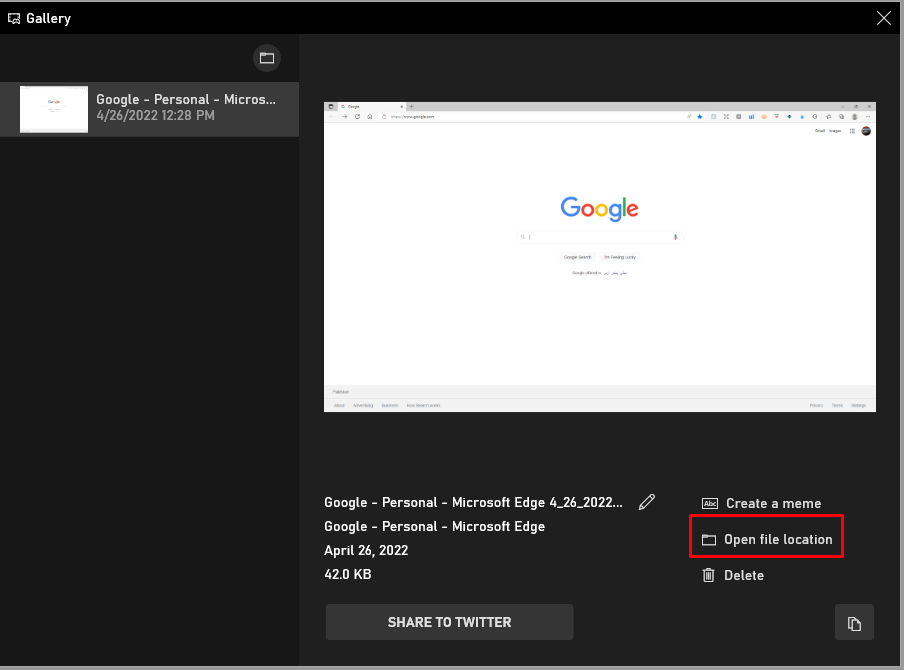
There are two ways to access the saved screenshot one is by clicking on open file location from the gallery menu as in in the figure below:
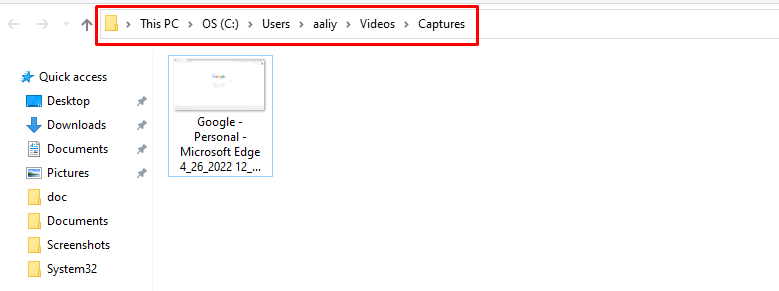
Or you can follow the highlighted path in the image given below:
This method is mostly suited for the live stream gamers as they can save some of the best moments they encountered while playing games or can also use it to take pictures of the leaderboard of the game.
5 – Taking Screenshot by Using the built-in snipping tool
Last but not least you can take a screenshot either of any selected area or of full screen and can do edits in your screenshot using the snipping tool. This tool comes with the Windows operating system and does not require any installation prior to its use. To open the snipping tool, you have write it in the Windows search bar as in the image below:
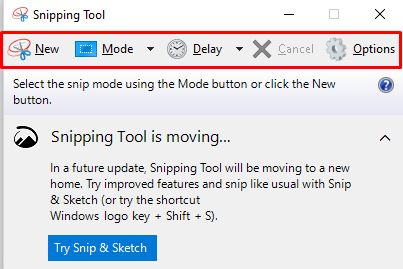
Once you have opened the snipping tool you will see the interface as in the image below:
To select the area of which you want to take a screenshot you have to click on the icon named new in the top menu bar of the snipping tool. After you have taken the screenshot, the tool will ask you to save the screenshot, just save it in your desired place.
Conclusion
Screenshots are the best to illustrate any process that you are unable to give a live demonstration for. It can help you save the steps of any process in case you forget any of the steps. Similarly, using the screenshots can make it easy for you to save your work before sending it to someone. Since on the internet there are a number of applications that you can use to take screenshots but finding the good ones is difficult. So, we have given the 5 quick and easiest ways through which you can take screenshots and they do not require installation of any third party softwares.


