In this article, we will provide you with several methods to increase the fan speed on the laptop to let you control your CPU temperature.
How to Increase Fan Speed on Laptop
If you are worrying about your slow fan speed, you should apply the following methods to increase fan speed on your laptop.
1: Increase fan speed using Windows Control Panel
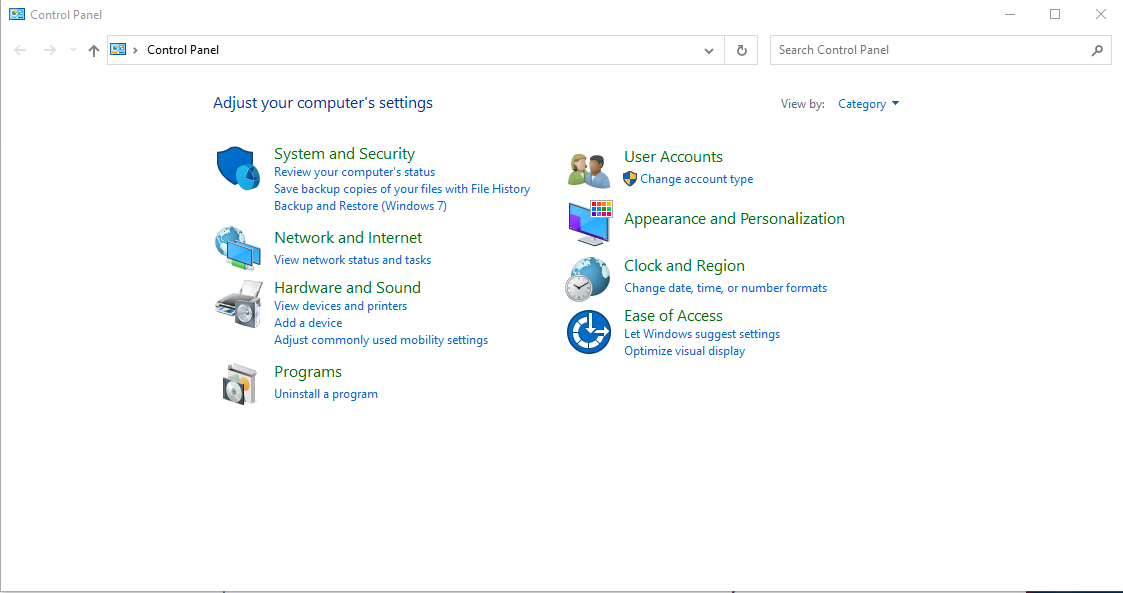
Your operating system includes a built-in fan speed feature that will let you control your laptop fan speed. To open it on your windows laptop, go to the “Control Panel” option which you can find in the start menu.
Then follow the below mentioned steps.
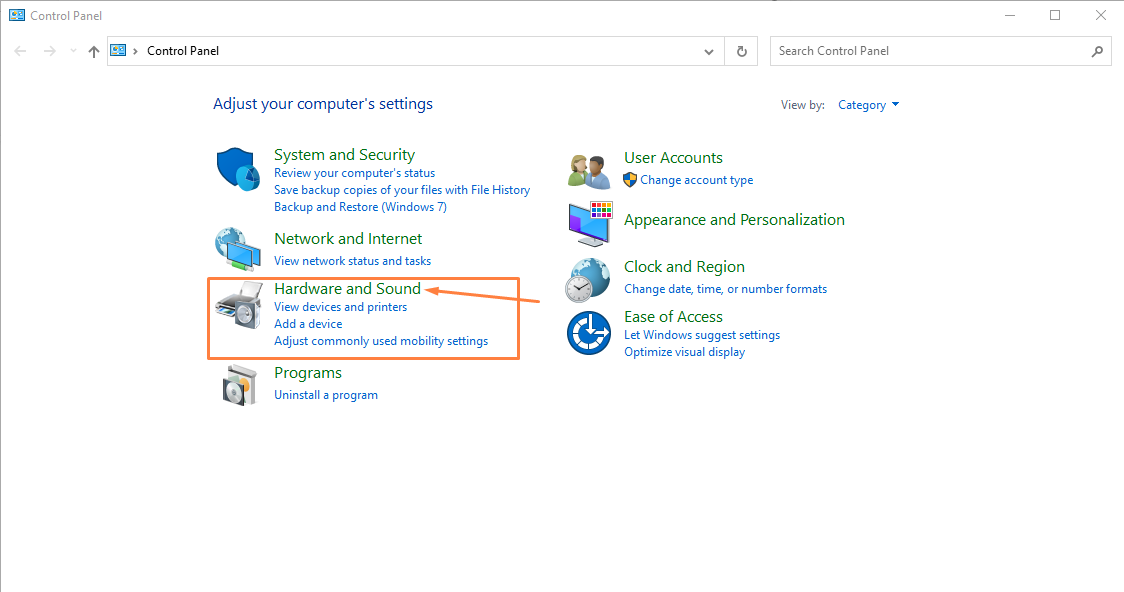
Step 1: Go to the “Hardware and Sound” option:
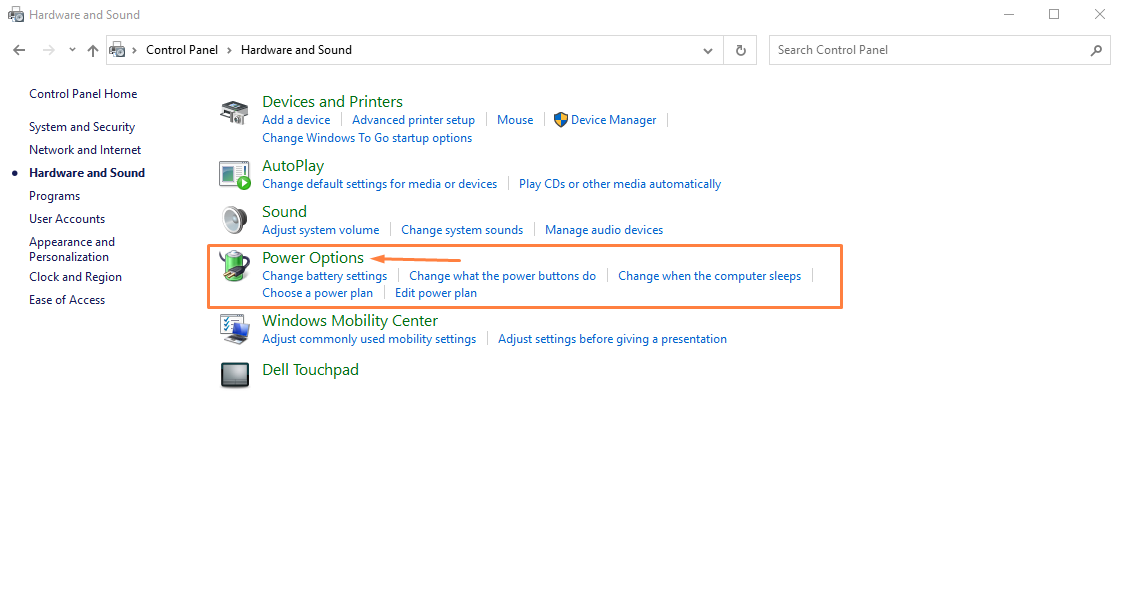
Step 2: Click on the “Power Options”:
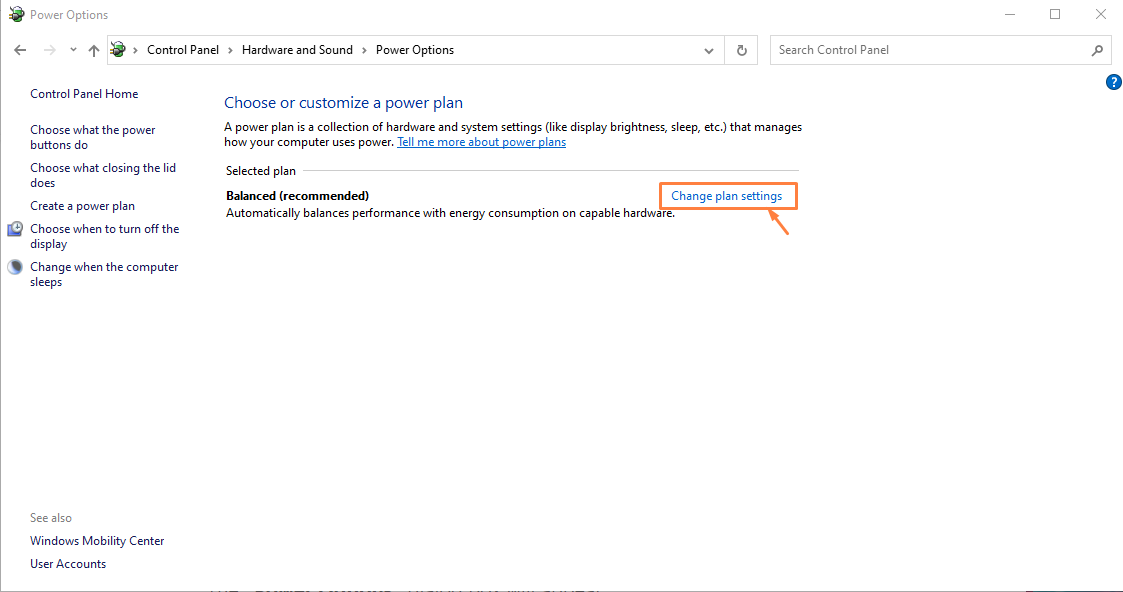
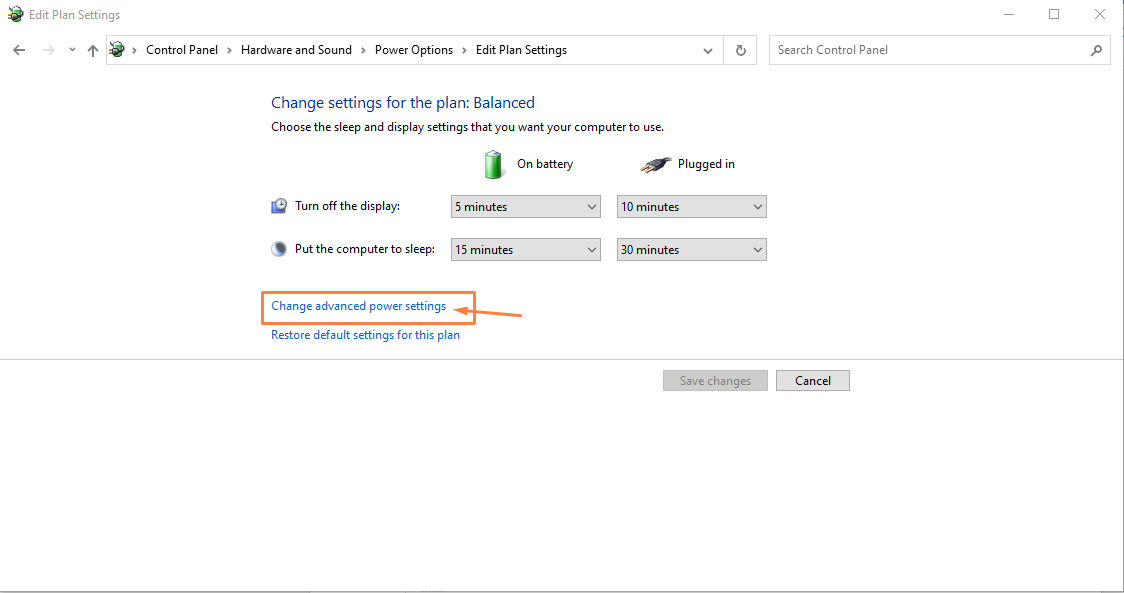
Step 3: Click on the “Change plan settings” option:
Step 4: Next, go to the “Change advanced settings” option:
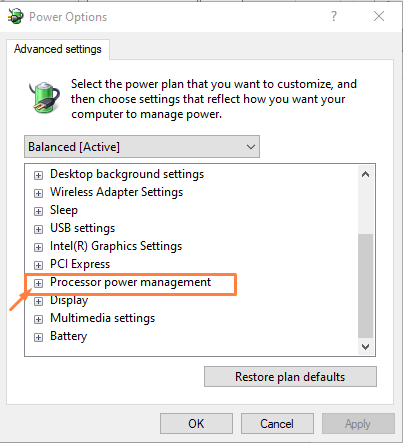
This will open up the power plan for your laptop:
Step 5: Scroll down and find the “Process Power Management” option and click on the “+” sign.
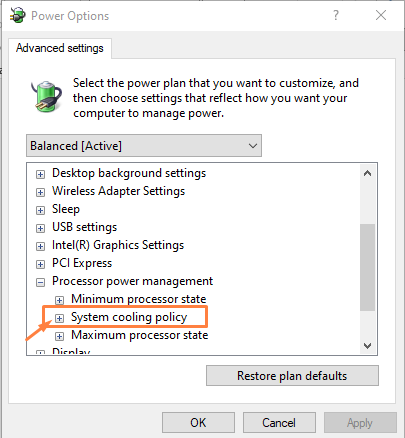
Step 6: Go to the “System cooling policy” option by clicking on the “+” sign option.
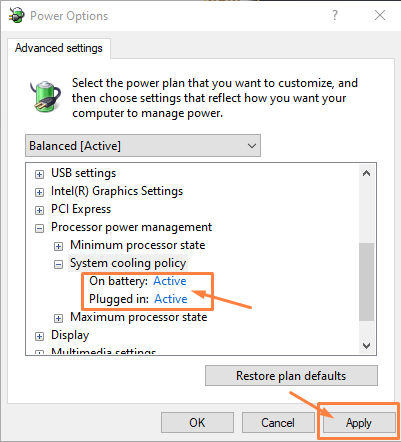
Step 7: Ensures that both options are in “Active” mode if they are not changed from passive to active and then click on the “Apply” option to confirm it.
The main difference between Active and Passive cooling is given below.
- Active mode provides you best performance by increasing the fan speed first then slowing down the processor to main cooling. It will set the cooling system policy to active.
- Passive mode first slows down you laptop processor and then it increases the fan speed. This option is better if you want to slow down the fan noise.
2: Increase fan speed from Third-party apps
You can also utilize the services of third-party apps to increase your laptop fan speed. Several tools like SpeedFan, Argus Monitor, and others will allow you to increase your fan speed according to your choice. You can install any app onto your laptop and it will then allow you the freedom to increase your fan speed to high RPM.
3: Increase Fan speed from BiOS
If you don’t like the option of third-party apps on your laptop, you can use this method to increase the fan speed on the laptop. For this reason, you will need to restart your laptop and enter the bios system option. The keys will be different based on the laptop model/manufacturer.
Also, it is to be noted that not all laptops include thermal options in BIOS menus. These fan settings options are mostly found in high end gaming laptops. Before performing this method, first check on the manufacturer website whether your laptop has fan settings or not. Once you find it, you can then enter the system and go to the “Thermal” option there, you will find the fan option. You can easily increase the fan speed from there.
Conclusion
A CPU fan is considered as the backbone of a laptop as it controls the temperature of the CPU. The fan speed of your laptop is set to its default RPM value and if someone wants to increase the fan speed on the laptop, he/she should follow the above methods to make it happen. Having set the fan speed to high RPM value will surely boost your system performance but it will significantly increase the noise also.

