Sometimes, an unstable internet connection at the user’s end cause’s the stated error. Moreover, missing system files and faulty drivers could be the reason.
This write-up will demonstrate various ways to fix the stated error.
How to Fix Windows Updates Error 0x8024401c?
The stated error can be resolved using these methods:
Let’s explore each of the methods one by one.
Fix 1: Run Windows Update Troubleshooter
Windows update troubleshooter is used to deal with critical update problems. The stated error can be fixed by running the Windows update troubleshooter. For that reason, run the troubleshooter by following the below steps:
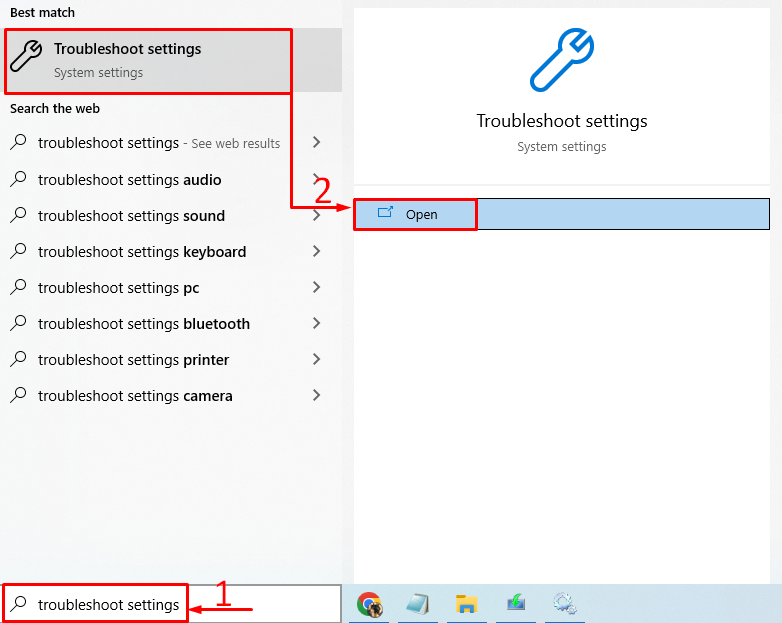
Step 1: Open Troubleshoot Settings
First, launch “Troubleshoot settings” from the Start menu:
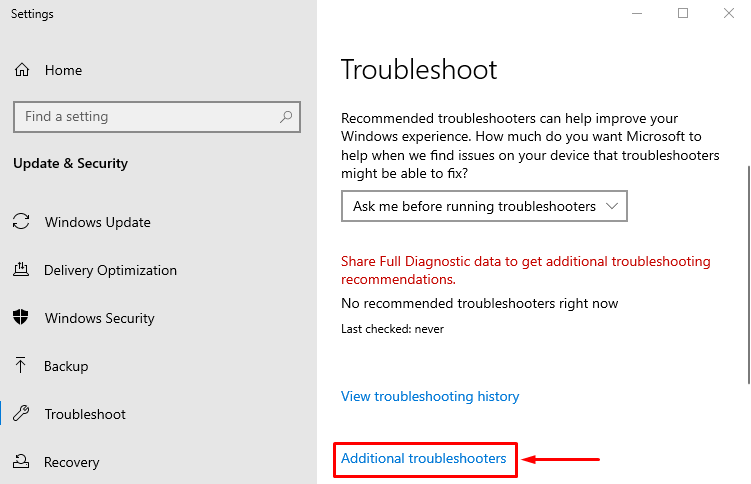
Step 2: Navigate to Additional Troubleshooter
Click on “Additional troubleshooters” in the troubleshoot window:
Step 3: Launch Troubleshooter
Search for the “Windows Update” and trigger “Run the troubleshooter”:
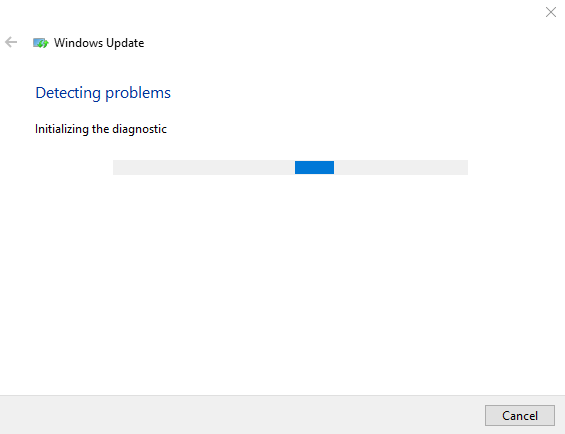
As you can see, the Windows update troubleshooter has started to detect problems:
Restart Windows after the troubleshooting is finished.
Fix 2: Repair System Files
Missing and corrupt Windows files could be the reason for the stated error. For that reason, run the SFC scan. System file checker is a tool used to repair corrupt Windows files. To do so, follow the below steps:
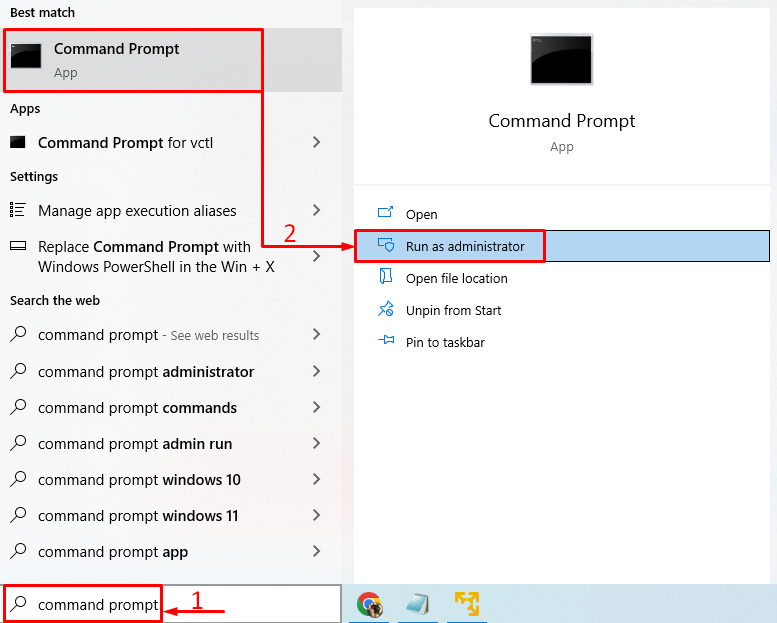
Step 1: Open Command Prompt
Firstly, launch “CMD” from the Windows Start menu:
Step 2: Start SFC Scan
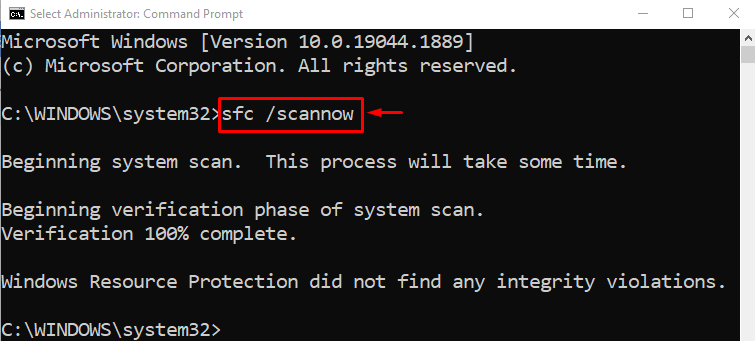
Execute the code in the terminal to start the SFC scan:
The system file checker has completed the scan. This scan has repaired the corrupt and missing system files. Reboot the PC and verify whether the update error is resolved or not.
Fix 3: Run DISM Scan
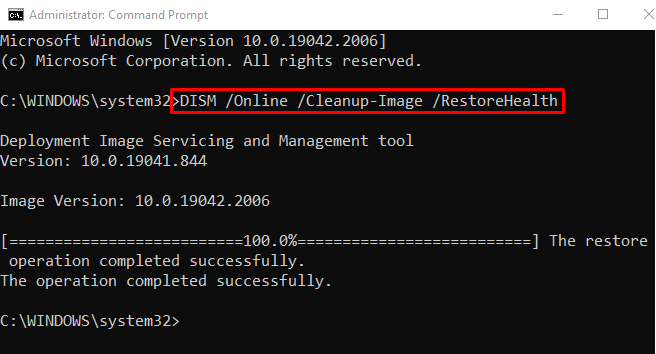
DISM is a command line utility tool that repairs Windows image files. Running a DISM scan will resolve the stated error. To do so, first of all, open “CMD” via the Start menu. Run the below code to start the DISM scan:
The scan has been completed successfully. Reboot the PC and verify whether the Windows update problem is fixed or not.
Fix 4: Disable IPv6
Sometimes disabling IPv6 resolves the connectivity problems. For that reason, follow the steps below:
Step 1: Open Network Settings
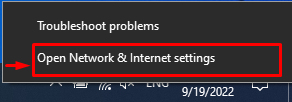
First, locate the “Network icon” and right-click on it:
Step 2: Open Network Connections
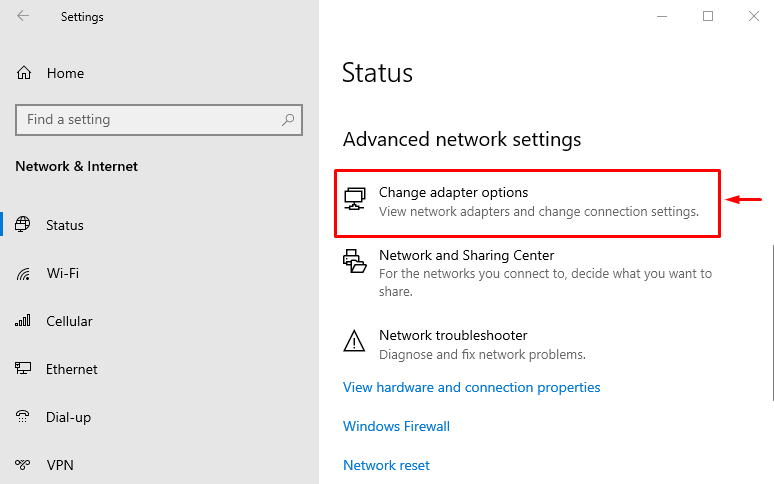
Click on “Change adapter options” to open network connections:
Step 3: Open Wi-Fi Properties
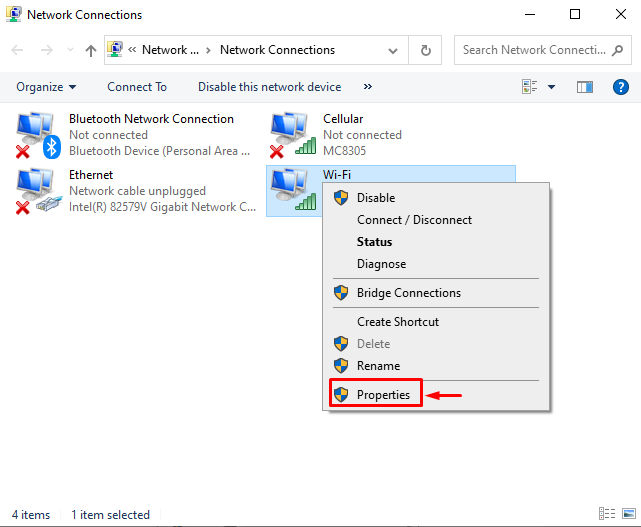
Right-click on “Wi-Fi” and select “Properties”:
Step 4: Disable IPv6
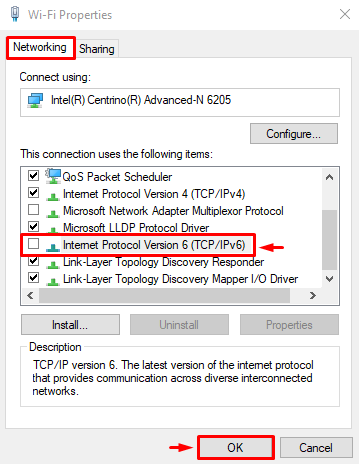
Navigate to the “Networking” tab. Uncheck the “Internet Protocol Version 6” box and hit the “OK” button:
The IPv6 has been disabled. Restart Windows and check if the Windows update service is working fine.
Fix 5: Perform Clean Boot
Performing clean boot disables Non-Microsoft services. Enabling a clean boot eventually helps the computer to boot faster and more securely. To enable a clean boot, follow the below steps:
Step 1: Open System Configuration
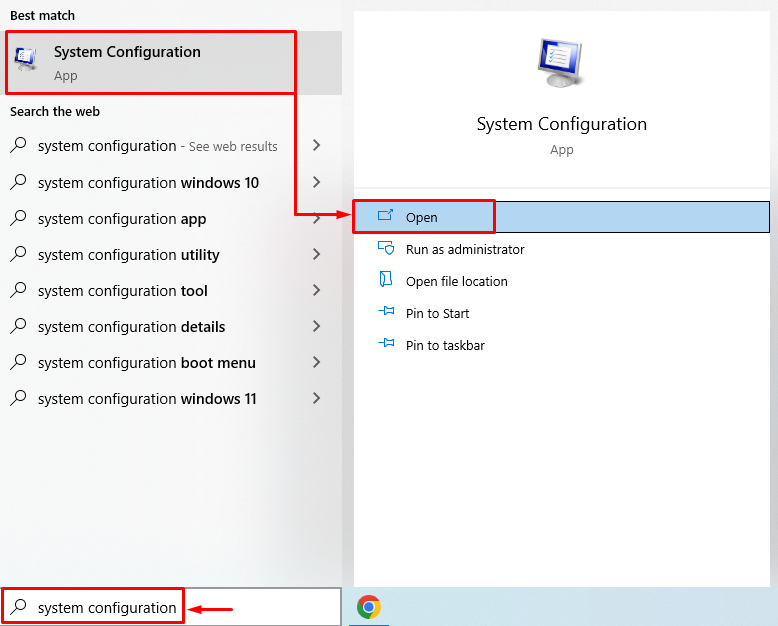
First, open “System Configuration” via the Start menu:
Step 2: Disable Non-Microsoft Services
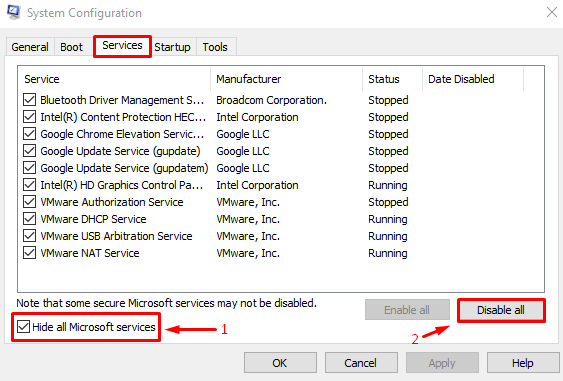
Navigate to the “Services” segment. Un-tick the rectangle box of “Hide all Microsoft services”. Click the “Disable all” button and finally hit the “OK” button:
Clean boot mode has been enabled successfully. Reboot the PC and find out whether the error is fixed.
Conclusion
The “Windows Updates Error 0x8024401c” can be fixed using various methods. These methods include running Windows update troubleshooter, repairing system files, running DISM files, disabling IPv6, and performing a clean boot. This article provided various methods to fix the specified error.

