This blog post aims to provide various methods to fix the stated problem.
How to Resolve the “Windows Audio Device Graph Isolation High CPU” Problem?
First, try the basic method of rebooting the system to fix the stated problem. If it gets resolved, then well and good, otherwise try these methods:
Fix 1: Disable All Sound Effects
As the first fix, disable all the sound effects to rectify the stated problem. For that reason, follow the given steps.
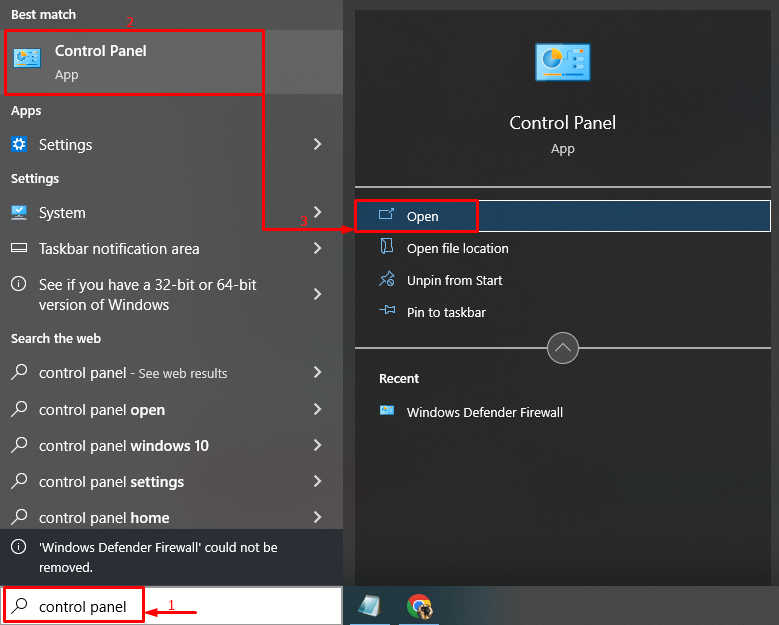
Step 1: Open Control Panel
First, launch “Control Panel” from Windows 10 Start menu:
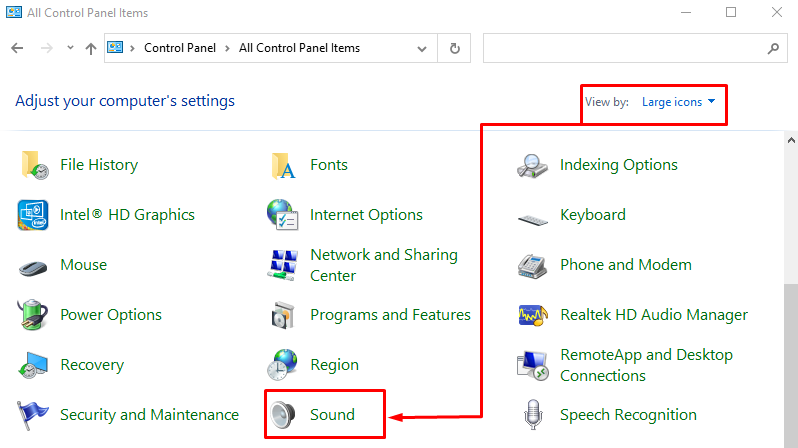
Step 2: Open Sound Properties
First, select the “Large icons” as highlighted below in the Control Panel. Then, left-click on the “Sound” to open sound properties:
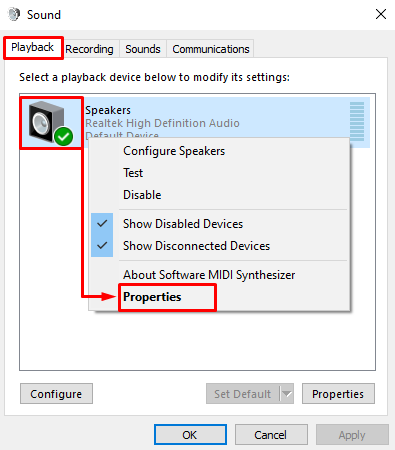
Navigate to the “Playback”, right-click on “Speakers”, and select “Properties”:
Step 3: Disable Sound Effects
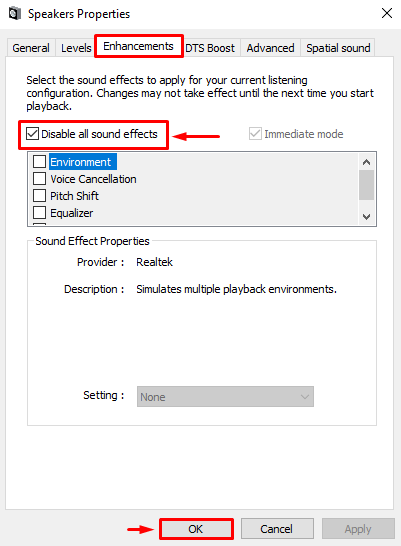
Navigate to the “Enhancements” tab. Mark-check the “Disable all sound effects” box and select the “OK” button:
The sound effects have been disabled successfully.
Fix 2: Reinstall Audio Drivers
The stated problem also occurs due to obsolete or missing audio driver files. Therefore, reinstalling the audio drivers will surely fix it.
Step 1: Open Device Manager
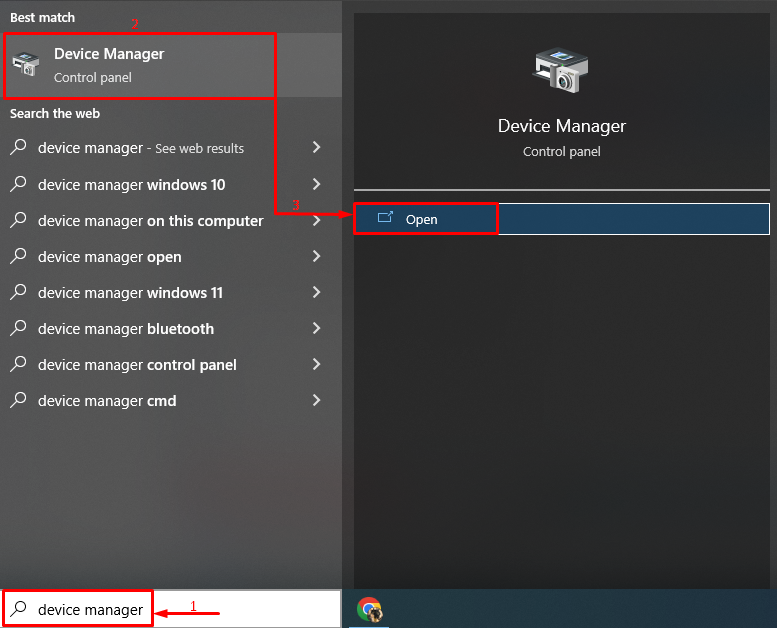
First, search and launch “Device manager” with the help of the Windows Start menu:
Step 2: Remove Audio Driver
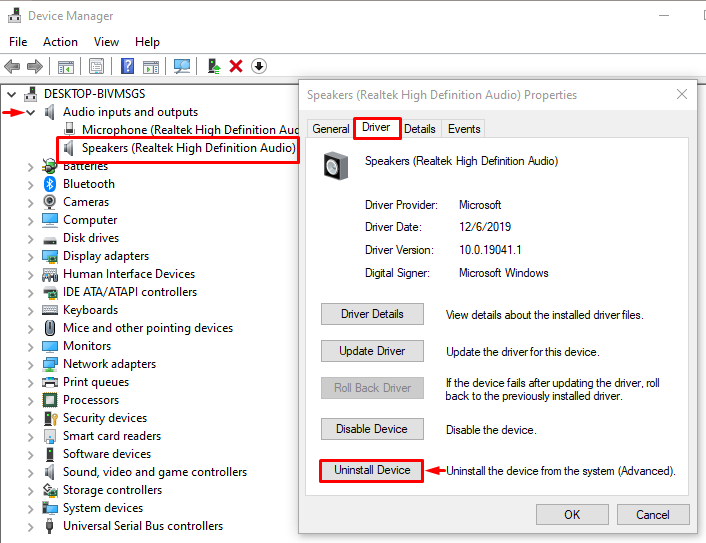
Expand the “Audio inputs and outputs” section, double-click the audio driver and click on the “Uninstall Device” option:
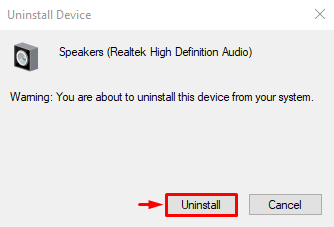
Click the “Uninstall” button for uninstalling the selected audio driver:
Step 3: Reinstall Audio Driver
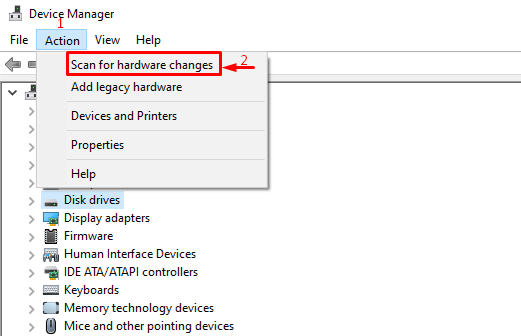
After that, click on the “Action” menu and trigger the “Scan for hardware changes” option:
Fix 3: Run Full System Scan
The stated error could also occur due to some executable malware. If that’s the case, then performing a full system scan will fix it.
Step 1: Open Virus & threat protection
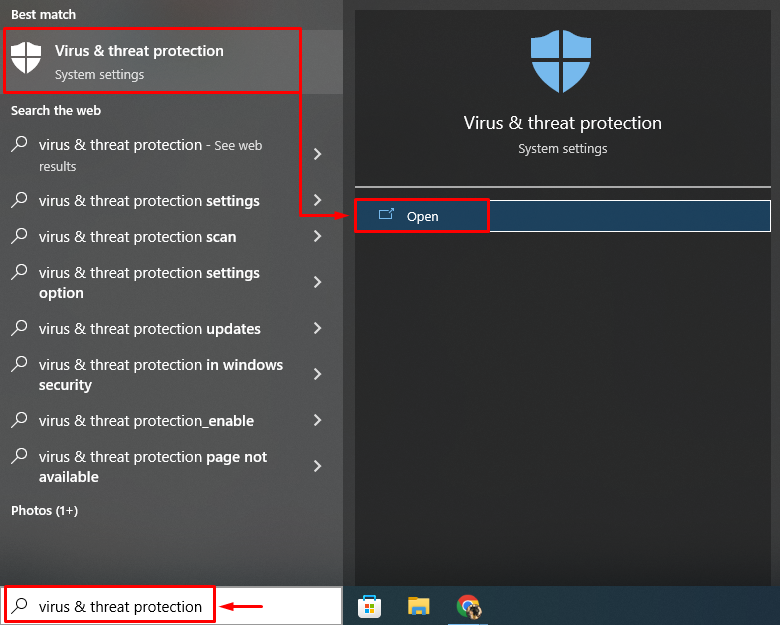
First, launch “Virus & threat protection” from the Start menu:
Step 2: Launch Scan Options
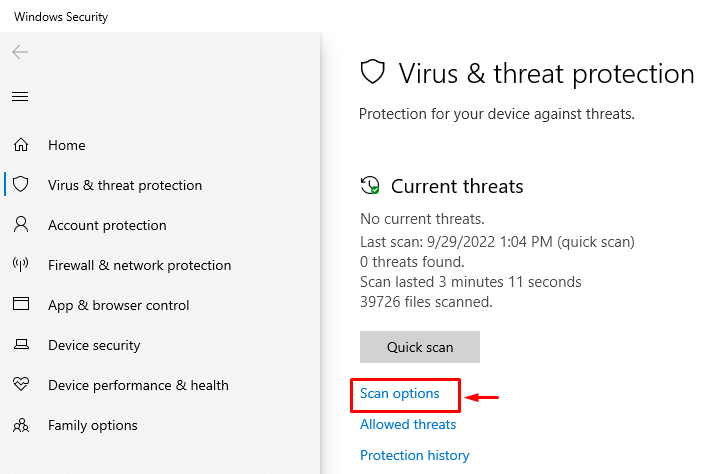
Select “Scan options” from the on-screen window:
Step 3: Run the Scan
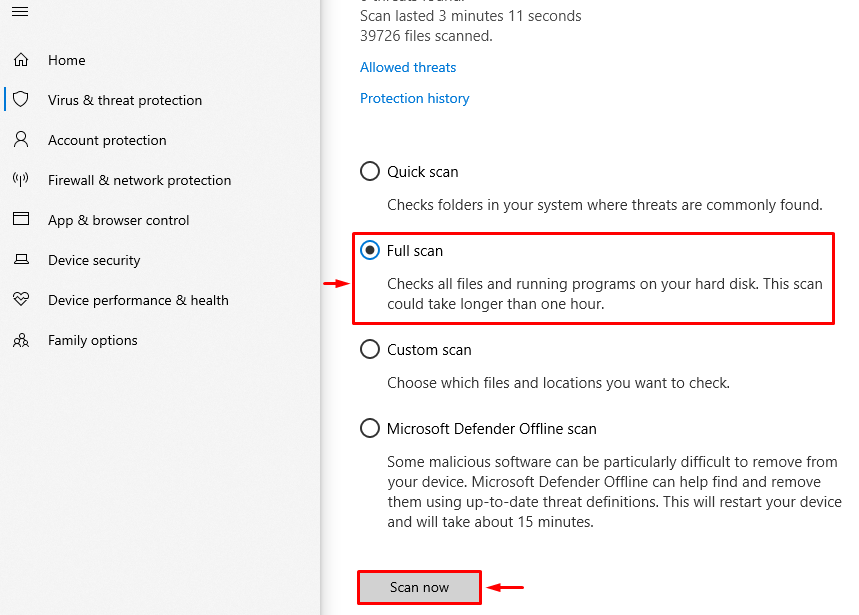
Select “Full scan” and hit the “Scan now” button:
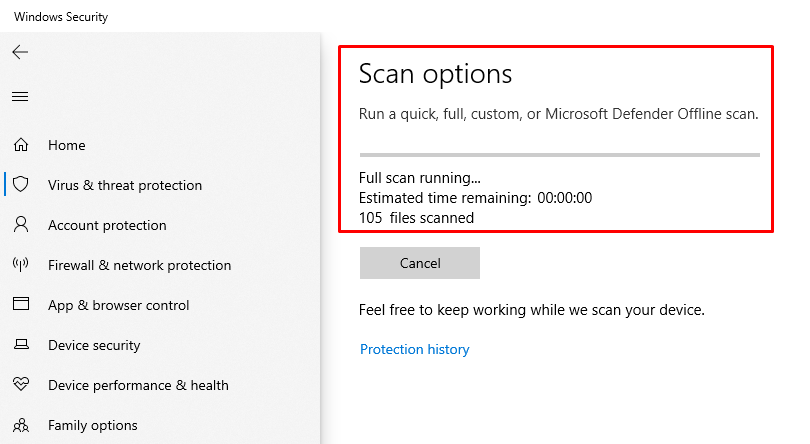
The scan has started to remove the malware:
Restart Windows when the scan is finished, and check whether the problem got resolved.
Fix 4: Uninstall Skype
The Skype app can cause the audio device to use high CPU usage. So, let’s try removing Skype from Windows.
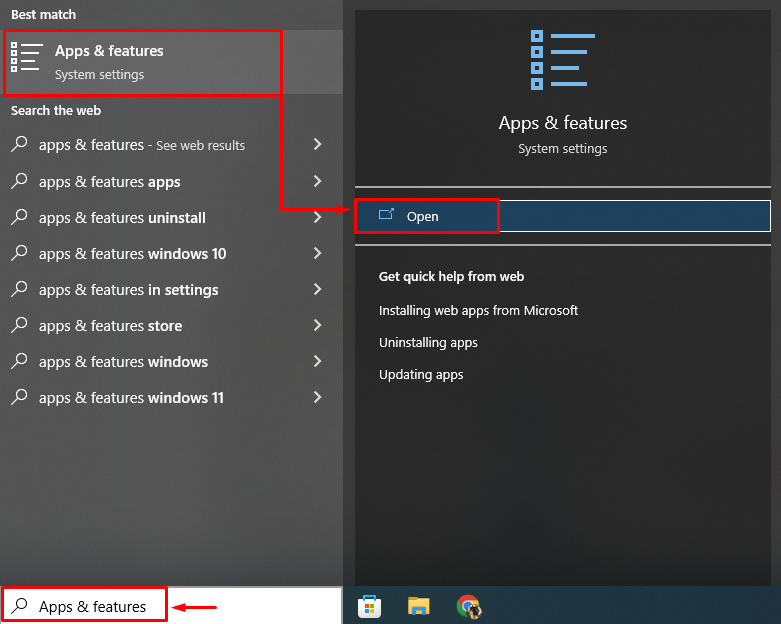
Step 1: Launch Apps & Features
First of all, launch “Apps & features” from the Start menu:
Step 2: Uninstall Skype
Locate “Skype” and click on the “Uninstall” option to remove Skype from Windows:
Now, restart Windows and check out the CPU usage.
Conclusion
The “Audio device graph isolation high CPU usage” problem can be resolved using various methods, which include disabling the sound effects, reinstalling audio drivers, running a full system scan, or removing Skype from Windows. This write has provided various solutions to resolve the audio device graph isolation and high CPU usage.

