This blog will present different approaches for solving the random shutdowns of Windows.
How to Resolve the Windows PC Randomly Shuts Down Error?
The following methods can be used to fix the stated problem:
- Check power supply
- Modify advanced power settings
- Perform clean boot
- Run SFC scan
- Disable fast startup
- Run DISM scan
- Perform startup repair
Let’s explore all the methods one by one!
Fix 1: Check Power Supply
Firstly, check if your computer is getting hot. To prevent overheating, ensure the power supply is properly connected. If you are on a laptop, check if the battery is installed properly. Because sometimes, when the battery is not installed properly or the battery gets damaged, it results in a random shutdown.
Fix 2: Modify Advanced Power Settings
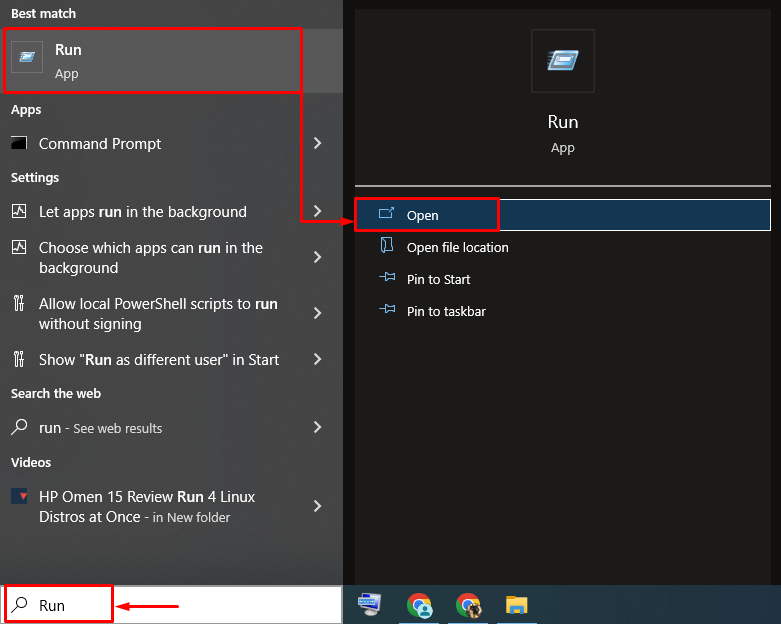
Modify the power settings to fix the stated problem. For that reason, open the “Run” app via the Start menu:
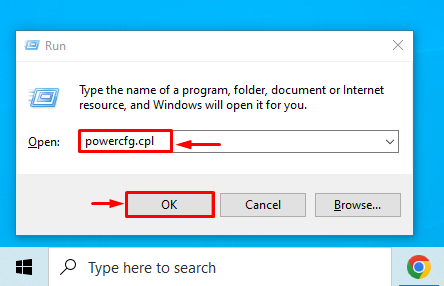
Type “powercfg.cpl” and hit the “OK” button to open “Power Options”:
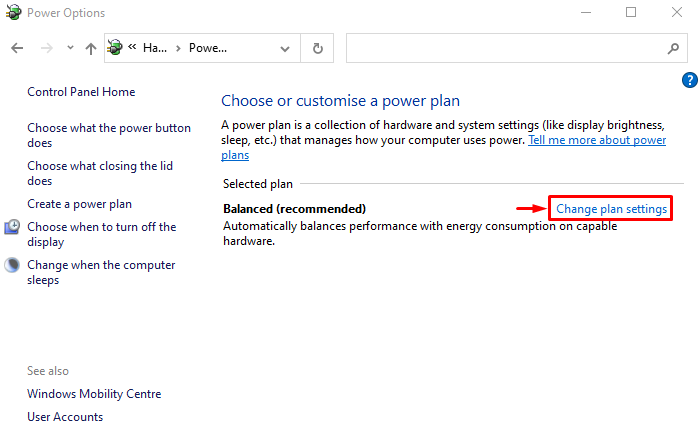
Click on “Change plan settings”:
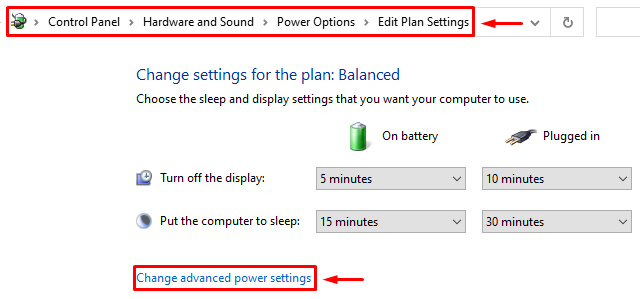
Left click on the “Change advanced power settings” options:
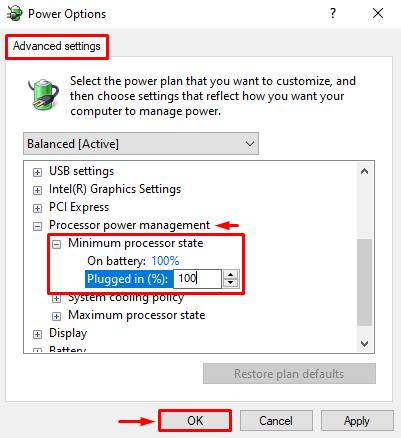
Expand the “Processor power management” section. Also, expand the “Minimum processor state” and set “On battery” and “Plugged In” to “100%”:
Restart windows after saving settings.
Fix 3: Perform Clean Boot
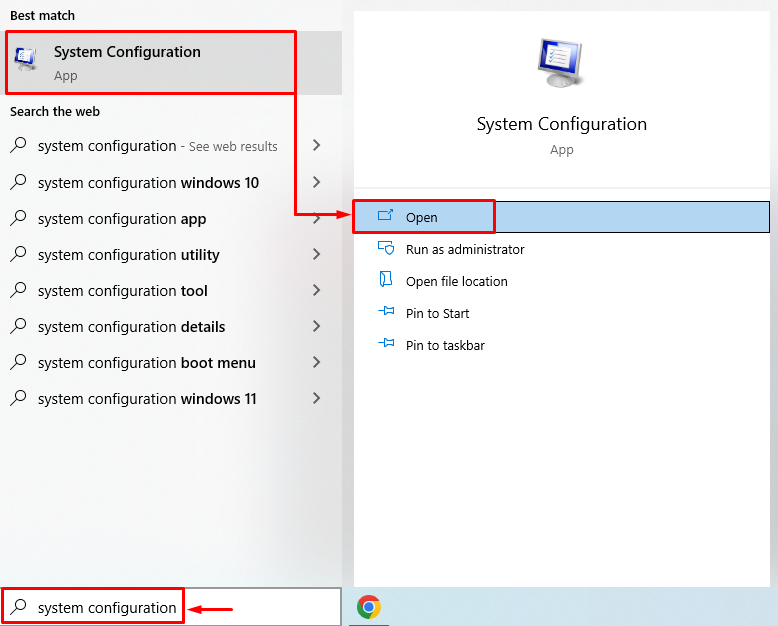
A clean boot helps in the fast and secure boot of Windows. Clean boot disables all the services except Microsoft. For that reason, open “System Configuration” via the Start menu:
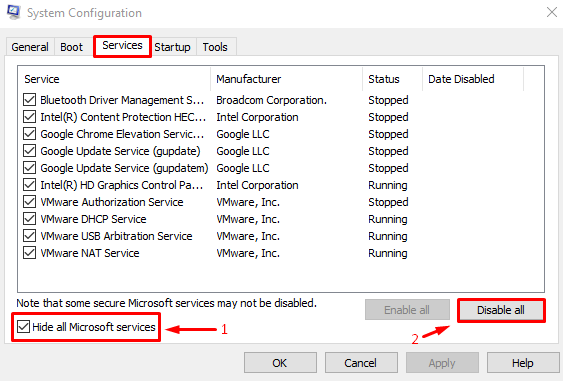
Navigate to the “Services” section. Tick the “Hide all Microsoft services” check box. Click on the “Disable all” option and hit the “OK” button:
Restart Windows after enabling the clean boot.
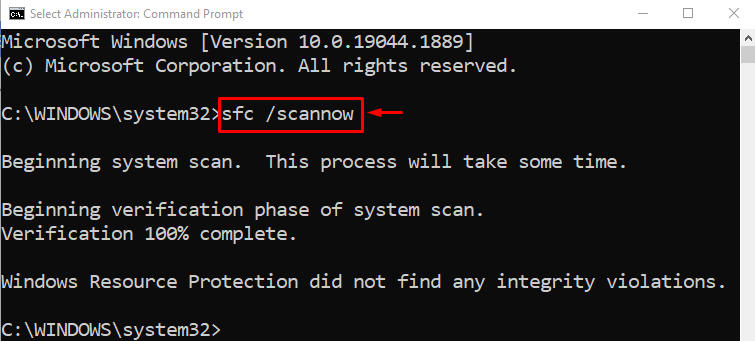
Fix 4: Run SFC Scan
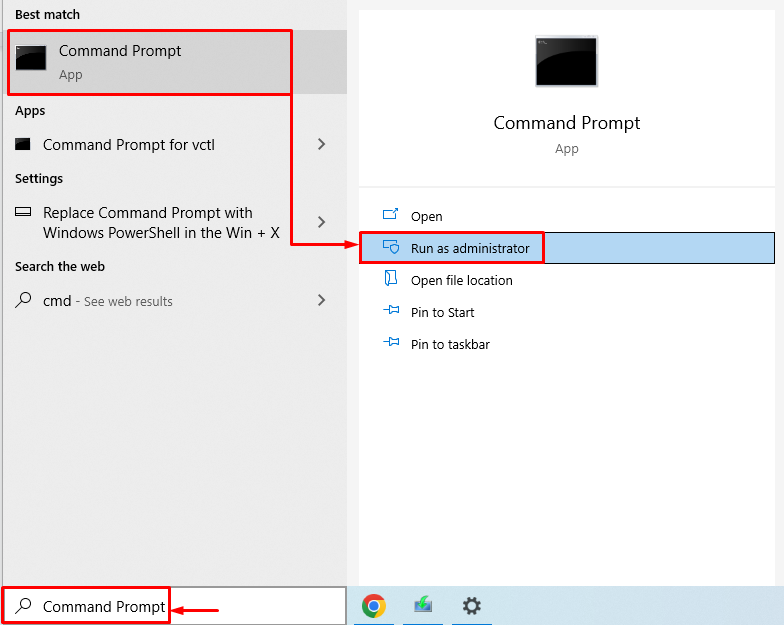
Run system file checker scan to fix the random shutdown of Windows. For that reason, open “CMD” via the Start menu:
Execute the below code in the console to run the system file checker scan.
After running the scanning system, the files have been repaired successfully.
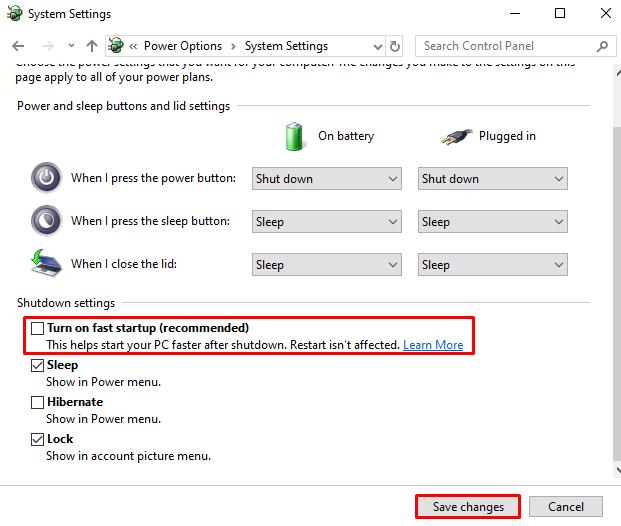
Fix 5: Disable Fast Startup
Disable “fast startup” to fix the random shutdown problem. To do so, launch “Run” via the Start panel. Type “powercfg.cpl” in the box and hit the “OK” button to open “Power Options”. Left click on the “Choose what the power buttons do”:
Left click “Change settings that are currently unavailable” to disable password protection:
Untick the “Turn on fast startup” box. Click on the “Save changes” button:
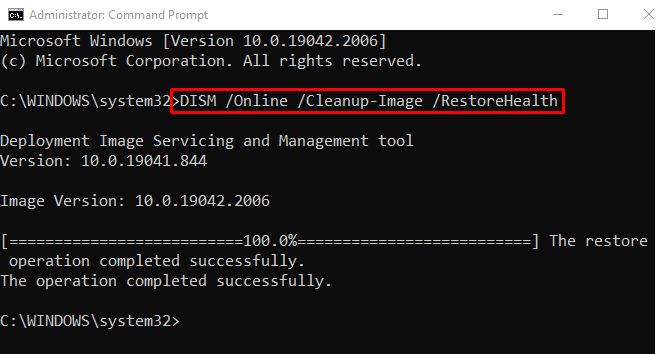
Fix 6: Run DISM Scan
Run the DISM scan to fix the stated problem. As DISM scan helps in restoring Windows image health. For that reason:
Launch the “Command prompt” with administrative privileges from the Windows Startup menu and run the below-given command:
When the DISM scan is completed, restart Windows.
Fix 7: Perform Startup Repair
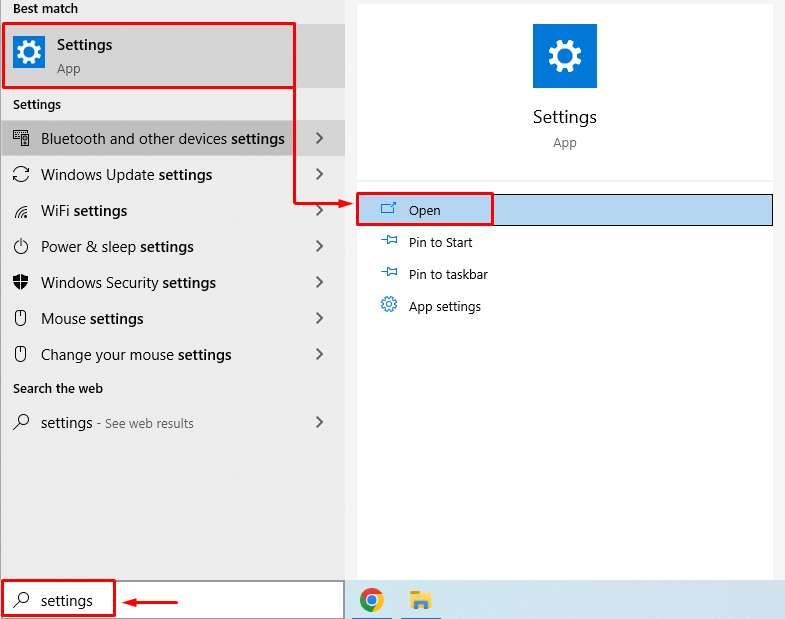
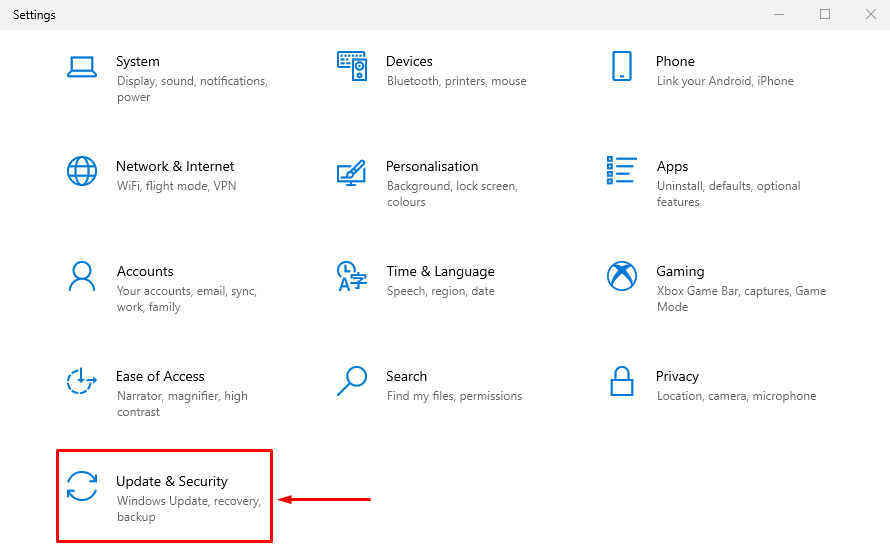
Perform Windows startup repair to fix the random shutdown problem. Startup repair helps Windows resolve all Windows problems. To do so, first, launch the “Settings” app from the Windows Start menu:
Choose “Update & Security” from the settings window:
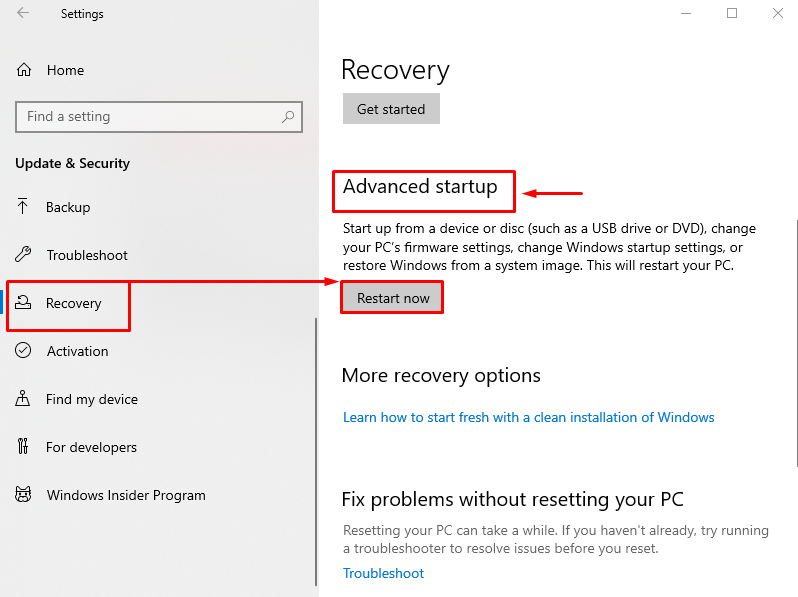
Navigate to the “Recovery” section. Click on the “Restart now” button to reboot Windows in recovery mode:
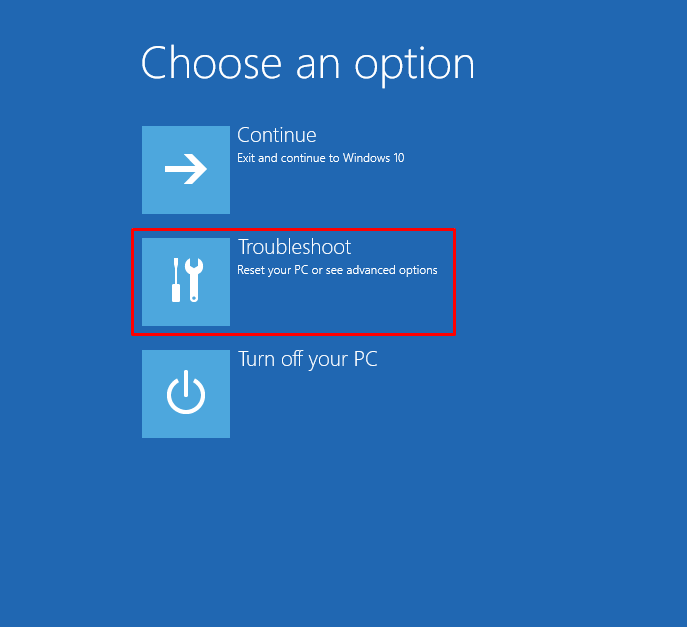
Select “Troubleshoot” from the given options:
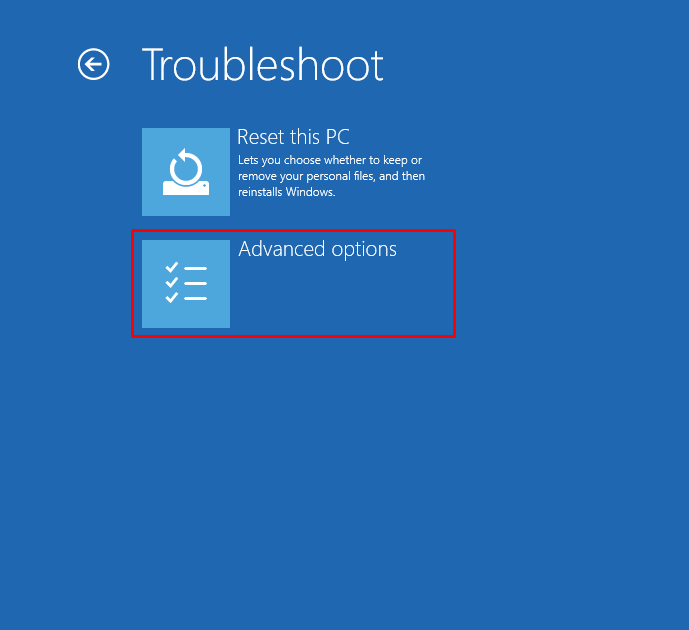
Click on the “Advanced options” from the “Troubleshoot” settings:
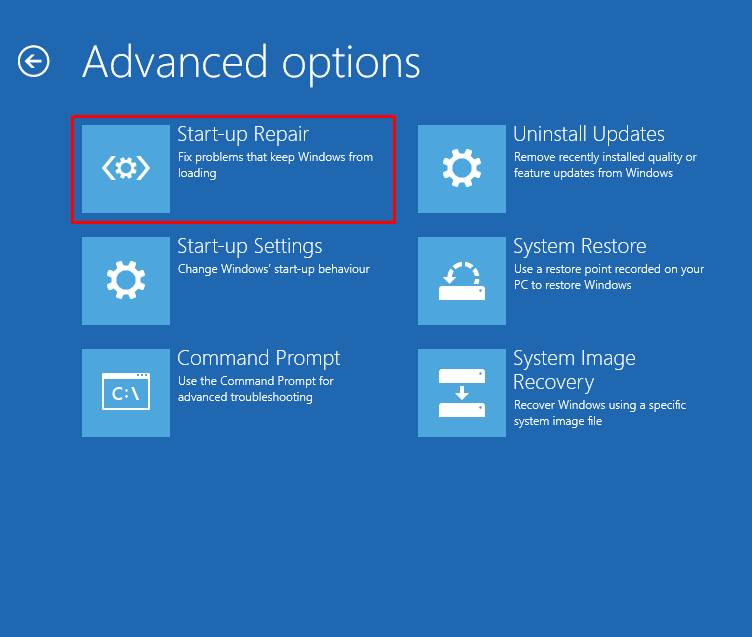
Select “Start-up Repair” from the “Advanced options” section:
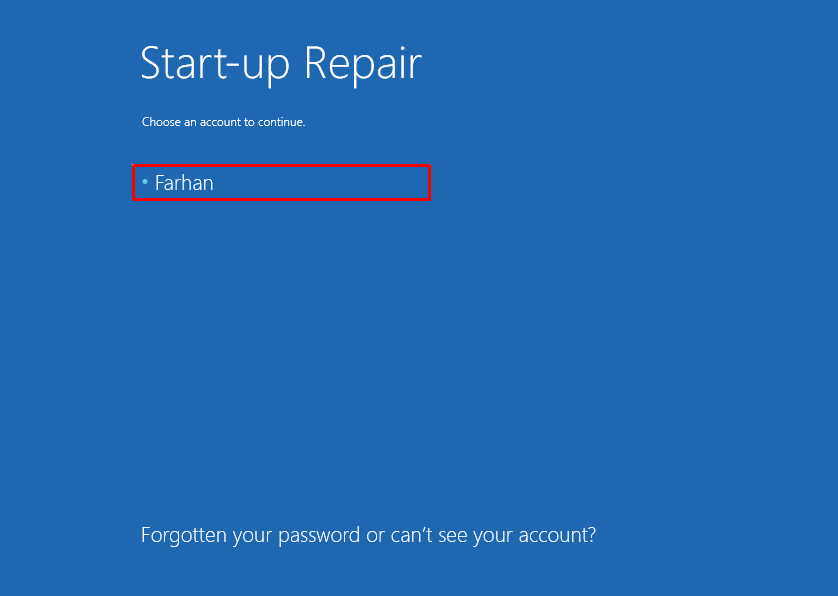
Choose a user account from the “Start-up Repair” window:
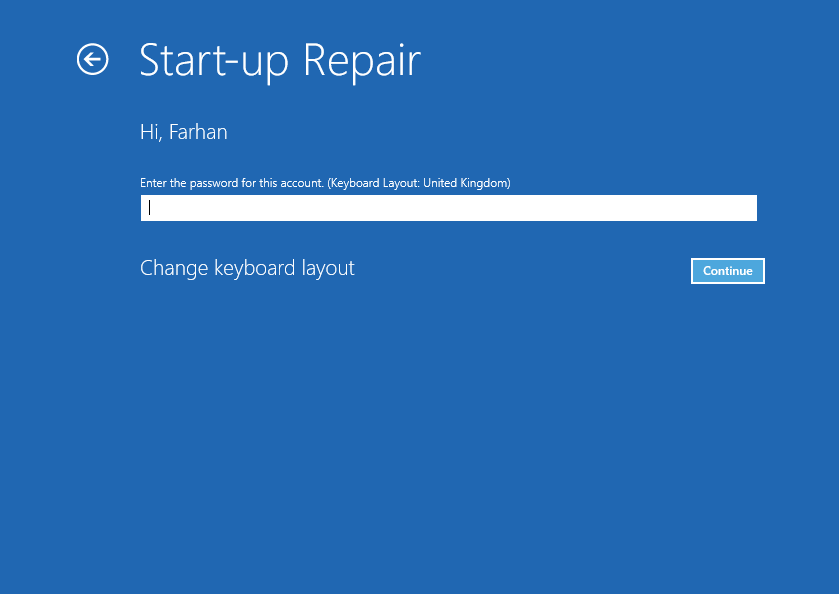
Enter the user password and hit the “Continue” button:
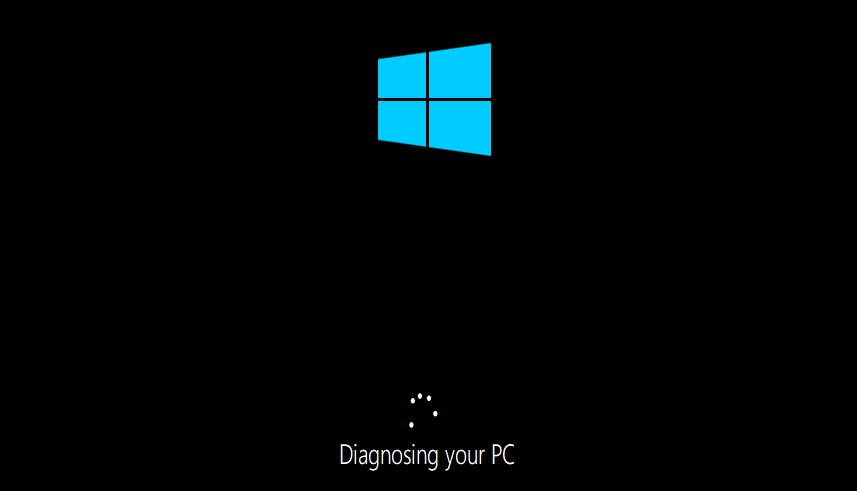
The startup repair has started to repair Windows:
Restart Windows when the troubleshooting process gets completed.
Conclusion
“Windows 10 pc randomly shuts down issue” can be resolved using various methods. These methods include checking the power supply, modifying advanced power settings, performing a cleaning boot, running an SFC scan, disabling fast startup, running a DISM scan, or performing startup repair. This blog has provided several methods to solve the “PC Randomly Shuts Down” Issue.

