Weaviate is built on a schema-driven approach, representing the data as entities and their relationships. It utilizes the word embeddings to transform the textual data into high-dimensional vectors which enables the similarity-based searches and contextual recommendations.
The best way to learn Weaviate is a hands-on approach. In this tutorial, we will show you how to configure a Weaviate cluster using Docker and Docker Compose.
Requirements:
In this tutorial, we will demonstrate the installation methods and process using the following:
- An Ubuntu system (22.04)
- A sudo or root user
Installing Docker on Ubuntu
The first step is to install Docker and Docker Compose on Ubuntu. Start by refreshing the system repositories as follows:
Once updated, run the following command to remove any conflicting packages that are associated with Docker or Docker components:
Next, install the packages to allow APT to download the packages over the HTTPS protocol:
In the next step, add the Docker’s official GPG key with the following command:
curl -fsSL https://download.docker.com/linux/ubuntu/gpg | sudo gpg --dearmor -o /etc/apt/keyrings/docker.gpg
sudo chmod a+r /etc/apt/keyrings/docker.gpg
Once imported, run the following command to setup the repository:
"deb [arch="$(dpkg --print-architecture)" signed-by=/etc/apt/keyrings/docker.gpg] https://download.docker.com/linux/ubuntu \
"$(. /etc/os-release && echo "$VERSION_CODENAME")" stable" | \
sudo tee /etc/apt/sources.list.d/docker.list > /dev/null
Finally, update the system repositories and install Docker and associated components as follows:
sudo apt-get install docker-ce docker-ce-cli containerd.io docker-buildx-plugin docker-compose-plugin
This should download the Docker engine, Docker compose, and all associated packages.
Configuring Weaviate
Once we have Docker on our machine, we can configure the docker-compose.yml file which we will use to launch the Weaviate cluster.
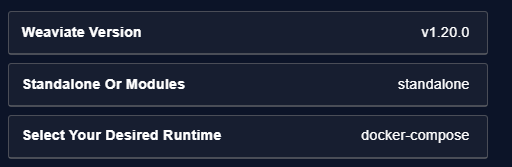
Luckily, Weaviate provides us with a graphical-based configurator that allows us to select the modules and features of Weaviate that we wish to include.
Open your browser and navigate to the following link:
https://weaviate.io/developers/weaviate/installation/docker-compose
Locate the configuration tool and follow the procedure by selecting the tools and features that you wish to include in your Weaviate cluster.
Once completed, you will get the commands to download the docker-compose.yml as shown in the following example:
The previous command downloads a standalone copy of the Weaviate cluster with no modules. You can check the file with your editor to view the options on the container.
You should get an example configuration as follows:

The next step is to start the Docker container. We can use the command as follows:

Once started, you can use the API clients such as cURL to ping the container on port 8080.
Conclusion
You learned how to use the Weaviate configurator to create a basic Weaviate standalone cluster using the Docker Engine.