Understanding Variables in Botpress
In Botpress, variables are used to store and manipulate the data during chatbot interactions. They act as placeholders to retain an information that is received from the users, system variables, or results of calculations, making the conversation more context-aware and dynamic. Variables help the chatbots to remember the user input, track states, and deliver personalized responses based on stored data.
When a user interacts with a chatbot, their inputs and relevant information can be saved as variables, allowing the chatbot to reference and use that data later in the conversation. This capability enables the developers to create more intelligent and interactive chatbots that provide relevant responses and adapt to user preferences over time.
For example, we can use the variable to store the data or information like name, email address, or preferences. The chatbot can then use this information to tailor responses, offer personalized recommendations, or perform actions based on the stored data.
Variable Data Types in Botpress
Before we dive into creating variables, let’s get familiar with the different data types that are offered by Botpress:
1. String: Strings represent the text data and can contain any combination of numbers/integers, letters, or special characters.
Example uses: Storing a user’s email address, storing a chatbot’s response to a user’s query about available discounts.
2. Boolean: Booleans can have two possible values: true or false.
Example uses: Storing whether a user has subscribed to the newsletter, storing whether the user has confirmed their order.
3. Number: Numeric variables are used to store the numerical data, either with or without decimal places.
Example uses: Storing a user’s age store the quantity of items that a user wants to purchase.
4. Date: Date variables store specific dates or dates along with timestamps in ISO 8601 format.
Example uses: Storing the last login date of a user, storing the date and time of a user’s scheduled appointment.
5. Object: Objects are collections of key-value pairs and are especially useful when dealing with structured data.
Example uses: Storing user preferences for communication channels, storing the data obtained from an external API call.
6. Array: Arrays are collections of similar variables which can include strings or even objects.
Example uses: Storing a list of products in the user’s shopping cart, storing a set of frequently asked questions.
7. List: A collection of items where each item can be chosen from a predefined set of values.
Example uses: Storing user preferences for language selection, storing a list of available payment methods.
8. Pattern: Pattern variables use Regular Expressions (Regex) to store specific patterns and can match certain words or numbers.
Example uses: Storing valid coupon codes for applying discounts, storing special keywords that trigger specific bot responses.
With this understanding of data types, let’s now explore how to create variables in Botpress.
How to Create Variables in the Botpress Studio: A Step-by-Step Guide
Botpress Studio offers a simple and efficient way to create variables to store and manipulate the data during chatbot interactions. Follow these steps to add variables to your chatbot’s flow:
Step 1: Open the Desired Flow
Launch the Botpress Studio and open the chatbot project. Navigate to the flow where you want to create the variable or create a new flow specifically for this purpose.
Step 2: Access the Inspector Panel
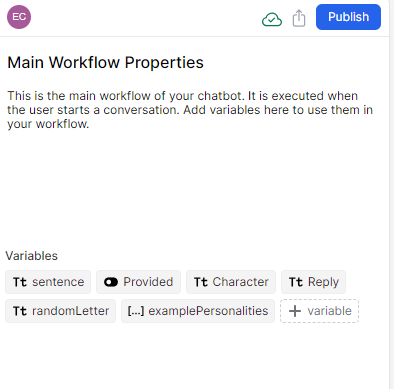
Click on an empty space in the main workflow canvas. This action opens the inspector panel for the main workflow.
Step 3: Locate the Variables Section
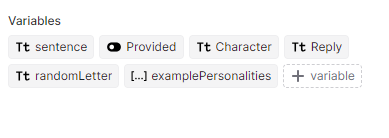
Within the inspector panel, locate the “Variables” section under the “Workflow Properties”.
Step 4: Add a New Variable
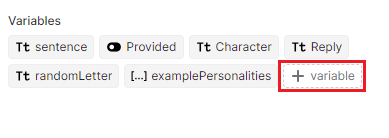
Under the “Variables” section, click on the “+ variable” button. This opens the “Add Variable” window.
Step 5: Specify the Data Type
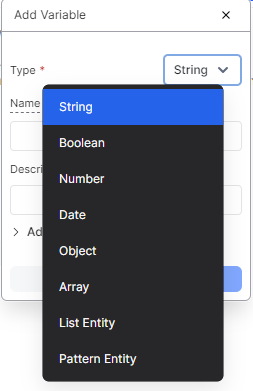
In the “Add Variable” window, specify the data type for the variable first. You can choose from various data types like string, Boolean, number, date, object, array, list, or pattern.
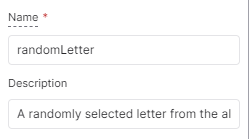
Step 6: Define the Name and Description
Provide a meaningful name for your variable in the “Name” field and add a brief description of the variable’s purpose in the “Description” field.
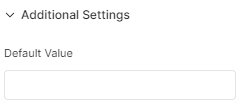
Step 7: Set a Default Value (Optional)
If needed, you can set a default value for the variable in the “Default Value” field under the “Additional Settings”.
Step 8: Create the Variable
Once you specified all the necessary details, click on the “Add” button.
Step 9: Use the Variable
You can now use this variable in different nodes of your chatbot’s flow to store and access the data, personalize the responses, or make dynamic decisions based on user inputs.
By following these steps, you can harness the power of variables in Botpress Studio and create more interactive and personalized chatbot experiences for your users. Once the variable is created, you can display it in a send message card using the “{{workflow.variable_name}}” or “@variable_name” syntax.
Tips for Using the Variables Effectively in Your Chatbot
- Identify Use Cases: Determine where the variables can enhance your chatbot’s functionality.
- Choose Data Types Wisely: Select appropriate data types (string, number, Boolean, etc.) for efficient data handling.
- Use Descriptive Names: Assign meaningful names to variables for better readability.
- Implement Conditional Logic: Leverage the Boolean variables for dynamic decision-making.
- Personalize User Responses: Use variables to personalize the interactions based on user data.
- Track User Context: Store and track the user inputs to maintain the conversation context.
- Errors Handling: Validate the user inputs using variables and provide error handling.
Conclusion
This blog discussed how variables are implemented in Botpress. We started by understanding the various data types for variables that are offered by Botpress. Step by step, we learned how to create the variables. We also discussed some tips for using the variables effectively. Leveraging the variables in Botpress Studio unlocks the potential for more intelligent and interactive chatbot experiences, delivering exceptional user engagement and satisfaction.