This post will guide you about:
Users in Oracle
A user in the Oracle database is an authorized account that can access and use the database. Each user has his credentials (username and password) to access the database. Whenever a user is logged into the database, a session is started in which they can access objects and perform actions for which they have privileges. These privileges are assigned to them after the user is created by the database administrator.
Note: Creating a new user is not the only thing, you should assign it a role and grant privileges to the user to ensure data security.
Let’s see commands to perform some actions related to users in Oracle:
Create a New User
Open SQL Developer or SQL PLUS utility and login to your database. Now, to create a new user in the database, use this syntax given below:
Note: In Oracle 21c, you have to use the prefix “c##” before the names of users, roles, and profiles.
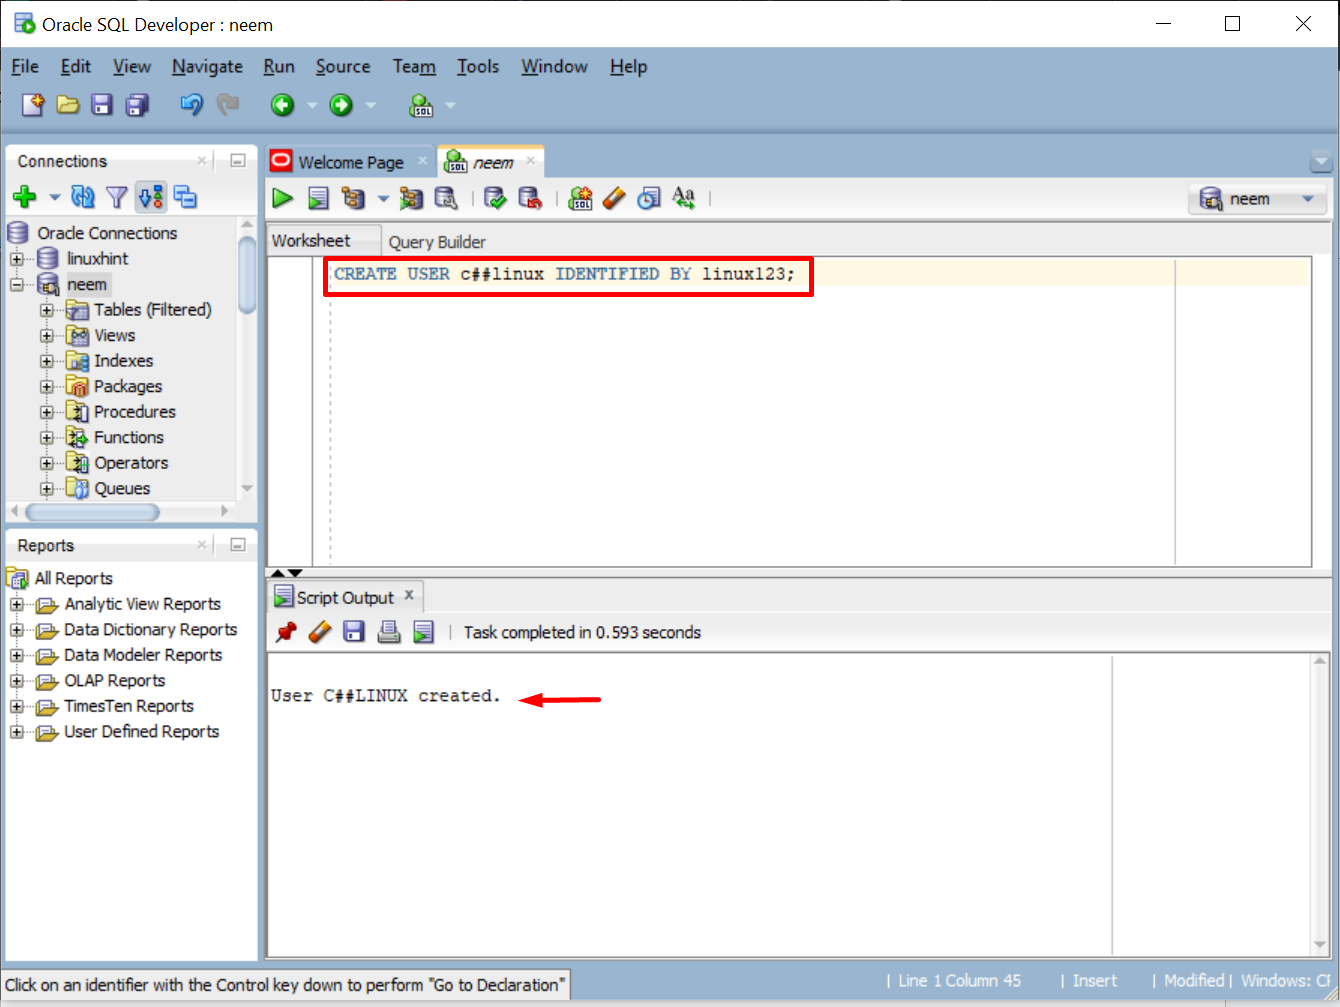
Provide the username and password in the syntax to create a new user. For this post, the username is “c##linux” and the password is “linux123”:
The output displays a success message on the creation of a new user:
The user is created, let’s see how to change the password for the new user if it is needed.
Modify the User’s Password
To change the password of a user, Oracle provides the “ALTER” statement. Use this syntax given below to modify the user password:
IDENTIFIED BY <new_password>;
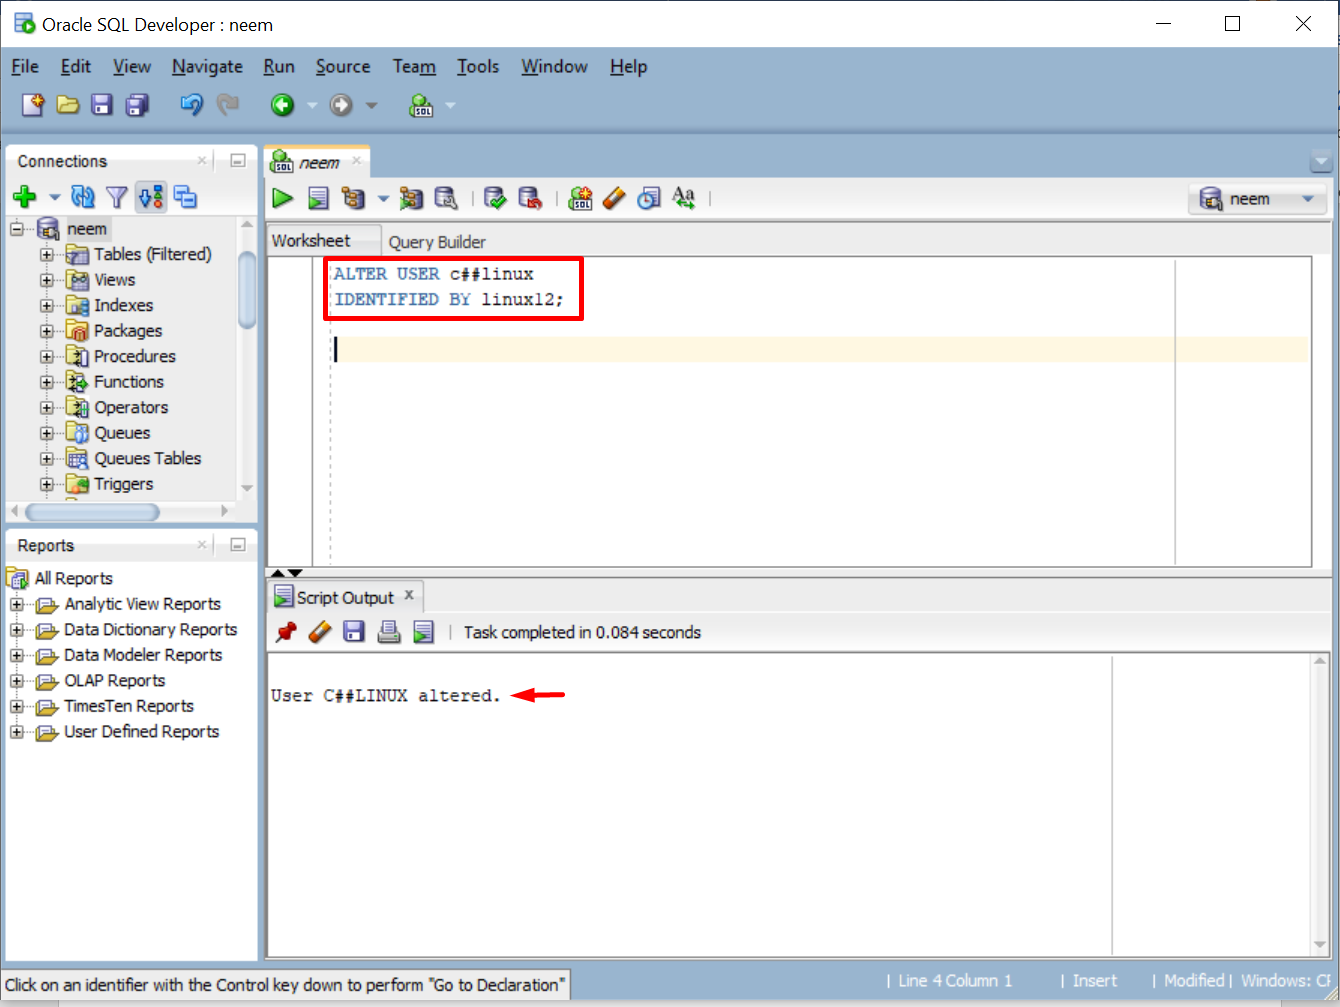
Specify the username and new password in the syntax above. In our case, the username is “c##linux” and the new password is “linux12”:
IDENTIFIED BY linux12;
The output shows a success message which means the password has been altered:
The password is modified. Let’s see how to display the list of all the available users in Oracle.
List all Users in Oracle
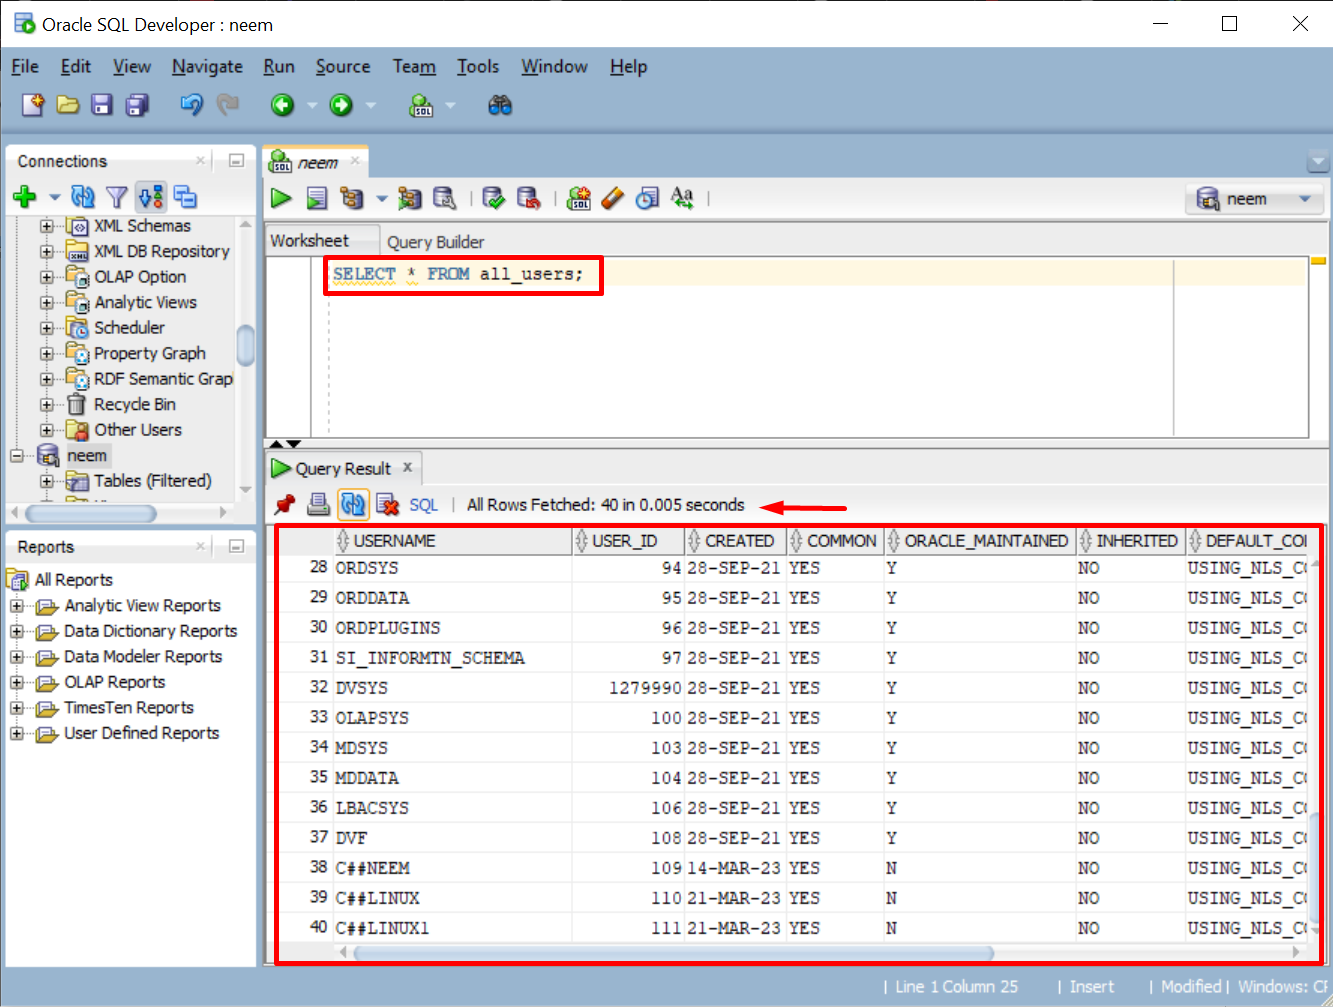
To display the list of all available users in Oracle, type this command and execute it:
The result will provide the list of all available users:
You have understood users in Oracle along with commands for creating, displaying, and modifying users. Let’s discuss roles in Oracle.
Roles in Oracle
Roles in Oracle are used to group privileges or other roles so that they can be assigned to users easily, instead of manually defining them individually for each user. Roles are usually created by database administrators, however, any other user with privileges can also create roles.
Let’s see a few necessary commands for roles in Oracle:
Create a New Role
To create a role in the Oracle database, use this syntax:
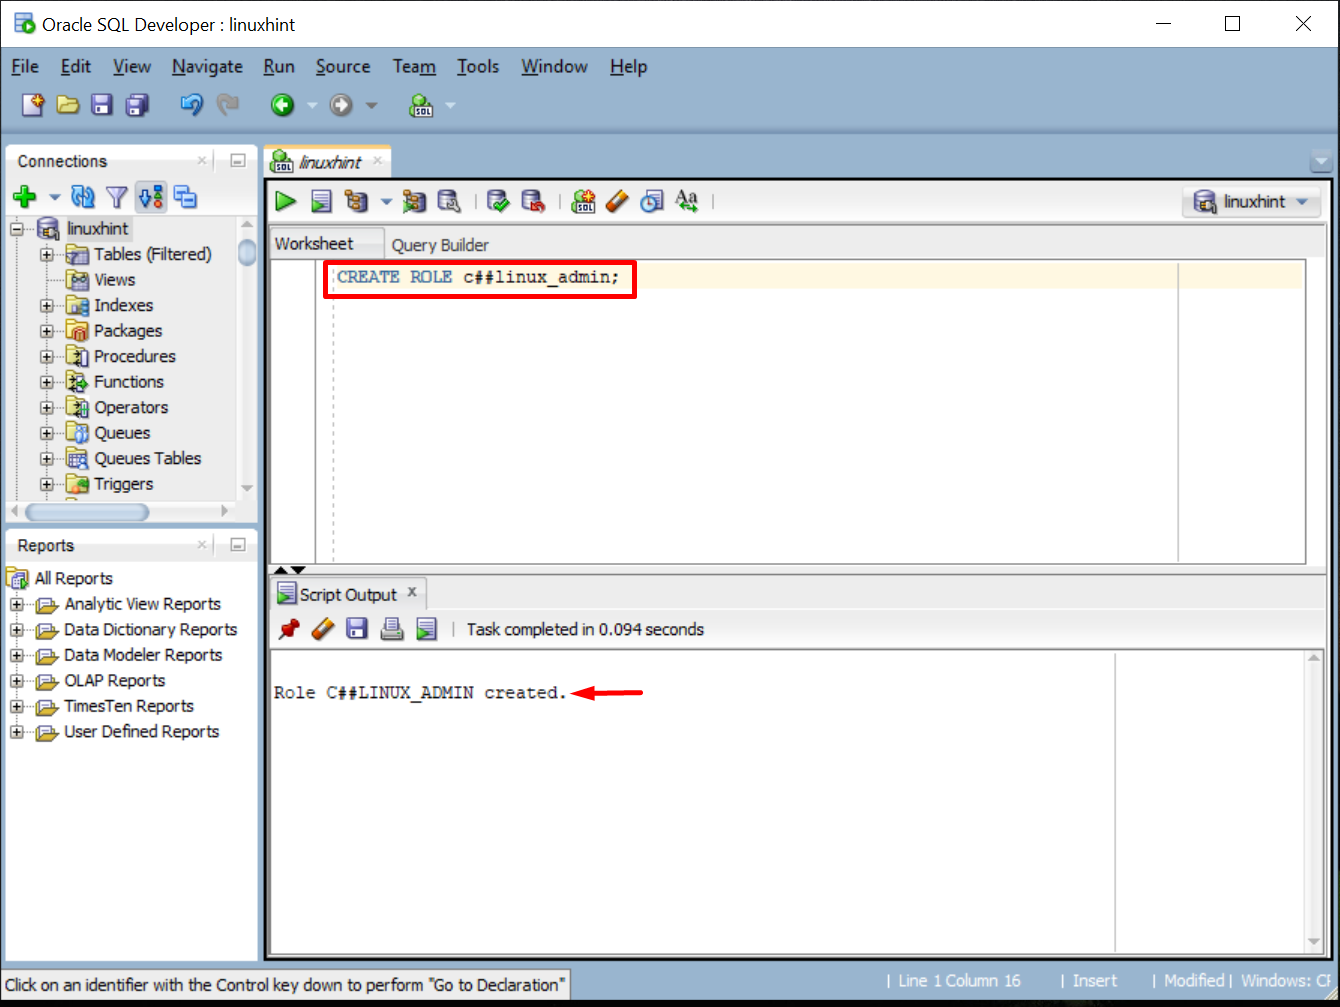
Make sure to provide the role name. Here in our case, it is “c##linux_admin”, so the command would become:
The result will return a success message on the creation of role:
Once the role is created, it’s time to grant privileges to the role.
Grant Privileges to the Role
To grant specific or all privileges to a role, use this syntax:
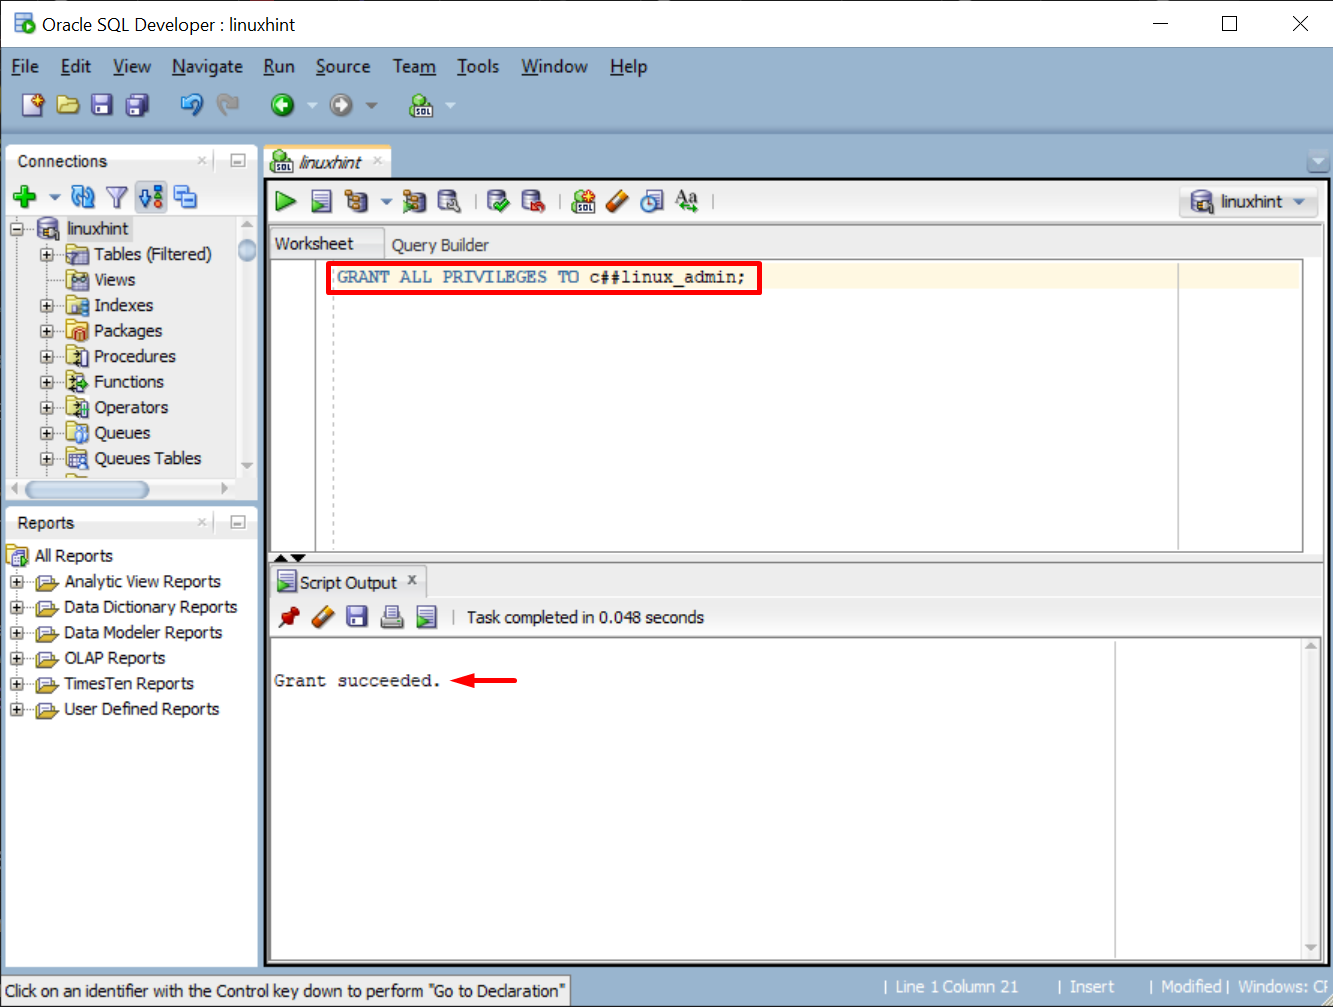
For this example, we will grant all privileges to the role named “c##linux_admin”. Type the command given below and execute it:
The output will display the message “Grant Succeeded”:
Once the privileges are granted, it’s time to assign roles to the user.
Assign the Role to a User
To assign the role to any user, use this syntax:
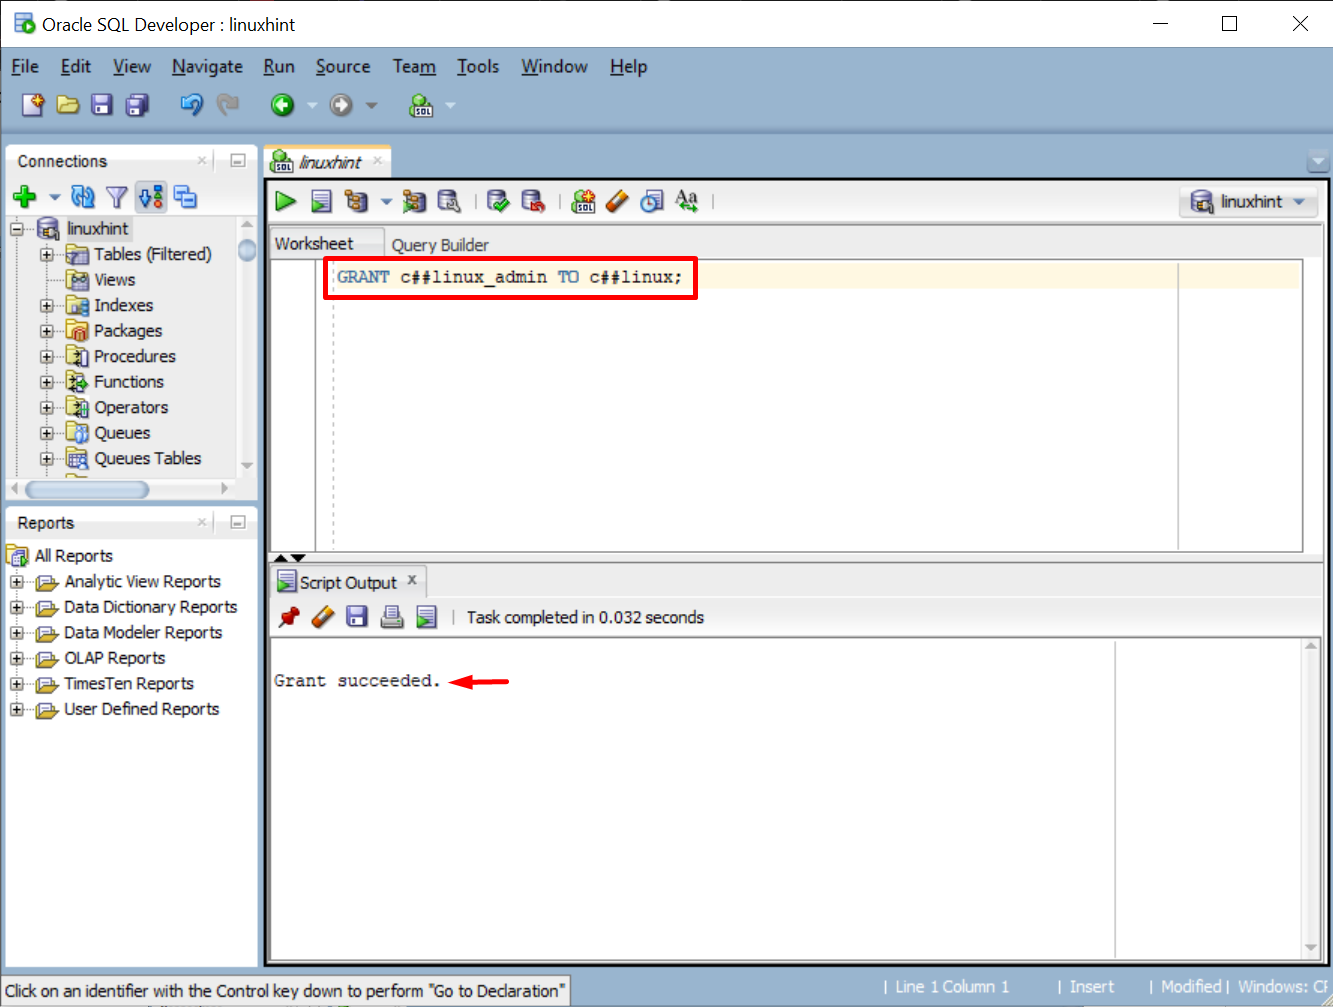
Write the role name and user name according to your database. For this example, our role name is “c##linux_admin” and the user name is “c##linux”:
The success message will appear when the role will be assigned to the user:
The role in Oracle is discussed. Now, it’s time to understand profiles in Oracle.
Profiles in Oracle
Profiles in Oracle are used to manage system resource allocation and password management policies for the database. If no profile is assigned to the user, the “default” profile (all resources are unlimited) is assigned to the user.
To create a policy in Oracle, this syntax is used:
<limit_name> <limit_value>
...;
Let’s see the commands for creating:
Profile to Manage Resources
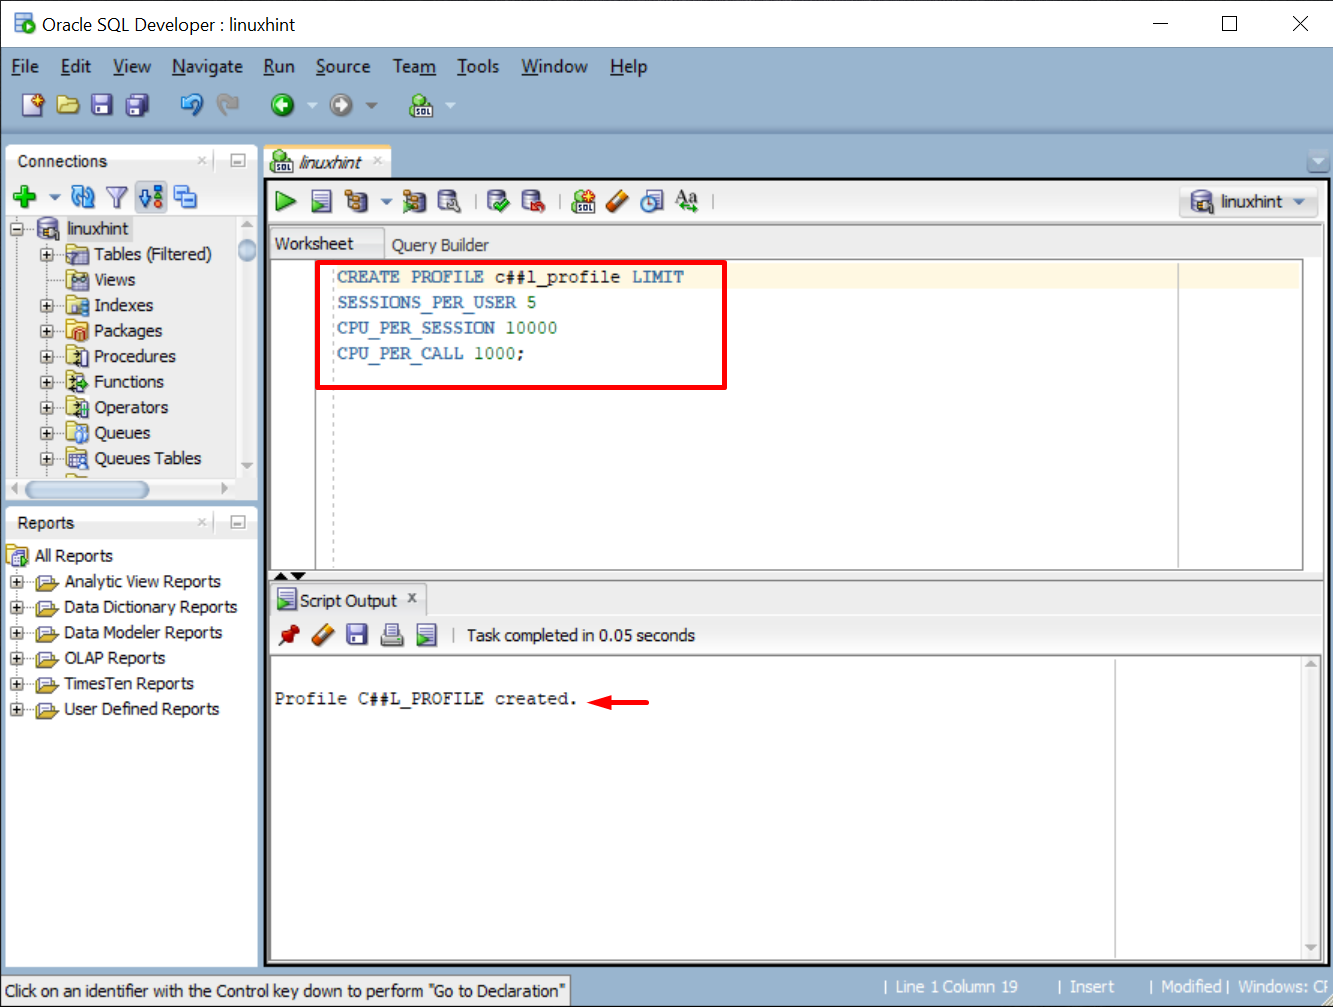
To create a policy for setting the limit on resources, such as CPU and Sessions, type this command, and make sure to change the profile name and resources you want to limit accordingly:
SESSIONS_PER_USER 5
CPU_PER_SESSION 10000
CPU_PER_CALL 1000;
Run the command and the output will display the message on the successful creation of the profile:
You have managed the resources allocation. Now, let’s see how to create a profile for password policies.
Profile to Manage Password Policies
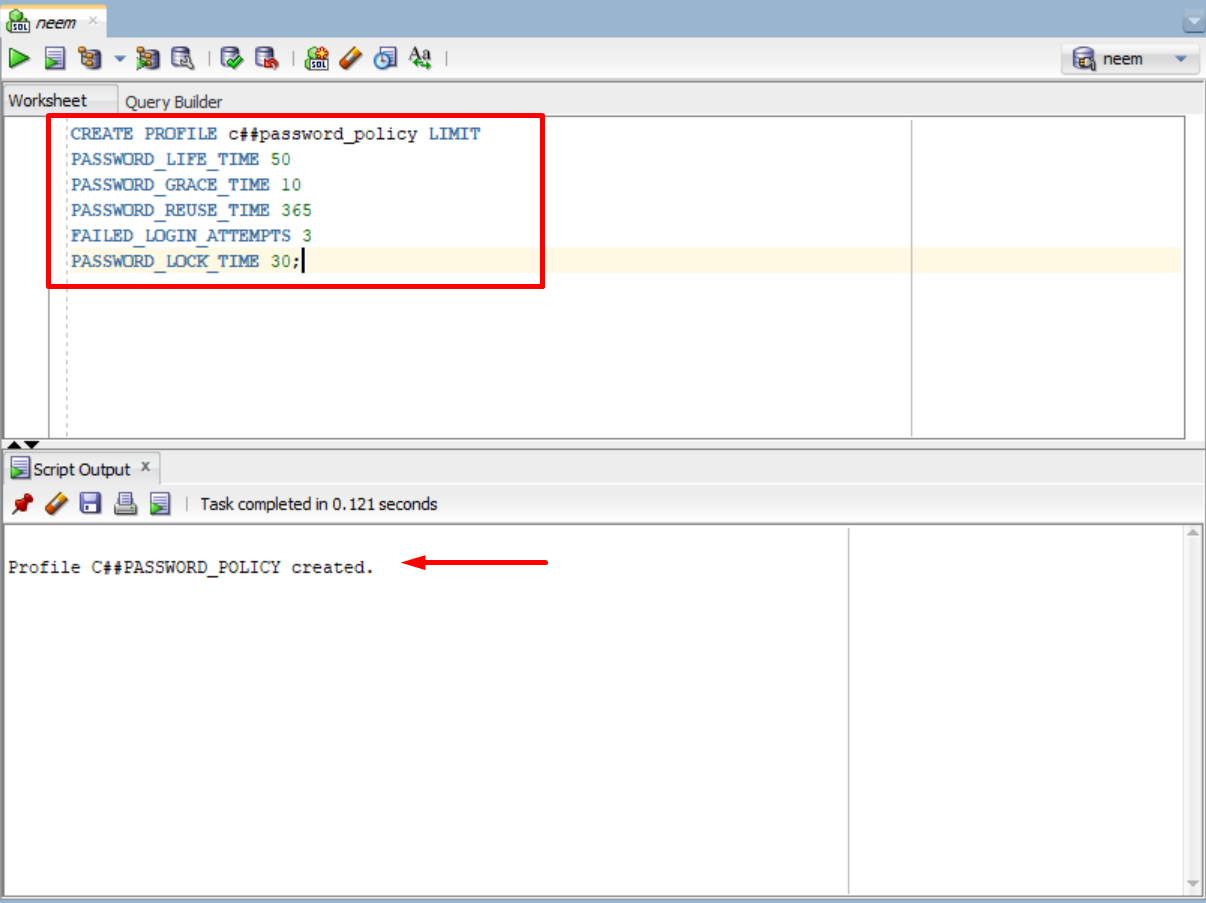
To create a password policies profile, which can be assigned to users for ensuring the password limitations, can be created using this command. Make sure to change the policy name and limit values:
PASSWORD_LIFE_TIME 50
PASSWORD_GRACE_TIME 10
PASSWORD_REUSE_TIME 365
FAILED_LOGIN_ATTEMPTS 3
PASSWORD_LOCK_TIME 30;
After the execution of the command, the result will show success message on the creation of password policy profile:
Once the profile is created, it should be assigned to a user.
Assign the Profile to a User
To assign a profile to a user, use this syntax:
PROFILE <profile_name>;
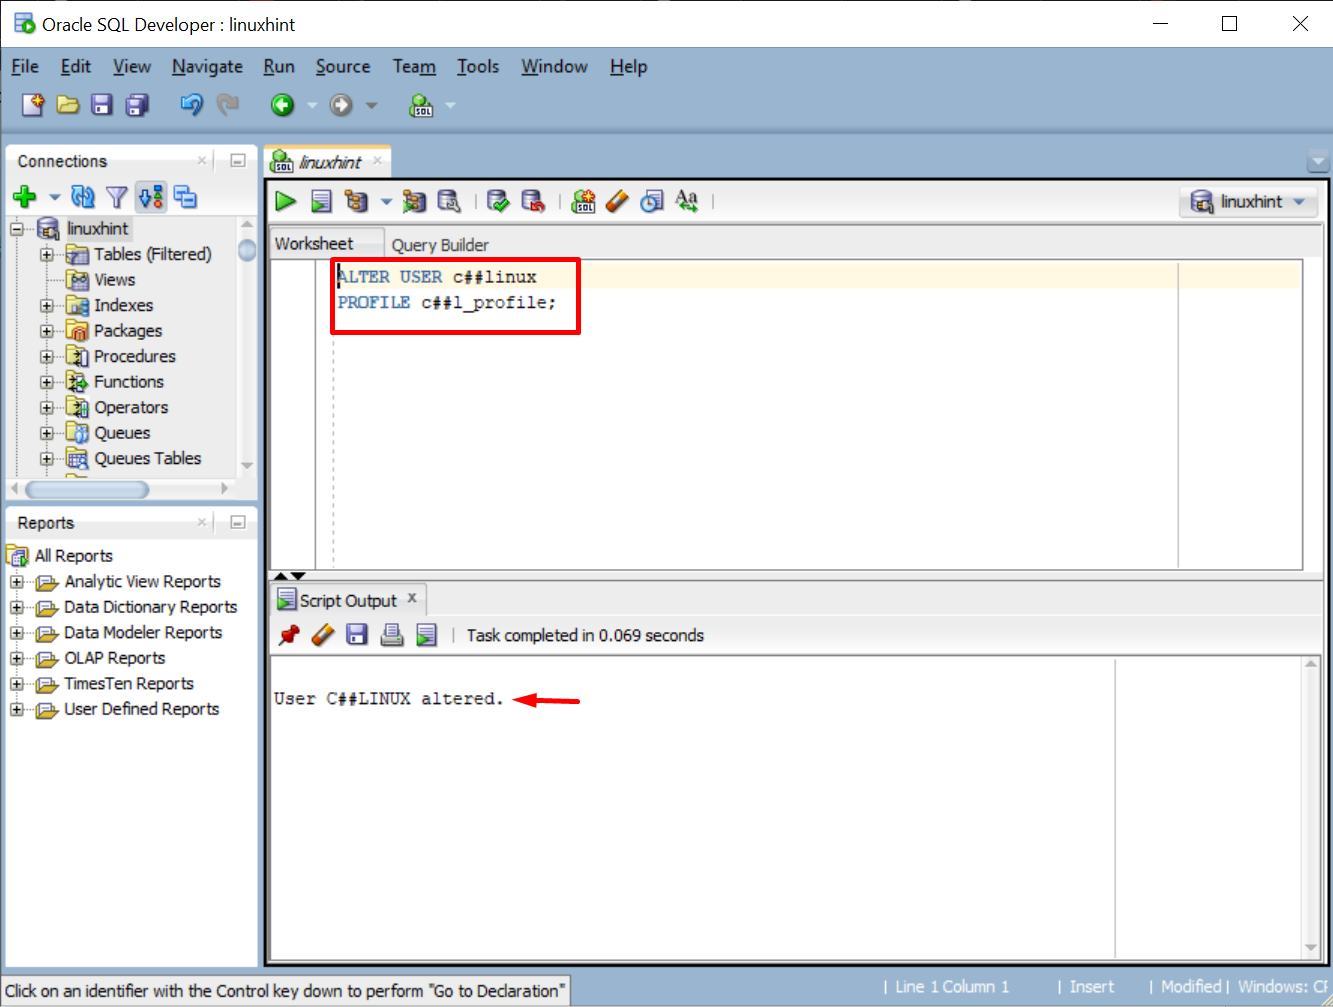
In this example, we have created a profile for resource management named “c##l_profile”. Let’s assign it to our user by typing this command:
PROFILE c##l_profile;
The result displays a message which indicated that the profile is assigned to the user:
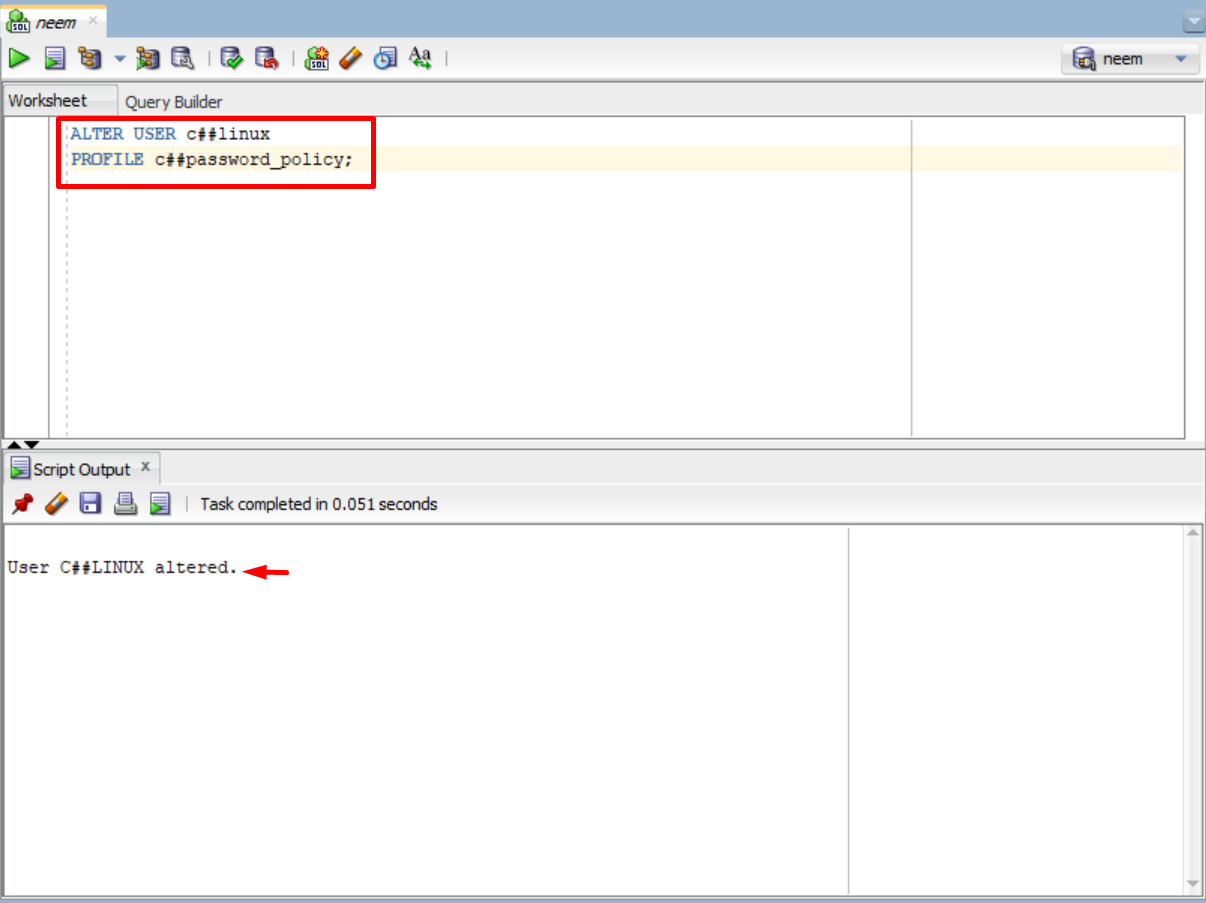
We have created a profile for defining password policies named “c##password_policy”. Let’s assign it to our user by typing this command:
PROFILE c##password_policy;
Once the command will execute, the profile will be assigned to the user:
You have discussed the usage of Users, Roles, and Profiles in Oracle.
Conclusion
Users, Roles, and Profiles are essential to maintain Oracle Database security. The user is an authorized account that can access the database. Roles are used to group privileges or other roles, which can be assigned to users. Profiles are used to manage system resource allocation and password management policies for the database. This post discussed the usage of Users, Roles, and Profiles in Oracle.

