Linux network namespaces are a Linux kernel feature allowing us to isolate network environments through virtualization. For example, using network namespaces, you can create separate network interfaces and routing tables that are isolated from the rest of the system and operate independently.
To understand namespaces easily, it is worth saying Linux namespaces are the basis of container technologies like Docker or Kubernetes.
For now, Linux includes 6 types of namespaces: pid, net, uts, mnt, ipc, and user. This tutorial focuses on Linux network namespaces.
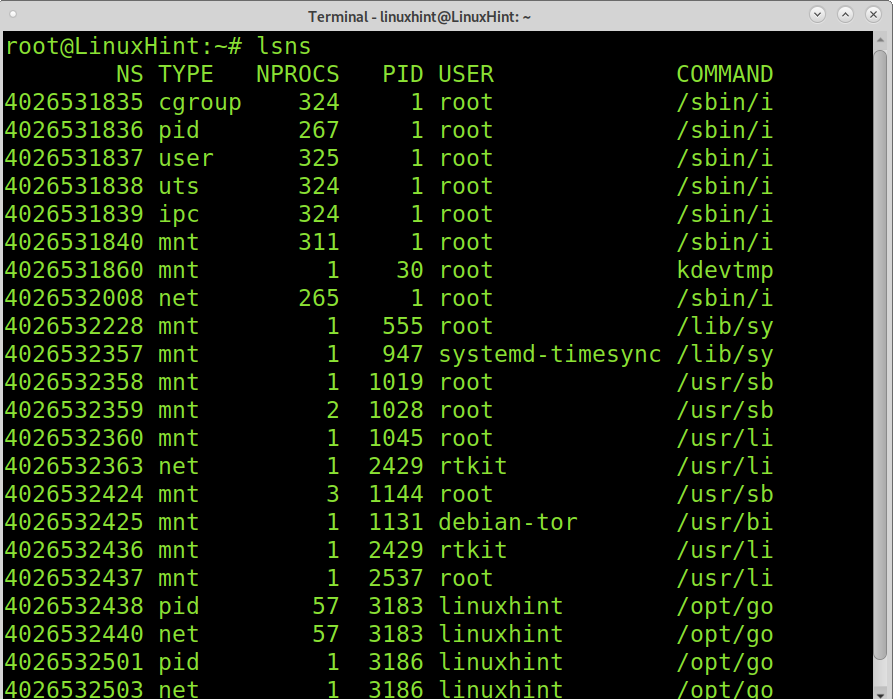
If you command lsns, it will display all existing namespaces in your system, as shown in the image below.
Note: The namespace used for this tutorial is named linuxhint; replace it with your namespace name.
Adding a Linux network namespace:
Managing network namespaces is done using the ip netns command followed by the proper options.
To create a network namespace in Linux, you need to execute the ip command followed by the netns (network namespace) option, the add option, and the new namespace name, as shown in the following screenshot. Then, the ip netns command can be run to show the existing network namespaces only. Remember to replace linuxhint with the name of your namespace.
ip netns
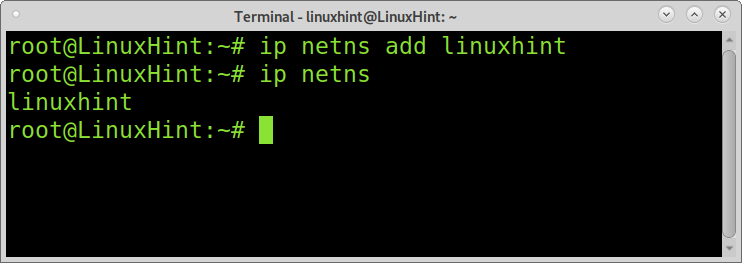
As you can see, a new namespace was created named linuxhint.
Network namespaces have their own interfaces, routing tables, loopback interface, iptables rules, etc. You need to create these resources for your namespace.
Creating loopback interface for the namespace:
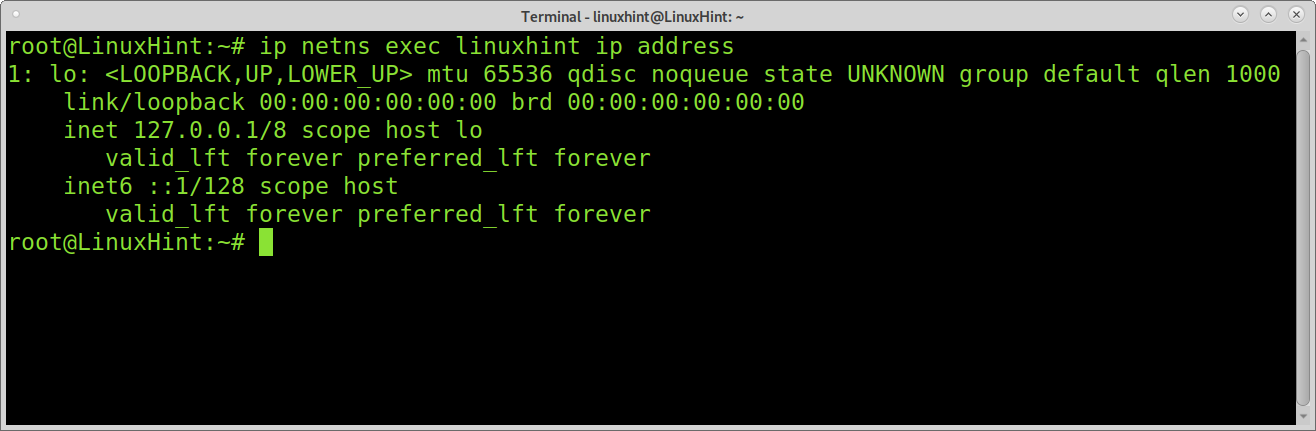
To run commands within a network namespace, the syntax is the following.
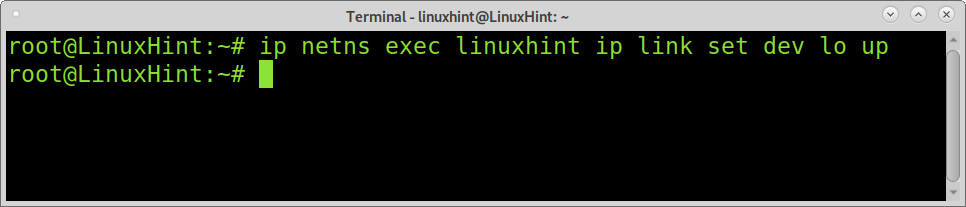
By default, the loopback interface is down. You need to execute the following command; as explained previously, the command below executes the ip link set dev lo up within the chosen namespace.
You can check if your loopback interface was added properly by running the following command:
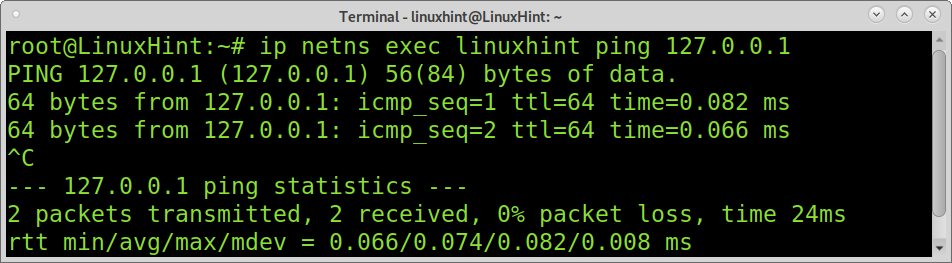
You also can ping your namespace loopback interface to test it, as shown below.
Adding network interfaces to your namespace:
You can associate a hardware network card to your namespace, or you can add virtual network devices. By adding virtual network interfaces, you can allow connectivity between different namespaces. Virtual network devices are named veth (Virtual Ethernet Device).
To create a virtual network ethernet device, run the following command, where enp2s0 is the for the new device and v-peer1 its arbitrary name, replace it with yours.

Now assign the virtual device to your namespace by running the command below.

Assign an ip address to the new network device as shown below.

By default, the network device is down; you need to set it up. To set your virtual network device up, run the following command.

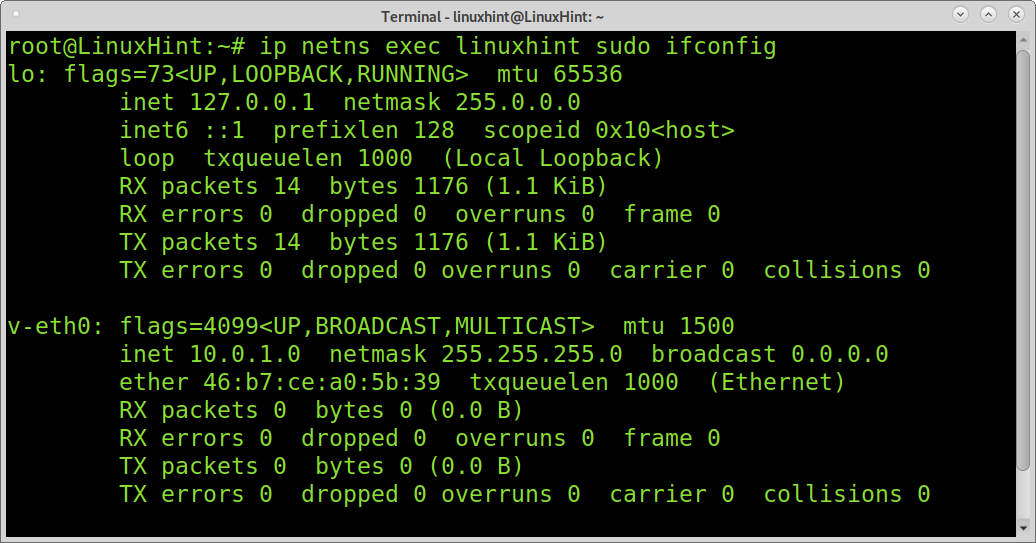
As you can see in the screenshot below, the virtual device was added properly.
The example below shows how to assign a physical network card to your network namespace. In this case, the physical network card is the enp2s0.

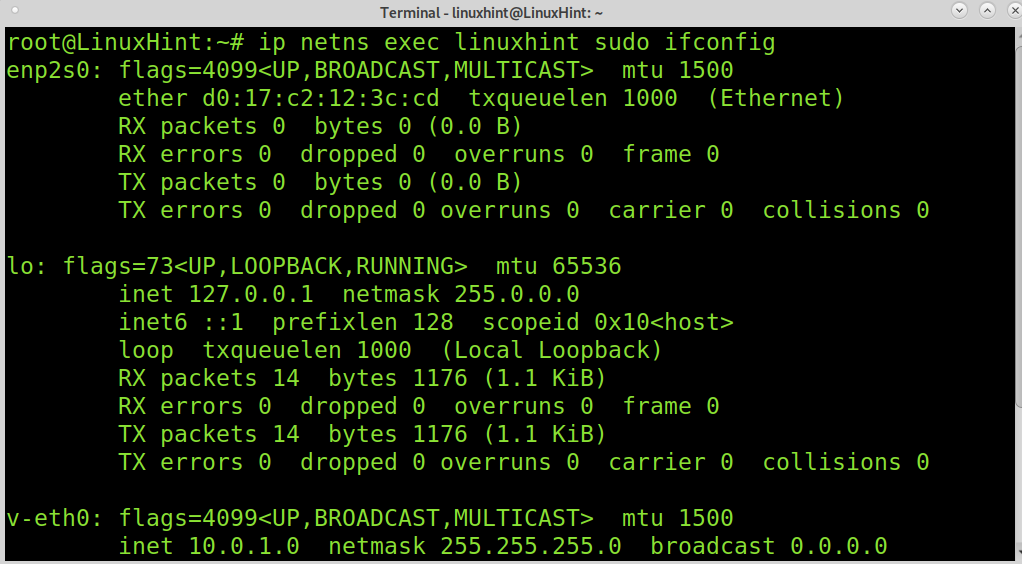
As you can see by running the example below, the network card was added properly. You can assign an IP address using the same commands explained previously.
As explained previously, each namespace has its own route table, IP, and more, including its own firewall rules. Adding firewall rules to your namespace is simple; just run the commands after ip netns exec linuxhint, as shown below. The example below will list iptables policies if existing.

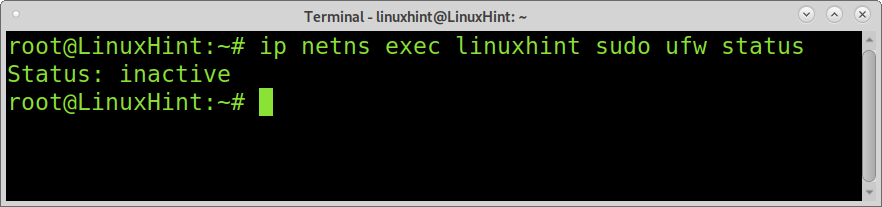
The following example shows the same but using UFW (Uncomplicated Firewall) instead of iptables. In this case, the firewall is reported as disabled.
Removing a Linux Network Namespace:
Removing network namespaces is pretty simple, like when adding them.
To remove a namespace, run the command below, replace linuxhint with your namespace.
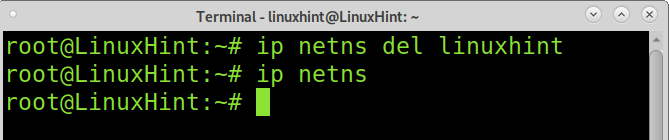
As you can see, after running ip netns, no network namespace was shown; it was successfully removed.
Conclusion:
Linux namespaces are a formidable method to isolate processes, filesystems, networks, and more. This functionality allows us to execute instances independently. This is extremely useful for security purposes. Namespaces are containers whose contents are fully isolated from the rest of the system, including from other namespaces. In this way, we can run different services in different containers. If a namespace gets compromised under an attack, the rest of the system remains safe. Using Linux namespaces, you can offer multiple clients their environment; this feature is also great for testing purposes or to run software whose origin is suspicious; in case of executing a malicious code, only your namespace will be affected, leaving your device safe.
I hope this tutorial on Linux namespaces was useful. Keep following Linux Hint for more Linux tips and tutorials.