You can use the official Synology Virtual Machine Manager app to create a virtual machine, install any Linux distribution, and work on your development projects on the virtual machine. You can do the same in a Docker container using the official Synology Docker app. Although developing on a virtual machine is much more flexible than developing on a container (as a virtual machine is like a full-fledged computer), a virtual machine requires a lot of memory and system resources than a Docker container.
If your Synology NAS does not have enough memory or you don’t want to upgrade the memory of your Synology NAS, then you can use Docker to create a Linux development environment on your Synology NAS.
In this article, I am going to show you how to create a custom Ubuntu 20.04 LTS Docker image, create a container from it to set up a Linux development environment using Docker on your Synology NAS, and do remote development there with Visual Studio Code. So, let’s get started.
Things You Will Need
To follow this article, you need to have:
- Synology NAS with at least 4 GB or more memory installed
- Docker app installed on your Synology NAS
- Computer or laptop to connect to the Web GUI of the Synology NAS
- Internet connection on your Synology NAS and computer/laptop
If you need any assistance on installing the Docker app on your Synology NAS, then you may read the article Running Docker Containers on Synology NAS at LinuxHint.com.
Creating a Projects Shared Folder
I would like to keep all my projects in a separate folder to keep things organized. So, I am going to create a new shared folder Projects on my Synology NAS. If you don’t have a separate folder to keep your projects yet, you can do the same.
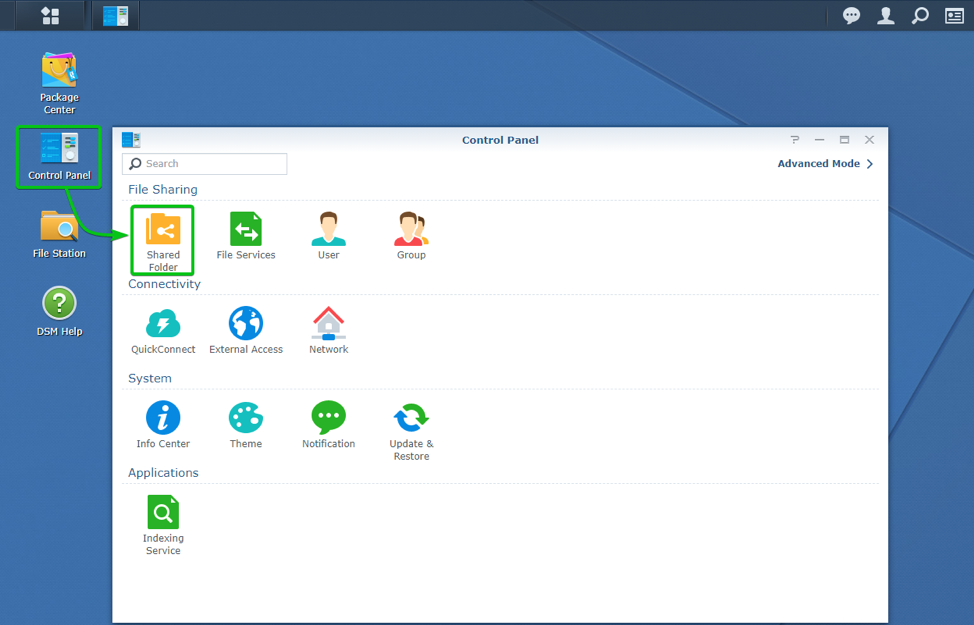
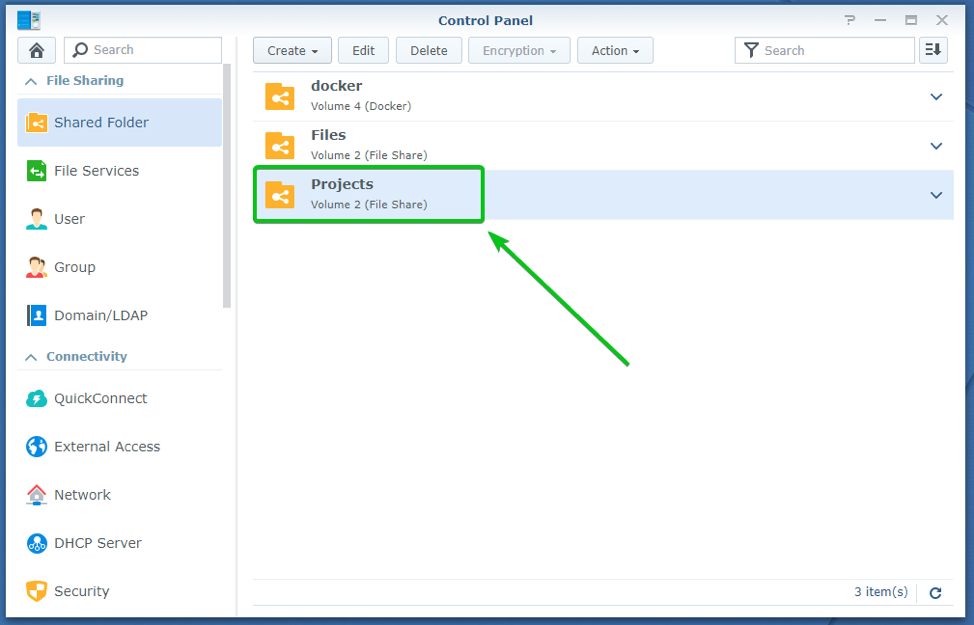
To create a new shared folder Projects, click on Shared Folder from the Control Panel app, as marked in the screenshot below.
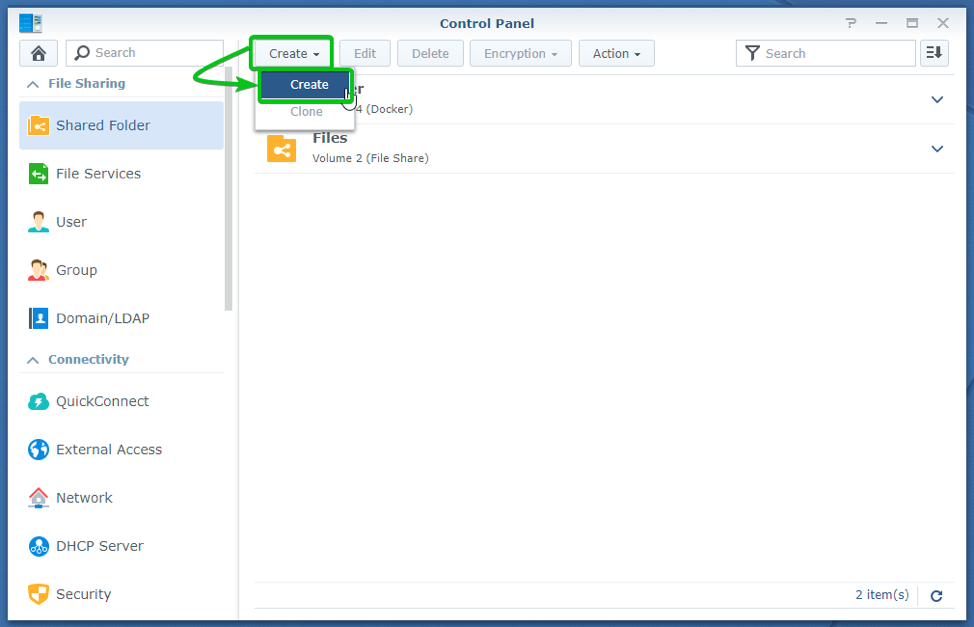
Click on Create > Create, as marked in the screenshot below.
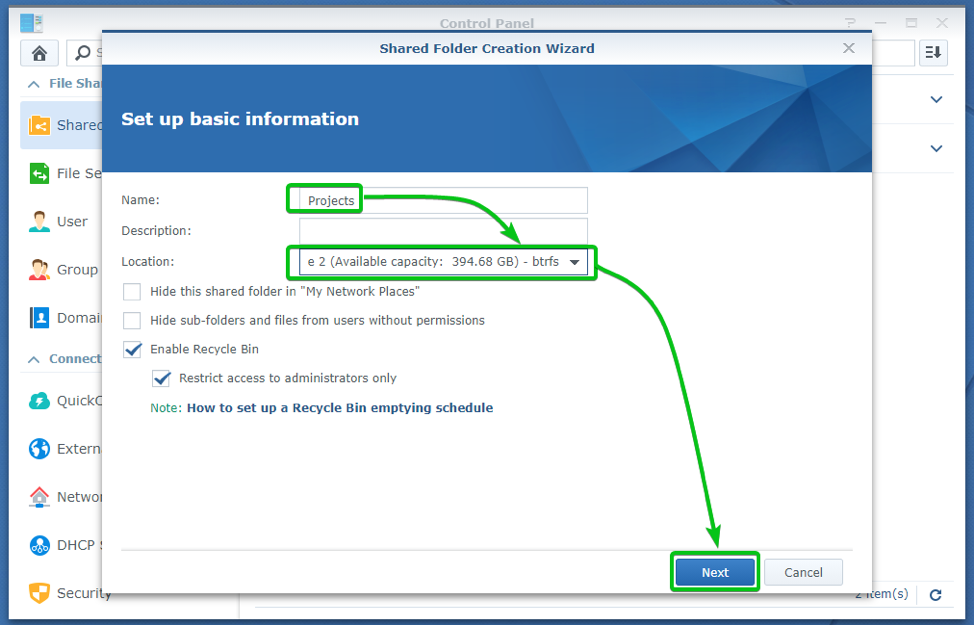
Type in Projects as the share Name and select a storage volume where you want to create the shared folder from the Location dropdown menu and click on Next, as marked in the screenshot below.
Click on Next.
Click on Next.
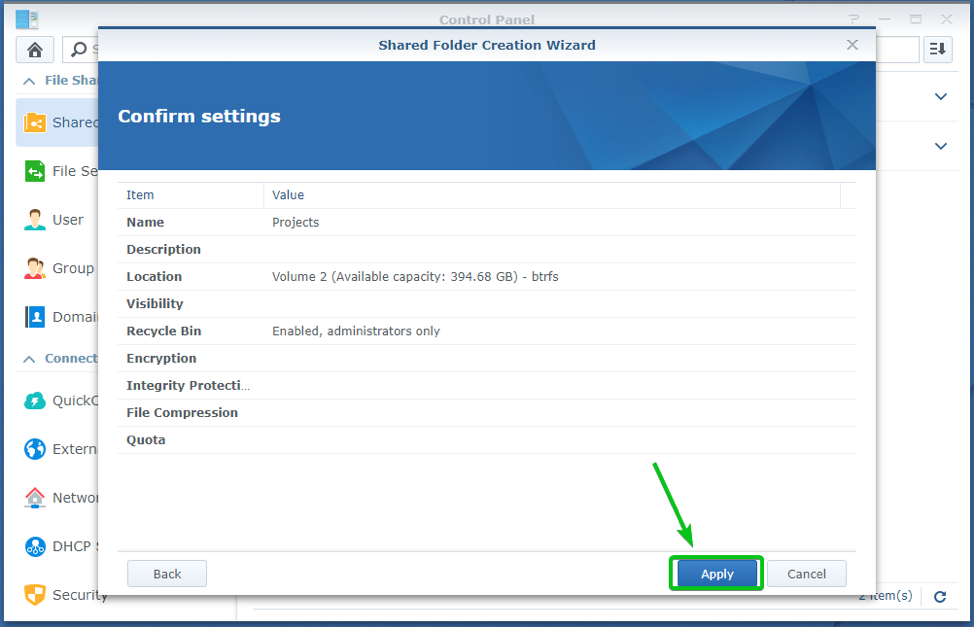
Click on Apply.
Set Read/Write permissions for the users that you want to allow access to the share and click on OK.
A new shared folder Projects should be created, as you can see in the screenshot below.
Enable SSH Access to Synology NAS
To set up a development environment on a Docker container, you will have to create a custom Docker image. At the time of this writing, you can’t create a custom Docker image from the official Docker app of your Synology NAS using a Dockerfile. But, you can create a custom Docker image using a Dockerfile from the command-line of your Synology NAS.
To access the command-line of your Synology NAS, you have to enable SSH from the Control Panel app.
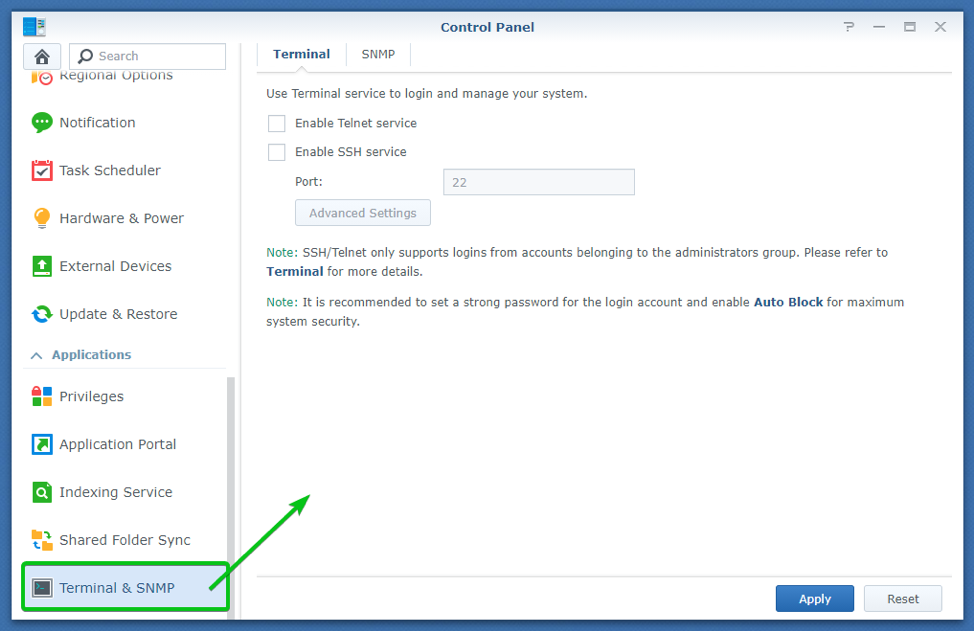
To do that, open the Control Panel app and navigate to the Terminal & SNMP section, as marked in the screenshot below.
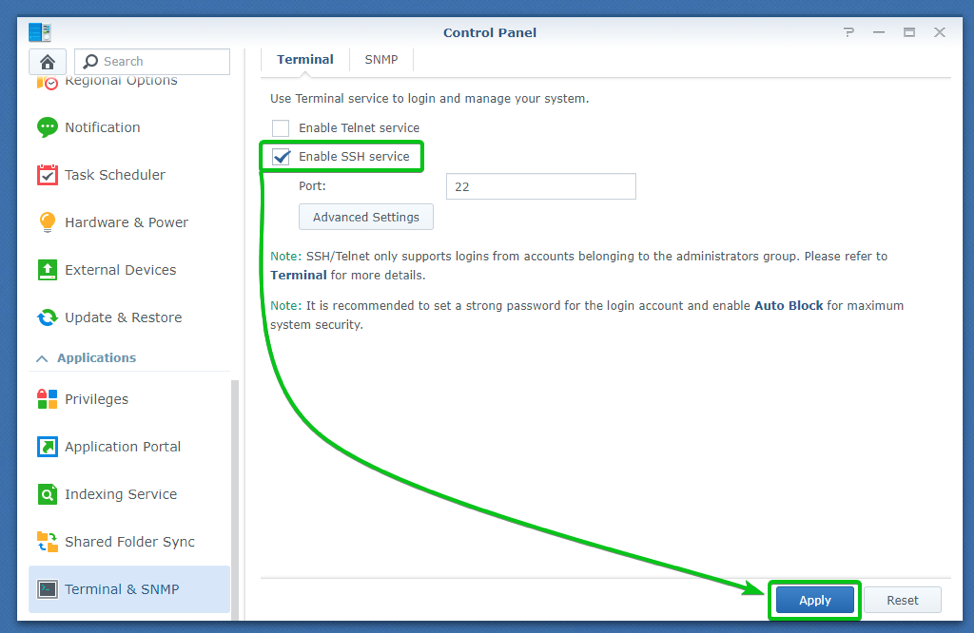
Check Enable SSH service checkbox and click on Apply, as marked in the screenshot below.
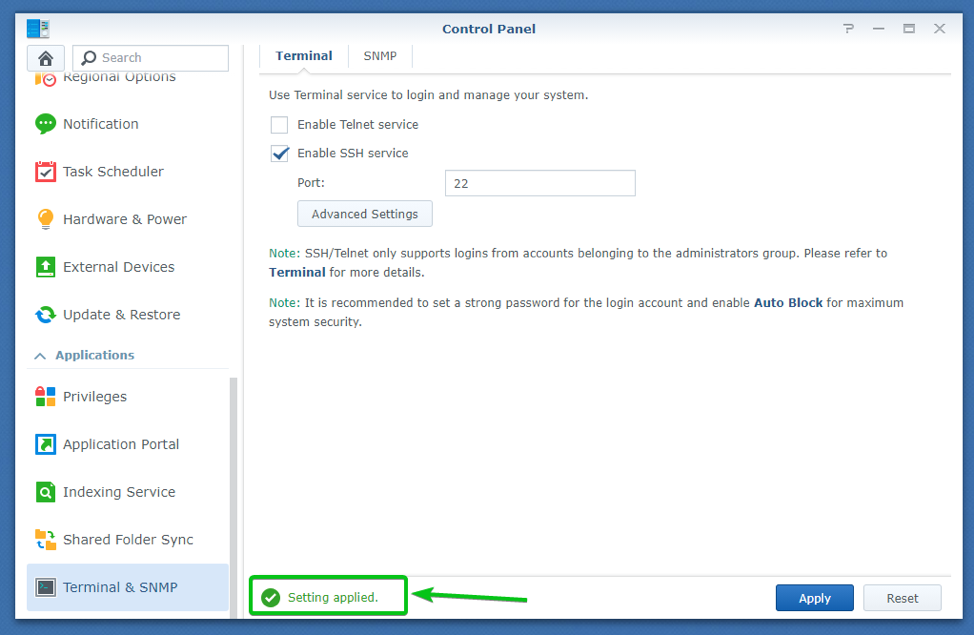
SSH service should be enabled on your Synology NAS.
Creating a Folder for the Container Image
Let’s create a dedicated folder in the docker shared folder to keep the Dockerfile that will be used to create a custom Docker container image.
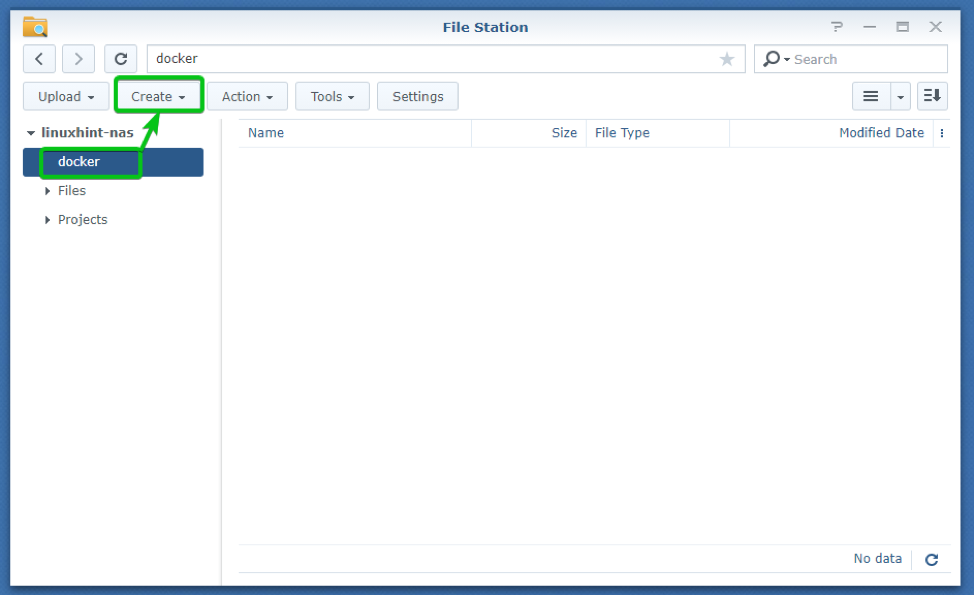
To create a new folder, open the File Station app, select the docker shared folder, and click on Create, as marked in the screenshot below.
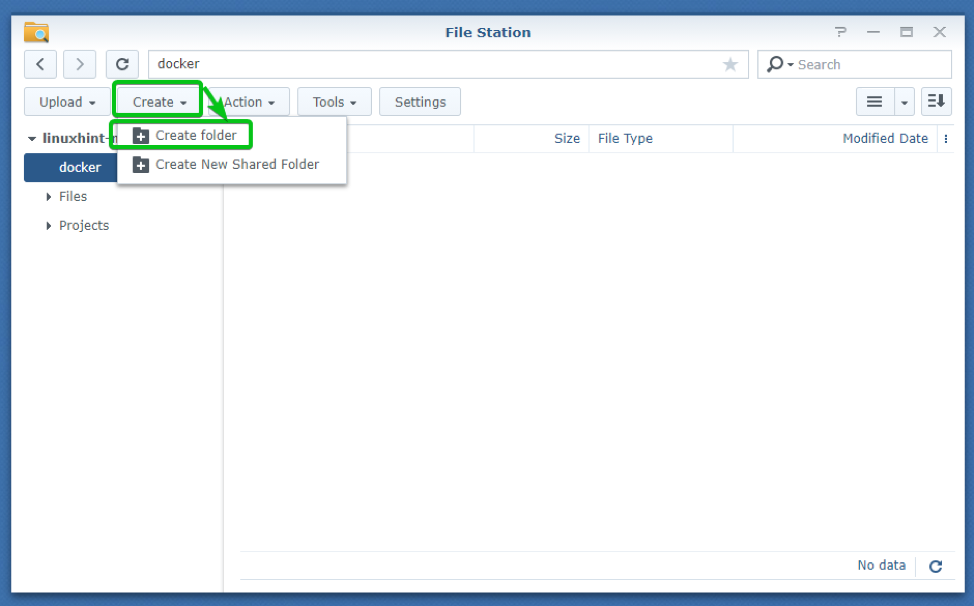
Click on Create folder.
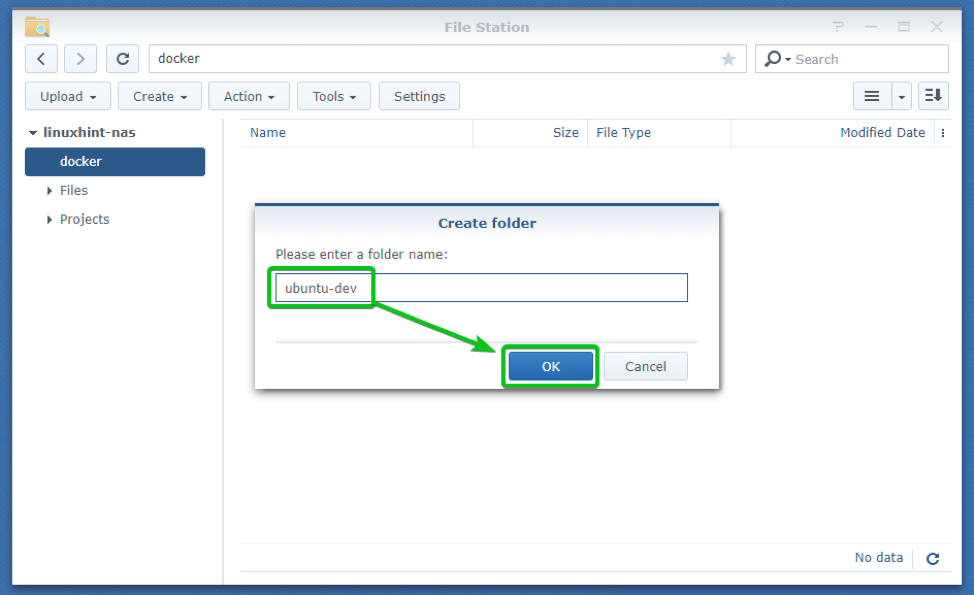
Type in ubuntu-dev as the folder name and click on OK.
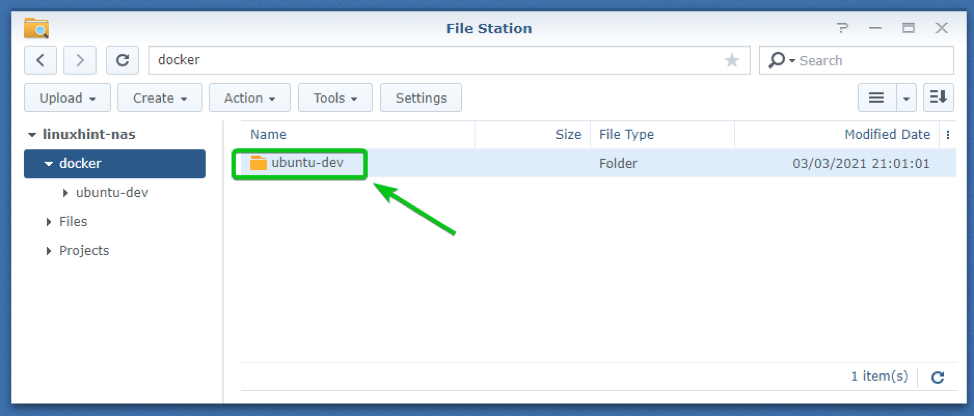
A new folder ubuntu-dev should be created in the docker shared folder, as you can see in the screenshot below.
Creating a Dockerfile for the Container Image
Create a new file Dockerfile in the ubuntu-dev/ folder and type in the following lines in the Dockerfile:
RUN apt update
RUN apt install locales locales-all -y
RUN locale-gen en_US.UTF-8
RUN update-locale LANG=en_US.UTF-8
ENV TZ=Asia/Dhaka
RUN ln -snf /usr/share/zoneinfo/$TZ /etc/localtime && echo $TZ > /etc/timezone
RUN apt install tzdata -y
RUN apt install openssh-server sudo bash-completion tree git -y
RUN useradd -m -d /home/shovon -s /bin/bash -G sudo shovon
RUN echo 'shovon:secret' | chpasswd
RUN service ssh start
EXPOSE 22
CMD ["/usr/sbin/sshd", "-D"]
Once you’re done, save the Dockerfile.
Here, line 1 tells Docker to use the official Docker Hub image ubuntu:20.04, as the base for the custom Docker image.
Line 3 updates the APT package repository cache on top of the base image.
Line 4-6 configures the locale settings for the image. I am setting it to en_US.UTF-8 in this case, but you can change it to a different locale if you want.
Line 8-10 configures the timezone for the image. I am setting it to Asia/Dhaka. Replace it with your desired timezone.
Line 12 installs the OpenSSH server, Git, sudo, Bash Completion, and the tree command-line utility on top of the base image.
Line 14-15 creates a new user shovon, sets /home/shovon as the home directory for the user, sets /bin/bash as the login shell for the user, adds the user to the sudo group, and sets the login password secret for the user.
You will want to create a user with a different name, set a different home directory, and set a different password. So, change the login username, password, and home directory path as required.
Line 17-19 starts the SSH service and exposes the SSH port 22 by default.
SSH into the Synology NAS
Once you’ve enabled the SSH service, you can SSH into the Synology NAS from your computer.
To connect to the Synology NAS via SSH, open a terminal on your computer and run the following command:
NOTE: Here, shovon is the login username and 192.168.0.110 is the IP address of my Synology NAS. It will be different for you. So, make sure to replace it with yours from now on.
As you’re accessing the Synology NAS via SSH for the first time, you will see the following prompt.
Type in yes and press <Enter> to continue.
Type in your login password and press <Enter>.
You should be logged into your Synology NAS via SSH, as you can see in the screenshot below.
Creating a Custom Docker Image for Development
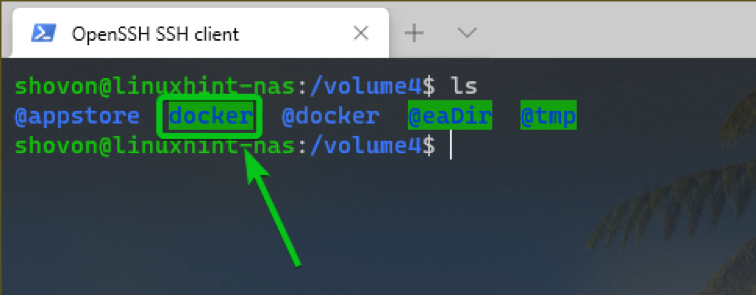
We have created a Dockerfile in the ubuntu-dev/ folder of the docker shared folder. As you can see, the docker shared folder is created in Volume 4 of your Synology NAS.
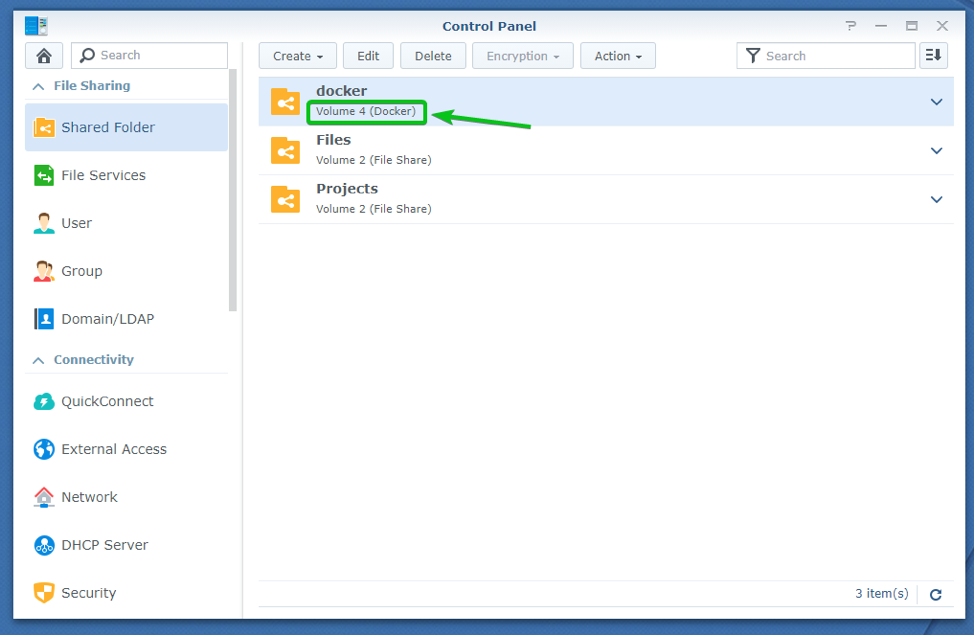
The docker shared folder should be in the /volume4 folder, as you can see in the screenshot below.
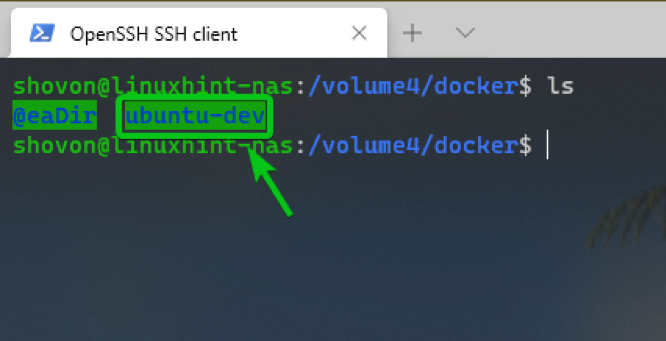
Navigate to the docker/ folder.
You should find the ubuntu-dev/ folder here which you’ve created earlier, as you can see in the screenshot below.
Navigate to the ubuntu-dev/ folder.
You should find the Dockerfile you’ve created in the earlier section of this article here, as you can see in the screenshot below.
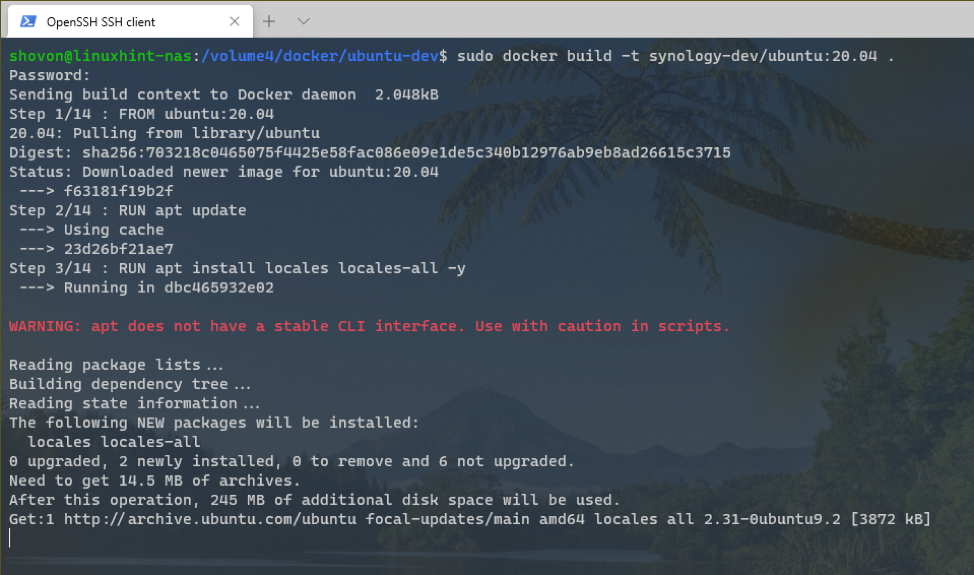
To create a custom Docker image synology-dev/ubuntu:20.04 from the Dockerfile, run the following command:
Type in the login password of your Synology NAS and press <Enter>.
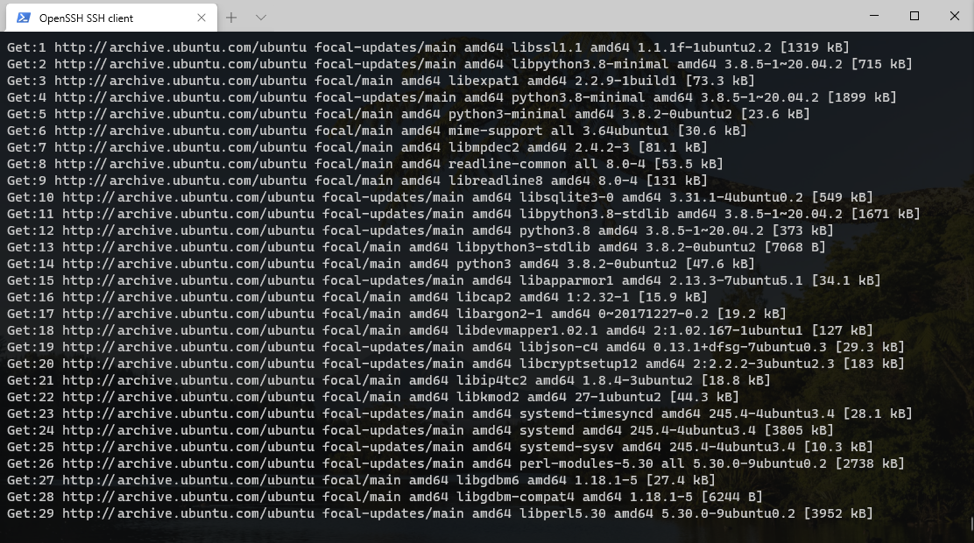
A custom Docker image is being created. It may take a while to complete.
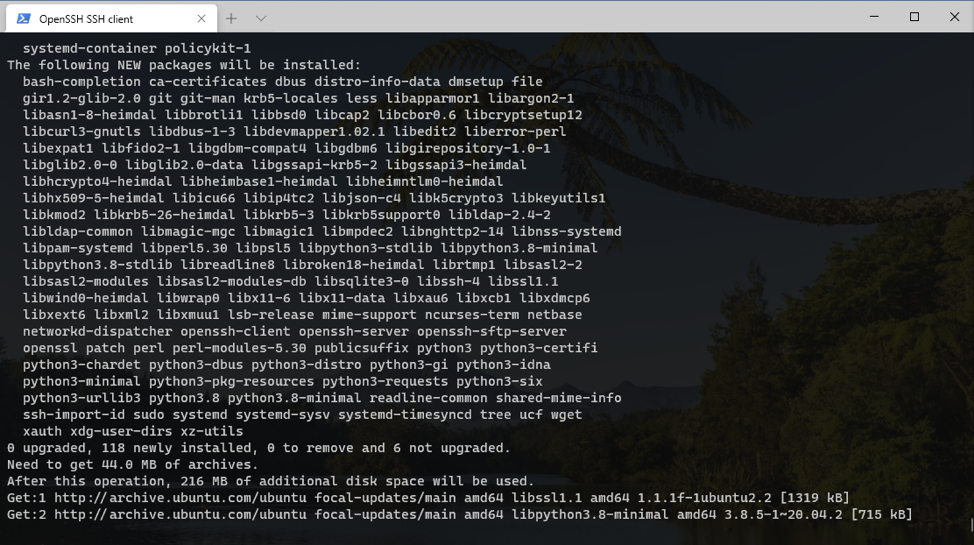
A custom Docker image is being created.
A custom Docker image is being created.
A custom Docker image is being created.
At this point, a custom Docker image synology-dev/ubuntu:20.04 should be created.
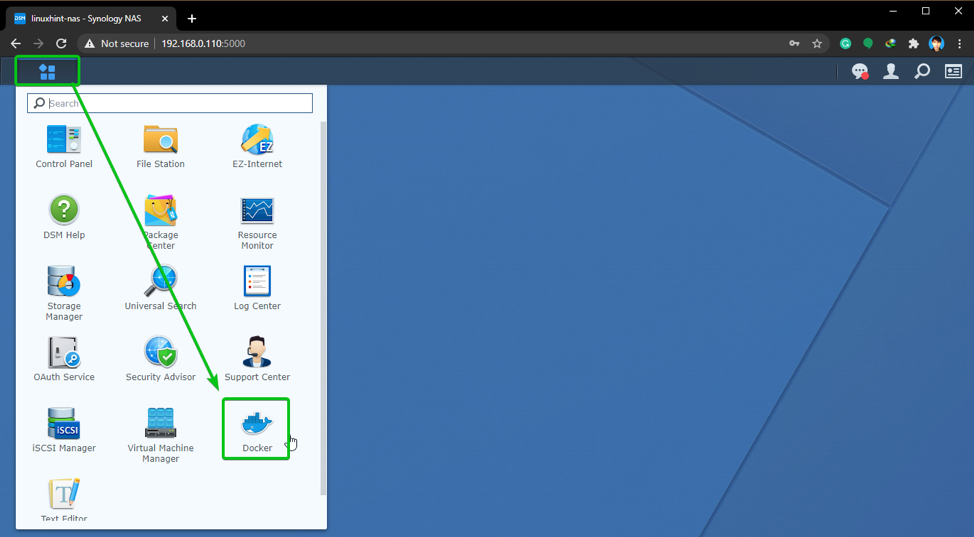
Once the custom Docker image synology-dev/ubuntu:20.04 is created, open the Docker app from the Web GUI of your Synology NAS.
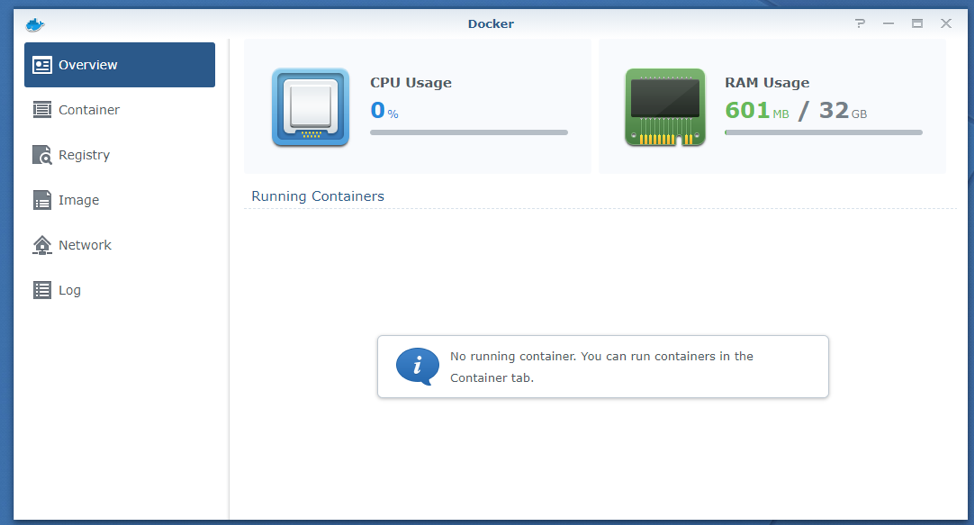
The Docker app should be opened.
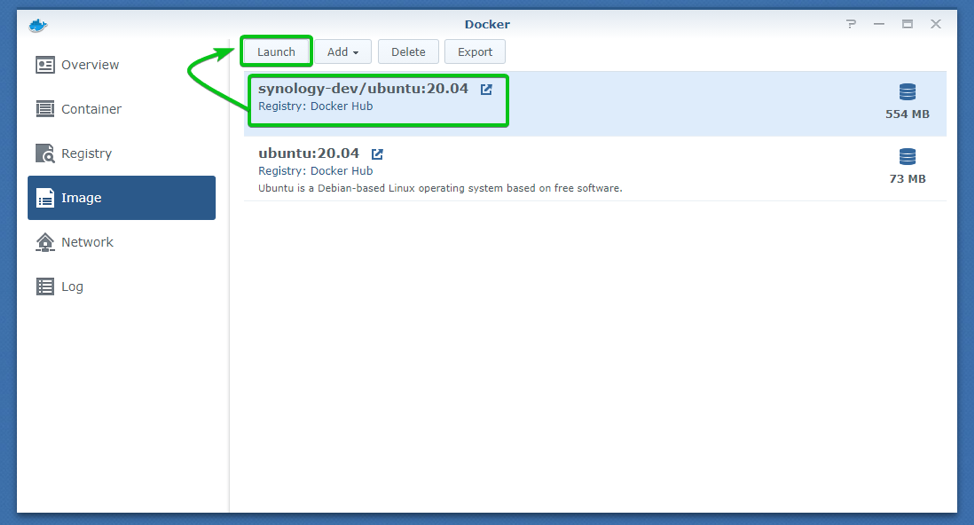
In the Image section of the Docker app, you should find the custom Docker image synology-dev/ubuntu:20.04, which you’ve just created, as you can see in the screenshot below.
Creating a Ubuntu 20.04 LTS Development Container
To create a new container using the custom Docker image synology-dev/ubuntu:20.04, select it and click on Launch from the Image section of the Docker app, as marked in the screenshot below.
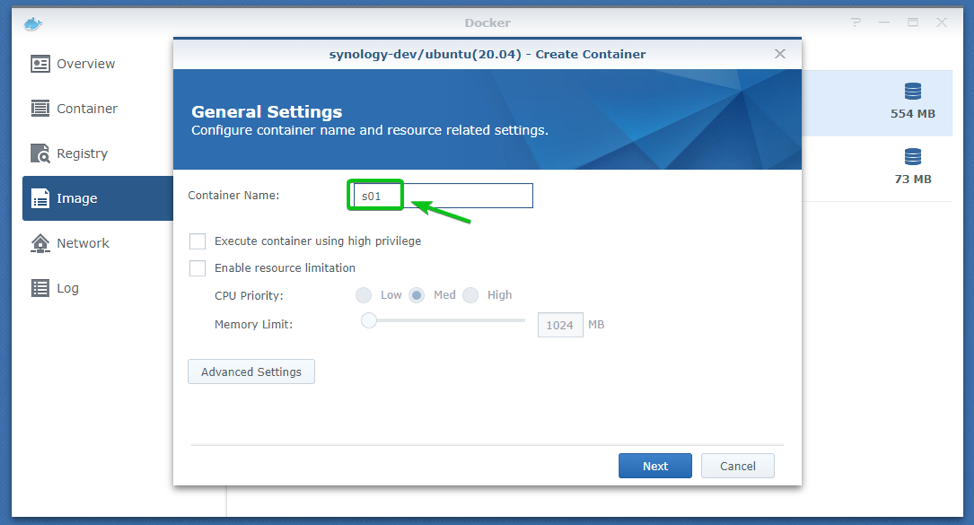
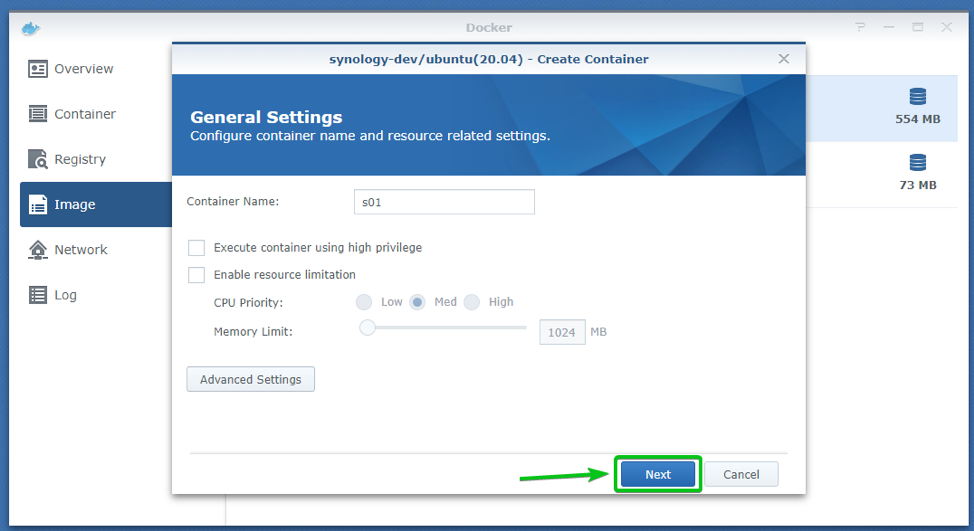
Type in a Container Name.
I will call it s01. You can call it whatever you want.
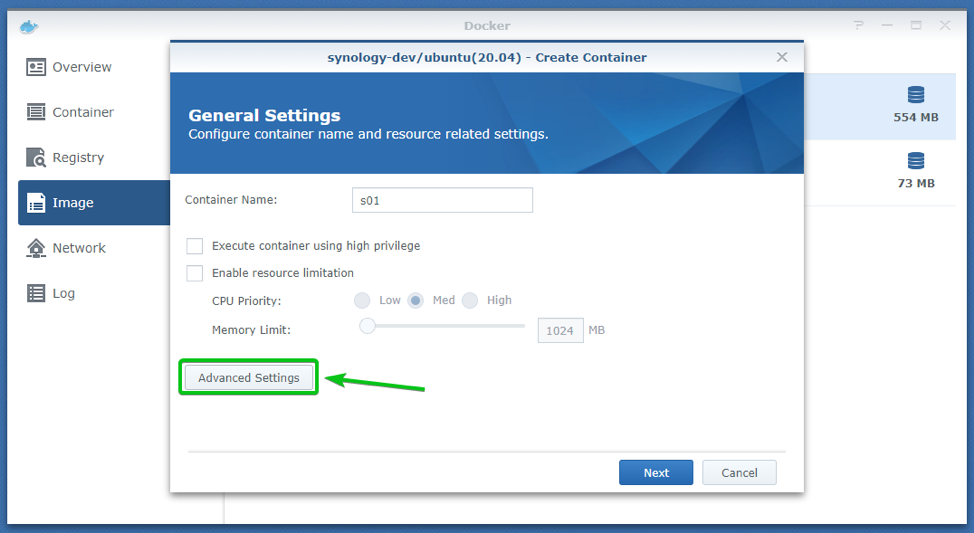
Click on Advanced Settings, as marked in the screenshot below.
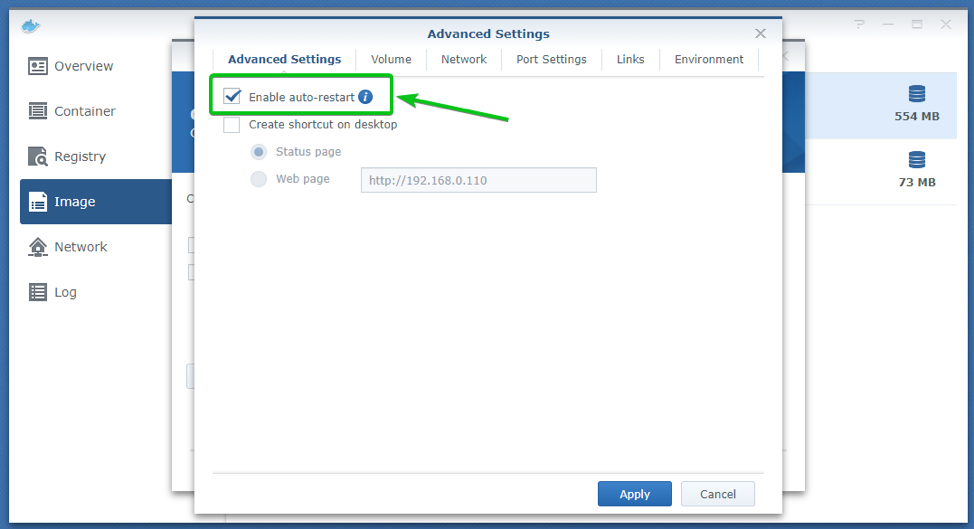
Check the Enable auto-restart checkbox from the Advanced Settings tab of the Advanced Settings window.
Navigate to the Volume tab of the Advanced Settings window.
To add the Projects shared folder (which you’ve created in the earlier section of this article for storing all the project files) to the container, click on Add Folder, as marked in the screenshot below.
Select the Projects shared folder from the list and click on Select.
A new entry should be added, as you can see in the screenshot below.
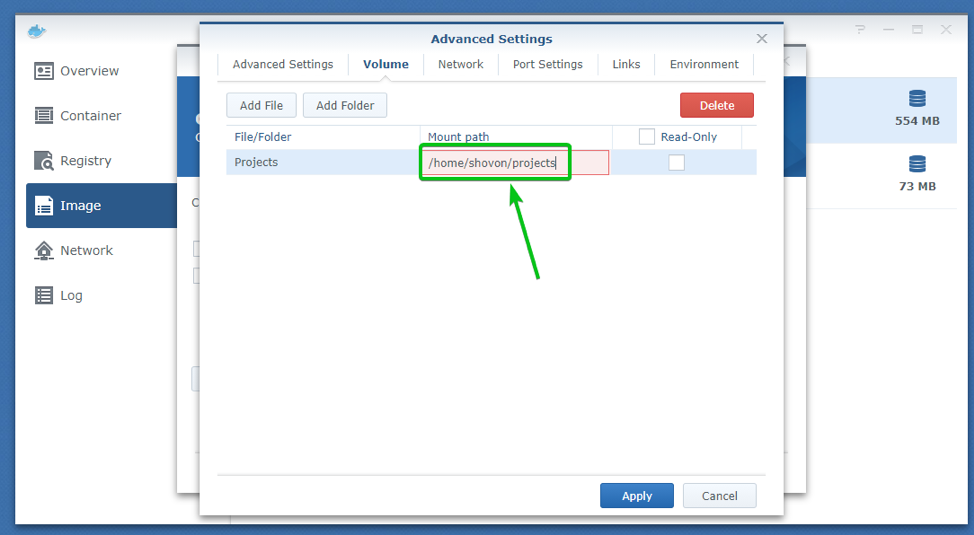
Type in the path where you want to mount the Projects shared folder on your container.
I will mount the Projects shared folder in the path /home/shovon/projects.
Navigate to the Port Settings tab from the Advanced Settings window.
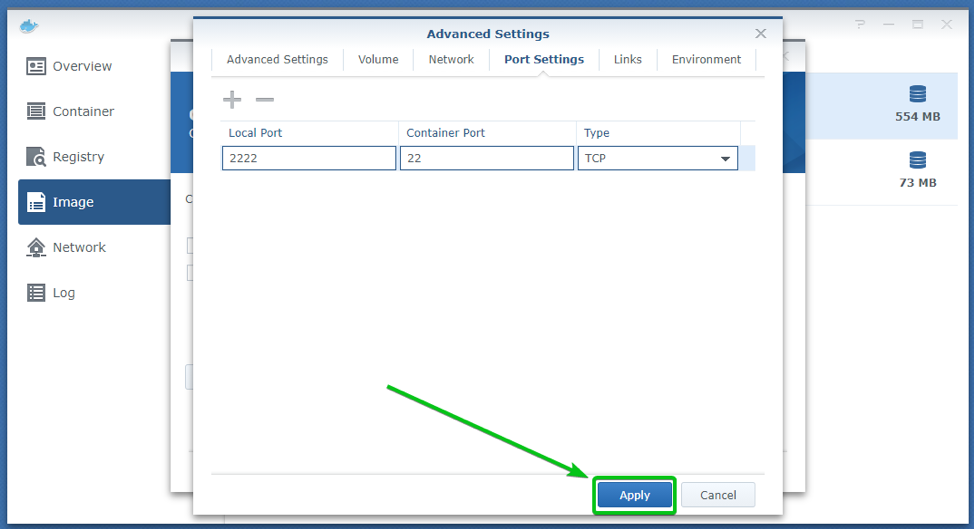
Type in the Local Port number 2222 for the Container Port number 22, as marked in the screenshot below.
Once you’re done, click on Apply.
Click on Next.
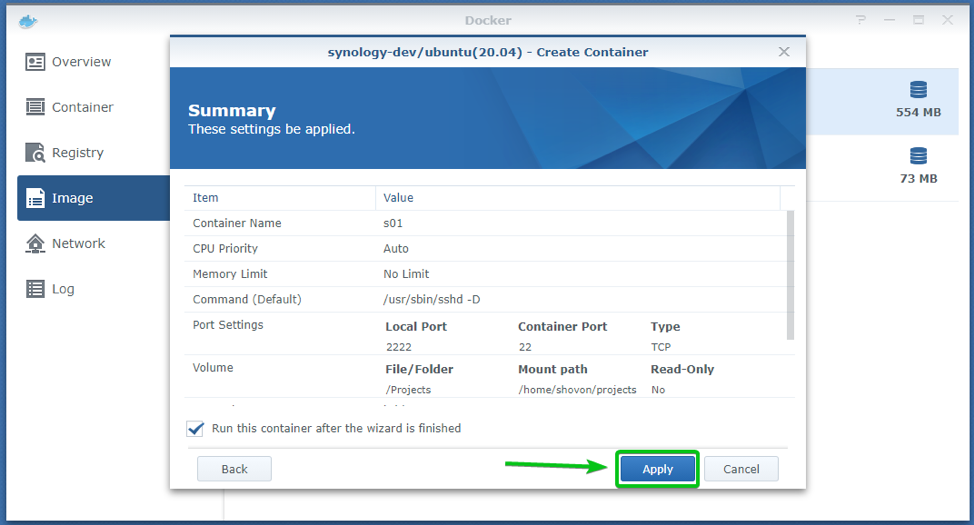
Click on Apply.
A new container s01 should be created, as you can see in the Container section of the Docker app.
Fixing Projects Shared Folder Permissions for the Container
Now, you have to SSH into the Docker container s01 and fix permissions for your Projects shared folder.
You can SSH into the Docker container s01 from your computer with the following command:
NOTE: Here, shovon is the login username of the Docker container. 192.168.0.110 is the IP address of your Synology NAS and 2222 is the forwarded port number of the Docker container. It will be different for you. So, make sure to replace it with yours from now on.
As you are connecting to the Docker container s01 for the first time, you will see the following prompt.
Type in yes and press <Enter>.
Type in the login password (secret, in my case) of your Docker container s01 and press <Enter>.
You should be logged into the Docker container s01 via SSH, as you can see in the screenshot below.
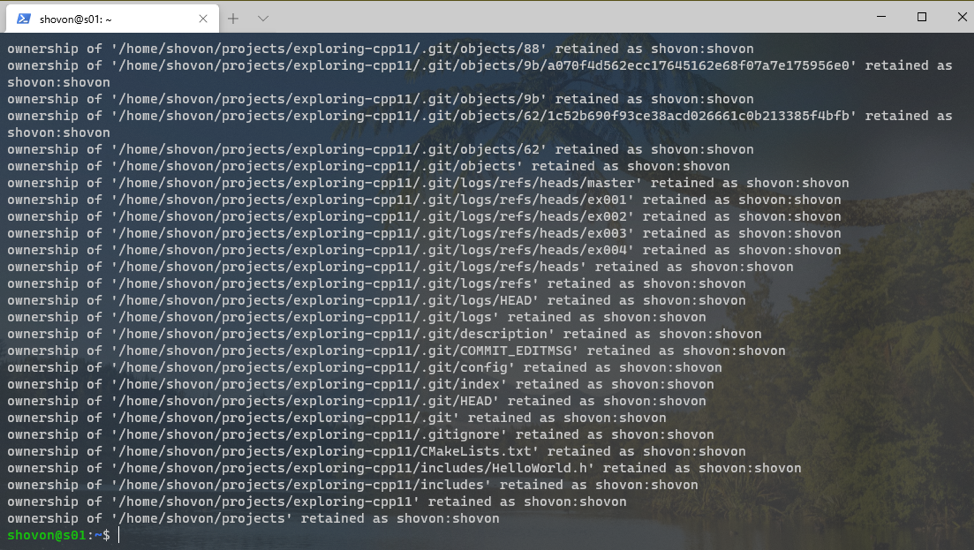
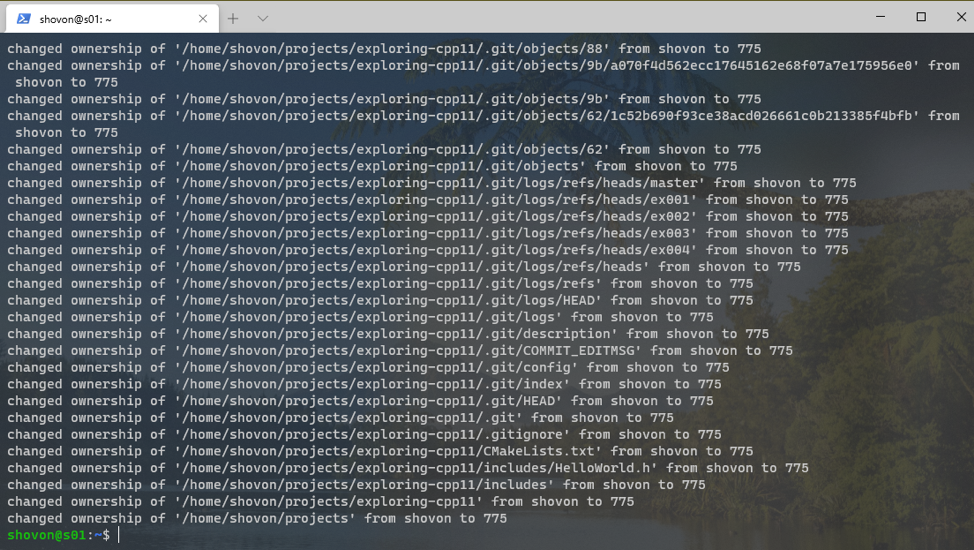
To change the owner and group of all the files and folders of your Projects shared folder to the login user and group of the Docker container s01, run the following command:
NOTE: I have mounted the Projects shared folder in the ~/projects folder of the Docker container s01. You may have mounted it somewhere else. So, make sure to replace the directory path with yours from now on.
The owner and group of all the files and directories of the Projects shared folder should be changed to the login user and group of the Docker container s01.
Now, set the correct permissions for the Projects shared folder mounted in the ~/projects folder of the Docker container s01 with the following command:
The correct file and directory permissions for the Projects shared folder should be set.
Setup Remote Development on the Container with Visual Studio Code
Visual Studio Code natively supports remote development. You can have Visual Studio Code installed on a computer (Windows/Linux/macOS) and connect to the Docker container s01 running on your Synology NAS via SSH and remotely do your development projects there. Your computer and the Synology NAS must be in the same network for this to work.
Let’s see how to do remote development on the Docker container s01 running on the Synology NAS using Visual Studio Code.
Start the Visual Studio Code editor on your computer. I am using Visual Studio Code on my Windows 10 computer.
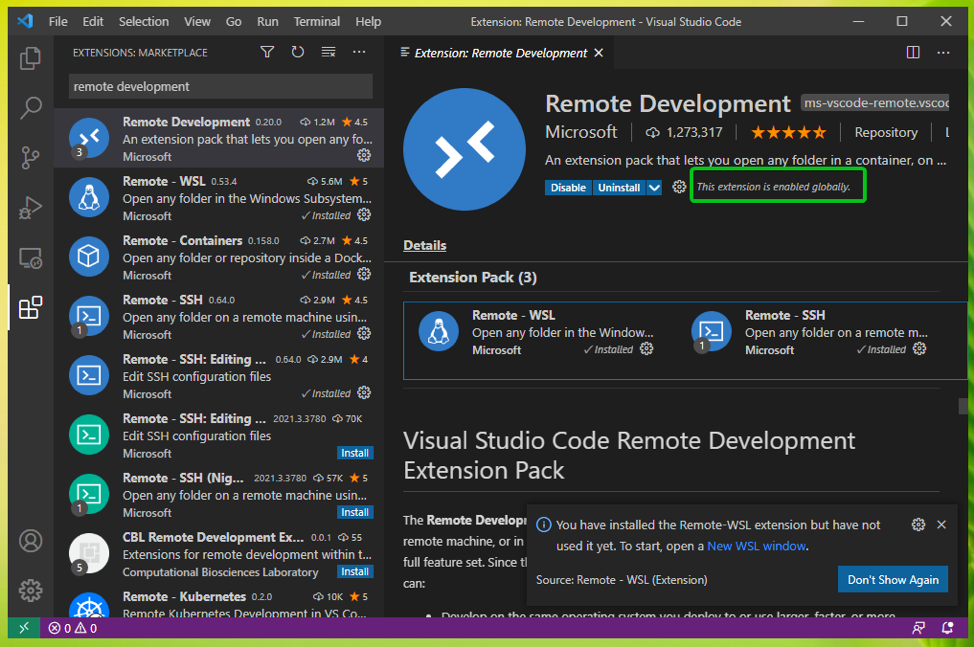
Now, you need to install the Remote Development extension on Visual Studio Code for doing remote development.
To install the Remote Development extension, click on the Extensions icon, search for the remote development extension, click on Remote Development, and click on Install, as marked in the screenshot below.
The Remote Development extension should be installed.
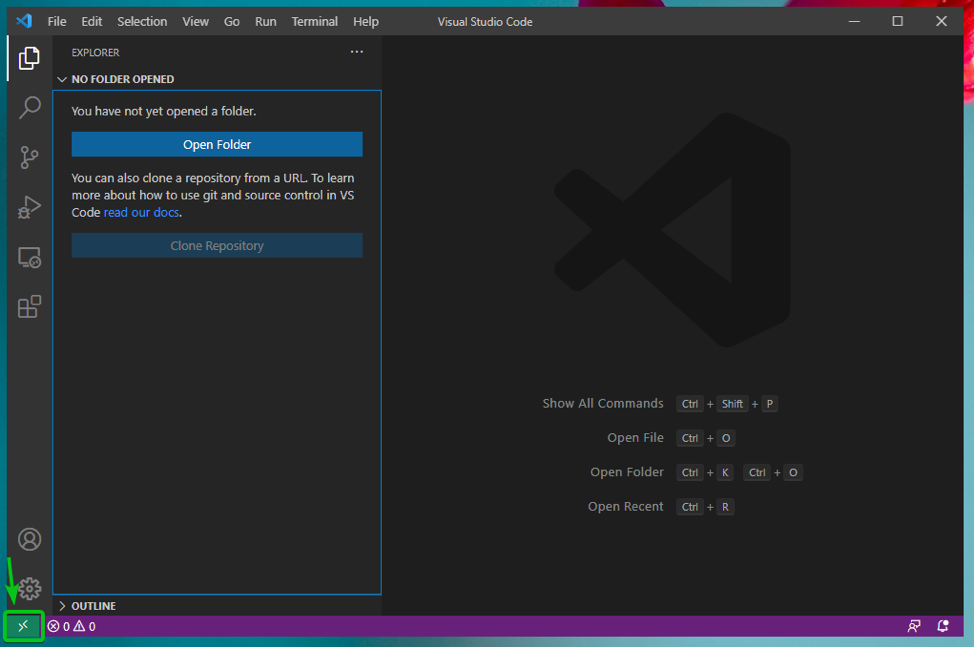
Once the Remote Development extension is installed, you should see the following icon () at the bottom-left corner of Visual Studio Code, as marked in the screenshot below.
To add the Docker container s01 running on your Synology NAS to Visual Studio Code for remote development, click on the remote development icon .
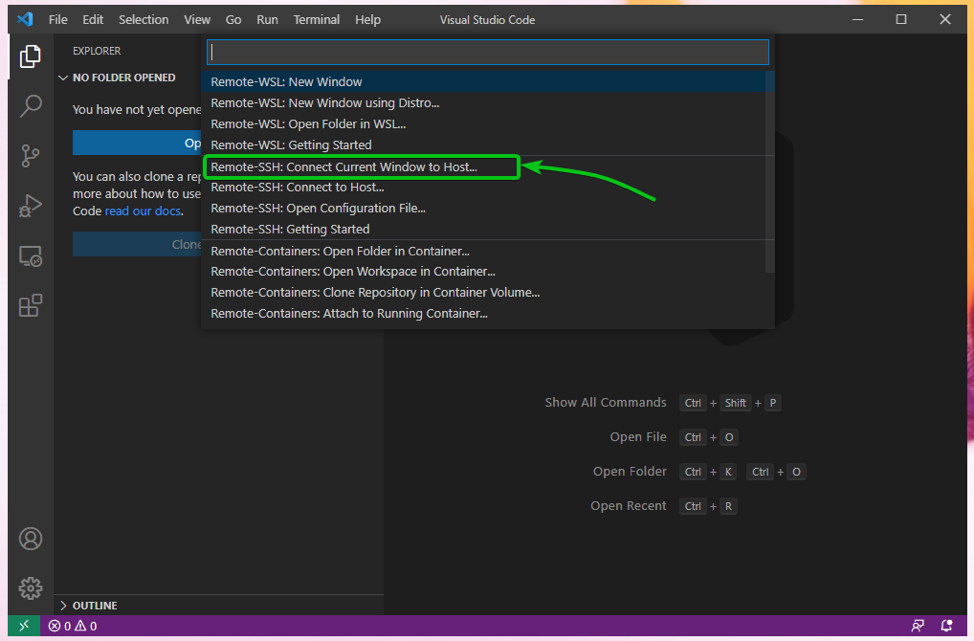
Click on Remote-SSH: Connect Current Window to Host…, as marked in the screenshot below.
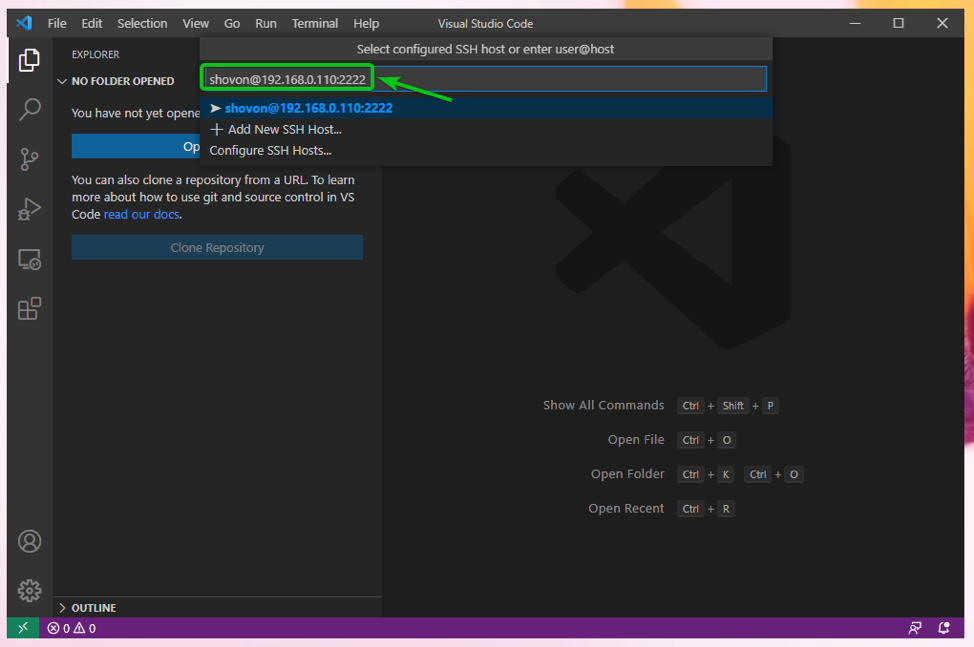
Type in [email protected]:2222 and press <Enter>.
Here, shovon is the login username of the Docker container s01, 192.168.0.110 is the IP address of my Synology NAS, and 2222 is the forwarded port number of the Docker container s01. The username, IP address, and port number will be different for you. So make sure to replace them with yours.
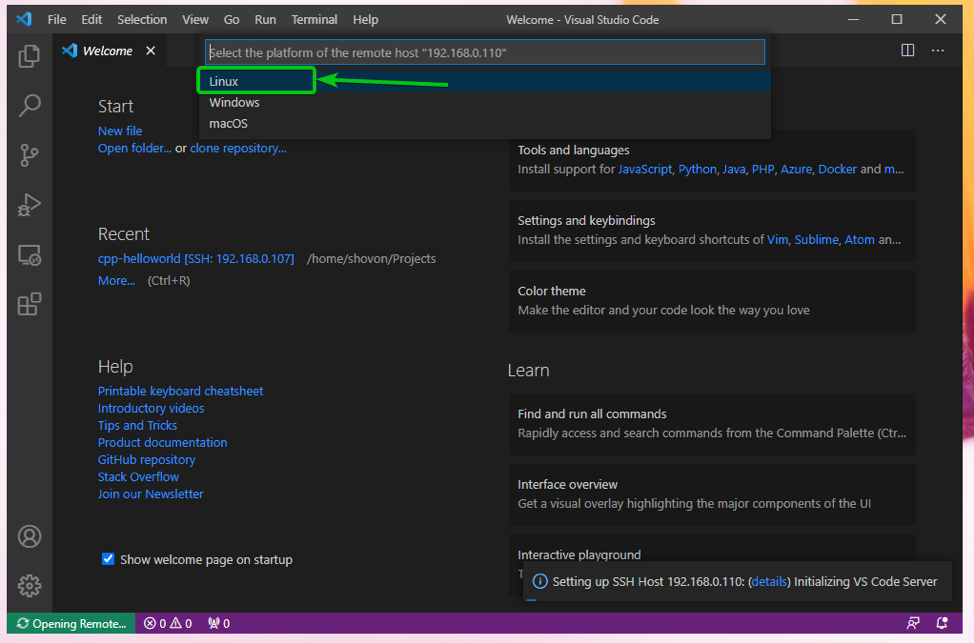
Click on Linux.
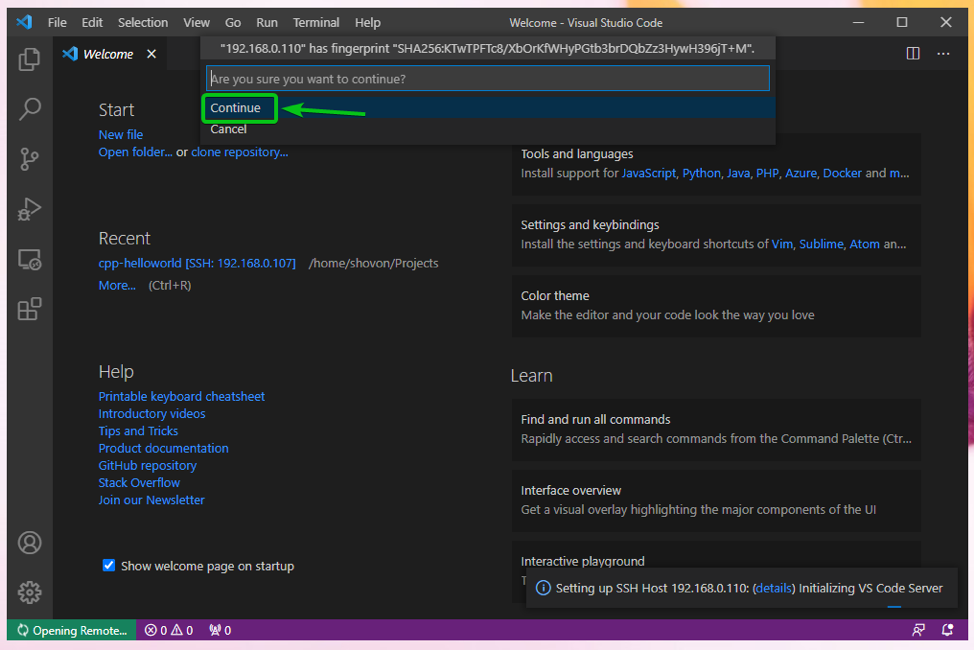
Click on Continue.
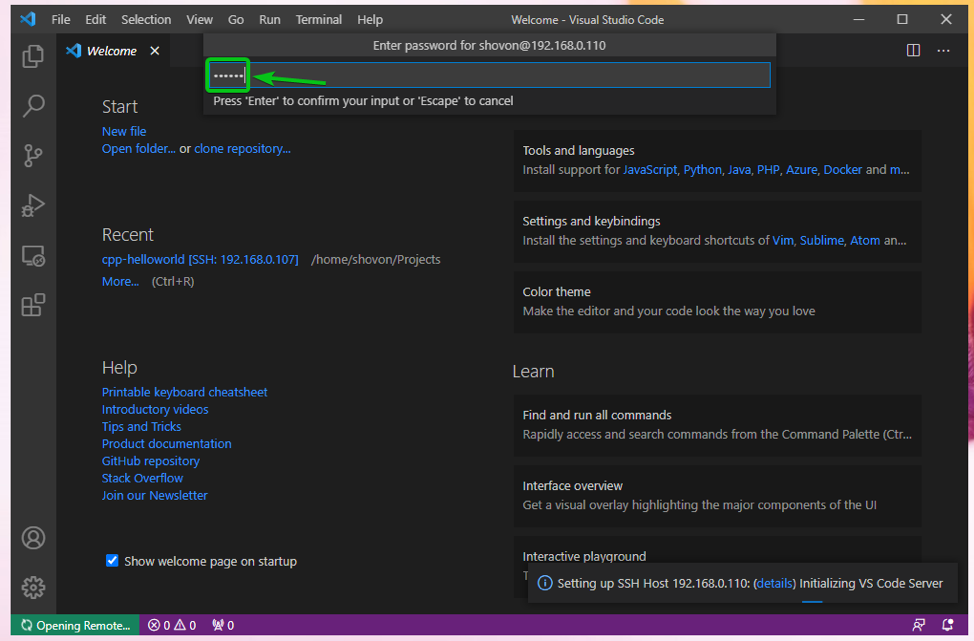
Type in the login password of the Docker container s01 and press <Enter>.
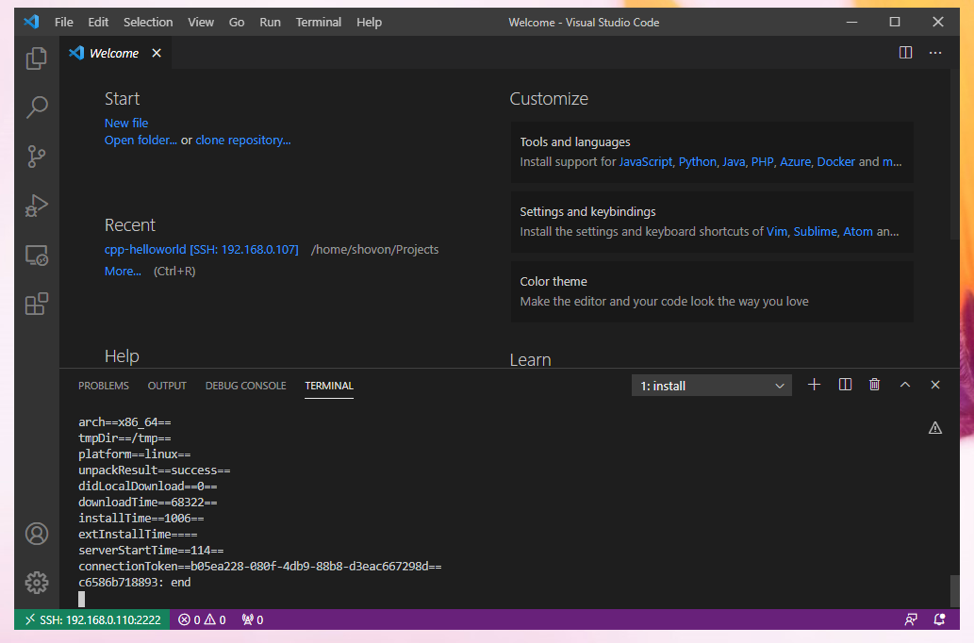
Visual Studio Code will download all the required files on the Docker container s01 and prepare the container for remote development. It may take a while to complete.
At this point, all the required files should be downloaded in the Docker container s01, and the Visual Studio Code should be ready for remote development.
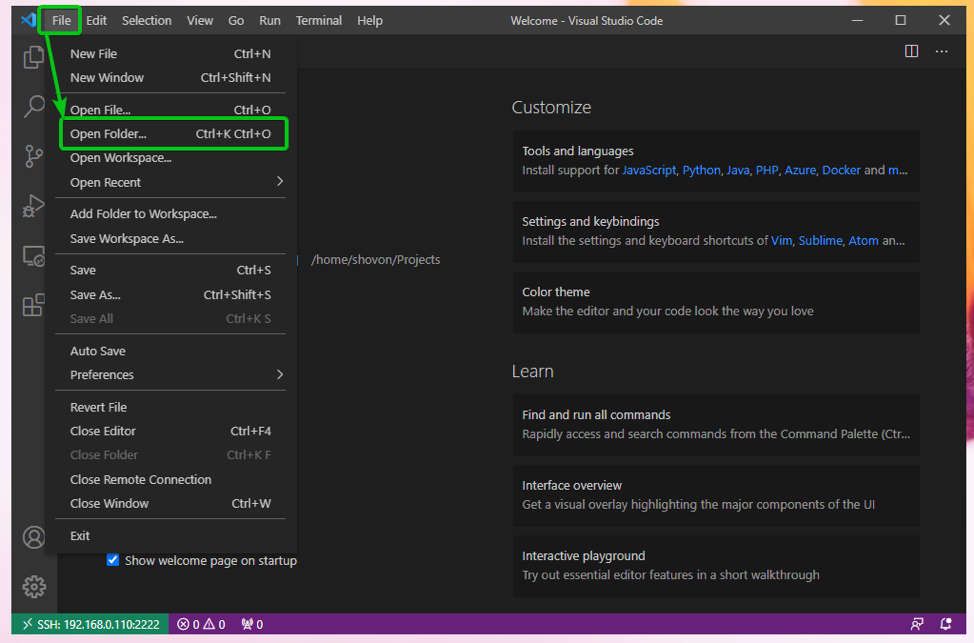
To open a project folder from the Projects shared folder, click on File > Open Folder…, as marked in the screenshot below.
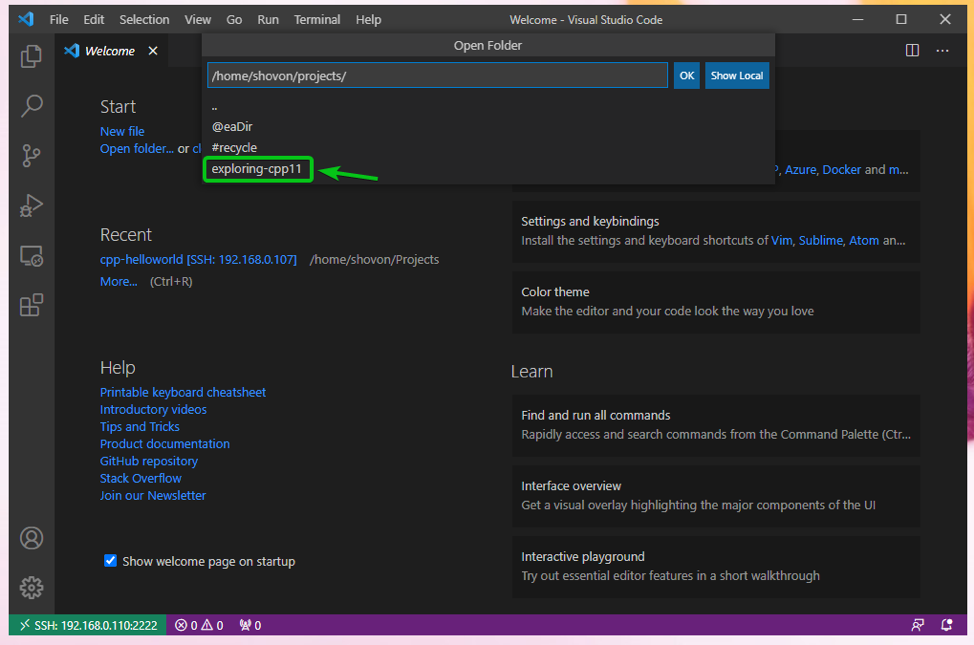
As you can see, all the available folders of the Docker container s01 are displayed. Click on the projects folder.
I have copied a simple C++ project exploring-cpp11 on the Projects shared folder of my Synology NAS. So, the folder shows up in the projects/ folder of the Docker container s01, as you can see in the screenshot below. I am going to use it to demonstrate how to do remote development on a Docker container running on your Synology NAS.
You may want to open a different project folder. You can also create an empty project folder and open it with Visual Studio Code and follow along.
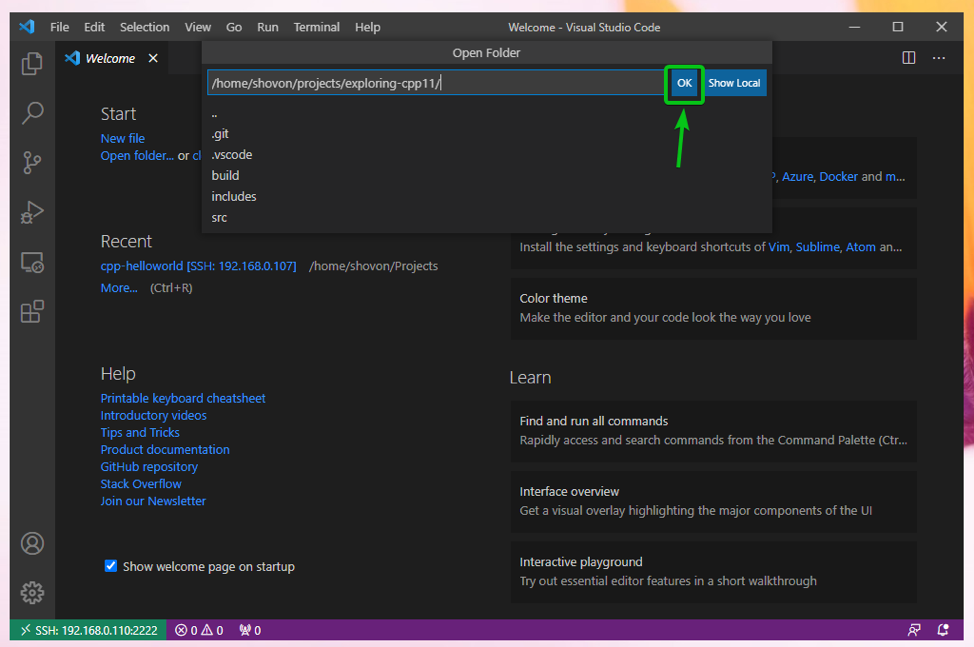
To open a project folder with Visual Studio Code, click on it. As I want to open the exploring-cpp11/ project folder, I will click on it.
Once you’re in the project folder, which you want to open with Visual Studio Code, click on OK.
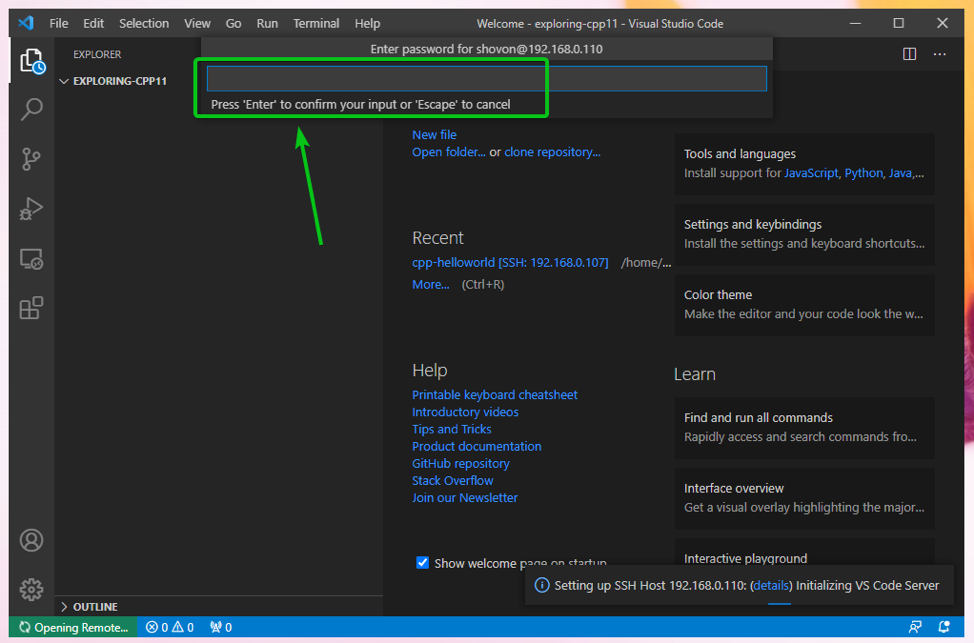
You may be asked to type in the login password of your Docker container s01. Type in the login password of your Docker container s01 and press <Enter>.
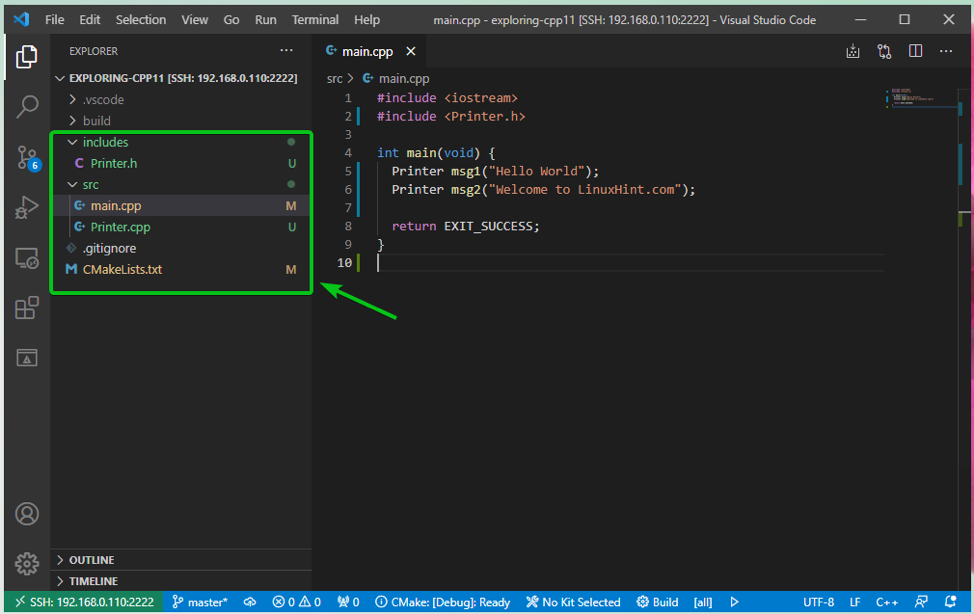
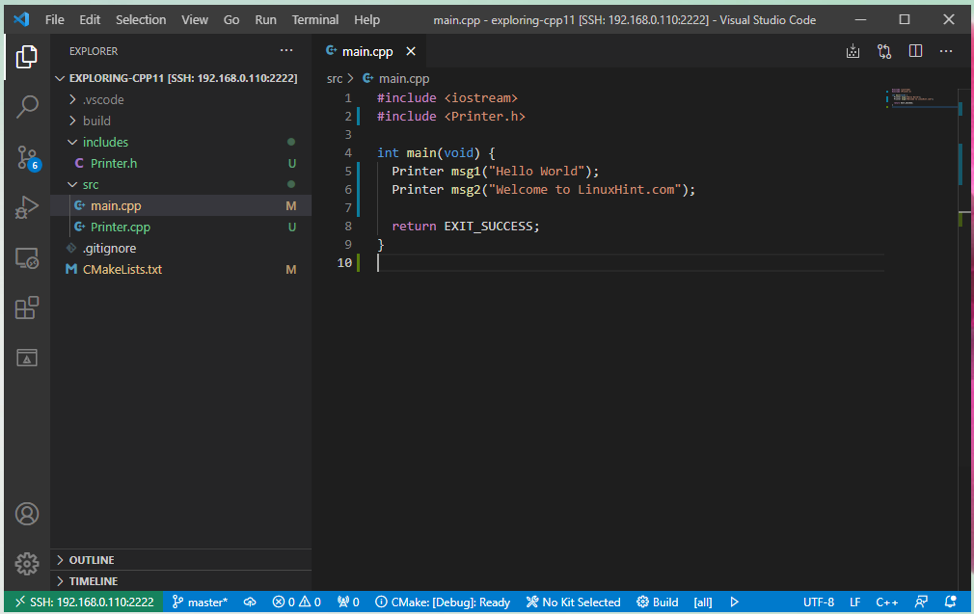
The project folder should be opened with Visual Studio Code, as you can see in the screenshot below.
In my project folder, I have an includes/ folder, src/ folder, and a CMakeLists.txt file.
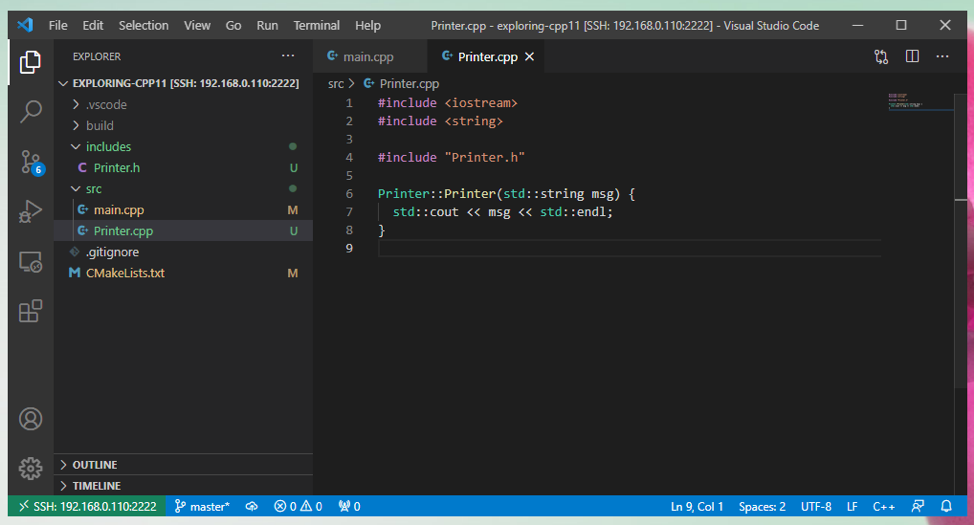
In the includes/ folder, I have a C++ header file Printer.h and in the src/ folder; I have 2 C++ source files main.cpp and Printer.cpp, as you can see in the screenshot below.
The contents of the C++ source file src/main.cpp is given in the screenshot below.
The contents of the C++ source file src/Printer.cpp is given in the screenshot below.
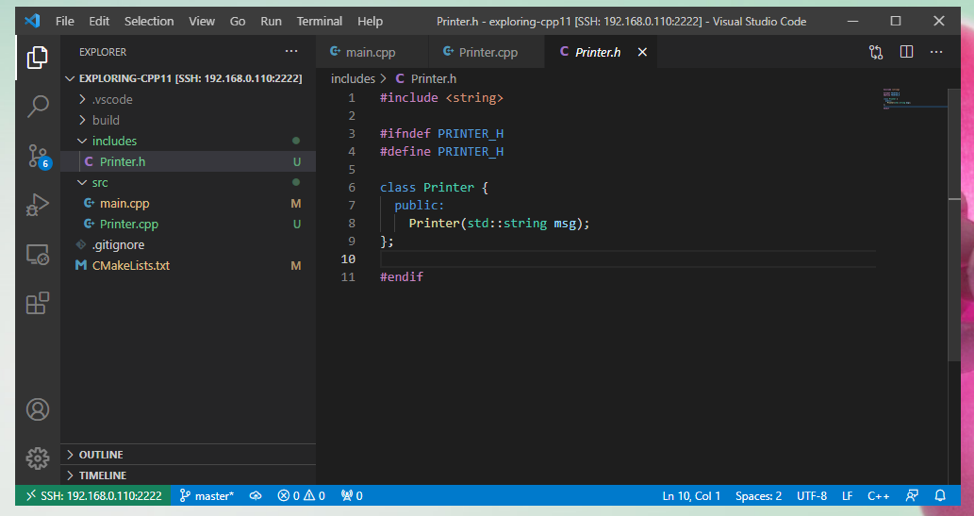
The contents of the C++ header file includes/Printer.h is given in the screenshot below.
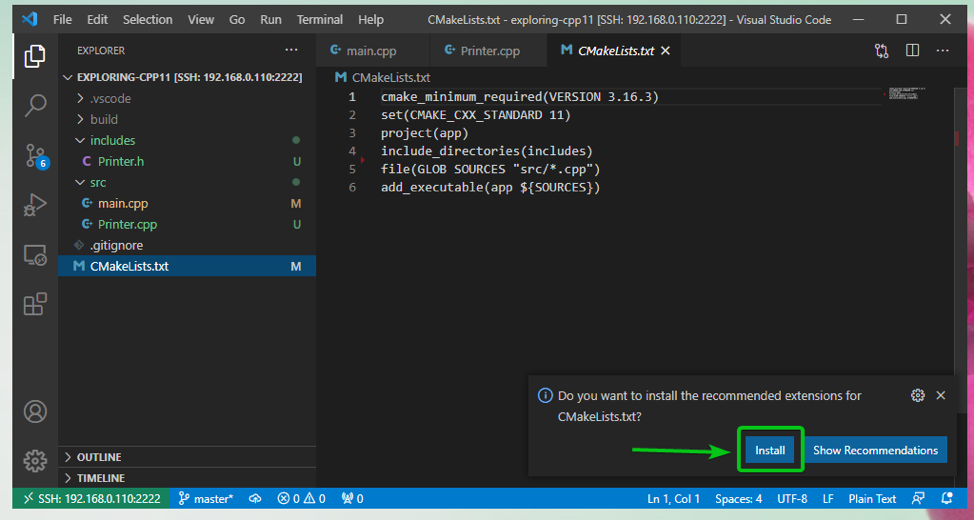
The contents of the CMake configuration file CMakeLists.txt is given in the screenshot below.
Once you’ve created a CMakeLists.txt file and type in the following contents on the file, Visual Studio Code should detect that you’re using CMake and it will ask you to install the required CMake extensions. Click on Install.
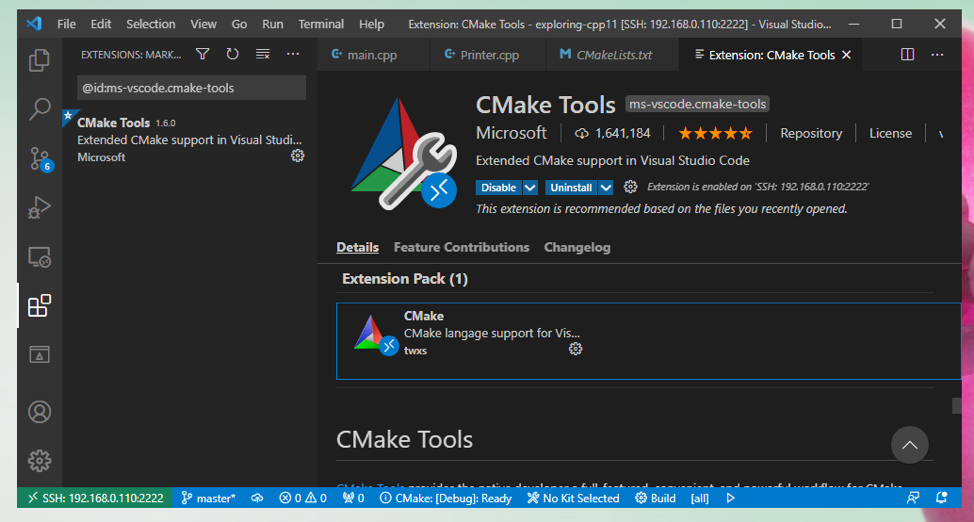
The required CMake extensions should be installed.
Once the required CMake extensions are installed, auto-completion and syntax highlighting should work for CMake configuration files, as you can see in the screenshot below.
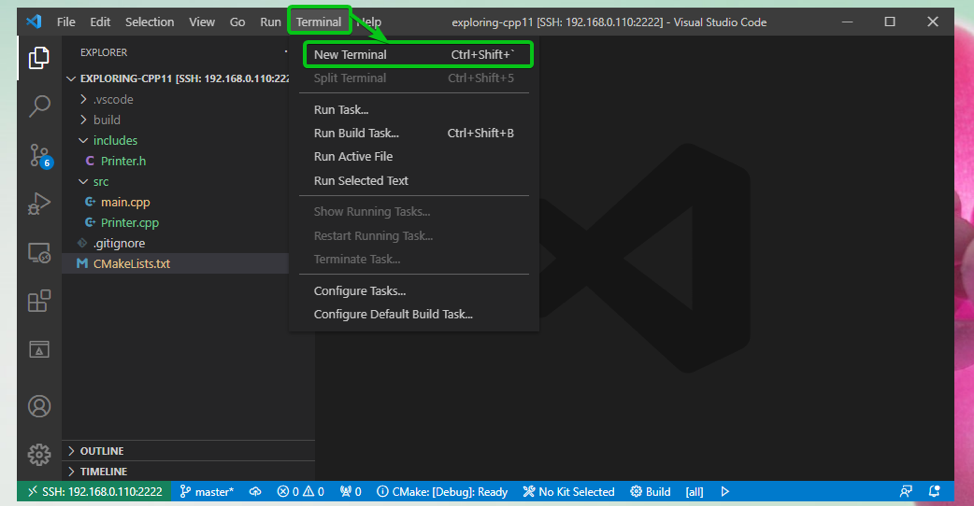
Once you’ve created all the required files and folders for the project, click on Terminal > New Terminal to open a new terminal window.
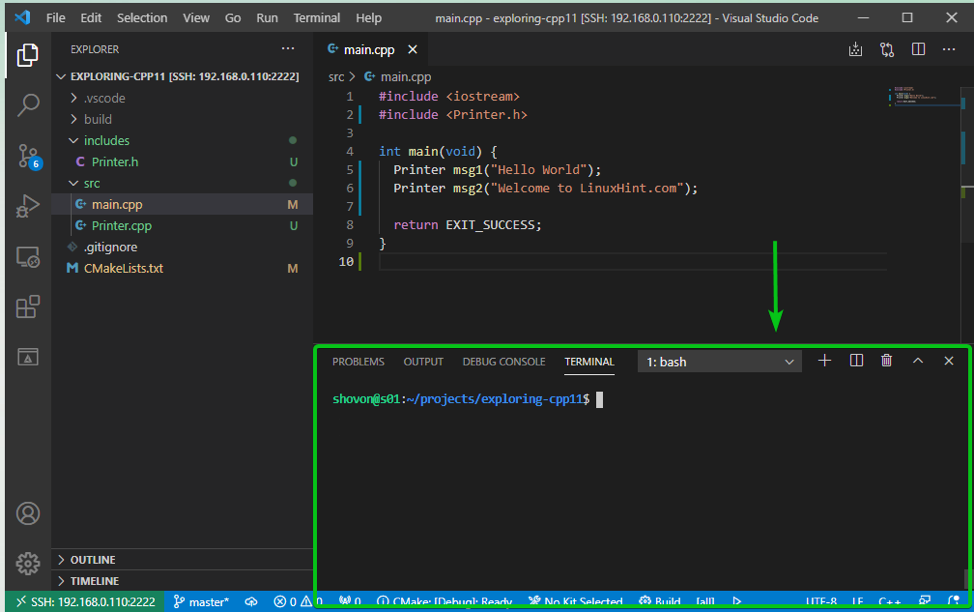
A new terminal window should be opened, as you can see in the screenshot below.
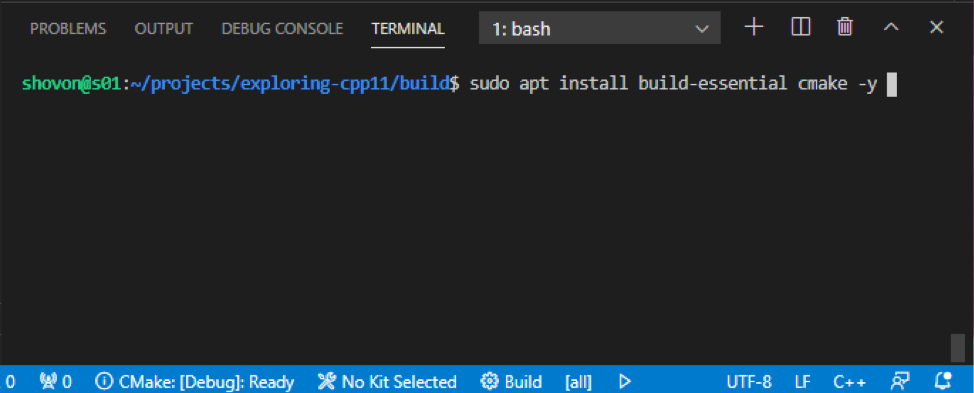
To compile the C++ program, you need to install a C++ compiler and the CMake build tools on your Docker container s01.
To do that, run the following command:
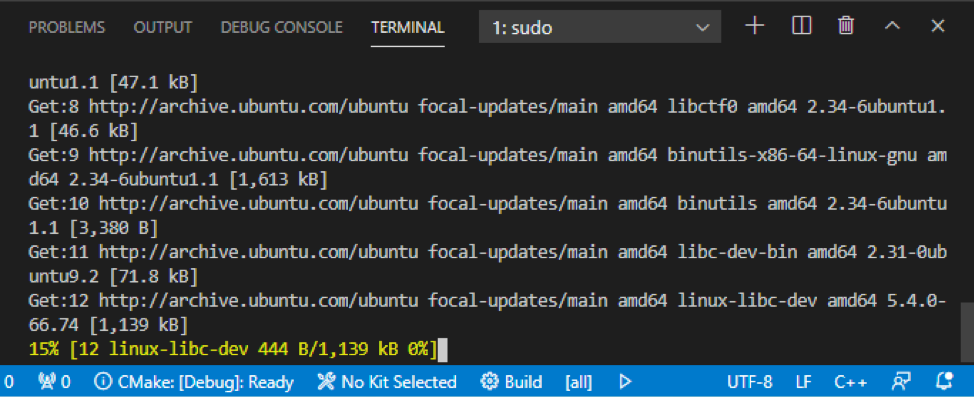
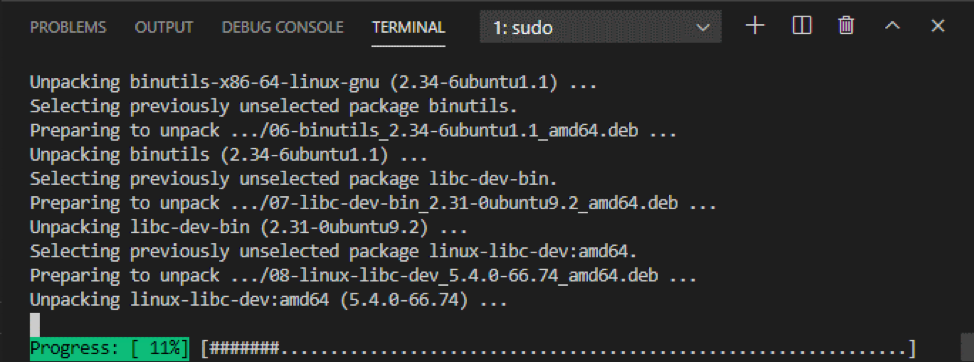
The C++ compiler and CMake build tools are being downloaded. It may take a few seconds to complete.
The C++ compiler and CMake build tools are being installed.
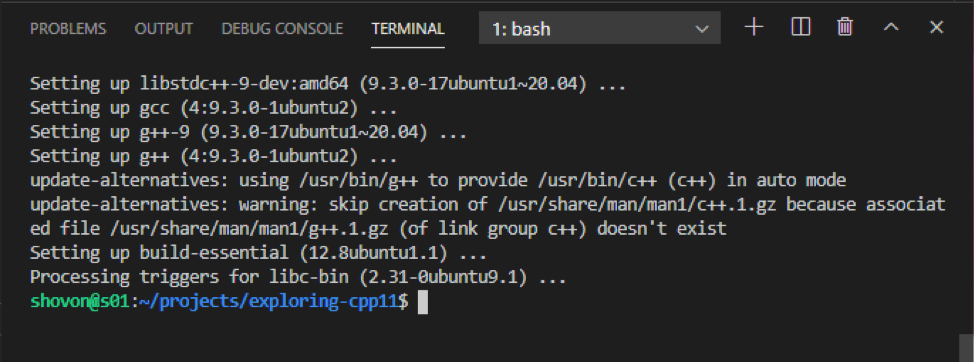
At this point, the C++ compiler and CMake build tools should be installed.
Now, create a build/ folder with the following command:
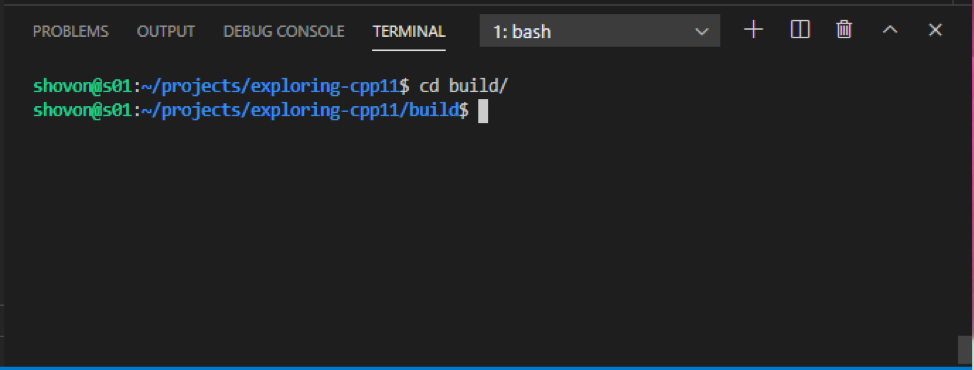
Navigate to the build/ folder with the following command:
Generate CMake build configuration files for the C++ project with the following command:
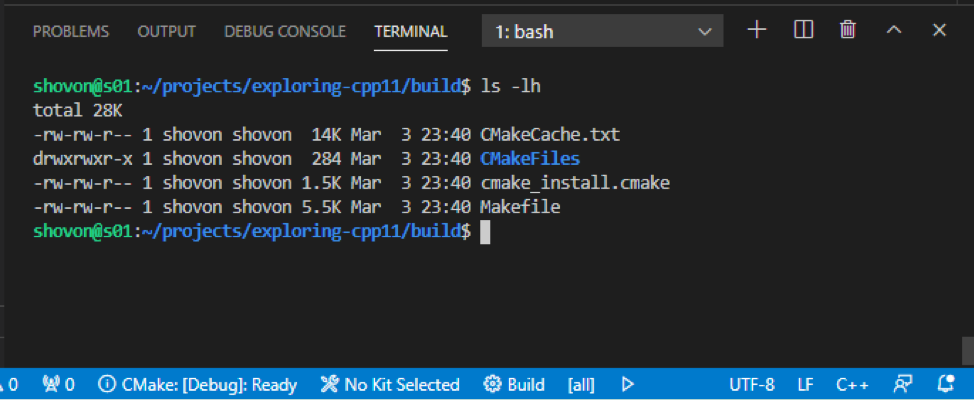
CMake build configuration files should be generated.
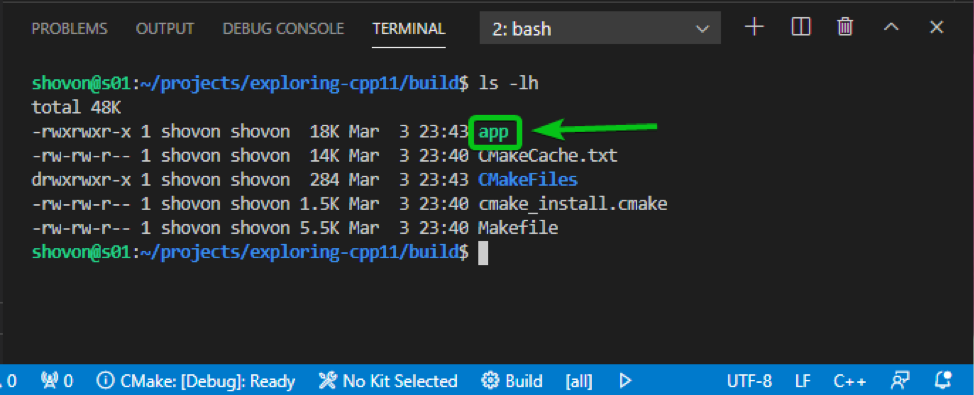
As you can see, Makefile and other CMake configuration files are generated in the build/ folder.
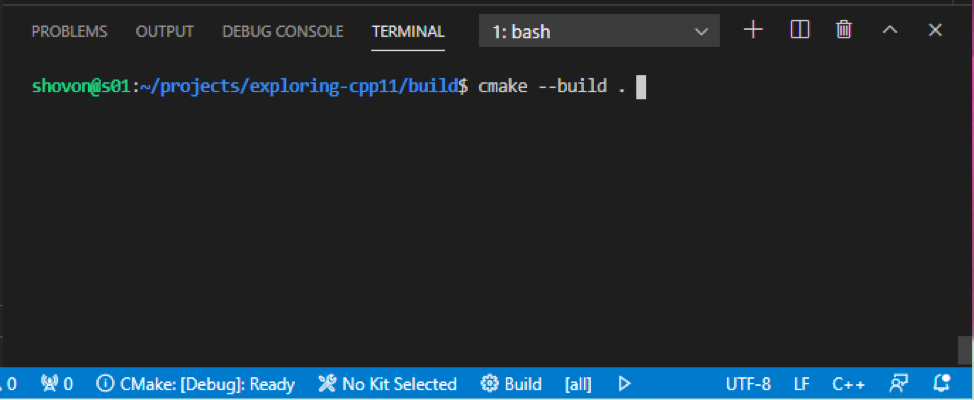
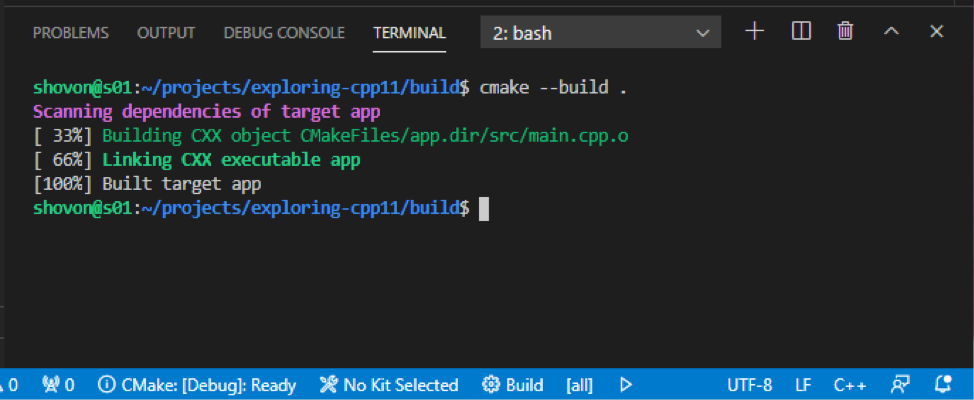
To compile the C++ project using CMake, run the following command:
The C++ project should be compiled, as you can see in the screenshot below.
Once the C++ project is compiled, a new executable file app should be created in the build/ folder, as you can see in the screenshot below.
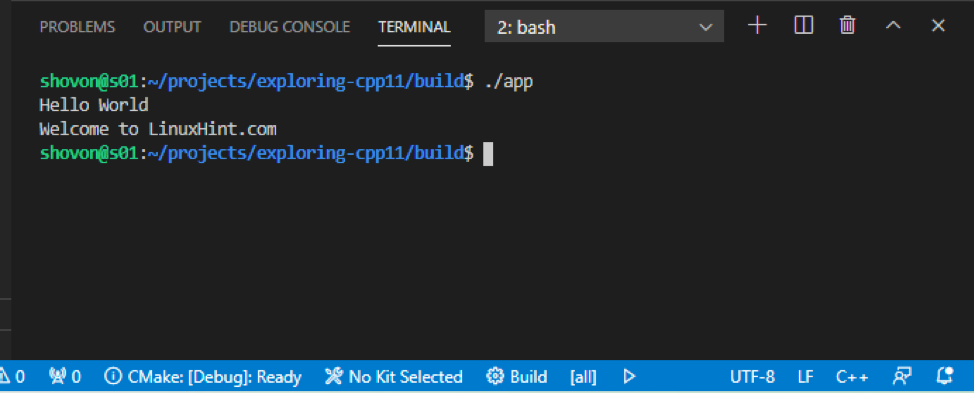
You can run the compiled executable file app, as follows:
As you can see, the correct output is being printed on the console.
This is how you use Docker to create a Linux development environment on your Synology NAS and do remote development on Docker containers using Visual Studio Code.
Conclusion
In this article, I have shown you how to use Docker to create a Linux developer environment on your Synology NAS and do remote development on Docker containers using Visual Studio Code. Other than that, how you can use the official Ubuntu 20.04 LTS Docker Hub image to create a custom Ubuntu 20.04 LTS Docker image to set up a Docker development environment is also taught here. You can do the same with other operating system images (i.e., CentOS, Debian) as well.

