Eclipse is a one of the famous integrated development environments commonly used as the second most popular Java development platform. It is considered a base workplace due to its extensible plugins. It enables developers to use and test code written in any programming language. However, sometimes developers want to remove eclipse from Windows. Maybe they want to switch to another IDE or reinstall Eclipse.
This blog will demonstrate the procedure for Eclipse uninstallation on Windows 10.
How to Uninstall Eclipse On Windows 10?
Eclipse cannot be uninstalled in the same manner as other programs. There is no proper uninstaller for eclipse. Therefore, users must manually delete the installation directory to remove Eclipse.
To delete the Eclipse, users are required to follow the listed instructions:
- Delete the Eclipse shortcut from the Start menu
- Delete Eclipse Installation Folder
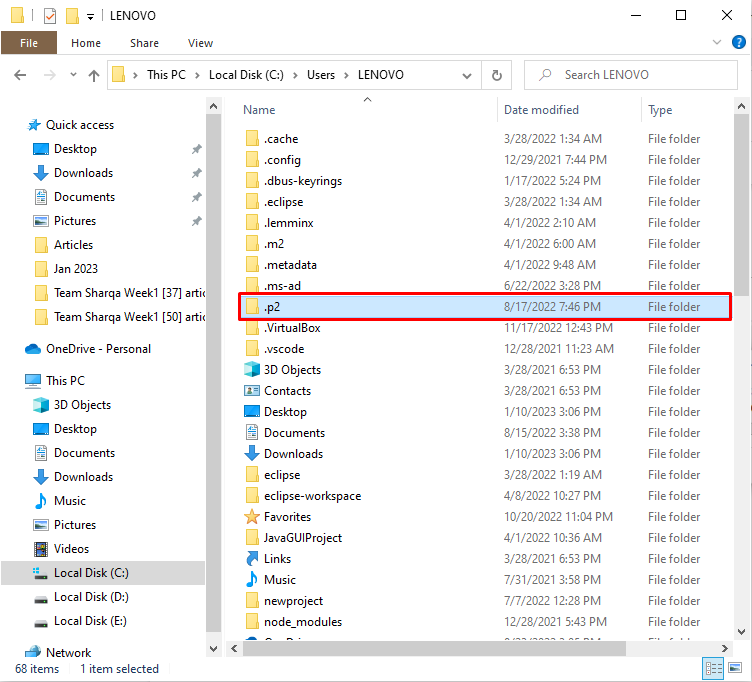
- Delete the .p2 folder from user home directory
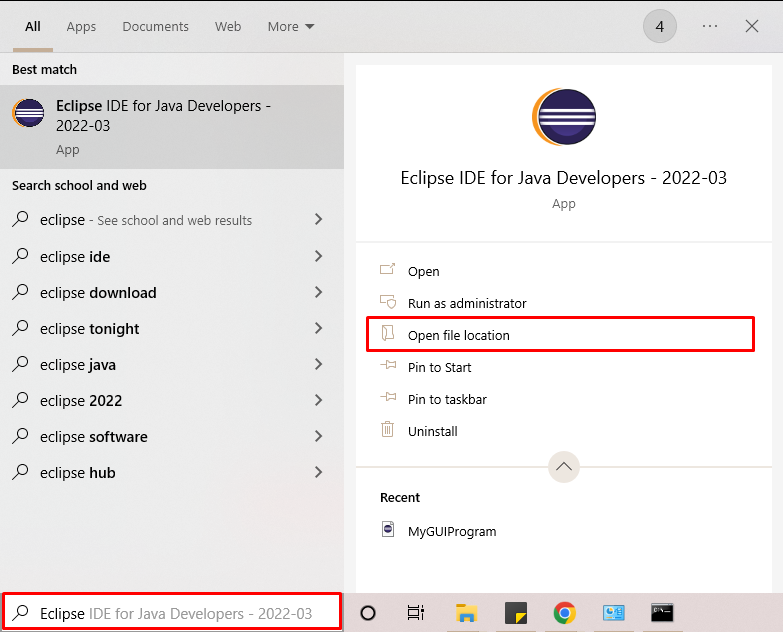
Step 1: Open Eclipse Shortcut Location
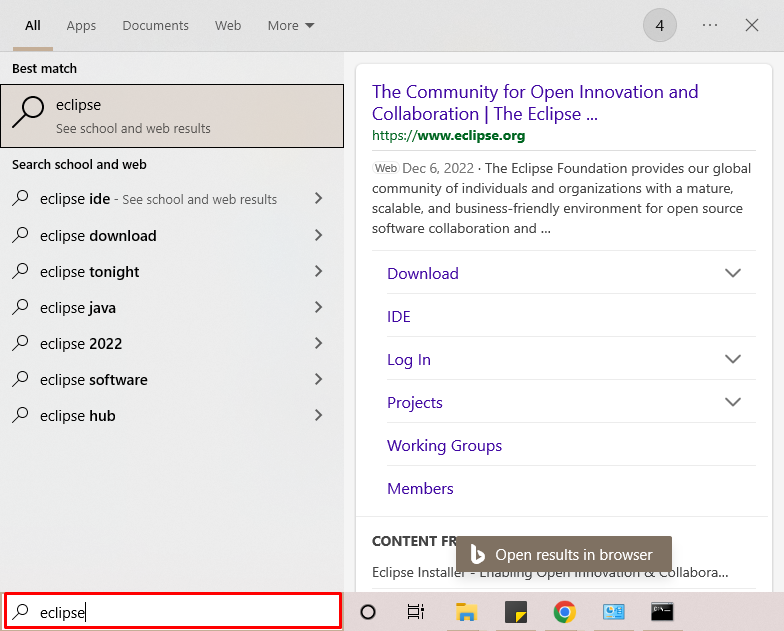
Search for “Eclipse” from the Windows Start menu, and open the Eclipse installation location by clicking on “Open file location”:
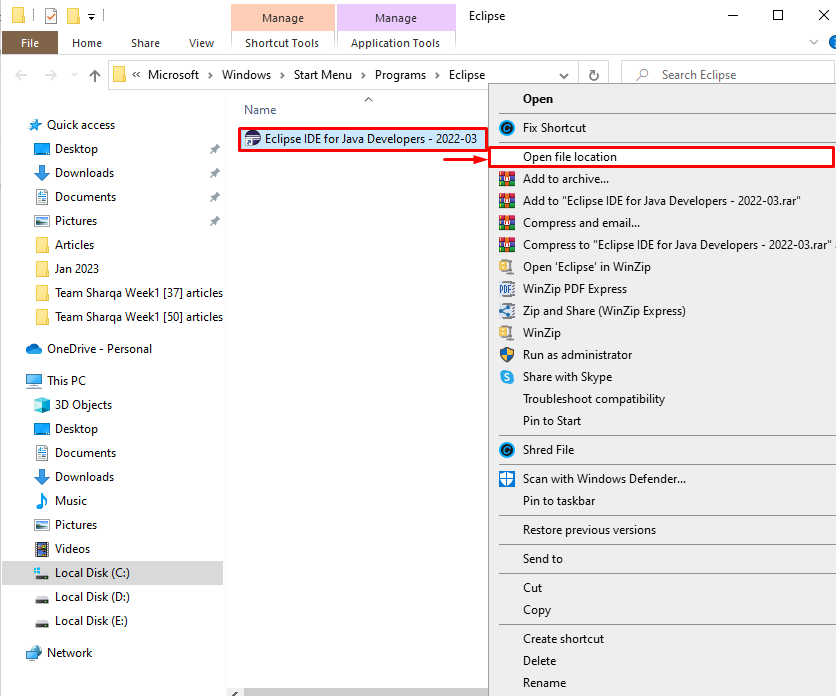
Step 2: Open Eclipse Installation Directory
Upon doing so, users are navigated to the location where the “Eclipse” shortcut is placed. To view the Eclipse installation folder, right-click on the Eclipse shortcut, and select “Open file location” from the displayed context menu:
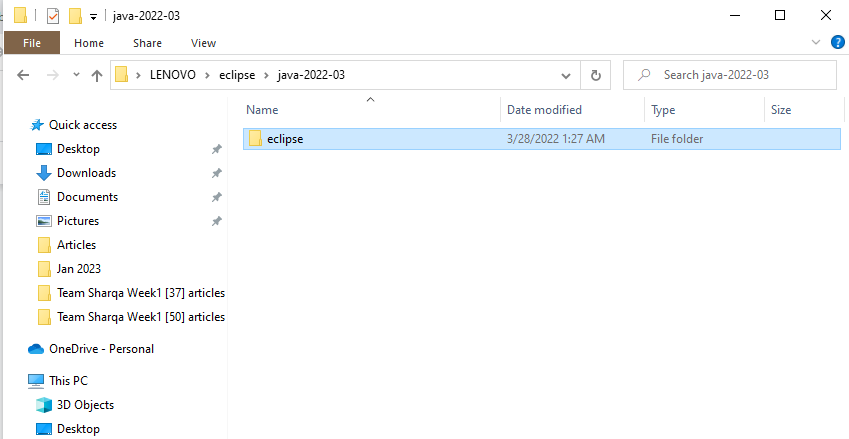
Here, users can see the “eclipse” installation folder. By default, the eclipse will be installed in “C:\Users\<username>\eclipse\java-<version>” directory:
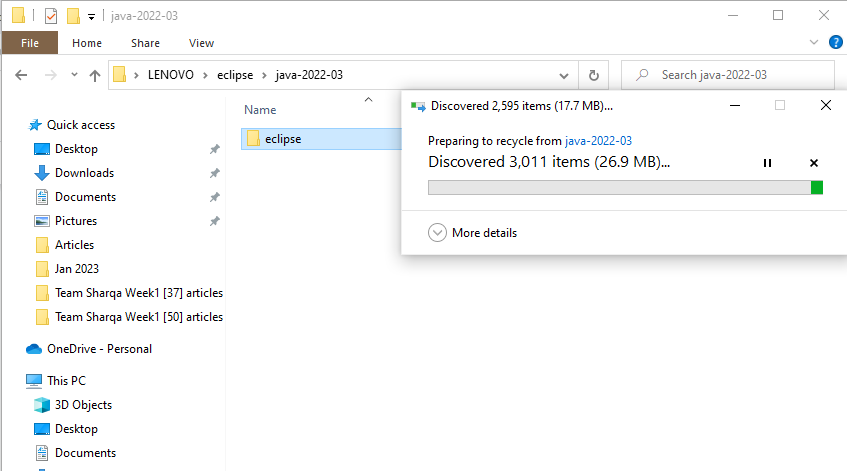
Step 3: Delete Installation Folder and Eclipse Shortcuts
To delete the installation folder as well as the Eclipse shortcut, select the folder and press the “delete” or “del” key:
Step 4: Remove the “.p2” Directory
Next, to completely remove Eclipse from the system, you must remove the Eclipse pool directory “.p2”, which manages Eclipse’s cache, files, and settings. For this purpose, visit the “Users” directory, such as “C:\Users\<user-name>”:
Step 5: Verification
Lastly, verify if the Eclipse has been removed from the system or not by again checking it in the Windows Start menu:
It can be observed that we have successfully uninstalled Eclipse on Windows.
Conclusion
To uninstall Eclipse, users must first delete the Eclipse shortcut. Then, delete the Eclipse installation folder. After that, delete the “.p2” directory that contains the cache, files, and other settings of Eclipse from your user’s home directory. This blog has demonstrated the method for Eclipse uninstallation on Windows 10.

