This write-up will offer you ten tips to free up RAM on your Windows 10 to speed up the system.
10 Tips to Free Up RAM on Your Windows 10
Here are the ten tips to free up RAM on Windows 10:
- Restart Windows 10
- Disable startup apps
- Scan for malware
- Adjust virtual memory
- Reduce visual effects
- Stop background running apps
- Disable SysMain in the Service Menu
- Close the unused tabs open in your browser
- Defragment your hard drive
- Disk cleanup.
Let’s check each method one by one!
Tip 1. Restart Windows 10
Restarting Windows 10 will close all the apps using your RAM while running in the background. RAM is a volatile memory (it loses stored data when the PC turns Off), so when the PC restarts, it close all the programs and processes using RAM and free up the allocated space.
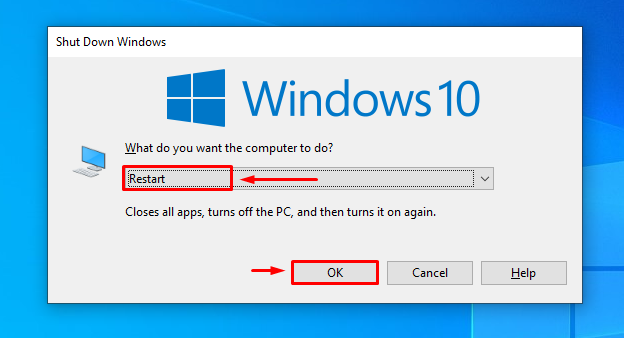
To restart Windows 10, press the “Alt+F4” keys. As a result, a “Shut Down Windows” pop-up will appear from where you have to select “Restart” and press the “OK” button:
Tip 2. Disable Startup Apps
Start-up programs are those programs that start to work whenever Windows 10 restarts. As a result, these programs increase the RAM and CPU usage and slow down the system. However, disabling the start-up programs will not only speed-up Windows 10 but also free up the RAM.
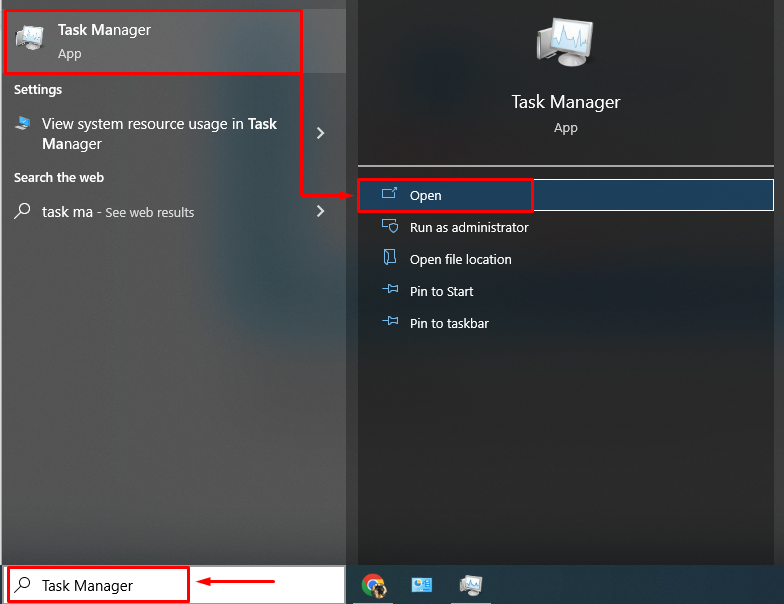
To do so, launch “Task Manager” from the “Start Menu” as demonstrated below:
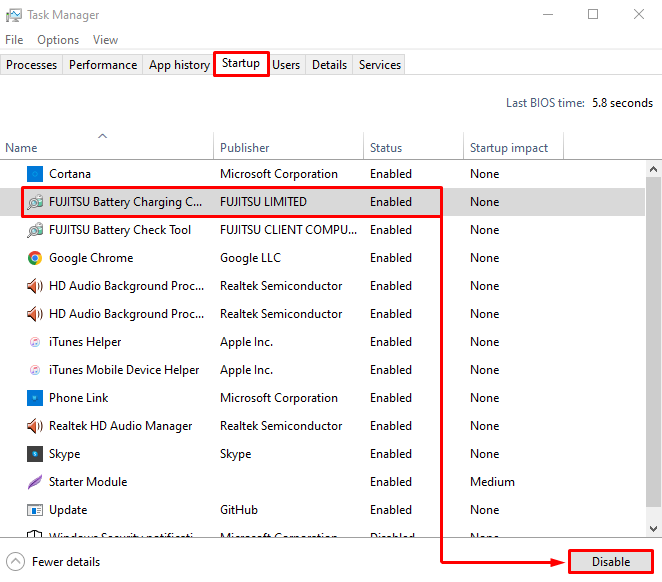
Navigate to the “Startup” tab, select any program you want to disable, and then press the “Disable” button, which is on the bottom right:
Tip 3. Scan for Malware
If your PC slows down and hangs up at certain times, it is because of malicious malware inside your system that can steal the data. Wait no more and scan immediately for the malware. This operation will secure your data and free up the RAM.
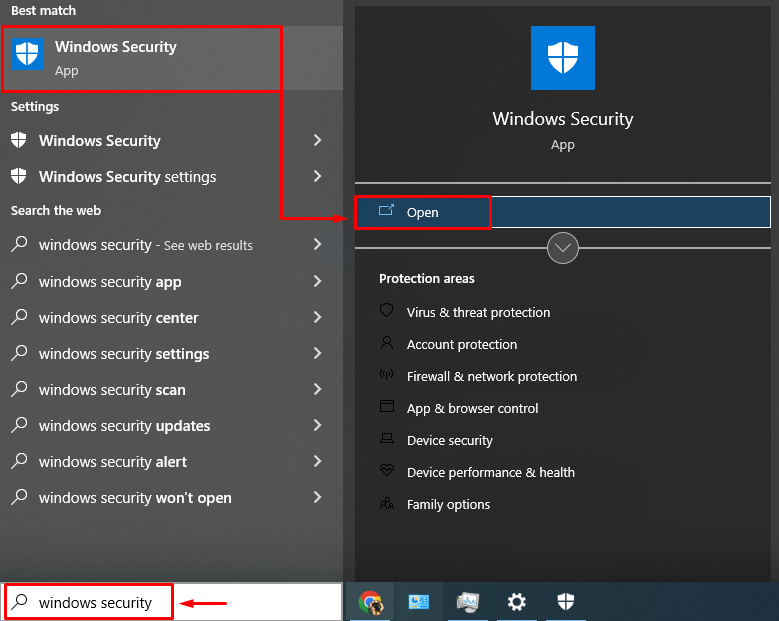
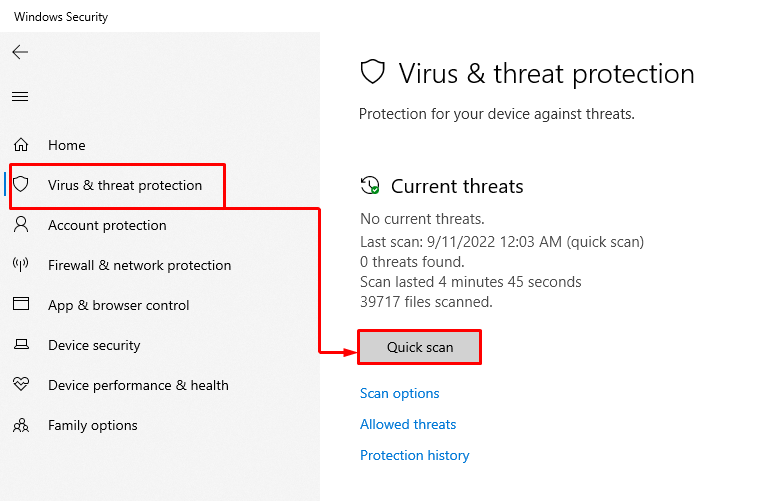
Launch “Windows Security” from the “Start Menu”:
In the “Windows Security” window, navigate to the “Virus & threat protection” tab, and click on the “Quick scan” to initiate the scan:
As you can see, the scan is running, and it will remove the malware and also free-up RAM:

Tip 4. Adjust Virtual Memory
If you feel that RAM is using more space and there is no space left for other programs to run, then you can try creating a virtual memory by turning your available hard disk space into virtual memory.
From the “Start Menu”, launch “View advanced system settings”:

Navigate to the “Advanced” tab and hit the “Settings” option:
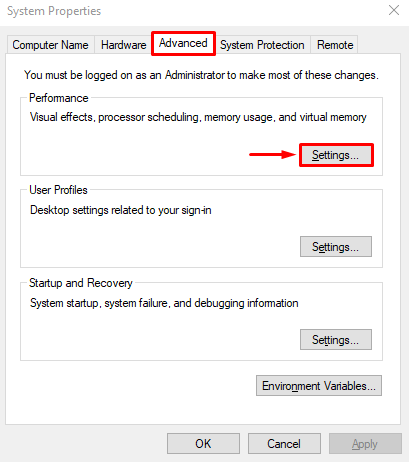
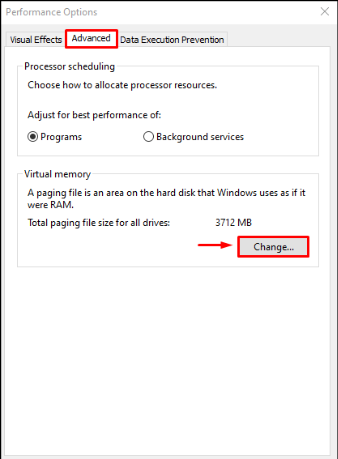
Move to the “Advanced” tab and click on the “Change” button:
First of all, uncheck the box “Automatically manage paging file size for all drives”, select “C drive”, check the radio button of “Custom size”, and enter the desired memory size in the given input fields, and hit “OK” button:
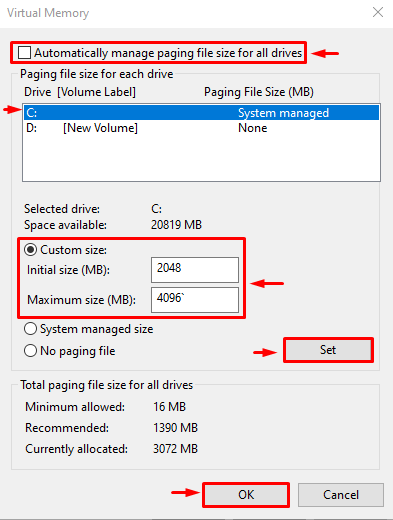
This will create virtual memory to increase RAM space.
Tip 5. Reduce Visual Effects
Reducing visual effects in Windows 10 will free up the RAM, which will directly improve the system’s performance.
Want to utilize this tip? Firstly, from the Start menu, open “View advanced system settings”. Then, in the “Performance Options” window, navigate to the “Visual Effects” tab, check the radio button of “Adjust for best performance”, and press “OK” to save changes:
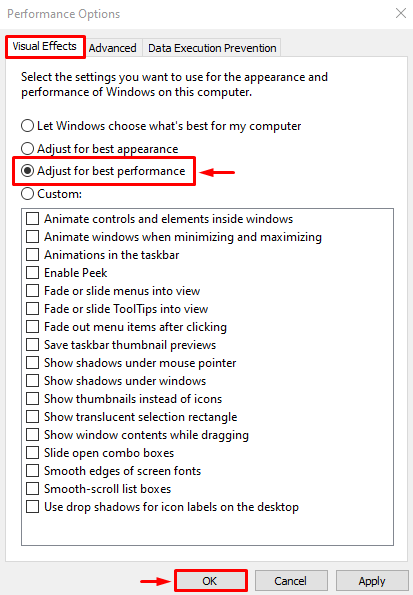
This will reduce the visual effects and RAM usage.
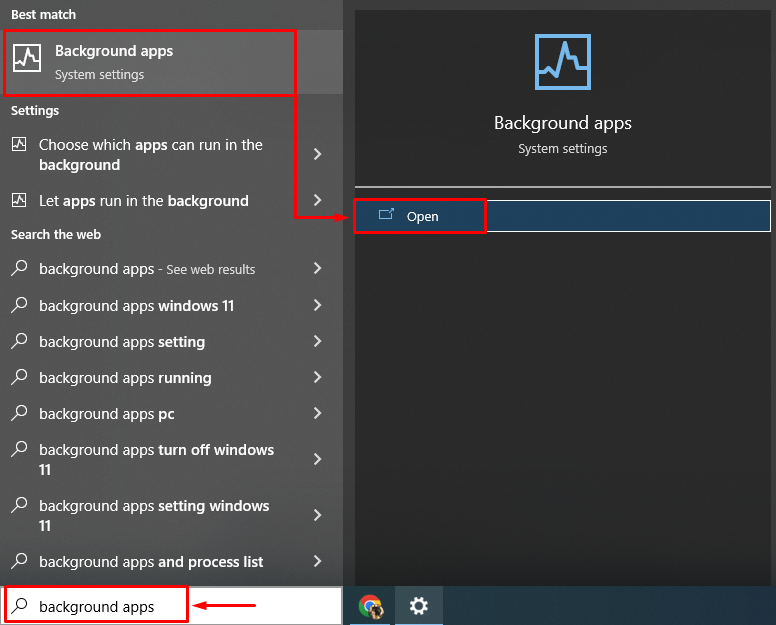
Tip 6. Stop Background Running Apps
The background apps could be the main factor in your high RAM usage, high usage of battery, and CPU.
To stop background running apps, launch the “Background apps” setting from the Start Menu:
You can close all apps by turning off the toggles of apps under the “Choose which apps can run in the background” section:
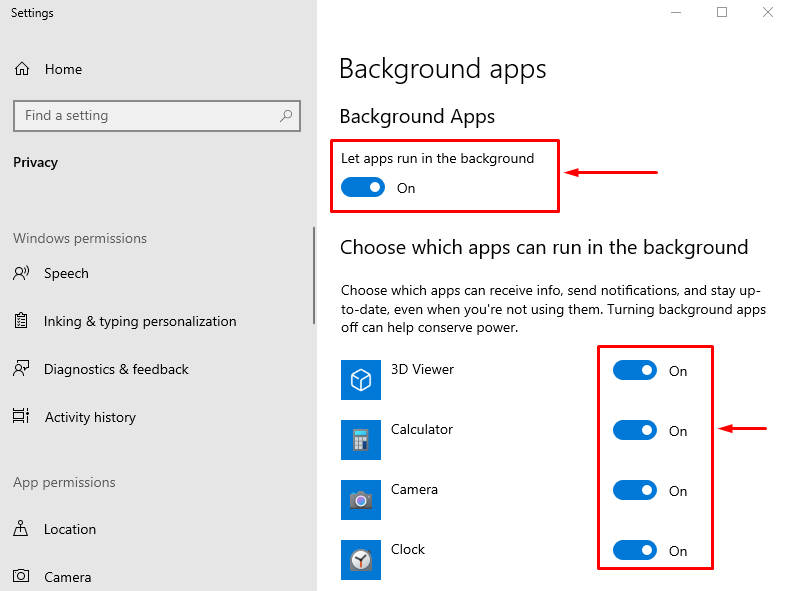
This will close the background apps running in the background to free-up RAM.
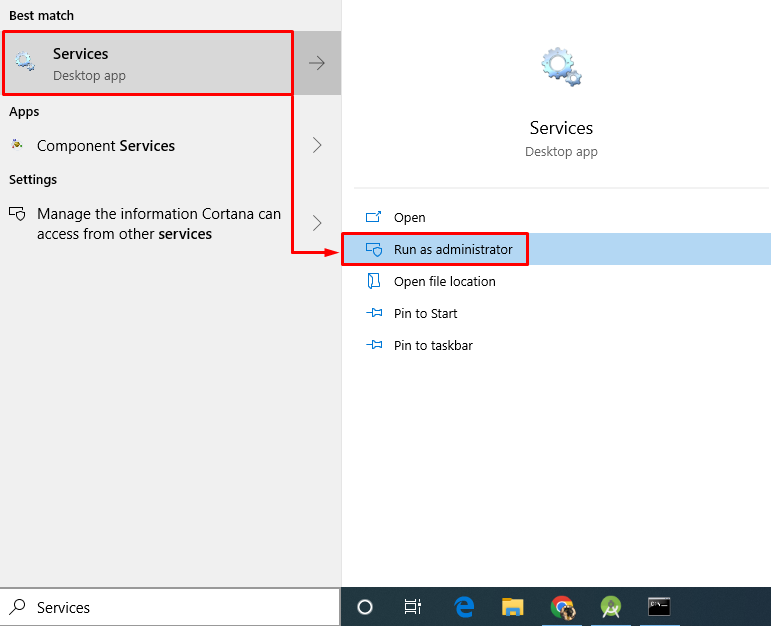
Tip 7. Disable SysMain in the Service Menu
SysMain (previously known as the SuperFetch) pre-loads the mostly used apps or processes in Windows 10 for a better user experience. It also causes the high usage of CPU and RAM because of its functionality of pre-loading the apps. More specifically, you can disable SysMain to free up your system RAM.
To disable SysMain, launch “Services” from the Start Menu:
Look for “SysMain”, open its properties, and navigate to the “General” tab. Then, set “Startup type” to “Manual” and hit the “Stop” option to stop the running service. Lastly, hit the “OK” button to disable SysMain and save changes:
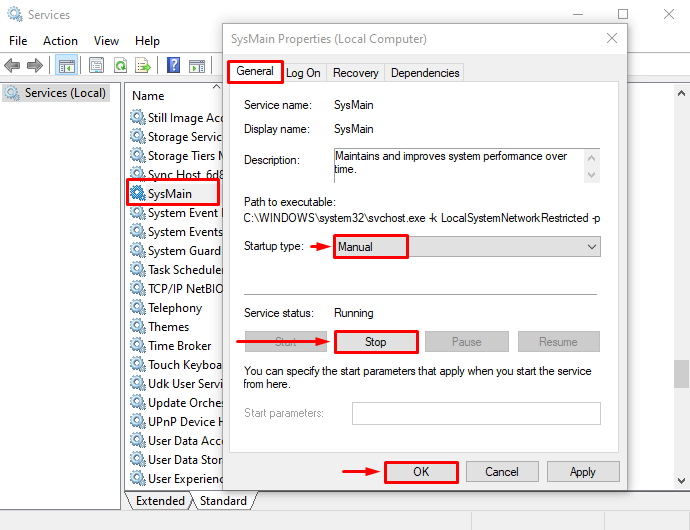
This operation will disable SysMain to free-up RAM space.
Tip 8. Close Unused Tabs Open in Your Browser
You may have noticed whenever you are using any internet browser Windows 10; RAM starts to fill up. It is because whenever you open a tab, it creates a new process in RAM. The more you open new tabs, the more processes will be created in the RAM. Tech users usually make fun of the Chrome browser for using almost all the RAM in Windows 10.
However, you can close the tabs in the browser by just simply clicking on the cross sign:

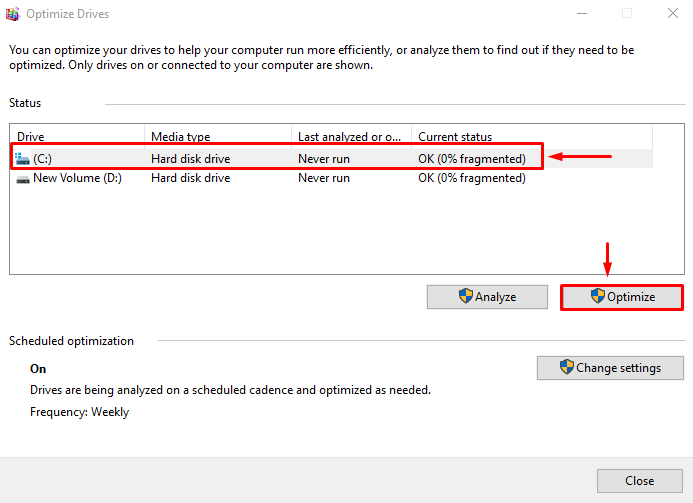
Tip 9. Defragment Your Hard Drive
Whenever you save new files on your Windows, the system creates a certain portion on the hard drive for it. Frequently saving or deleting files on a hard drive will result in disk fragmentation, which means that there are some gaps created on the hard disk, and no certain file can fill it.
To remove those created gaps, it is required to perform the disk defragmentation. For this purpose, launch “Defragment and Optimize Drives” from the Start Menu:

Now select the disk and click “Optimize” to start the process.
Note: The drives on our PC are fragmented, so it is showing the “Optimize” option instead of “Defragment Disk”. Therefore, run your Defragmentation process carefully:
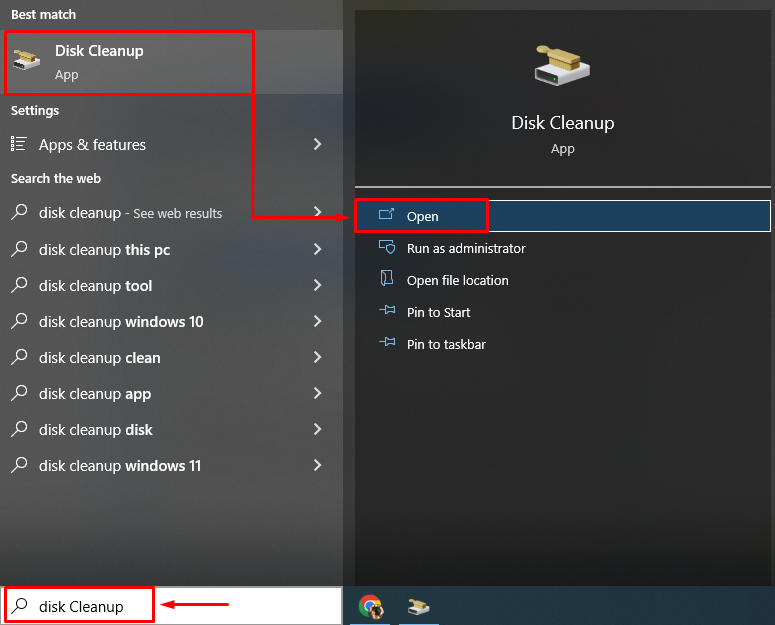
Tip 10. Disk Cleanup
Disk cleanup is a Windows 10 very useful tool used to delete temporary files and folders that are consuming your disk space and RAM usage.
Launch “Disk Cleanup” with the help of the Startup menu:
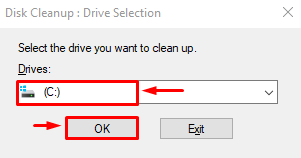
Select a disk and press the “OK” button:

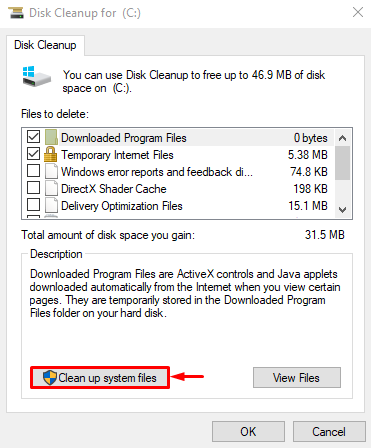
Select the files by marking the checkboxes in the “Files to delete” section and press the “OK” button:

As a result, you will see another option of “Clean up system files” click on it to proceed:
Again, select the disk and press the “OK” button:
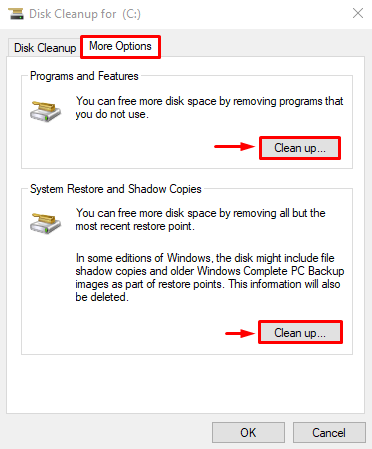
Navigate to the “More Options” tab, select the “Program and Features” or “System Restore and Shadow Copies” option to clean up the disk:
This will not only clean the disk, but it will free up RAM space for better performance of Windows 10.
Conclusion
To free up RAM on your Windows 10 system, you can go for the option of disabling startup apps, performing a scan for malware, reducing visual effects, creating virtual memory, restarting Windows, stopping background apps, or performing disk defragmentation. This write-up has covered the ten tips to free up RAM on your Windows 10 operating system.