“This device cannot start (code 10)” is an error that can be encountered due to incompatible, outdated, or missing network adapter drivers. The code 10 error mostly occurs after updating the Windows 10, as reported by the Windows user on various internet forums. This error signifies that your Device Manager could not start the hardware device or communicate with that device.
This tutorial will present numerous methods to rectify the described error.
How to Solve “This Device Cannot Start (Code 10)” Network Adapter Error?
The described error can be fixed using the given approaches:
- Restart the PC.
- Disable/enable the network driver.
- Reinstall the network driver.
- Update network driver.
- Rollback driver.
- Troubleshoot network adapter.
- Run hardware troubleshooter.
- Power flush.
- System restore.
Fix 1: Restart the PC
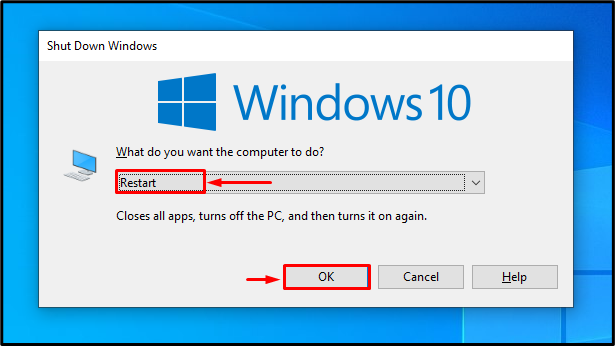
The described error can be repaired by restarting Windows 10. For that reason, first press the “Alt+F4” keys altogether to open the shutdown window, and select “Restart” from the drop-down menu to restart:
Fix 2: Disable/Enable the Network Driver
Another fix that can be used to rectify the described error is by enabling/disabling the network driver.
Step 1: Launch the Device Manager
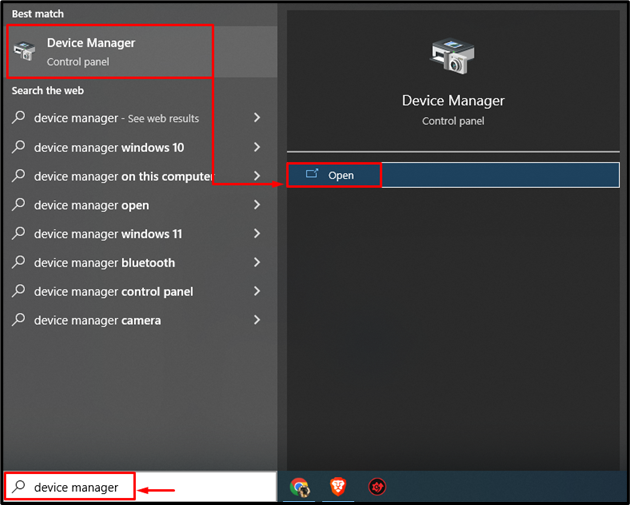
Initially, move to the Startup menu, search, and open the ”Device Manager”:
Step 2: Disable the Network Driver
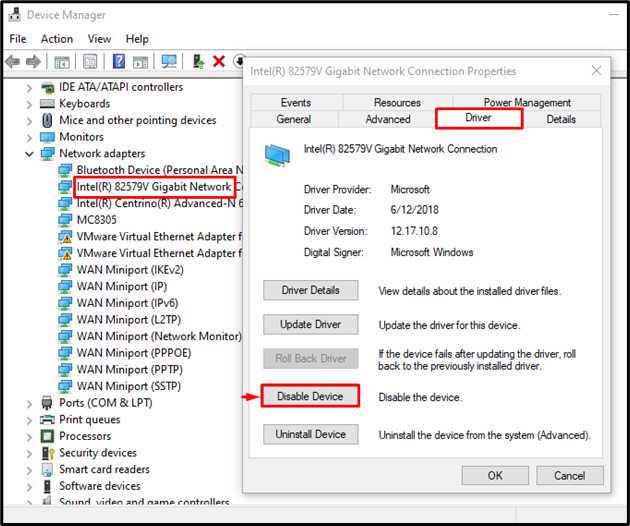
- First, extend the “Network adapter” segment and open “Properties”.
- Move to the “Driver” section and click “Disable Device”. A window will pop up, where you have to click on the “Yes” option to disable the driver:
Now, click on “Enable Device” to re-enable the network driver.
Fix 3: Reinstall Network Driver
The corrupt and missing driver files can also cause the stated error. Therefore, reinstalling the network drivers can also help in rectifying the stated error.
Step 1: Uninstall the Driver
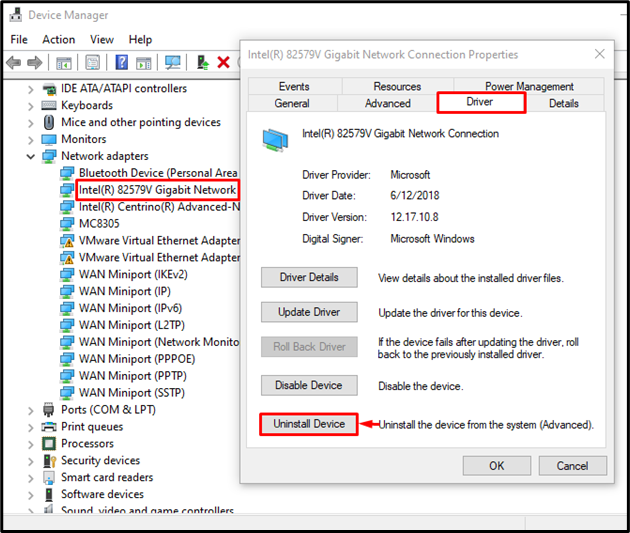
- Initially, extend the “Network Adapters” segment and open driver “Properties”.
- Move to the “Driver” section and click on “Uninstall Device”:
Step 2: Reinstall the Driver
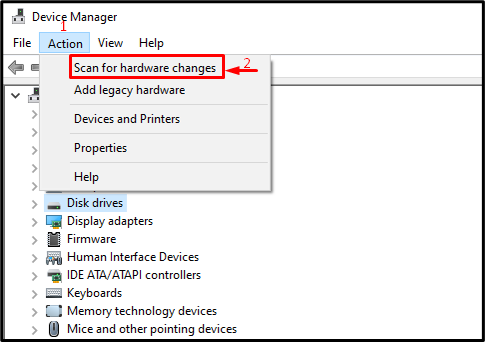
Trigger the “Action” option and from the context-menu select “Scan for hardware changes”:
Fix 4: Update Network Driver
Another method for fixing the mentioned issue is to update the network drivers. To do so, navigate through the given steps:
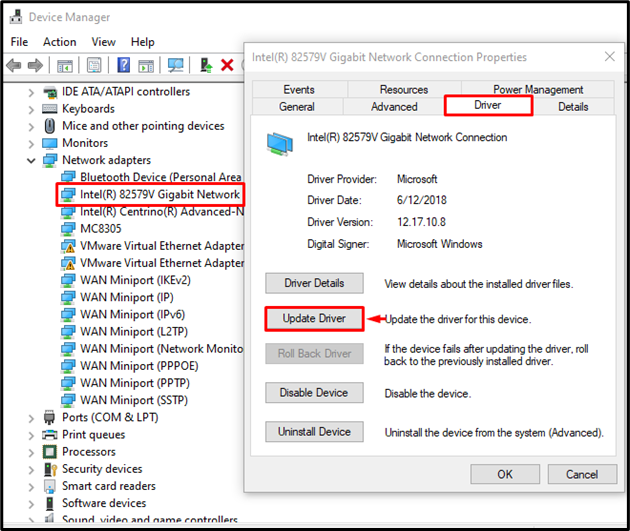
- At first, open “Device Manager”, extend the “Network Adapters” segment, and open driver “Properties”.
- Navigate to the “Driver” segment and trigger the “Update Driver”:
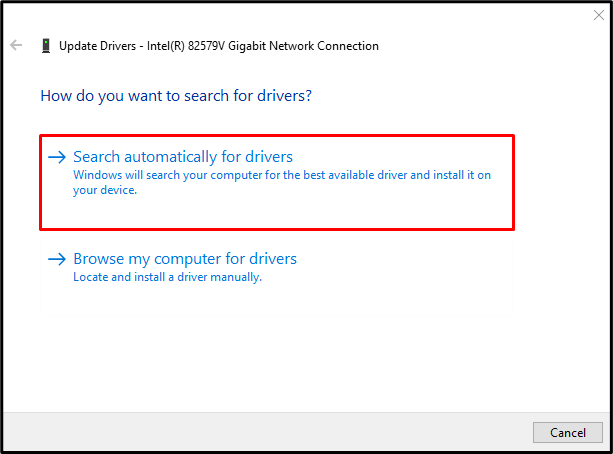
Trigger the highlighted option:
Fix 5: Rollback Network Driver
The driver you have updated may not be compatible and creating network problems. That is why rolling back to the recent driver version will help fix the issue:
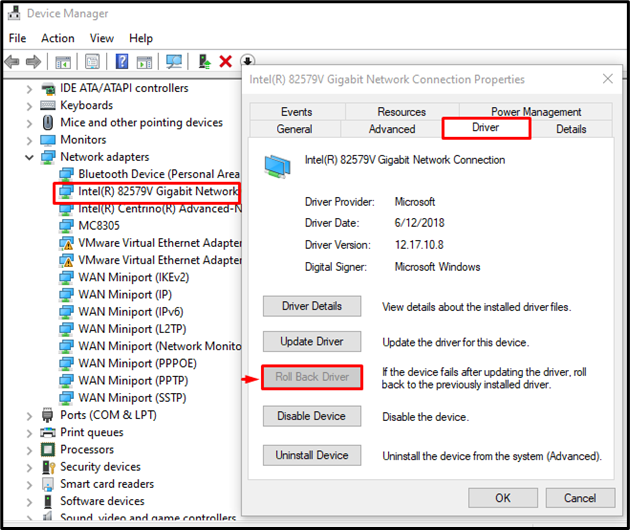
- First, extend the “Network Adapters” segment and open driver “Properties”.
- Navigate to the “Driver” section and trigger the “Roll Back Driver” option. If it’s grayed out, it means there was no backup created, which is why this driver can not be rolled back:
Fix 6: Troubleshoot the Network Adapter
Sometimes the bug in the system settings can cause the described error. So, running the network troubleshooter will fix the problem.
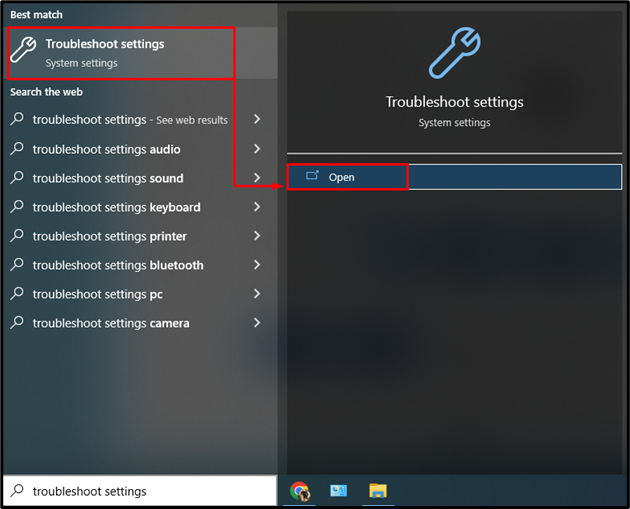
Step 1: Launch the Troubleshoot Settings
First, launch the “Troubleshoot Settings” from the “Start menu”:
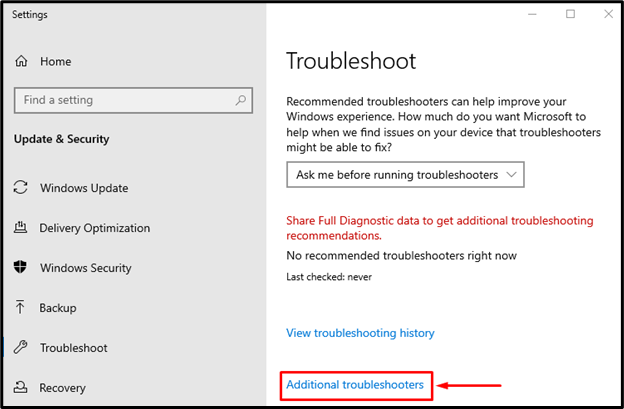
Step 2: Launch the Additional Troubleshooters List
Trigger the highlighted option:
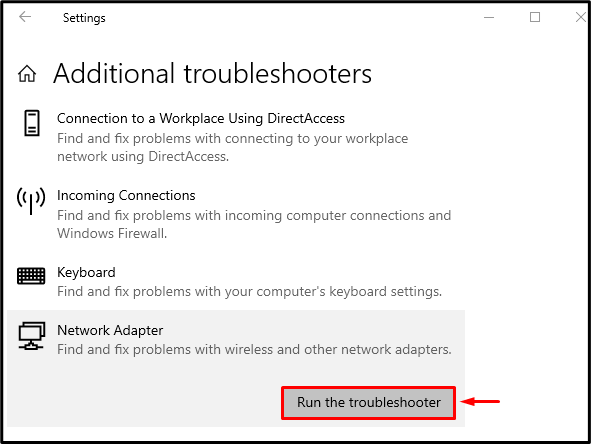
Step 3: Execute the Troubleshooter
Locate the “Network Adapter” and trigger the highlighted option:
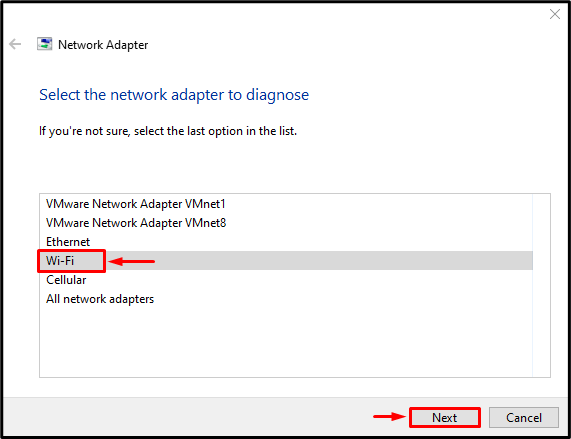
Select the “Wi-Fi” adapter from the list and click on the “Next” button:
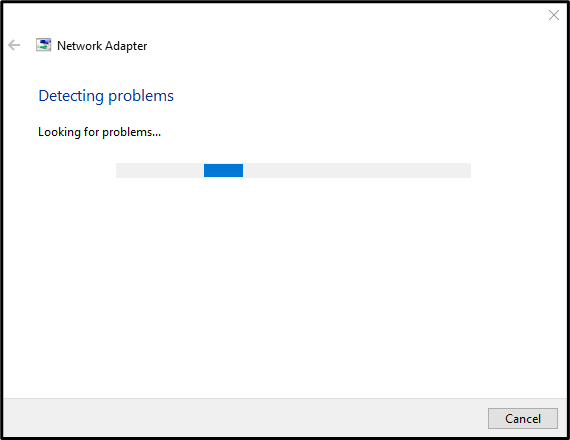
The troubleshooting wizard has started to detect the issue. If found any problems, it will diagnose them automatically:
Fix 7: Run the Hardware Troubleshooter
Running a “Hardware and Devices” troubleshooter is a great way to check whether the problem is with the hardware. It will surely assist in fixing the mentioned problem.
Step 1: Launch the Run App
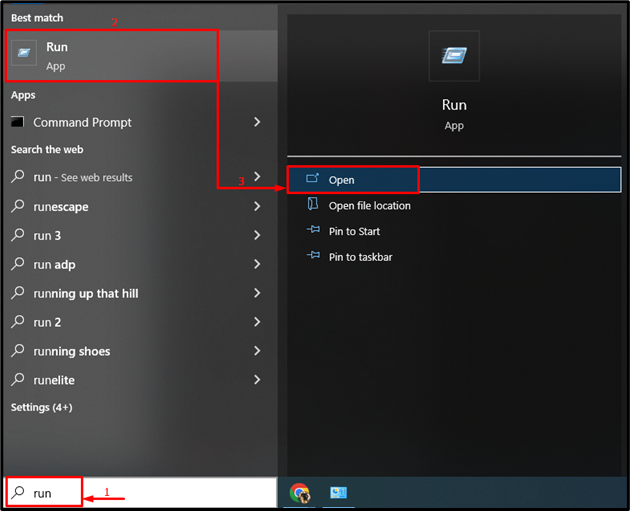
First, navigate to the Start menu, search, and open the “Run” app:
Step 2: Execute the Hardware and Devices Troubleshooter
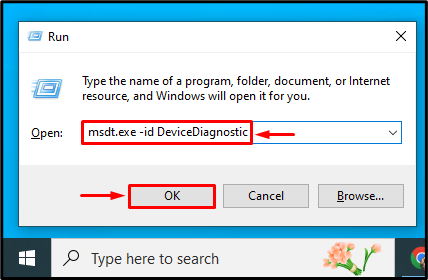
Type the “msdt.exe -id DeviceDiagnostic” (without inverted commas) in the “Run” dialog box and press the “Enter” button:
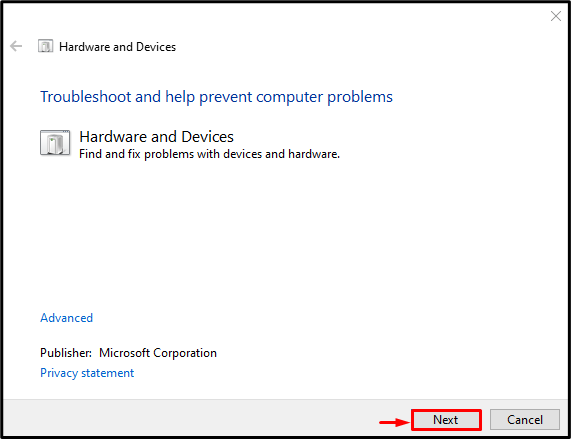
The “Hardware and Devices” troubleshooter has launched. Hit the “Next” button:
It will automatically diagnose the network adapter issues if found.
Fix 8: Power Flush
The flushing of power can assist in fixing the mentioned error. To do so, navigate to the given steps:
- Power off your PC.
- Plug out all the cables, especially the power cables.
- Hold the power key for 30 seconds.
- Turn on your computer after connecting the power cables.
- Now, check whether the problem with your network adapter has been resolved or not.
Fix 9: System Restore
Finally, if all the described solutions did not assist in fixing the mentioned problem, then restoring the system will surely fix it.
Step 1: Launch System Restore
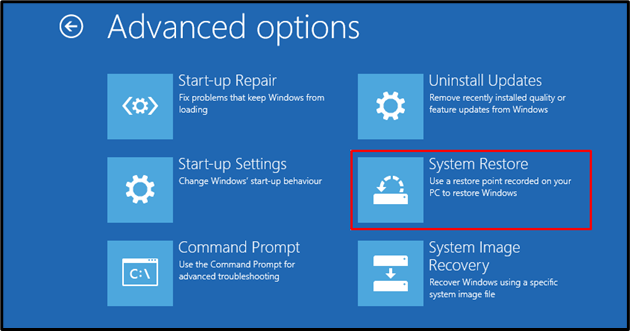
Select “System Restore” from the “Advanced options” section:
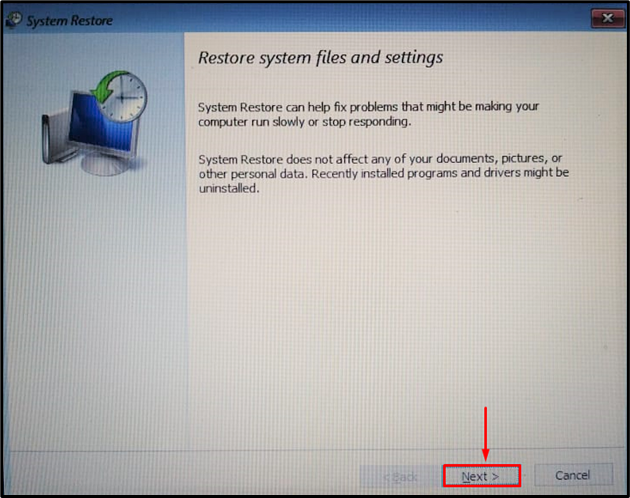
Trigger the “Next” button:
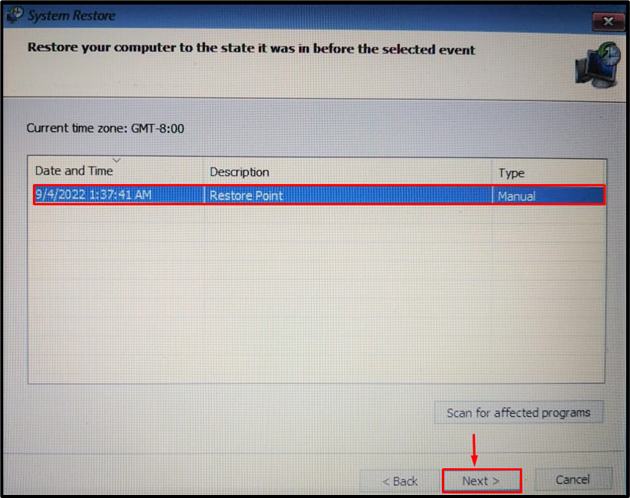
Select the restore point from the list and click on the “Next” button:
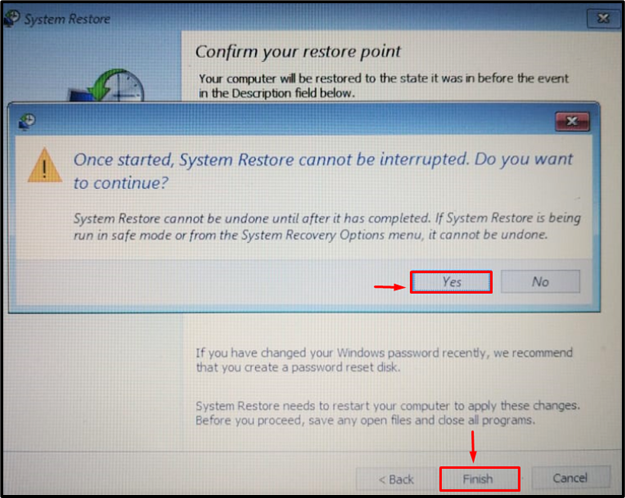
Now, click on the “Yes” from the pop-up option to initiate the system restore:
Once the restore is completed, restart the system and check whether or not it resolved the problem.
Conclusion
“This device cannot start (code 10)” network adapter error can be rectified using numerous methods. These methods include restarting the PC, reinstalling the network adapter, updating the network driver, rolling back the network driver, troubleshooting the network adapter, running the hardware troubleshooter, power flushing, or restoring the system. This tutorial has presented multiple methods to repair the mentioned problem.

