When working with Google Chrome, your browser may become unresponsive due to certain reasons. This situation can be frustrating, especially when you are doing something important. This article provides several tips that you can use to stop your Google Chrome browser from becoming unresponsive.
Stopping Google Chrome from Being Unresponsive
To stop your Google Chrome browser from becoming unresponsive, check out any of the following six tips in the sections below.
Tip # 1: Update Browser
The first tip is to update your browser. If your browser becomes unresponsive, this might mean that you are using an outdated version of the browser, which lacks some of the latest and most important patches and updates. This may be the most likely reason that your Google Chrome browser becomes unresponsive frequently. To check whether your Google Chrome is up-to-date, perform the following steps:
Open the Google Chrome browser and click the icon in the top-right corner of the browser to launch the menu, as highlighted in the image below:

Click the Settings option from the menu that appears, as shown in the following image:

Switch to the About Chrome tab, as shown below:

In the About Chrome section, you will be able to see whether your browser is up to date, as highlighted in the following image:
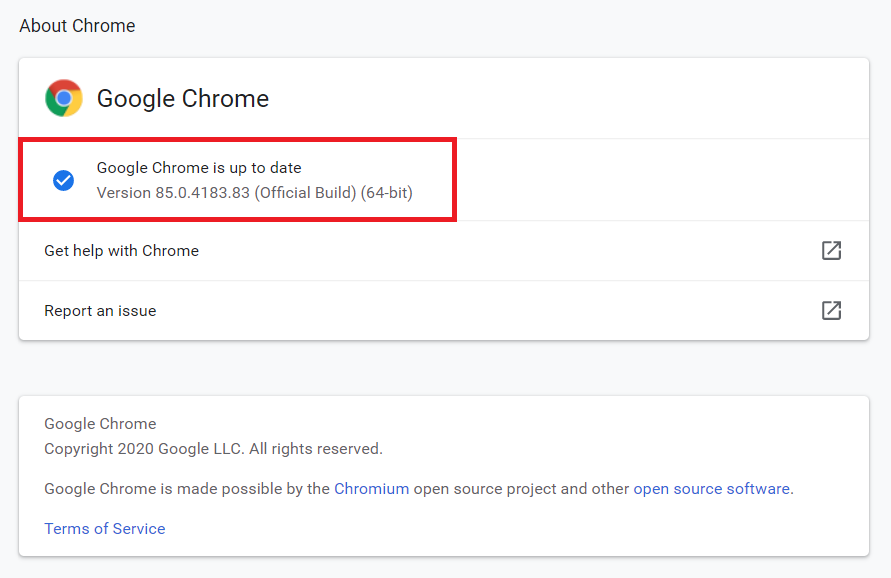
In my case, the browser is up to date. If your browser is not up to date, then there will be an Update to the Latest Version option visible in this tab. Click this option to update your browser.
Tip # 2: Turn off Hardware Acceleration
The second tip is to turn off the hardware acceleration feature in your browser. The hardware acceleration feature is there to relieve some of the burden from your CPU by transferring the graphics processing to the GPU. However, this may cause your Google Chrome browser to become unresponsive. To disable the hardware acceleration feature in Google Chrome, proceed as follows:
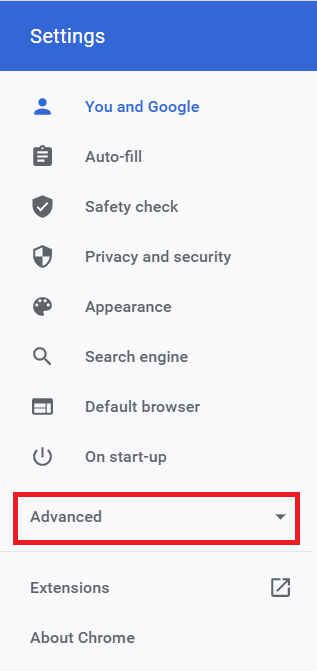
Navigate to the Settings page of Google Chrome, as described in Tip # 1.
Head over to the Advanced tab, as highlighted in the image below:
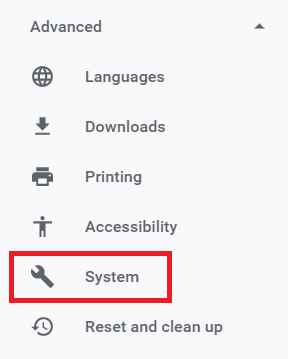
Click the System tab, as shown in the following image:
Finally, turn off the toggle button located beside the field titled “Use hardware acceleration when available,” as highlighted in the image below:

Tip # 3: Disable and Enable Extensions
The third tip is to disable all your extensions then enable them one-by-one to check which extensions are causing your browser to become unresponsive. To disable all Google Chrome extensions, follow the steps below:
Type the following URL in the Google Chrome search bar and then press the Enter key:
This URL is shown in the image below:

After doing this, you will be taken to the Extensions page of Google Chrome. From here, disable all installed extensions one-by-one, as highlighted in the following image:
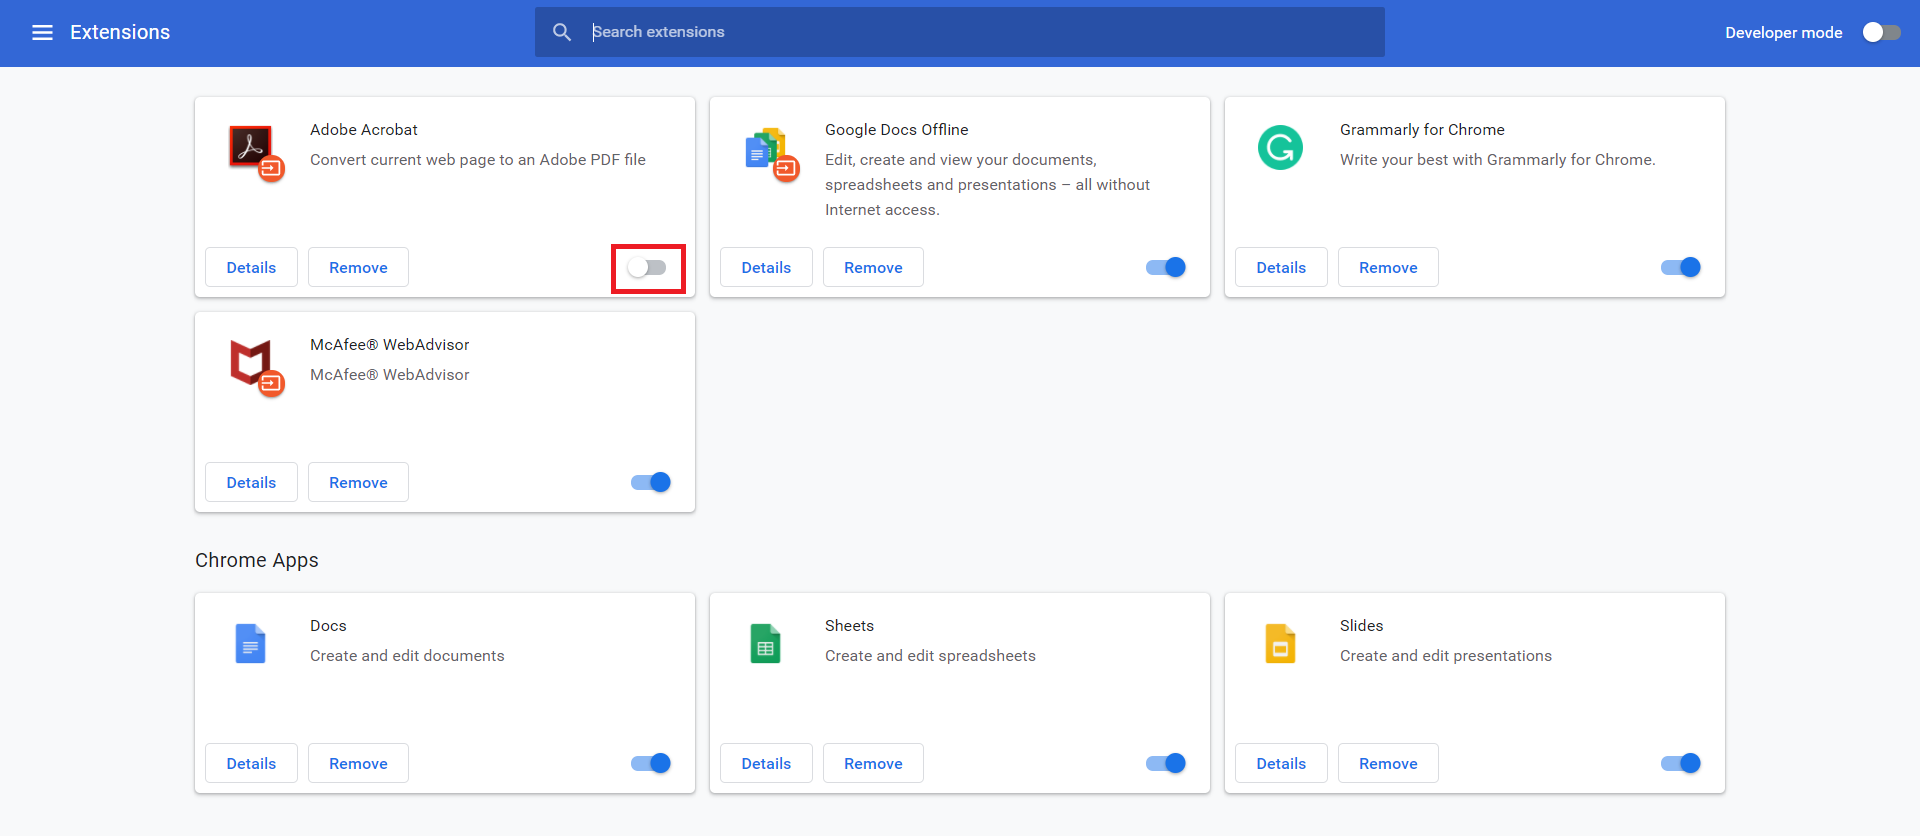
Once you have disabled all the extensions, try enabling them one-by-one by checking to see if your browser works with that extension. By following this method, you should be able to figure out which extension is causing your Google Chrome browser to malfunction, if an extension is the problem.
Tip # 4: Clear Cached Data
The fourth tip is to clear the browser’s cached data. Cached data can cause the browser to become unresponsive, so you may need to clear it all at once. To clear cached data in Google Chrome, perform the following steps:
Navigate to the Settings page of Google Chrome, as described in Tip # 1.
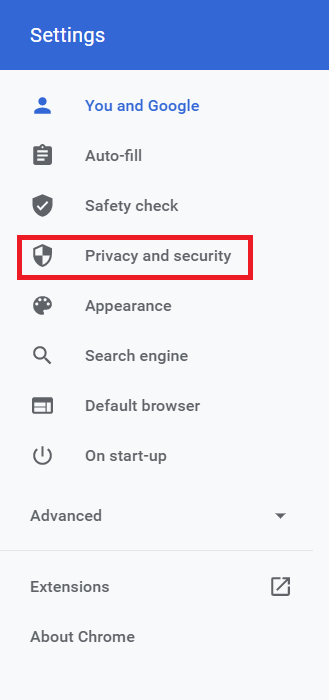
Click on the Privacy and Security tab, as highlighted in the image below:
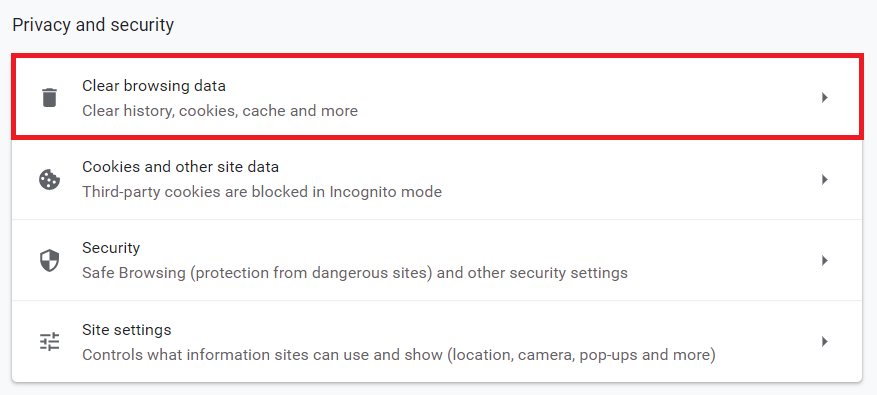
Click the Clear browsing data option, as shown in the following image:
Click the Clear data button, as highlighted in the image below:

Tip # 5: Disable Third-Party Cookies
The fifth tip is to disable third-party cookies. Third-party cookies may be responsible for rendering your Google Chrome browser unresponsive. To disable these cookies, perform the following steps:
Type the following URL in the Google Chrome search bar and then press the Enter key:
This URL is also shown in the image below:

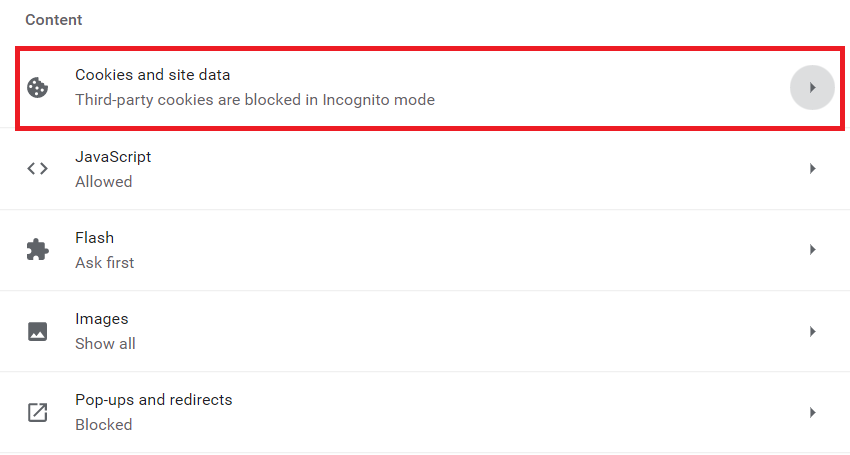
Click on the Cookies and site data field in the window that opens, as shown in the following image:
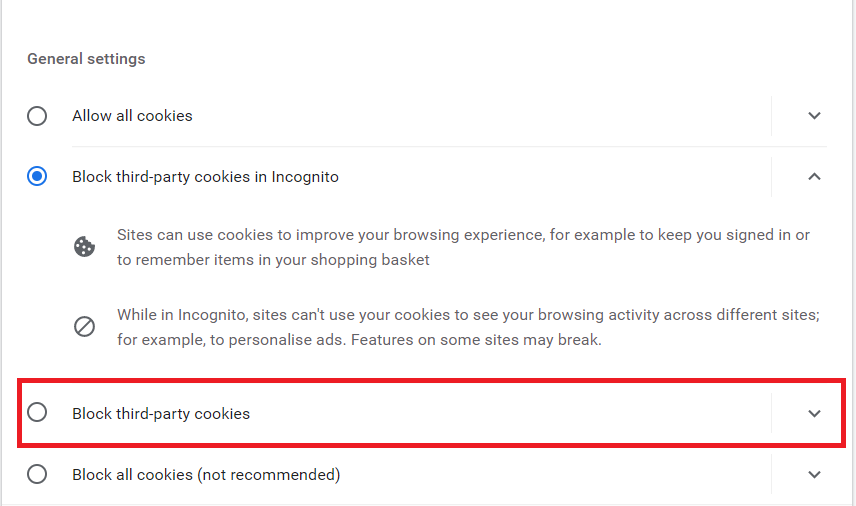
Finally, click the Block third-party cookies radio button to disable third-party cookies in the browser, as highlighted in the image below:
Tip # 6: Reset Google Chrome Browser
The final tip, if none of the above tips work for you, is to reset your Google Chrome browser. To reset your Google Chrome browser, perform the following steps:
Navigate to the Advanced section of the Settings tab of Google Chrome, as explained in Tip # 2.
Click the Reset and clean up tab, as highlighted in the image below:

Click the field titled, “Restore settings to their original defaults,” as highlighted in the following image:

Finally, click the Reset settings button, as highlighted in the image below:

Conclusion
By following any of the tips discussed in this article, you can easily stop your Google Chrome browser from becoming unresponsive. It is recommended to follow these tips in the order in which they are presented. You might be facing only a petty issue that can easily be resolved by following the first tip, so there would be no need to reset your browser.