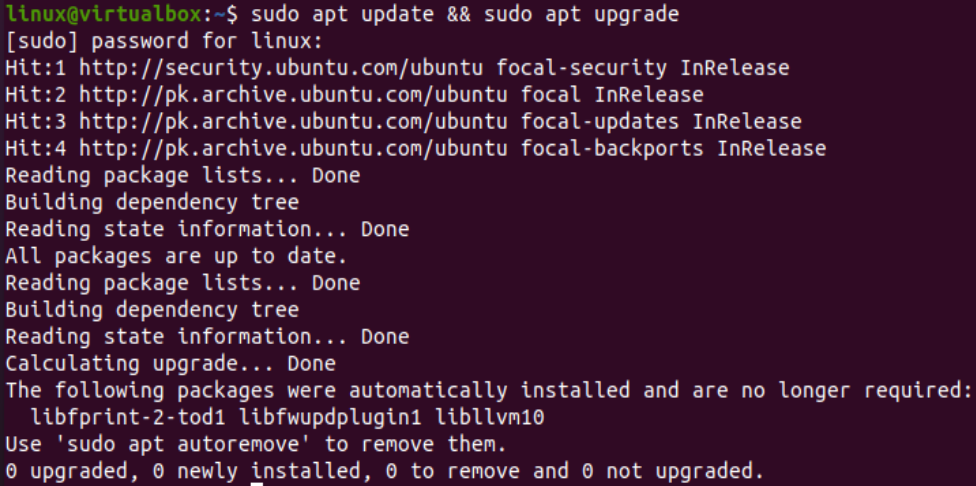
After the successful updating of our system, we are now ready to use the SQLite database in the console shell. For this, try the keyword “sqlite3” as an instruction in the shell. It will open the static SQLite shell console at our terminal screen, and we are ready to work on it.
To drop a view from the particular database, we must have one in it. For that, we must have tables in our database. So, we have tried the “.tables” instruction to list down all the tables of our current database. Unfortunately, there are no tables in the database. Thus, we need to create a new table using the CREATE TABLE instruction. We have named the new table “Information” that is going to contain a total of 5 columns in it, i.e., ID, Fname, Lname, Age, and Salary. The column ID, Age, and Salary are of integer type, while the column Fname and Lname will contain the text data within them. None of the columns contains the NULL values. Finally! The table has been created successfully, as shown in the output of the “.tables” instruction.
Using the SELECT instruction with the “*” character, we can display all the records of a table “Information.” We have tried it and found that it has no records yet. If we try to delete the table “Information” by the use of the DROP VIEW instruction, it will throw an error that the DROP VIEW instruction cannot be used to delete a table. So, we need to create views first.
>> DROP VIEW Information;
To create views, we have to insert data in the table Information. Therefore, we have to use the INSERT INTO instruction followed by the name of a table “Information” within the query area. The name of the table must be followed by the column names which will be used to insert the records, and the keyword “VALUES” must be followed by the records for all the 5 columns. A total of 10 records have been inserted for the ID, Fname, Lname, Age, and Salary column of a table Information as per the shown below query at SQLite terminal.
INSERT INTO Information(ID, Fname, Lname, Age, Salary) VALUES (2, "Ana", "Robert", 25, 39000);
INSERT INTO Information(ID, Fname, Lname, Age, Salary) VALUES (3, "Peter", "Watson", 32, 45000);
INSERT INTO Information(ID, Fname, Lname, Age, Salary) VALUES (4, "Ema", "Watson", 26, 48000);
INSERT INTO Information(ID, Fname, Lname, Age, Salary) VALUES (5, "Robert", "Patinson", 33, 76000);
INSERT INTO Information(ID, Fname, Lname, Age, Salary) VALUES (6, "Leo", "K", 28, 55000);
INSERT INTO Information(ID, Fname, Lname, Age, Salary) VALUES (7, "George", "Washington", 45, 706000);
INSERT INTO Information(ID, Fname, Lname, Age, Salary) VALUES (8, "Bush", "G", 55, 505000);
INSERT INTO Information(ID, Fname, Lname, Age, Salary) VALUES (9, "Sara", "Loren", 35, 65600);
INSERT INTO Information(ID, Fname, Lname, Age, Salary) VALUES (10, "Johny", "Depp", 43, 85000);
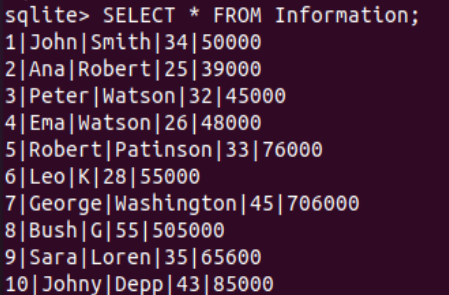
After the successful insertion of records according to the above query, we can now display those records in our SQLite shell. For this, we will be trying the SELECT instruction once again at this shell, followed by the asterisk “*” character, the keyword “FROM,” and the name of a table “Information.” This query has been presenting all 10 records of this table at our shell.
After this, we need to create views to delete them after that. So, we have been trying the CREATE VIEW command followed by the View name 5 times to create 5 different views. These views will be working on 5 different instructions using the table Information. The first view, “Detail1,” will select all the records from the Information table, while the 2nd and 3rd views, i.e., Detail2 and Detail3, will fetch the record according to the column “Age” of a table. The view Detail2 will display only the records where the column “Age” has values equal to or greater than 28, while the view Detail3 will display the records where the column “Age” has values less than 28.
CREATE VIEW Detail2 AS SELECT ID, Fname, Salary FROM Information WHERE Age >= 28;
CREATE VIEW Detail3 AS SELECT ID, Fname, Salary FROM Information WHERE Age < 28;
The last two views, i.e., Detail4 and Detail5, have been using the column “Salary” in their instruction to define the conditions of fetching the records of a table “Information.” According to the “.tables,” we have a total of 5 views and 1 table now in the database.
CREATE VIEW Detail5 AS SELECT ID, Fname, Salary FROM Information WHERE Salary < 35000;
>> .tables
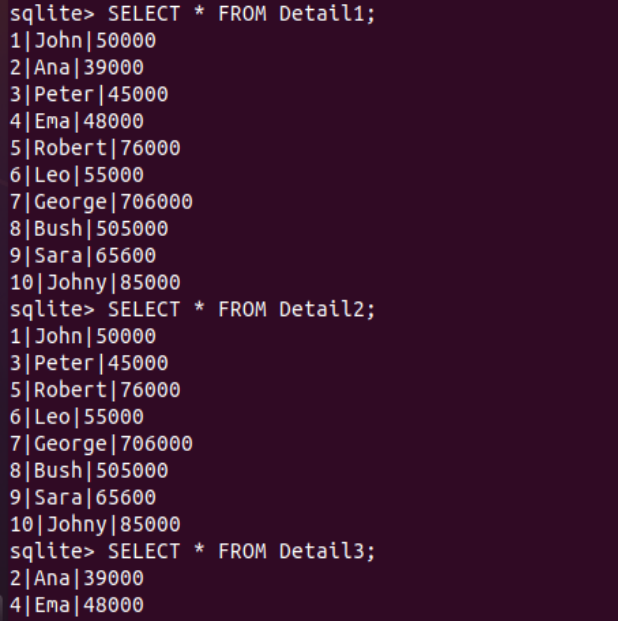
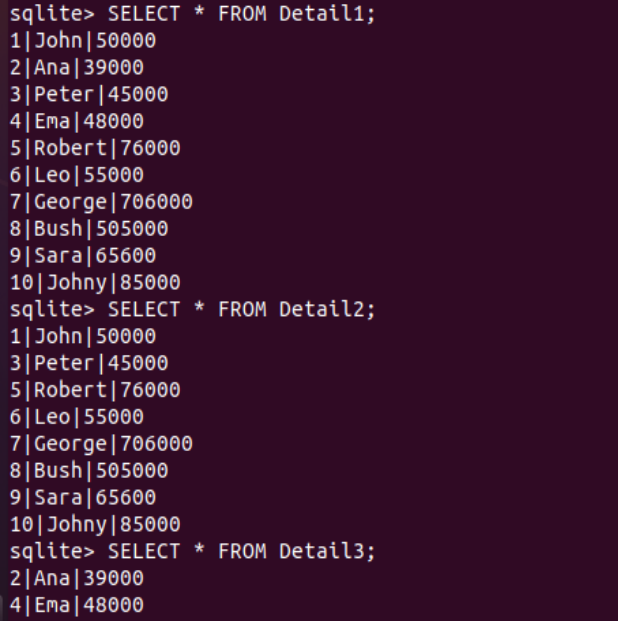
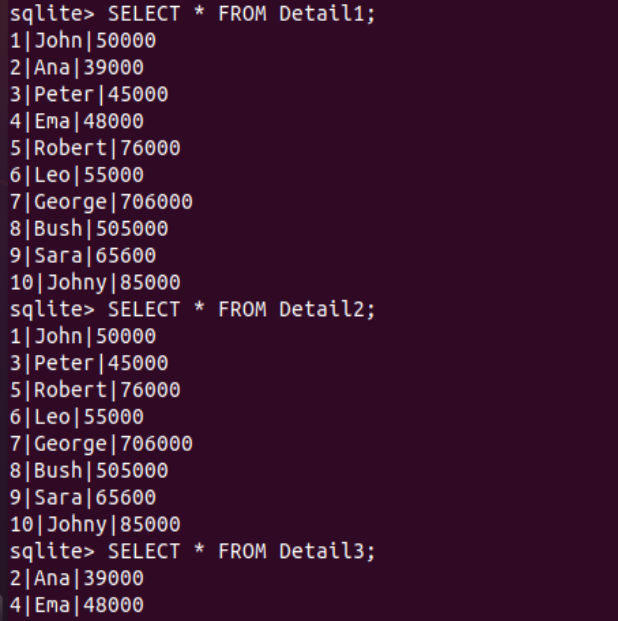
Let’s use the SELECT instruction to call the first view Detail1 to check out its result. On running this query, we have been displayed with a total of 10 records for three columns: ID, Fname, and Salary of a table “Information.”
After using the Detail2 view within the SELECT instruction, we have shown the total of 8 records out of 10 records from the table Information for the columns: ID, Fname, and Salary. This is because records 2 and 4 contain a value less than 28 for the column “Age.”
The use of Detail3 view in the SELECT instruction displayed only the 2 records from the table.
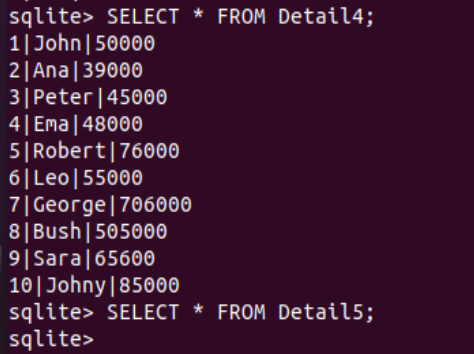
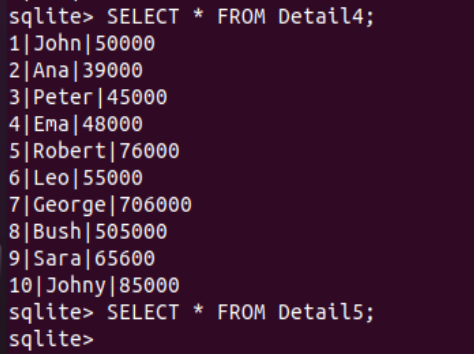
Now, we have been trying the SELECT instruction with the use of the Detail4 view. This instruction has been displaying a total of 10 records by the use of the “Salary” column in the condition.
The Detail5 view doesn’t return any record after being used within the SELECT Instruction.
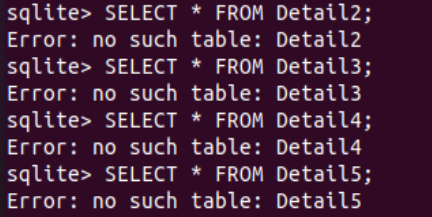
Let’s start deleting these views with the DROP VIEW instruction. We have used this instruction first to delete the Detail1 view. After using the SELECT instruction again to display the records using the Detail1 view, we have got the error as the view has been dropped successfully.
>> SELECT * FROM Detail1;
Now, we have 4 views left. We have tried the DROP VIEW instruction 4 times to drop all the views 1 by one and left with the table “Information” at last.
>> DROP VIEW Detail2;
>> DROP VIEW Detail3;
>> DROP VIEW Detail4;
>> DROP VIEW Detail5;
The use of SELECT instruction on views will display errors as displayed.
Conclusion
This was all about the use of DROP VIEW instructions to drop or delete a view created on some tables from the SQLite database used in the Ubuntu 20.04 system. For this, we have created tables, inserted records, created views, fetched records with SELECT query, and used the DROP VIEW instruction at last to drop the created views.

