This blog will provide solutions to the stated problem in various ways.
How to Show Network Icon on Taskbar in Windows 10?
To show the network icon on the Taskbar, check out the provided solution:
- Check the Wi-Fi icon in the taskbar tray
- Enable the Wi-Fi icon from the settings
- Update network drivers
- Show Wi-Fi icon using group policy editor
Let’s overview every method in detail.
Method 1: Check Wi-Fi Icon in the Taskbar Tray
First of all, look for the Wi-Fi icon in the system tray. As the majority of the time, icons are hidden in them. For that reason, trigger the “Show hidden icons” arrow:
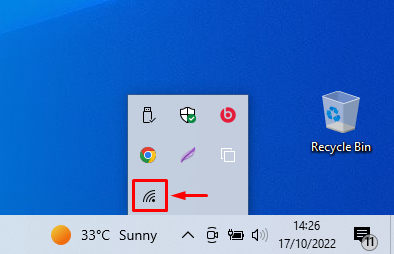
In the above image, it can be observed that the Wi-Fi icon is available and visible.
Method 2: Enable Wi-Fi Icon
Check the system settings to enable the Wi-Fi icon. For that purpose, go through the instructions provided below.
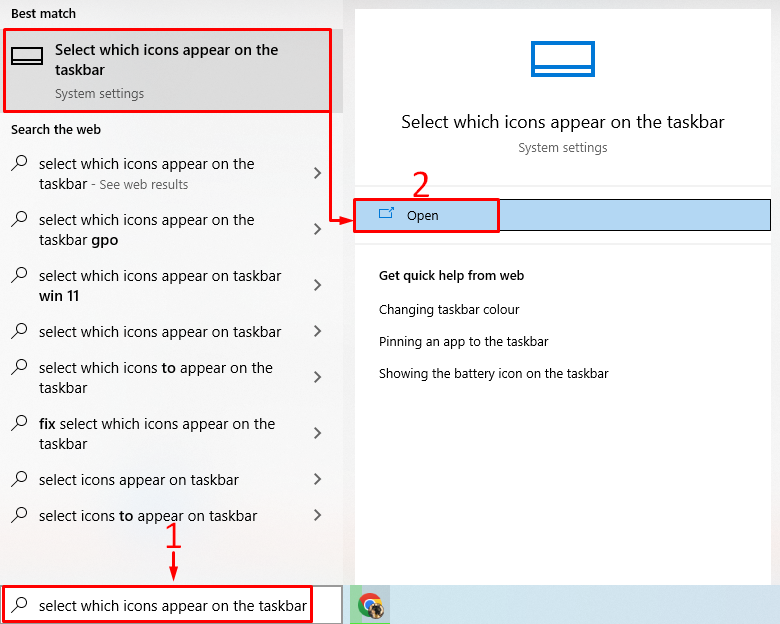
Step 1: Open Taskbar Settings
First, launch “Select which icons appear on the Taskbar” via the Start menu:
Step 2: Enable Wi-Fi Icon
Look for the “Network” icon and turn it on:
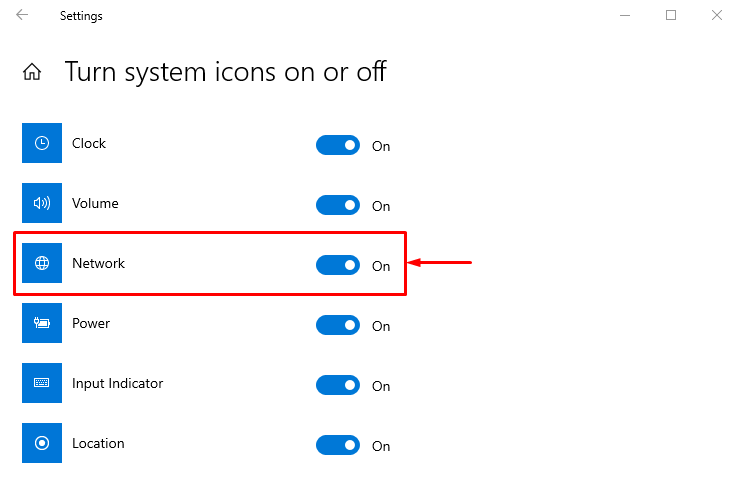
The Wi-Fi icon has been enabled successfully. Check the Taskbar for verification.
Method 3: Update Network Drivers
Missing or corrupt network driver files can result in the disappearance of the Wi-Fi icon. Therefore, updating network drivers can assist in enabling the Wi-Fi icon.
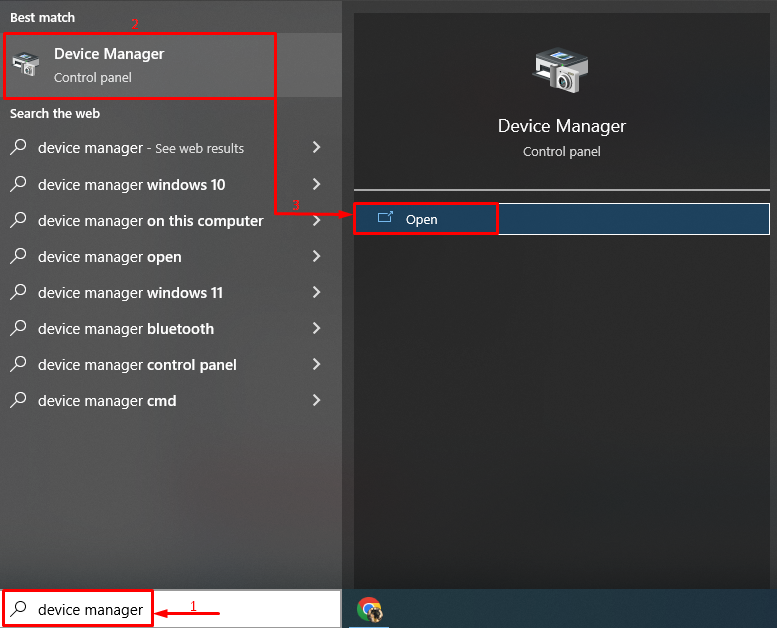
Step 1: Open Device Manager
First, launch “Device Manager” with the help of the Windows Start menu:
Step 2: Update Drivers
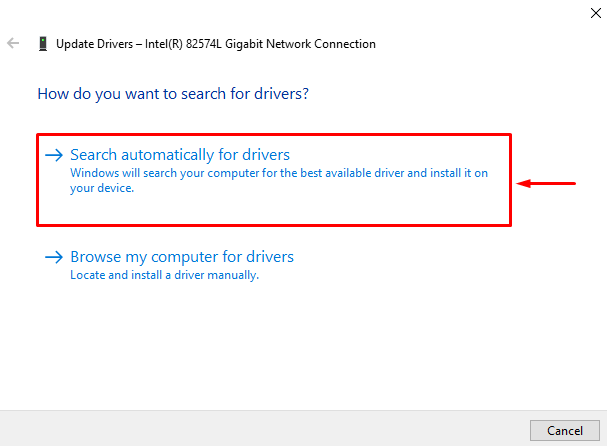
Extend the “Network adapters” list. Look for a network driver. Right-click on the driver and trigger “Update driver”:

Choose the highlighted option:
Reboot the system after updating the network driver.
Method 4: Show the Wi-Fi Icon Using Group Policy Editor
The group policy editor may have disabled the Wi-Fi icon, which is why it is not visible. So, enable the Wi-Fi icon from the “Edit group policy” system utility by following the given instructions.
Step 1: Launch Group Policy Editor
First, open “Edit Group Policy” via the Windows Start menu:

Step 2: Edit Taskbar Setting
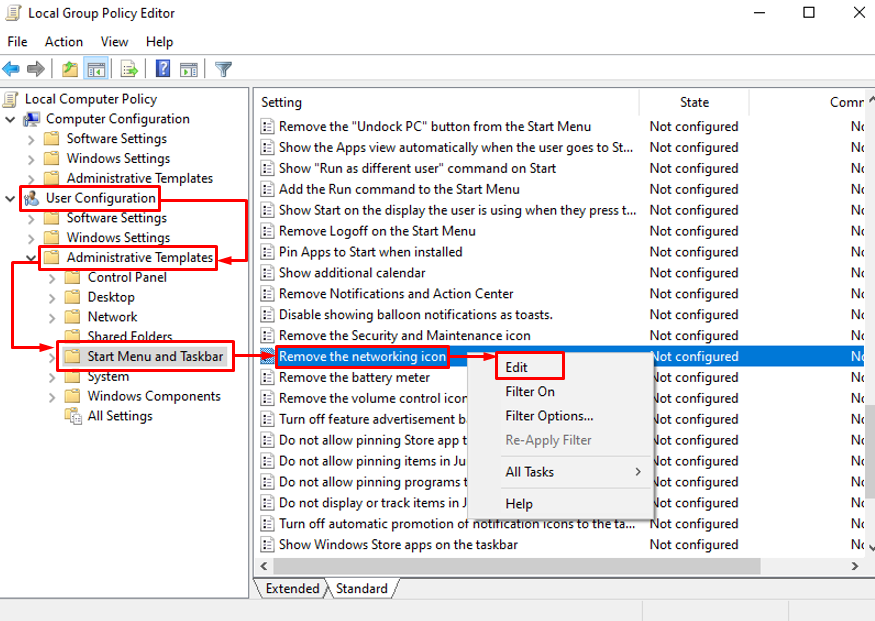
Move to the “User Configuration > Administrative Templates > Start Menu and Taskbar” directory. Find “Remove the networking icon”. Right-click on it, and trigger the “Edit” option:
Step 3: Enable Wi-Fi Icon
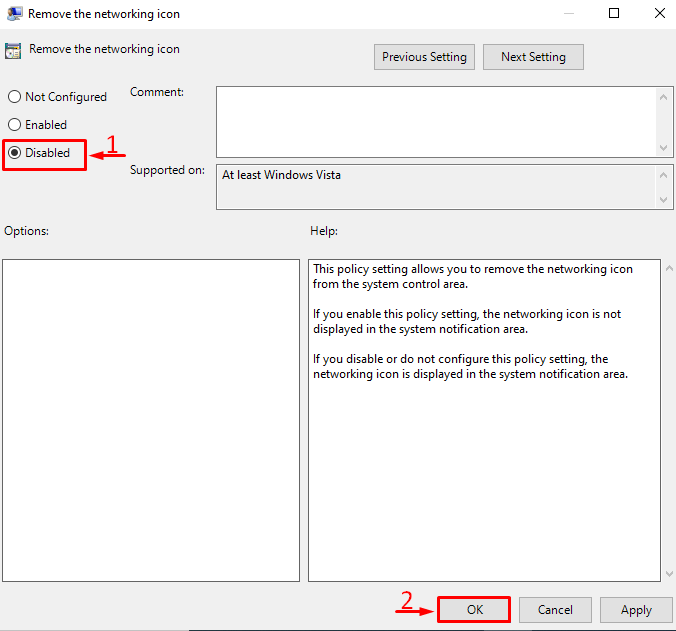
Select “Disabled” and hit the “OK” button:
Restart Windows and check if the Wi-Fi icon is visible on the Taskbar or not:
![]()
We have compiled various solutions to show the network icon on the Taskbar in Windows 10.
Conclusion
The Wi-Fi icon can be enabled on the Taskbar in Windows by utilizing various methods, which include enabling the Wi-Fi icon from the system settings, checking the system tray, updating network drivers, or enabling the Wi-Fi icon by using the group policy editor. This blog has covered several methods to enable the Wi-Fi icon in the Taskbar.