In this article, I will show you how to perform data scrubbing on the storage pools of your Synology NAS. I will also show you how to set up scheduled data scrubbing on your Synology NAS. So, let’s get started.
Table of Contents:
- Requirements of Data Scrubbing
- Creating a Shared Folder with Data Checksum and Advanced Data Integrity Enabled
- Performing Data Scrubbing Manually
- Configuring Scheduled Data Scrubbing
- Conclusion
- References
Requirements of Data Scrubbing:
To perform data scrubbing on a storage pool, you must fulfill some requirements. If any one of the requirements does not meet, you won’t be able to perform data scrubbing on your storage pool.
The requirements are:
1) The storage pool must be configured with one of the following RAID types:
i) SHR
ii) RAID 5
iii) RAID 6
iv) RAID F1
2) The volumes you create on the storage pool must be formatted using the Btrfs filesystem.
Also, if you want to check and repair corrupted data of one or more shared folders, Data checksum and advanced data integrity must be enabled for these shared folders.
Creating a Shared Folder with Data Checksum and Advanced Data Integrity Enabled:
I have told you earlier that if you want to check and repair corrupted data when you perform data scrubbing on a storage pool, Data checksum and advanced data integrity must be enabled for the shared folders (where you want to store important files) created on the volumes of that storage pool.
Data checksum and advanced data integrity can’t be enabled after a shared folder is created. You must enable it while you’re creating a new shared folder.
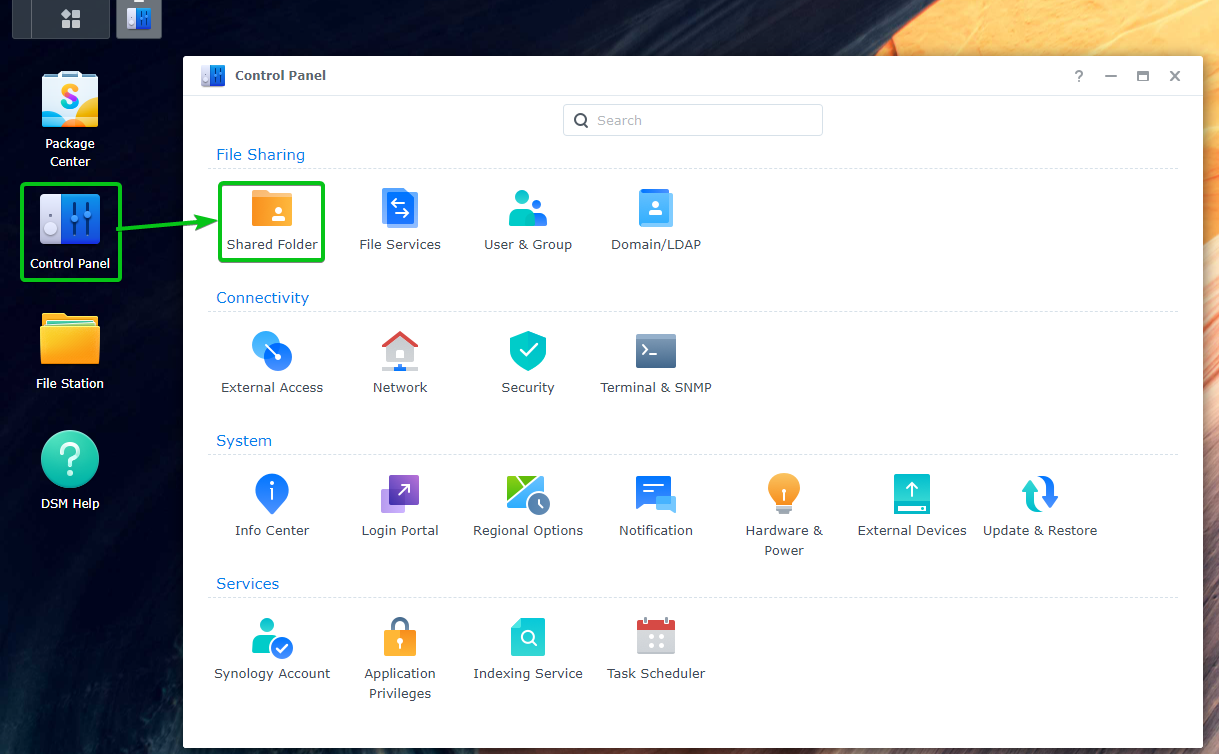
Navigate to Control Panel> Shared Folder to create a shared folder with data checksum and advanced data integrity enabled, navigate to Control Panel > Shared Folder.
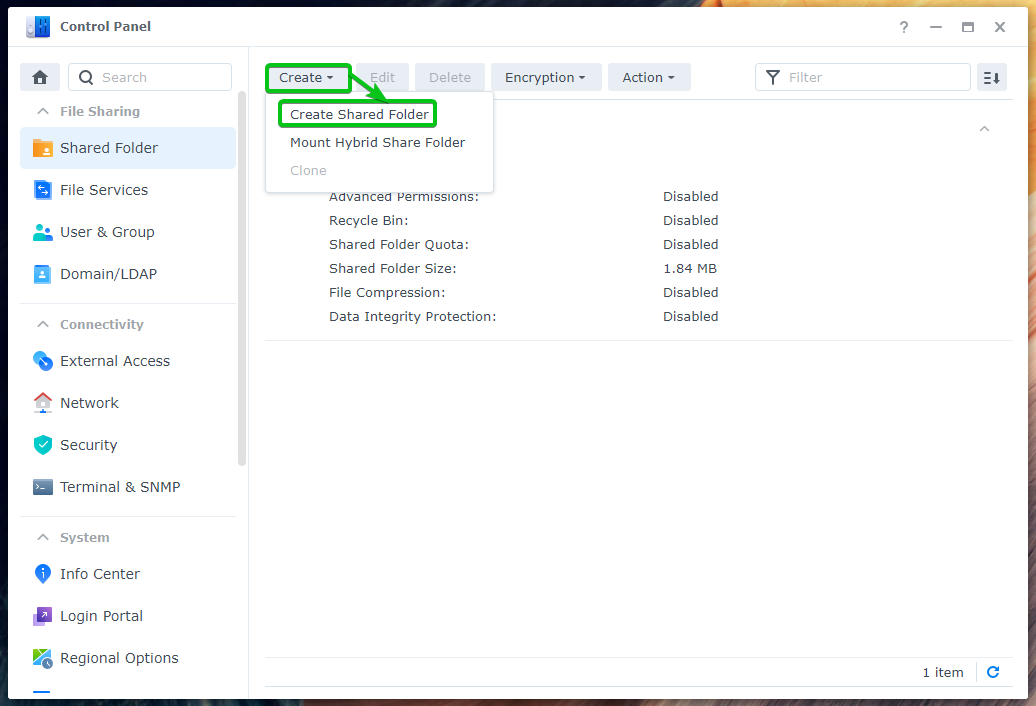
Click on Create > Create Shared Folder.
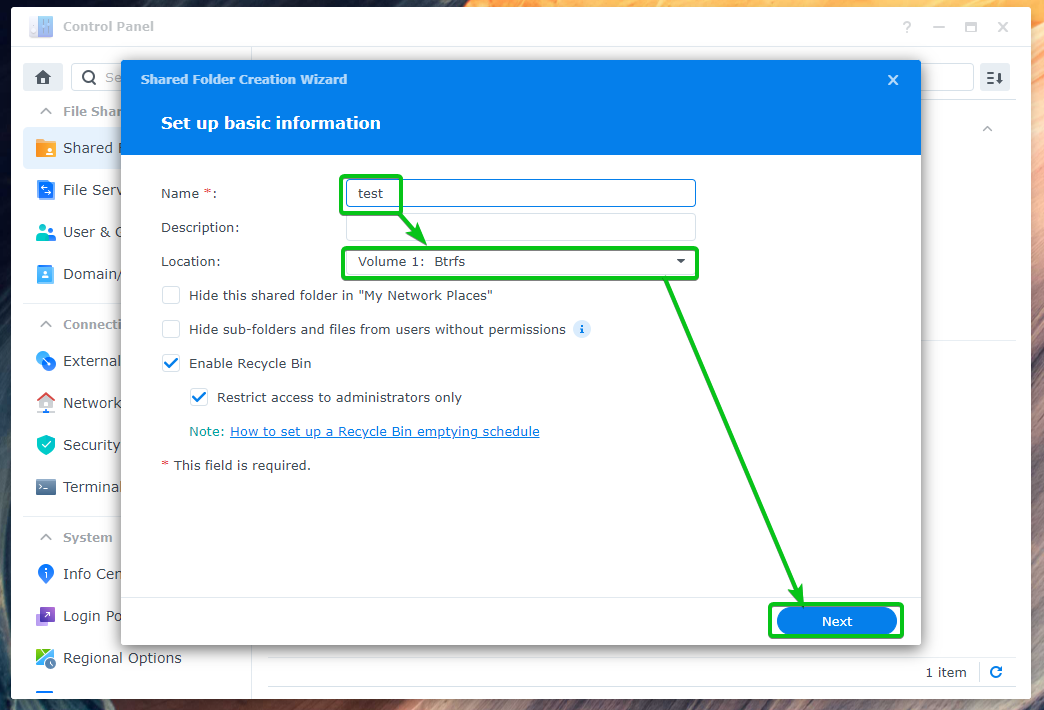
Type in a Name for the shared folder, select a Btrfs volume (where you want to store the data of this shared folder) from the Location dropdown menu, and click on Next.
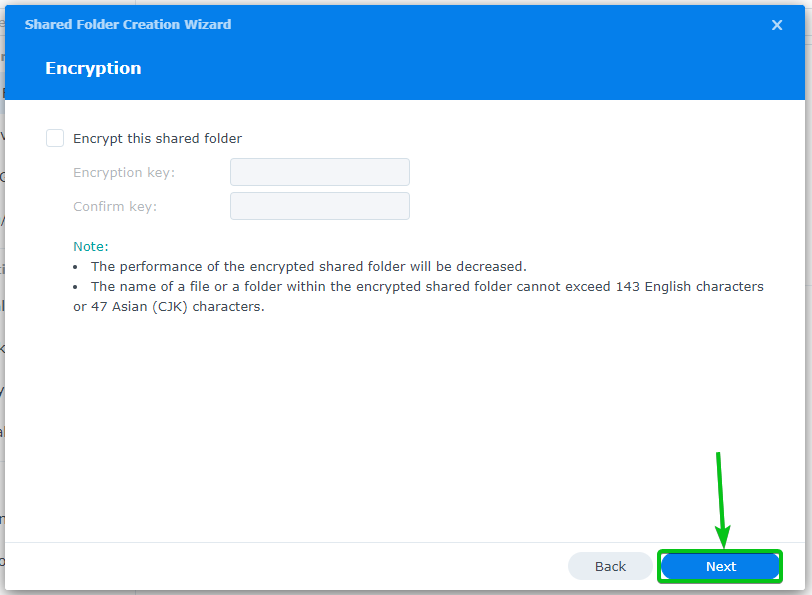
Click on Next.
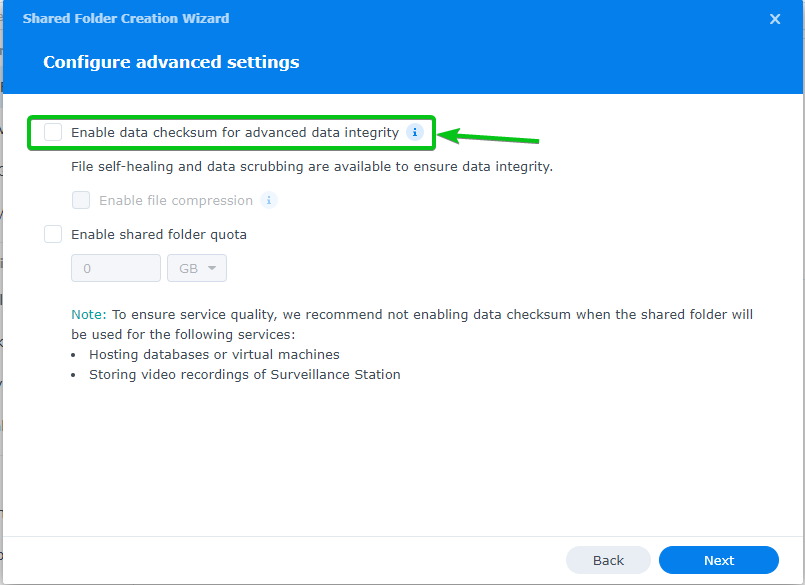
To enable data checksum and advanced data integrity, you will have to check the Enable data checksum for advanced data integrity checkbox as marked in the screenshot below.
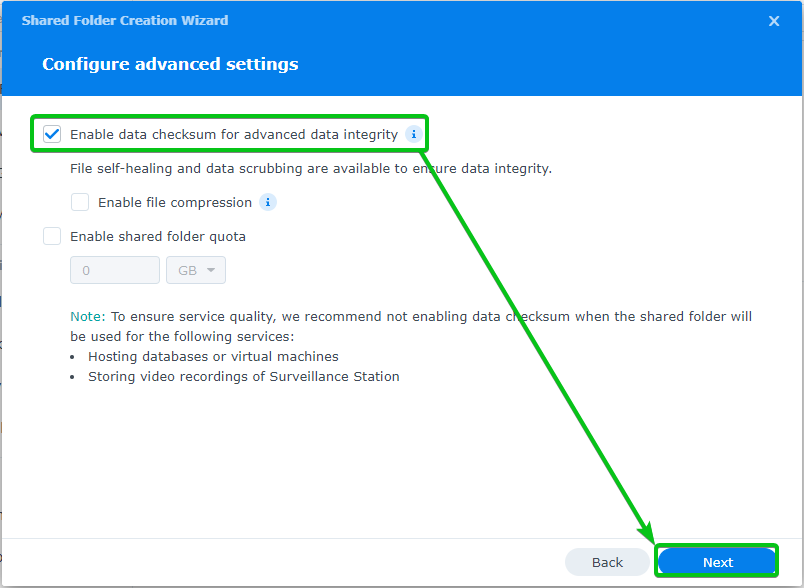
Check the Enable data checksum for advanced data integrity checkbox and click on Next.
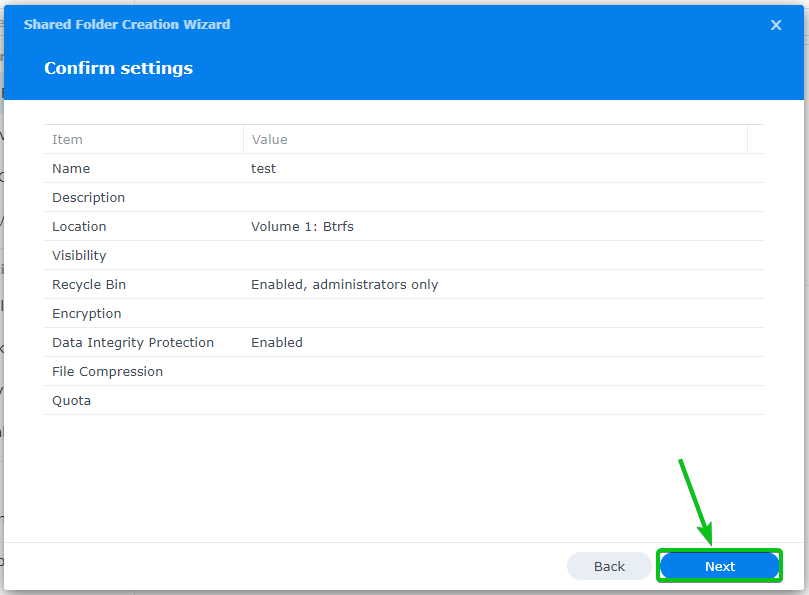
Click on Next.
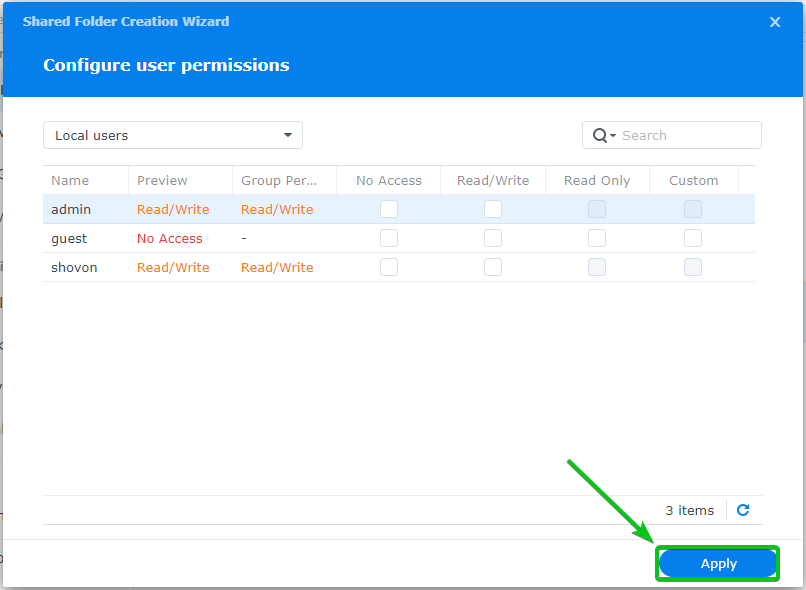
Click on Apply.
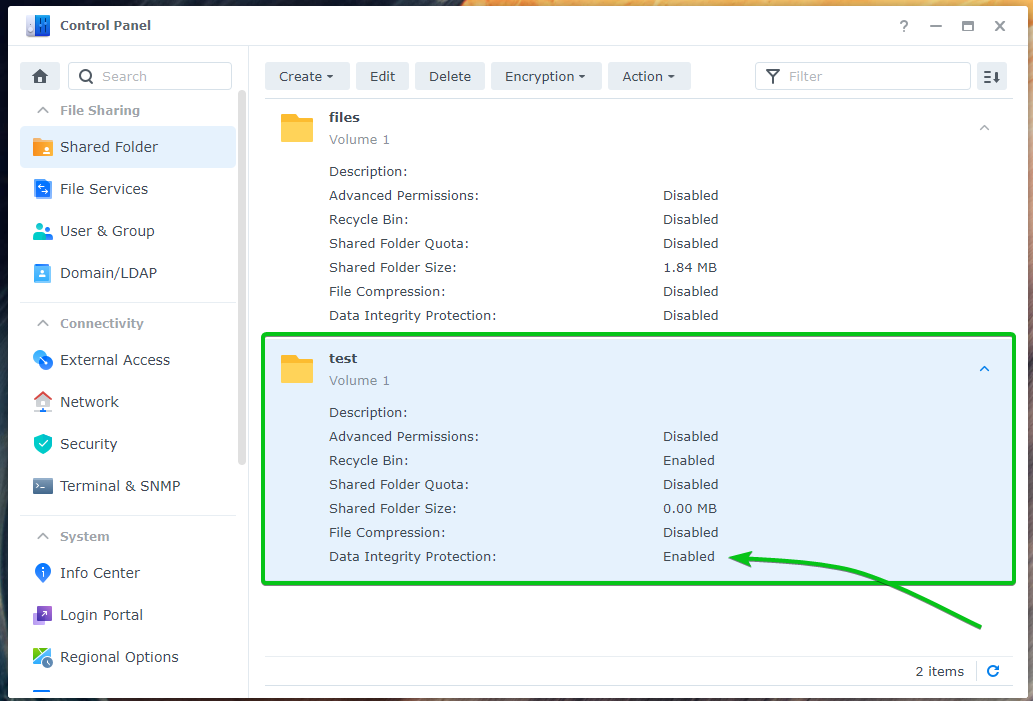
A new shared folder should be created. Data checksum and advanced data integrity should be enabled for the shared folder.
Performing Data Scrubbing Manually:
Open the Storage Manager app from the Application Menu (/) to perform data scrubbing manually.
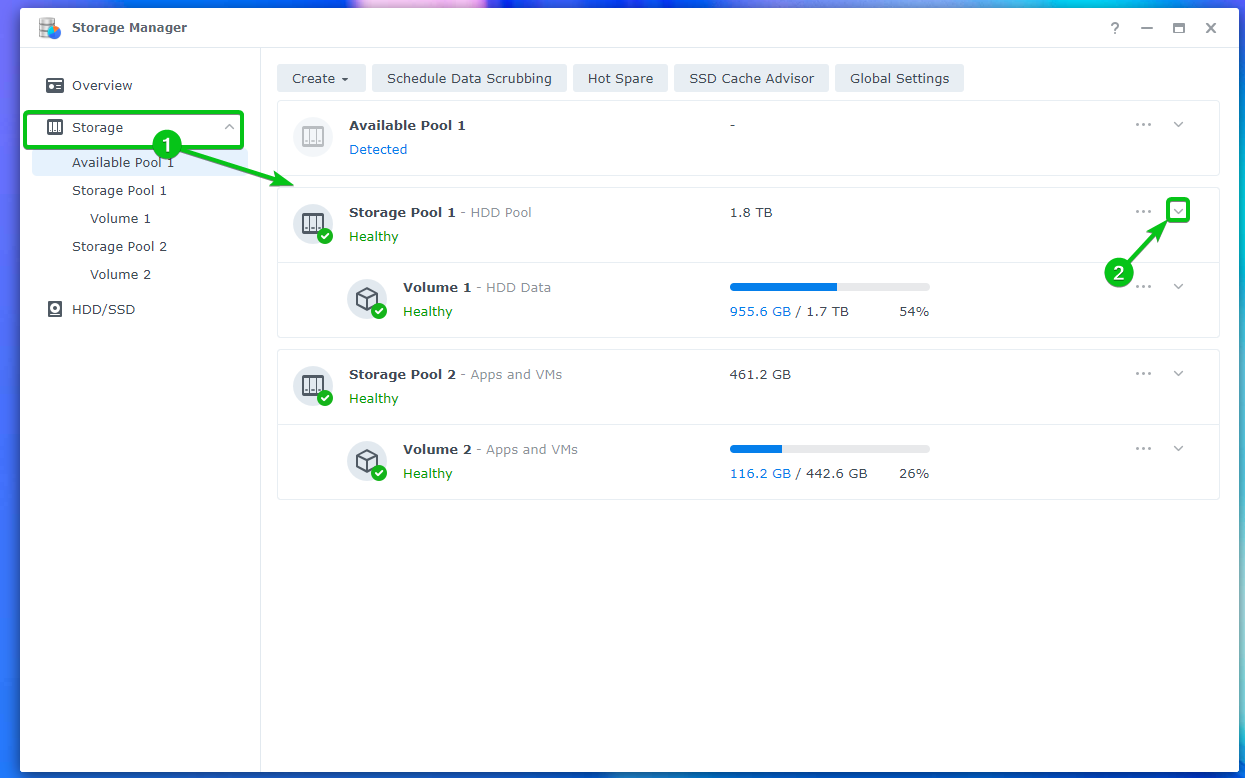
Navigate to the Storage section1. Click on the
icon of the storage pool2 (where you want to perform data scrubbing manually) to see more information about the storage pool.
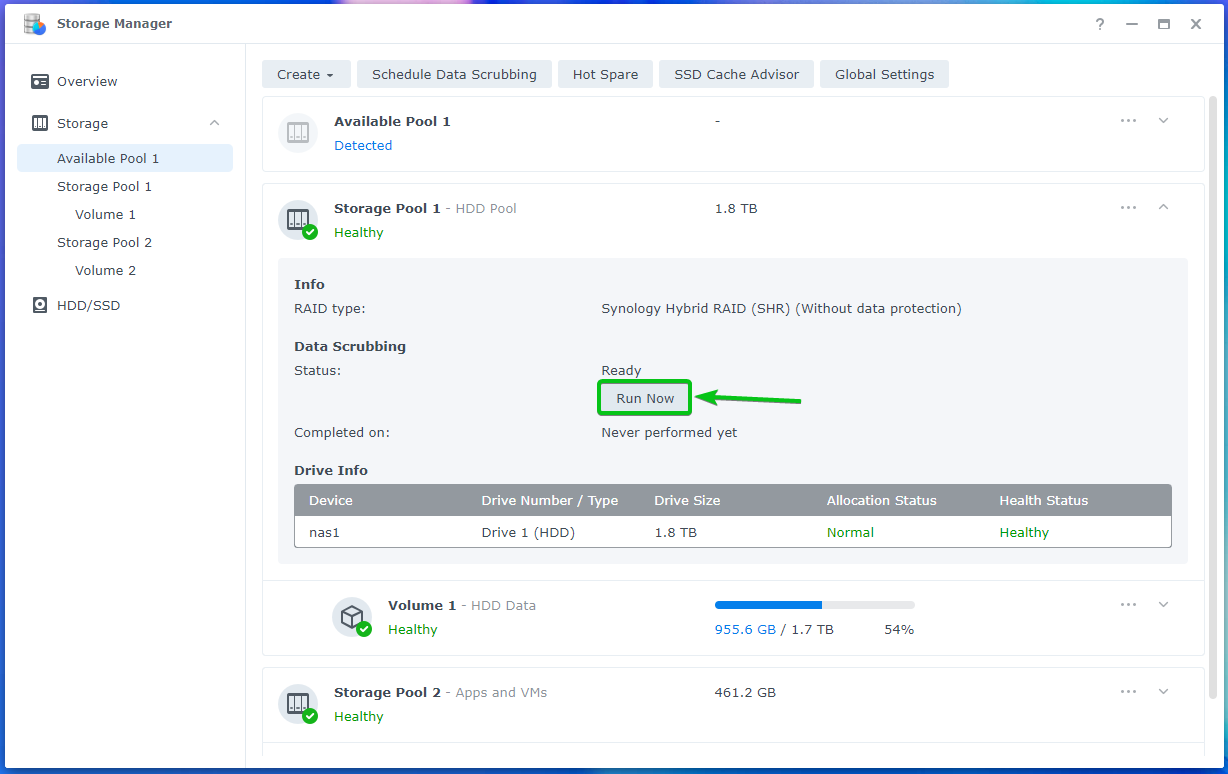
To perform data scrubbing manually on the storage pool, click on Run Now.
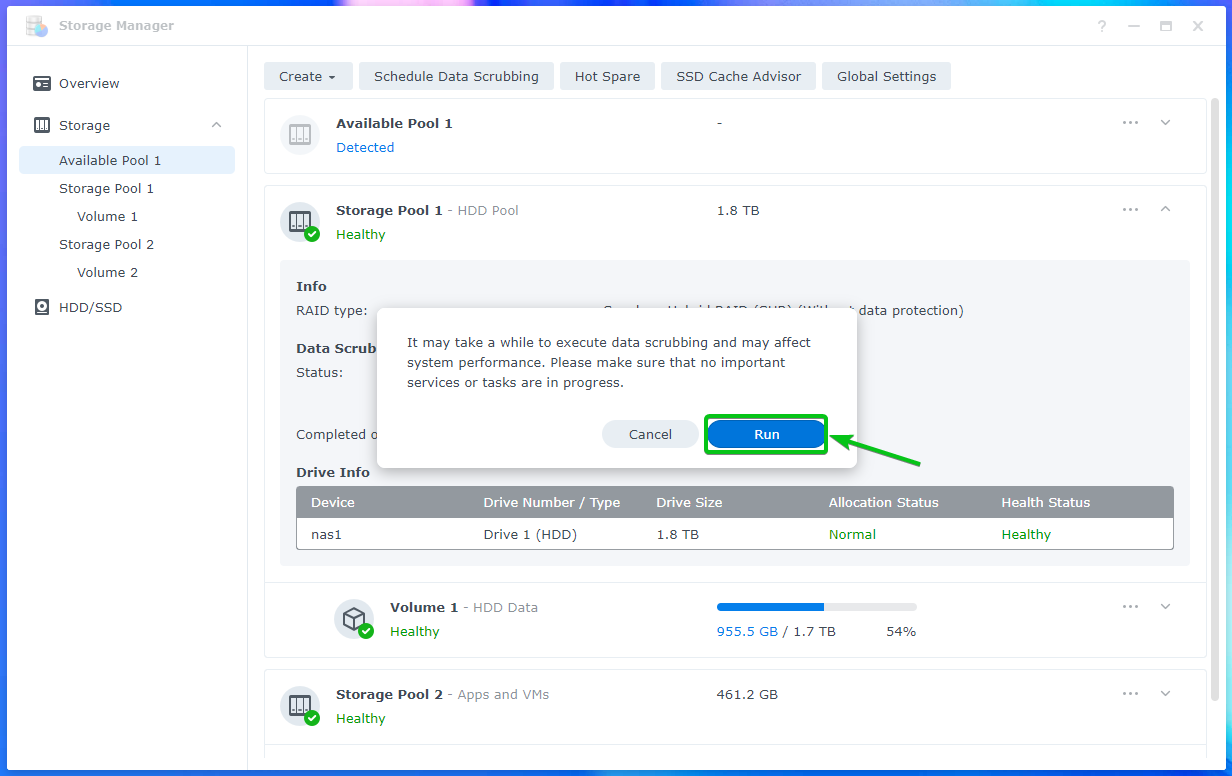
Click on Run to confirm the operation.
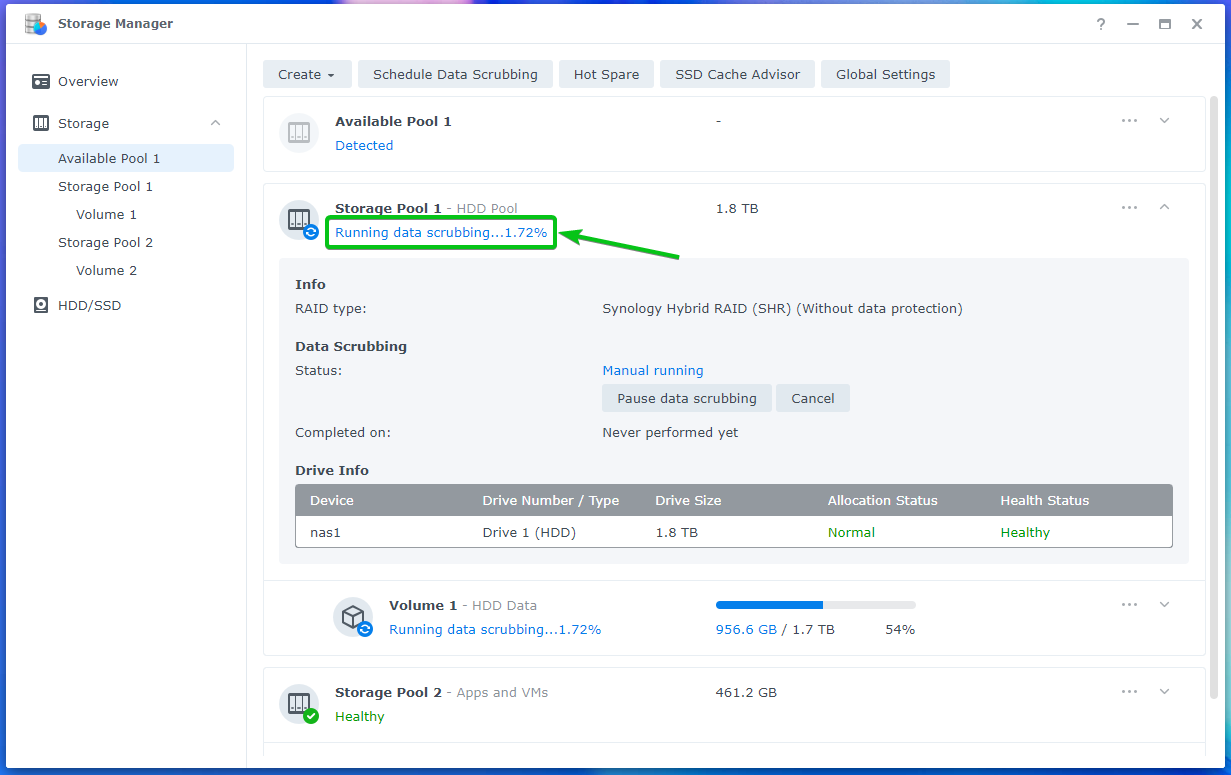
Data scrubbing should start running on the storage pool immediately. It will take a while to complete depending on the amount of data you have on the volumes of that storage pool.
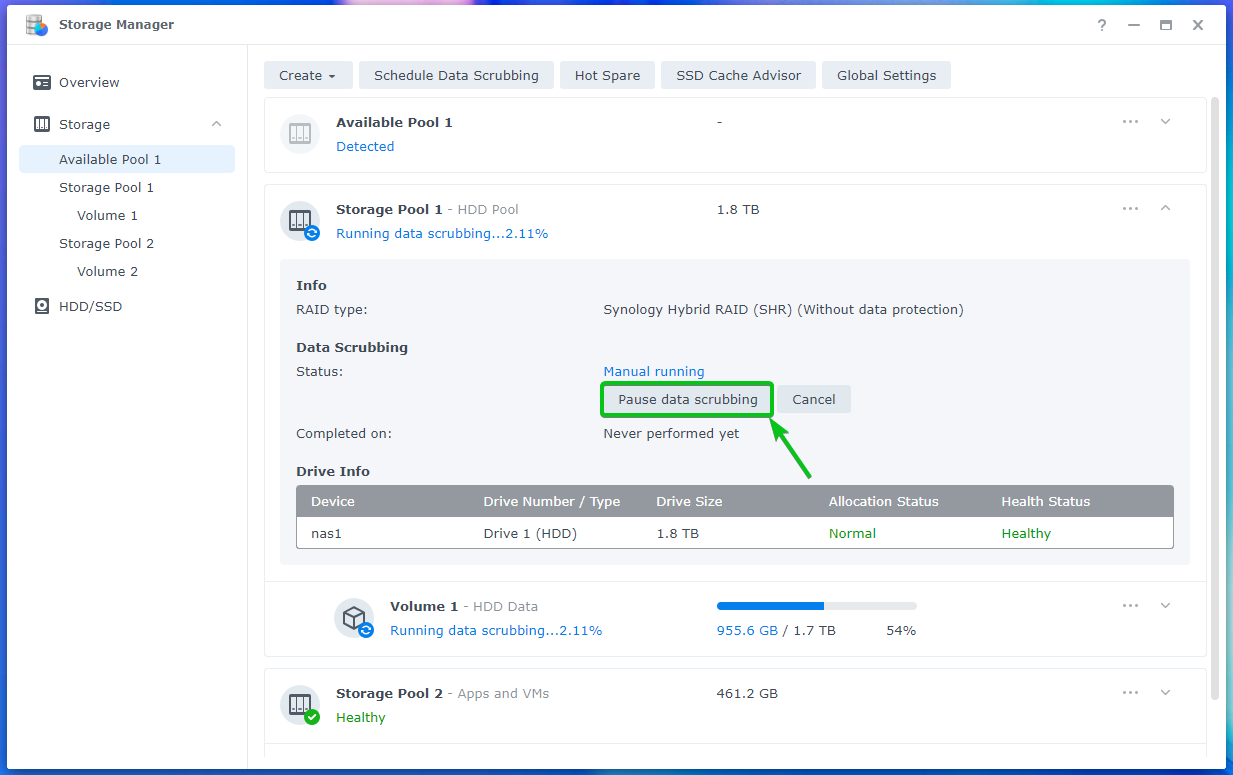
You can pause a running data scrubbing task anytime.
Click on Pause data scrubbing as marked in the screenshot below to pause the data scrubbing task.
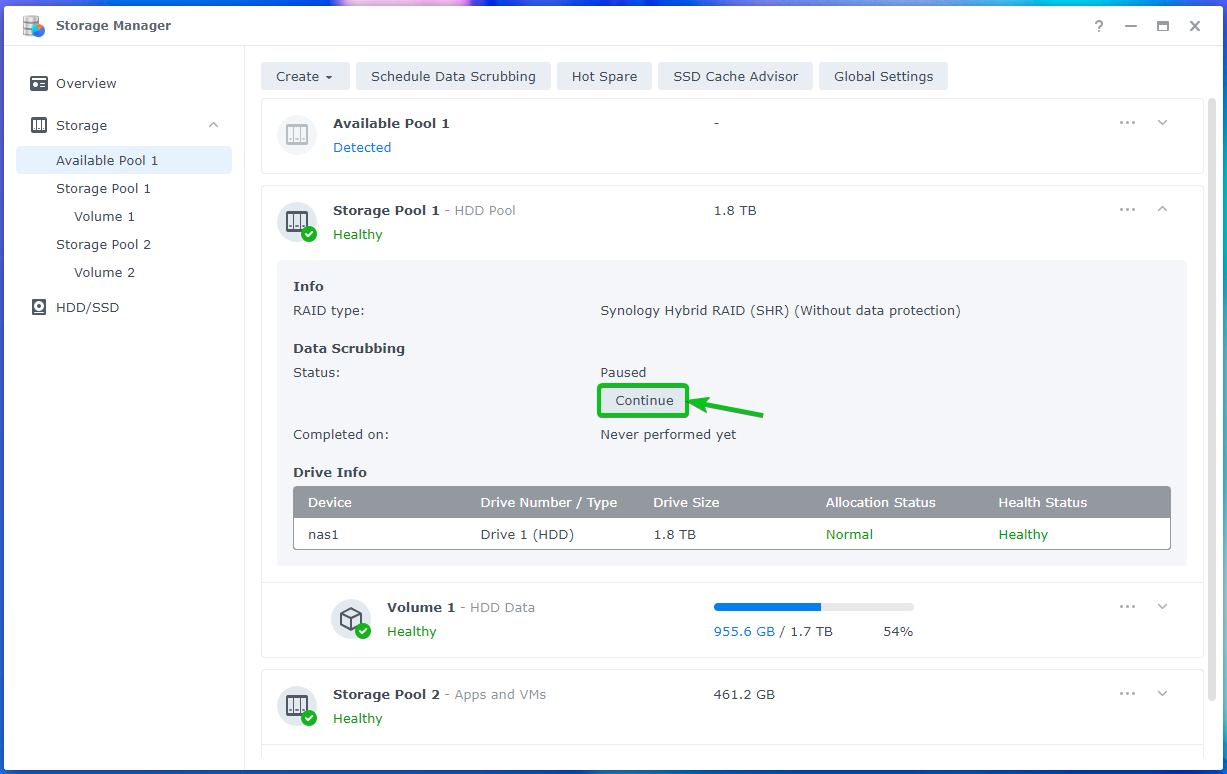
The data scrubbing task should be paused.
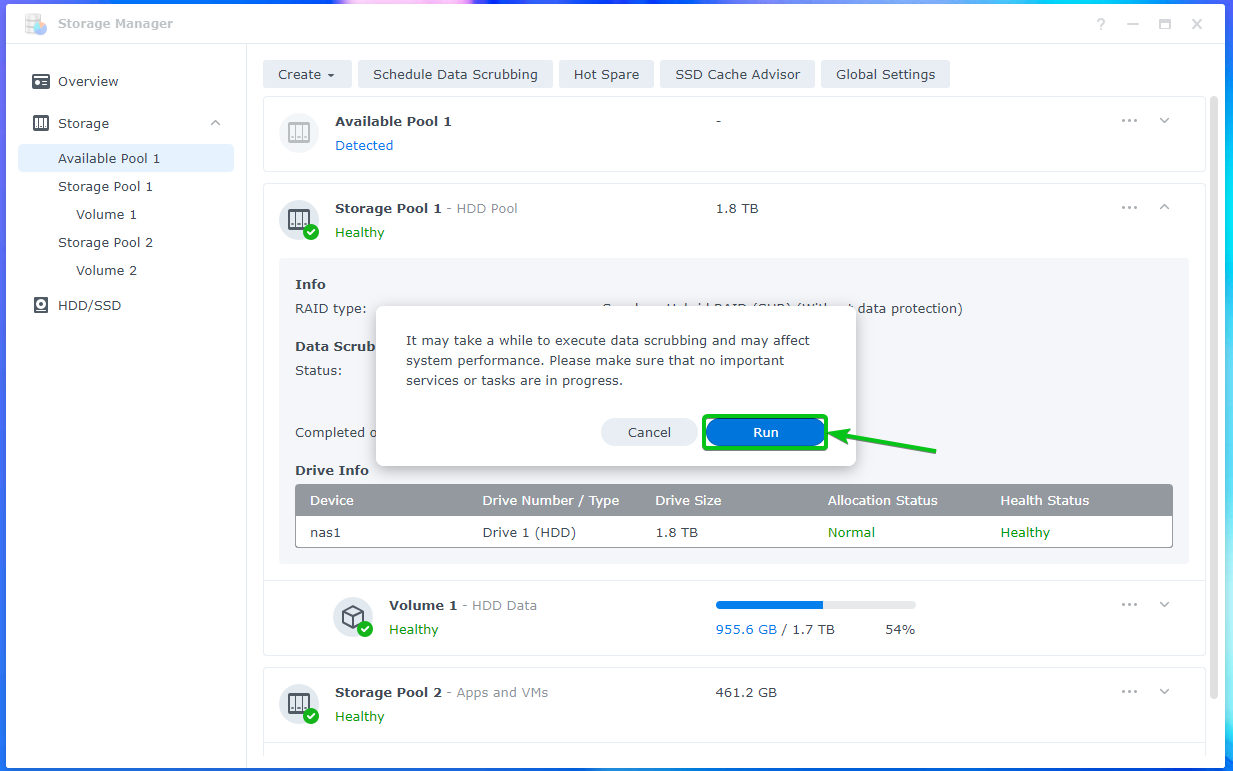
You can click on Continue to start the data scrubbing task again from where you’ve left off.
To confirm, click on Run.
The data scrubbing task should start again from where it was left off.
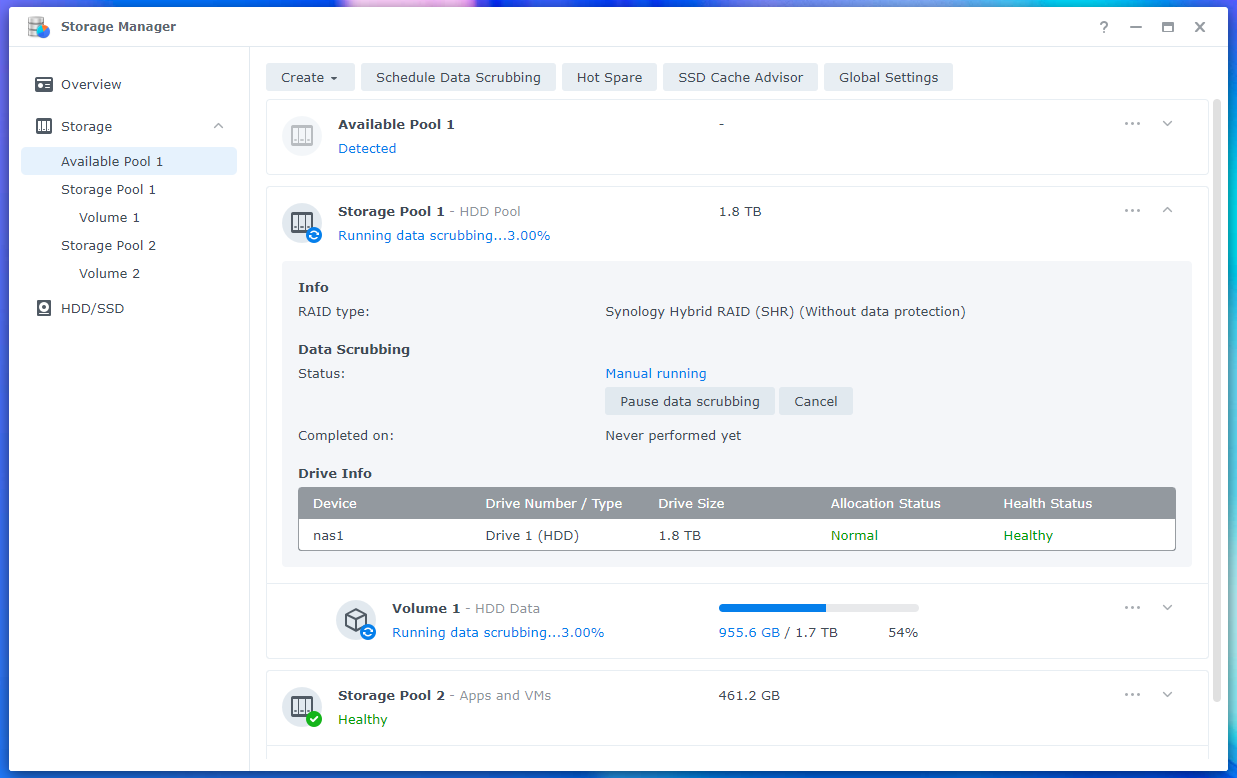
You can also cancel a running data scrubbing task.
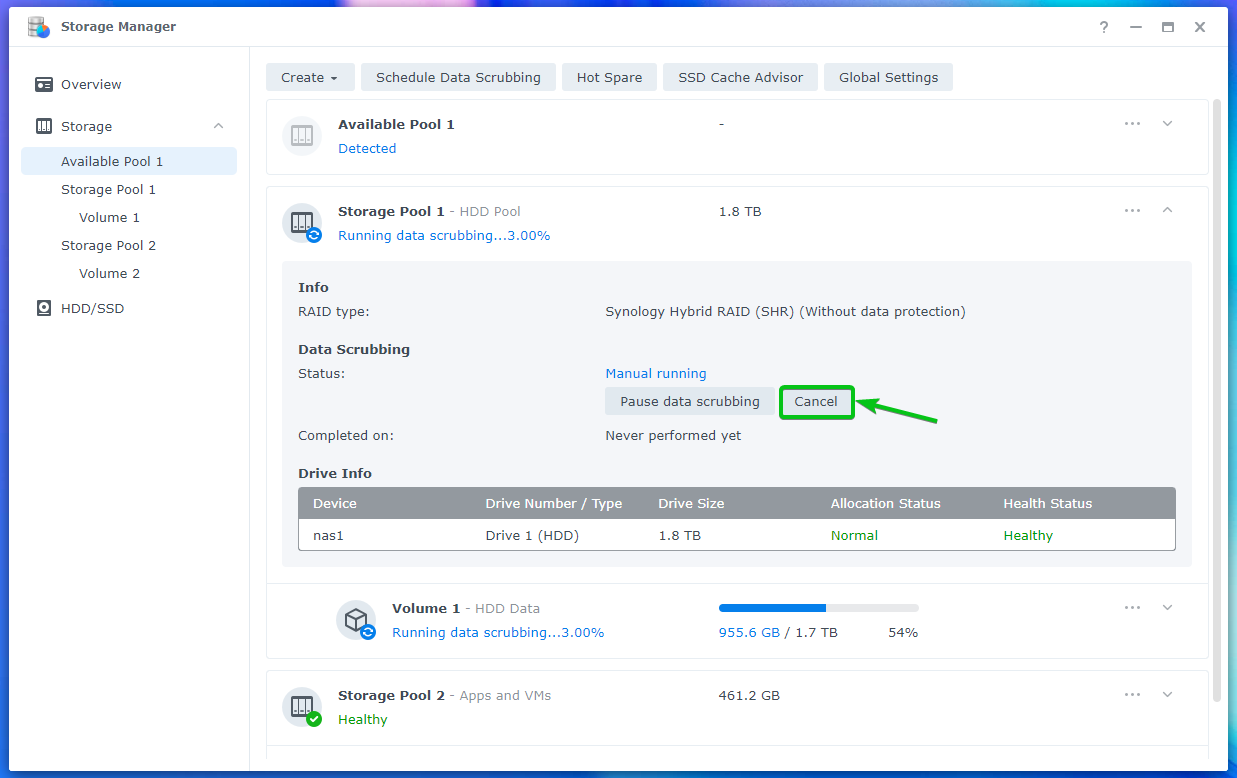
To cancel a running data scrubbing task, click on Cancel.
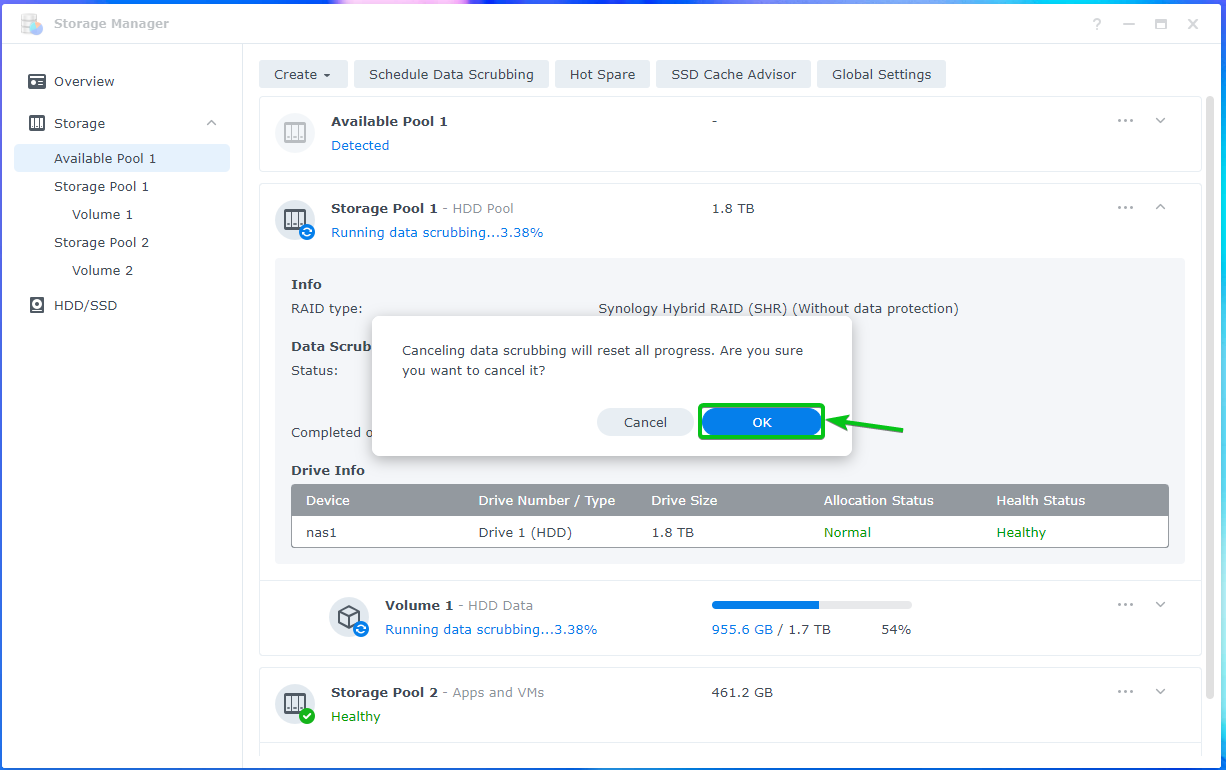
To confirm the cancel operation, click on OK.
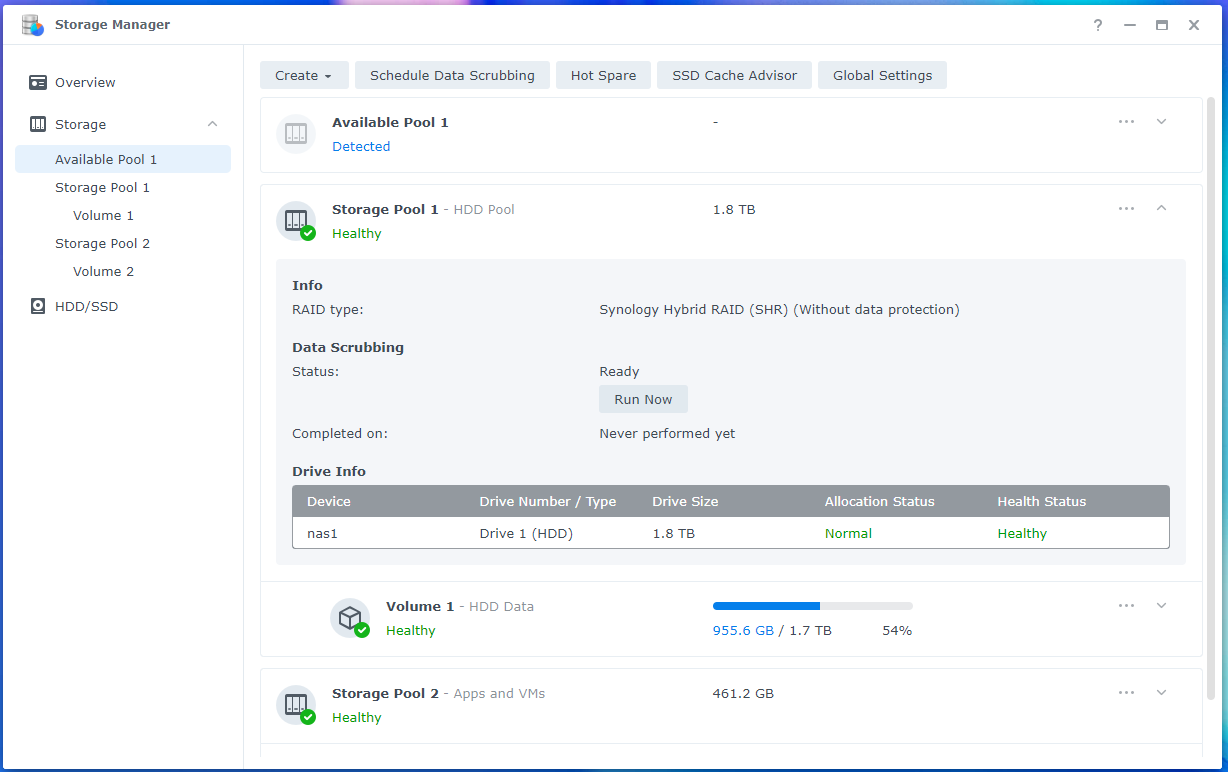
The data scrubbing task should be canceled.
Configuring Scheduled Data Scrubbing:
You can also configure to run data scrubbing on storage pools automatically from the Storage Manager app.
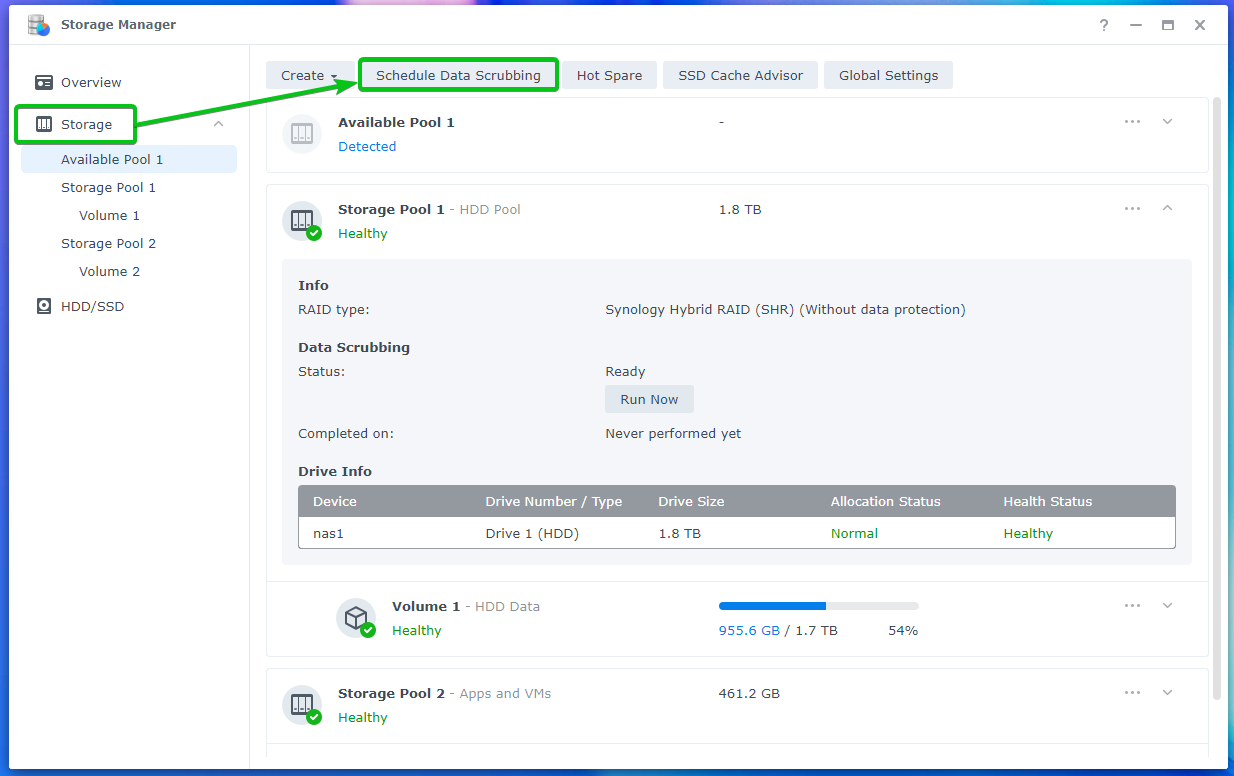
To configure scheduled data scrubbing, open the Storage Manager app and click on Storage > Schedule Data Scrubbing as marked in the screenshot below.
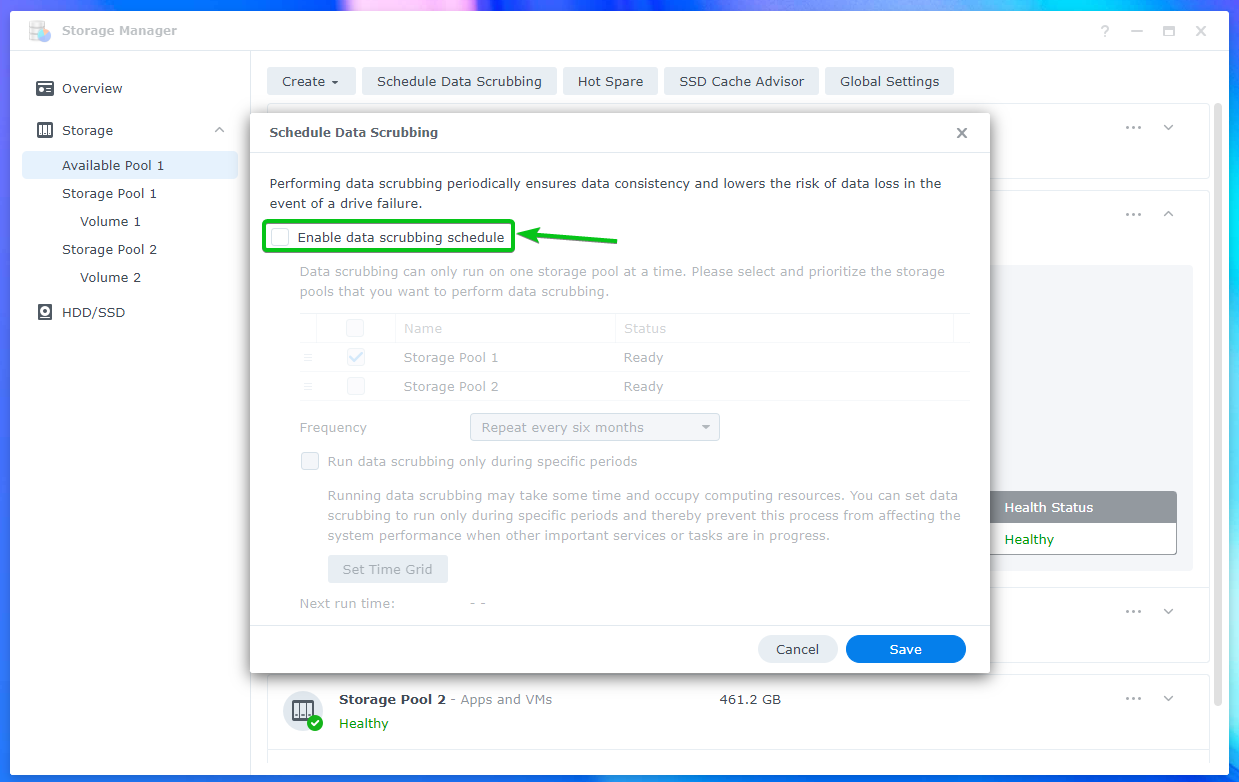
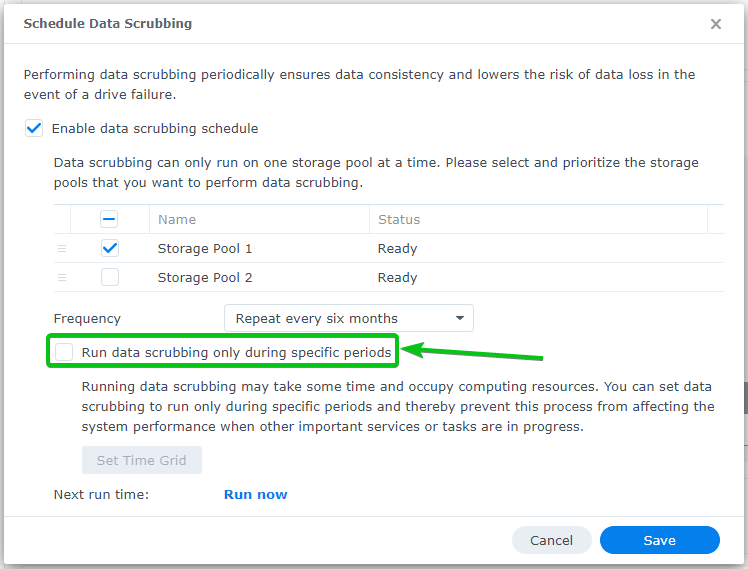
To enable scheduled data scrubbing, check the Enable data scrubbing schedule checkbox as marked in the screenshot below.
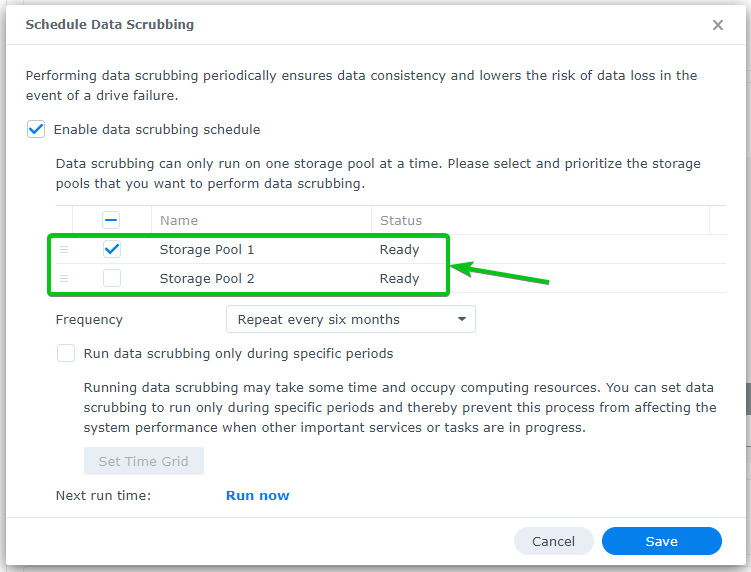
Select the storage pools where you want to perform data scrubbing.
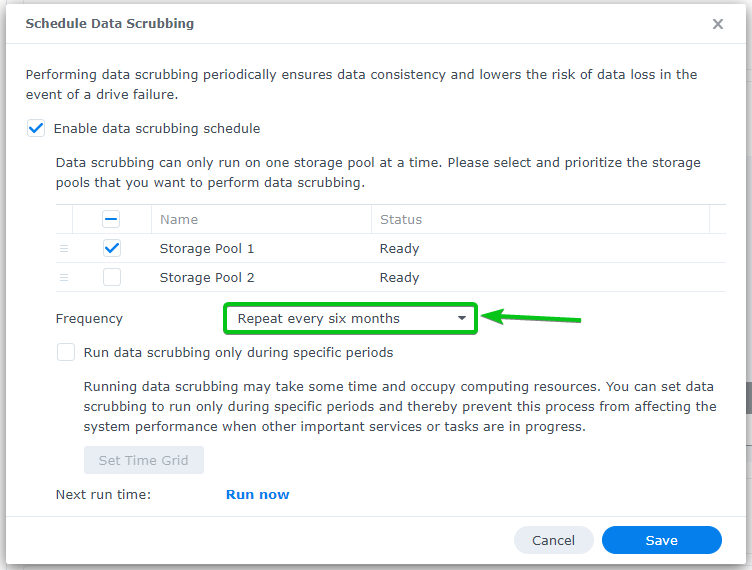
Select how often you want to perform data scrubbing from the Frequency dropdown menu.
You can configure a specific time when you want to perform data scrubbing.
To do that, check the Run data scrubbing only during specific periods checkbox as marked in the screenshot below.
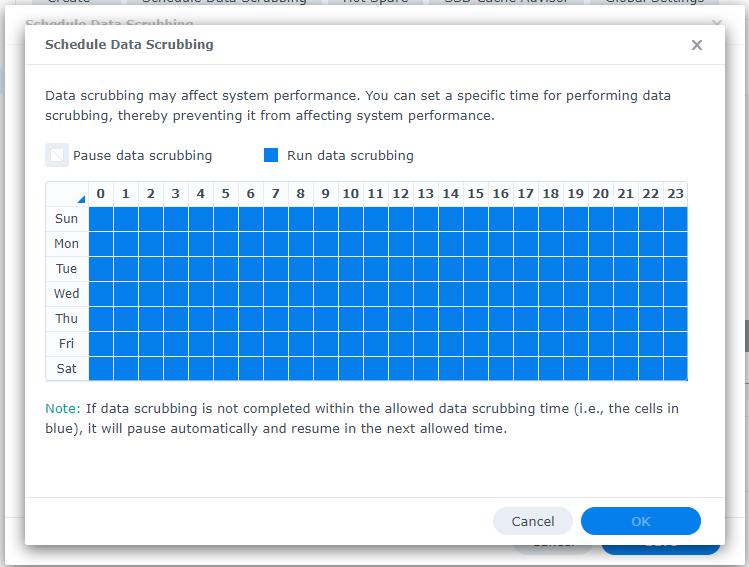
You will see the following window.
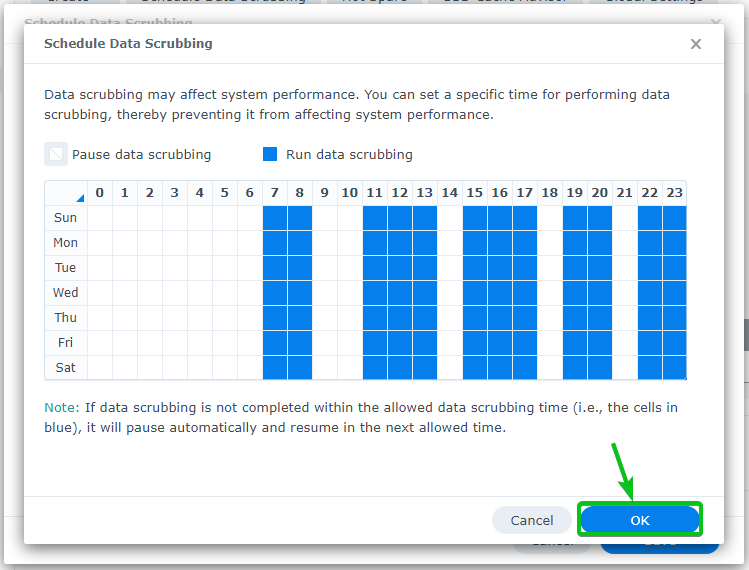
You can select weekdays and hours when you want to perform data scrubbing.
Once you’re done configuring the scheduled data scrubbing periods, click on OK for the changes to take effect.
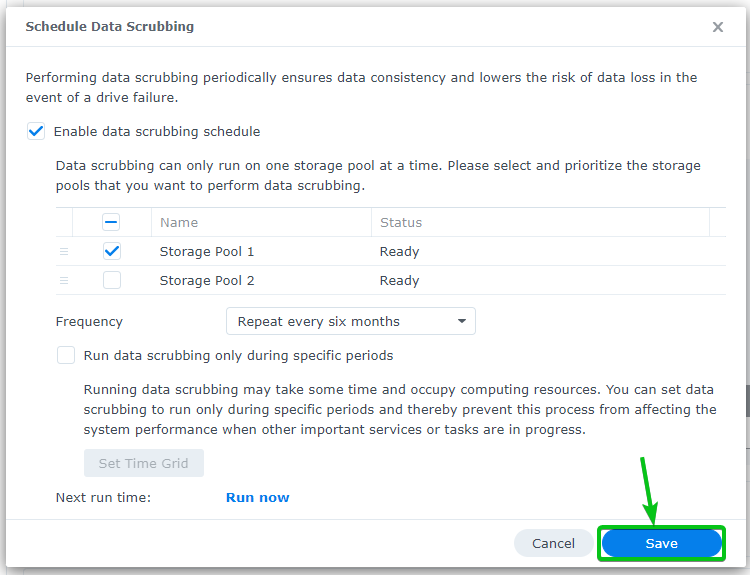
Once you’re happy with the data scrubbing schedule, click on Save.
The scheduled data scrubbing should be enabled.
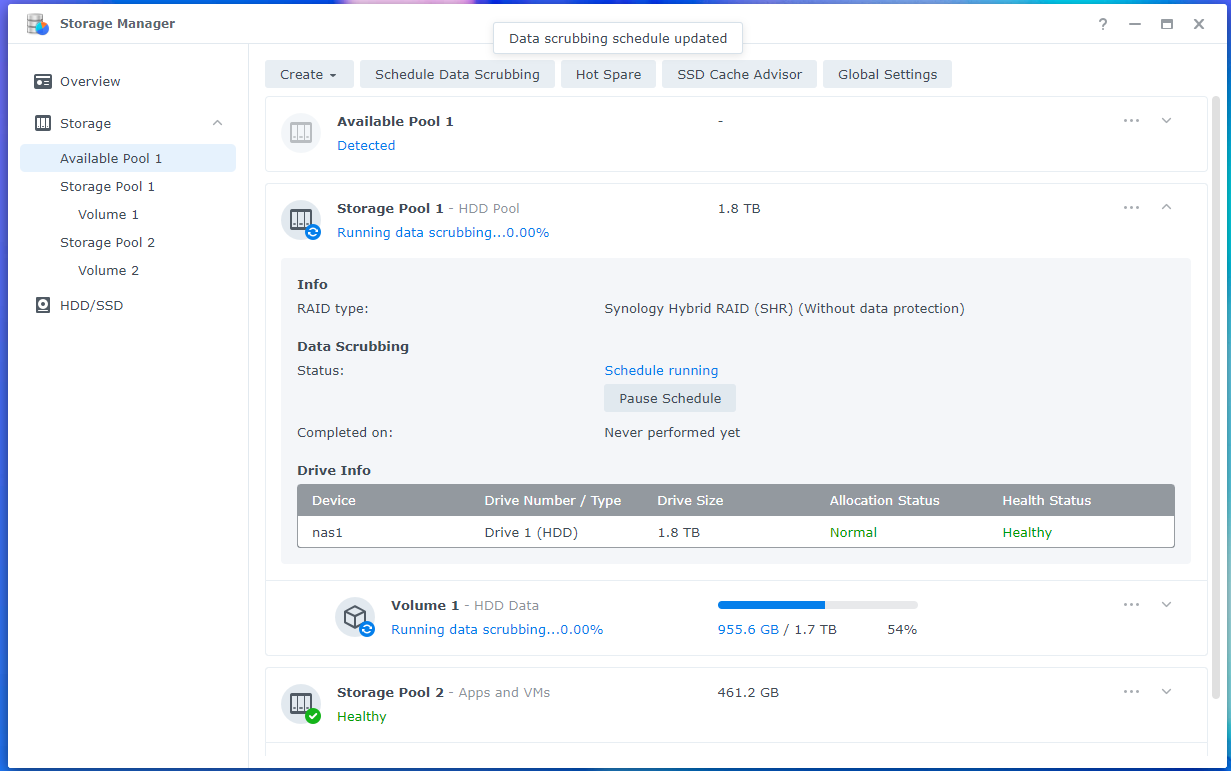
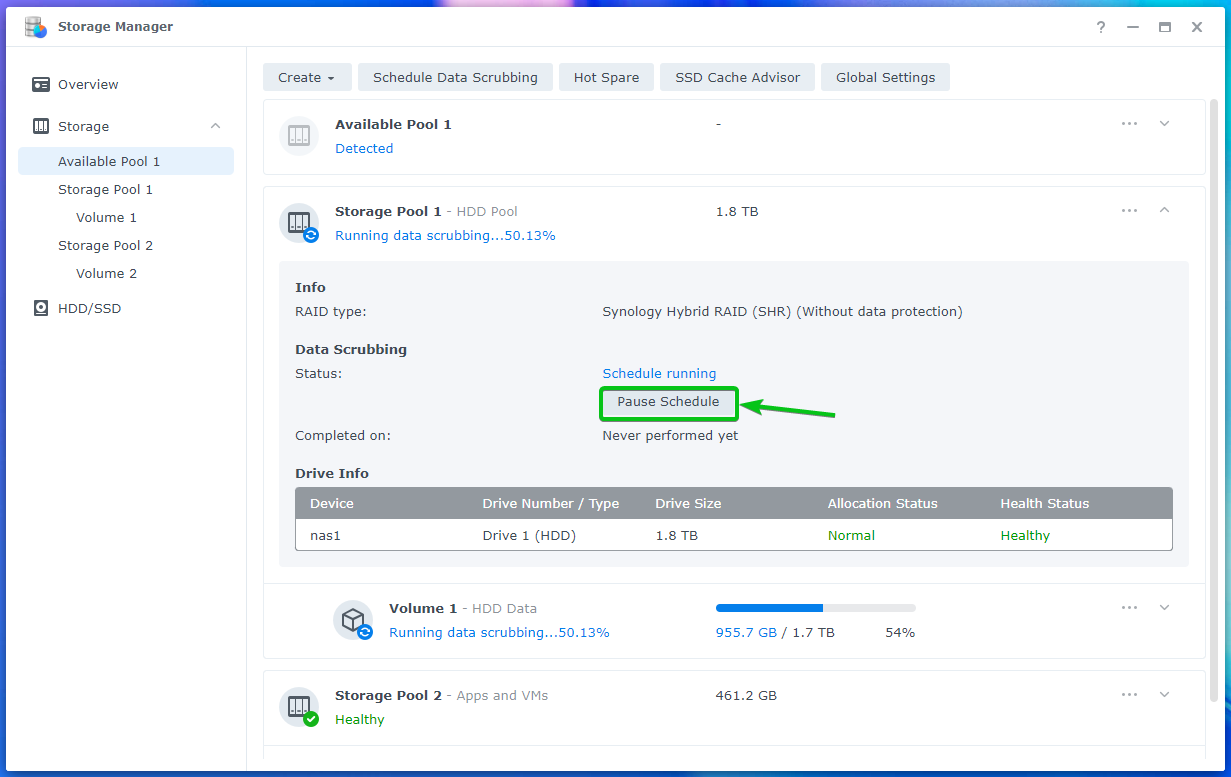
Once the data scrubbing schedule starts, you can click on Pause Schedule to manually pause the data scrubbing schedule.
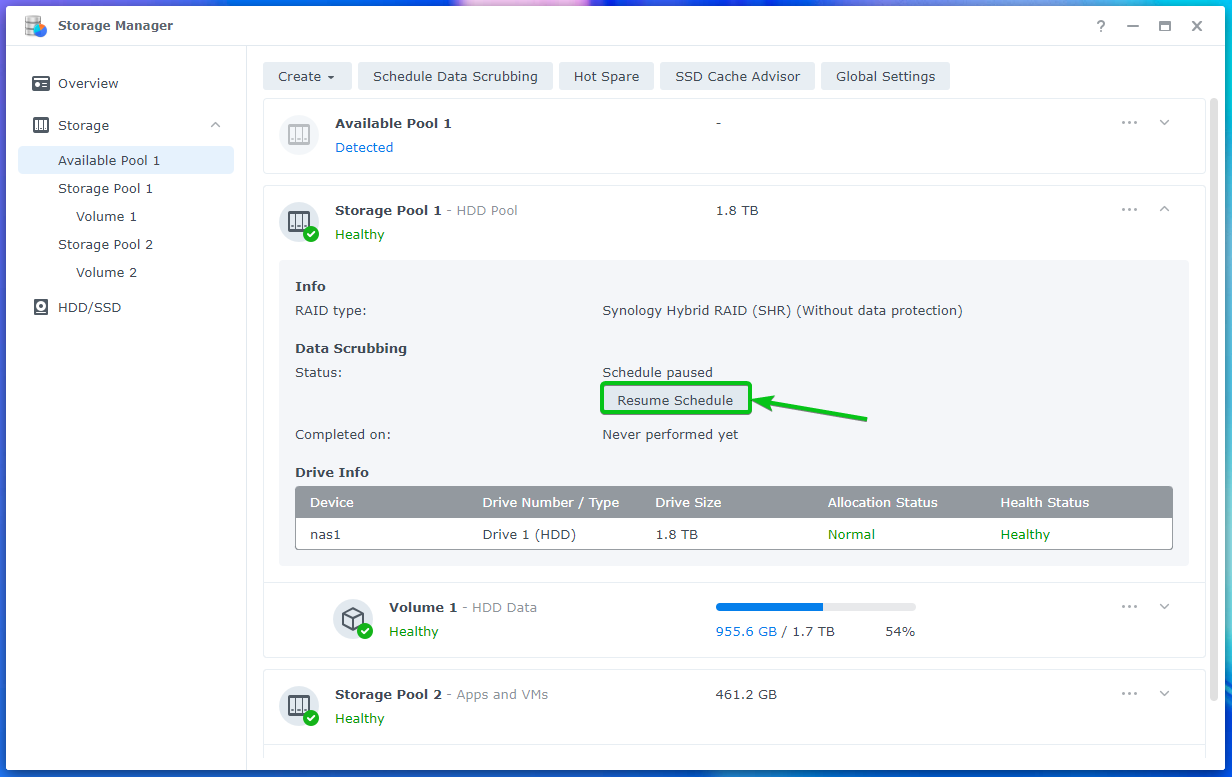
You can also click on Resume Schedule to resume paused data scrubbing schedule.
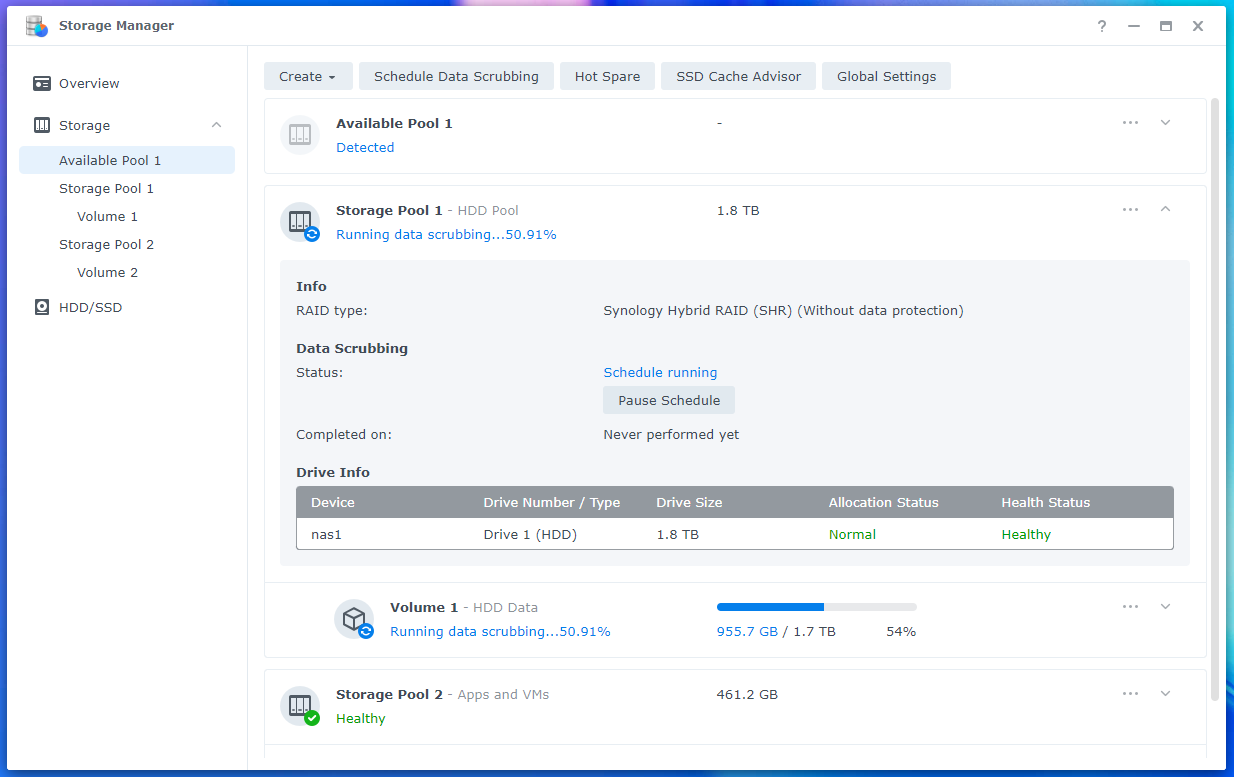
As you can see, the data scrubbing schedule is resumed.
Conclusion:
In this article, I have shown you how to perform data scrubbing on the storage pools of your Synology NAS. I have also shown you how to configure scheduled data scrubbing on your Synology NAS.

