How to Enable the MLflow Authentication on the Server
Launch the MLflow UI using the subsequent command to enable the MLflow authentication:
By restarting the server without the app-name option, the MLflow server administrator can choose to disable this feature whenever they desire. Here is a screenshot of the command as it is displays on the Windows operating system’s command line terminal (ignore the warning):
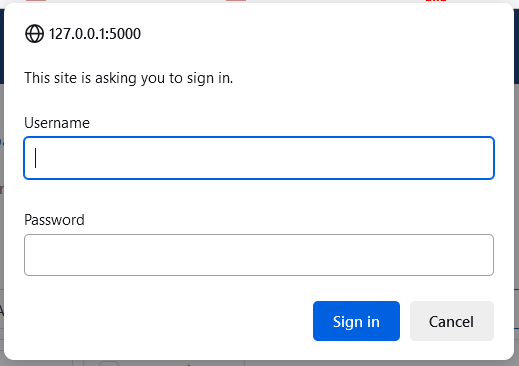
The MLflow server now requires a username and password to access the server experiments and artifacts when accessed via a browser by entering the http://127.0.0.1:5000 as the URL.
How to Setup Authentication on MLflow
With a few minor modifications in the instructions, commands, and configuration file names, setting up the MLflow authentication on Windows is very similar to setting it up on Linux.
Here is a tutorial for configuring the MLflow authentication on Windows using the “htpasswd” and Nginx as a reverse proxy. Remember that this configuration enables simple authentication, and it’s crucial to adequately protect the computer that runs the MLflow and Nginx to avoid an unauthorized access. Consider using OAuth or connecting MLflow with external identity providers for production environments or more stringent security requirements.
In this tutorial, we’ll go over setting up the basic authentication using “htpasswd” for user/password management and Nginx as a reverse proxy.
Step 1: Install Htpasswd
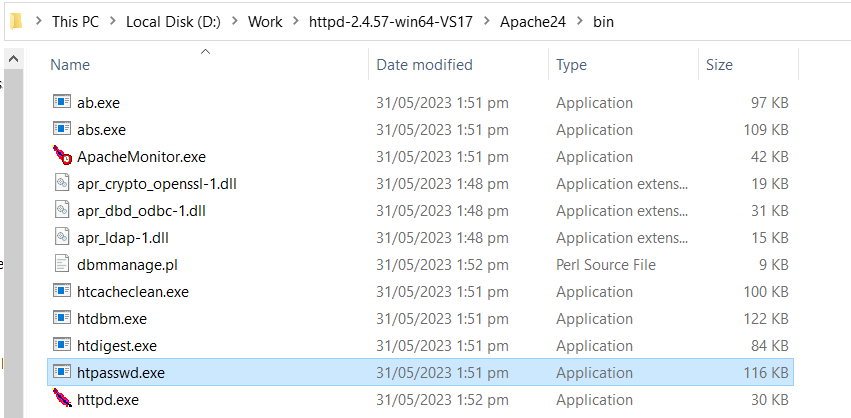
Although “htpasswd” is not a native Windows application, we employ a third-party tool which is known as Apache Lounge’s htpasswd utility here. Download it from Apache Lounge’s official website. Here is a screenshot demonstrating that we have “htpasswd.exe” in the bin directory of Apache after downloading the zip file and extracting it to our working directory:
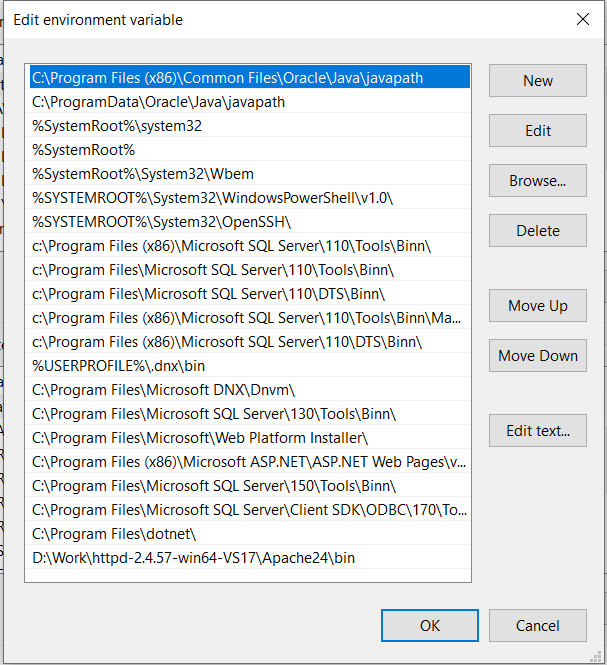
To use “htpasswd.exe” from any command prompt, copy it now to a location in your system’s PATH in the Environment variable.
Step 2: Create a Password File
To generate the password file, open a command prompt and go to the appropriate location. Use “htpasswd” to create or set a new password file or to add the users to a present one. Each line in the file needs to have an encrypted username and password. Use the following command to add new credentials for the user or update the password of an existing user:
Go to the Python folder (in this case, the working directory) and type the aforementioned command in the terminal or prompt window as shown in the following snippet. The password file, mlflow-authfile, is created.
After adding the “admin” username and pressing the “enter” key, the system asks for the password. After re-typing the same password on the prompt, the user is successfully created, and it shows that the user has been added with the required password:
Here is a screenshot showing the directory where the necessary password file is created:
A username and encrypted password in the “username:password” format should appear on each line of the file.
Step 3: Install and Configure Nginx
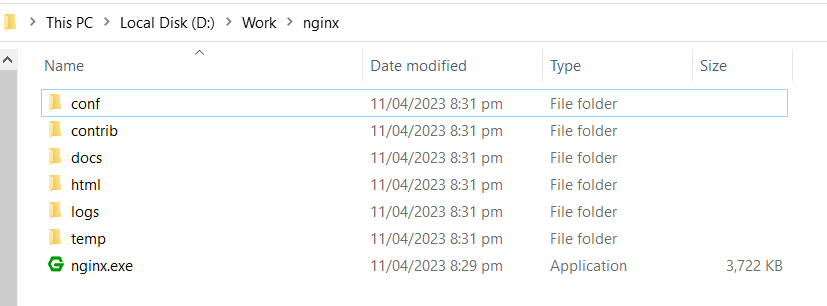
Get the Windows binaries of Nginx from the official website. Extract the downloaded file to the working directory in the Nginx folder:
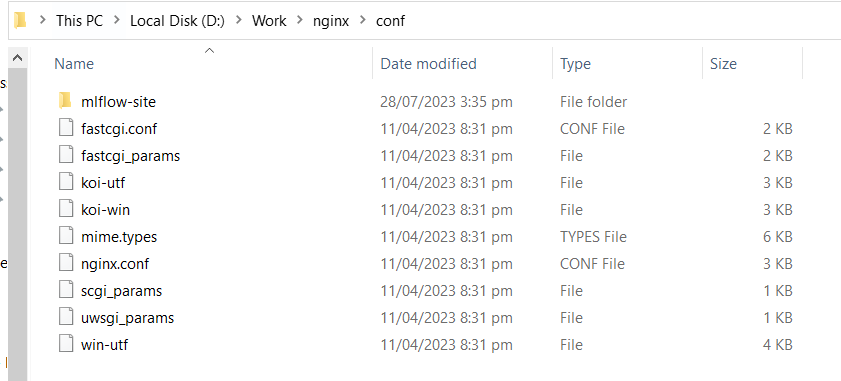
Make a new MLFlow server block in Nginx. Create the “mlflow-site” directory by opening a command prompt in the Nginx directory:
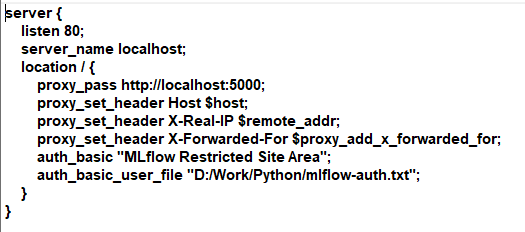
It’s time to make a new file for the MLflow configuration right now. Replace the server’s domain name or IP address with the localhost. Also, using forward slashes in the path, replace D:/Work/Python/mlflow-auth with the exact path to the password file that is previously created. Change the value of proxy_pass to the MLflow server’s URI. The ports are adjustable to the necessary port numbers.
Here is the snippet of the code to change:
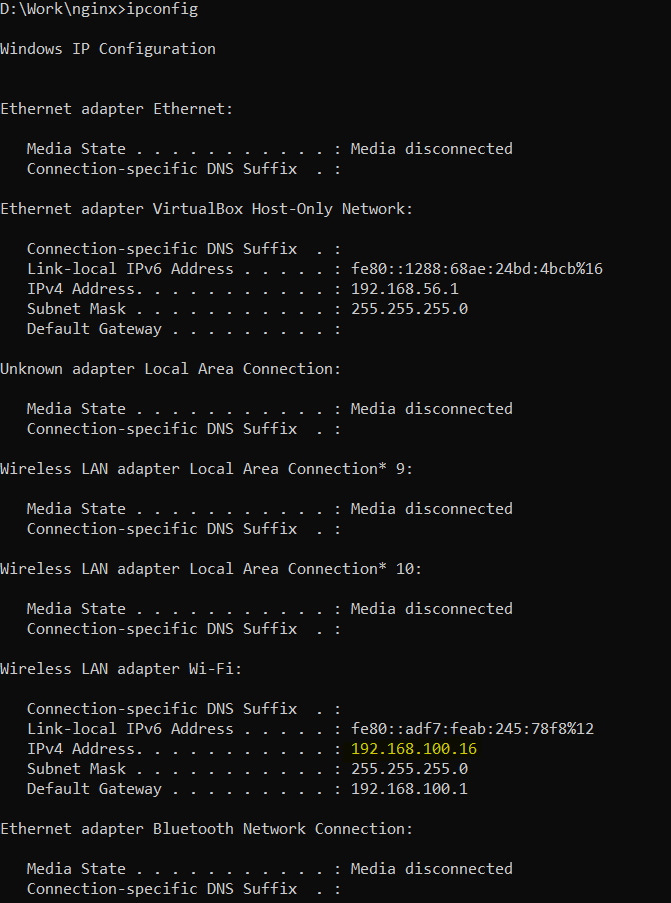
Enter the “ipconfig” command on the command prompt to find the IP Address:
Step 4: Enable the Nginx Server Block
In order to activate the Nginx server block, create a symbolic link using the following command on the command prompt:
mklink mlflow D:\Work\nginx\conf\mlflow-site\mlflow
Step 5: Start Nginx
Enter the “nginx.exe” command and navigate to the Nginx directory to launch Nginx from a command prompt:
Step 6: Start the MLflow Server
With the help of the following command, which includes the backend storage path of the MLflow server, you can start or restart the MLflow server in a new terminal window or command prompt. The results of experiments, searches, and other operations are stored on this path:
Command to Start the MLflow Server:
If, after executing the aforementioned command, you see the following error, don’t worry; simply execute the following command to fix the issue:
Change the URI scheme to store the model registry data on the local file system in order to resolve the error:
Step 7: Access MLflow with Authentication
Now, Nginx will request a username and password before granting access to the MLflow server and its artifacts when someone accesses MLflow via the domain or IP address. Now, in order to access MLflow’s UI and API, you must first provide a login username and password when using a web browser to access MLflow.
Conclusion
MLflow authentication on Windows requires MLflow to be performed behind a reverse proxy with the authentication turned on. In this instance, Nginx serves as the reverse proxy, acting as a middleman between the user’s browser and the MLflow server. Users are requested to enter a username and password before accessing the user interface and API for MLflow by configuring Nginx to enforce the basic authentication.
Last but not the least, to ensure that you are adhering to the most recent and secure practices, it is always crucial to consult the most recent documentation and resources for MLflow and Nginx.


