Java is a popularly used client-side programming language used for multi-purposes such as games development, mobile applications development, desktop computing, etc. If we have to run the softwares like Gradle/Tomcat, Maven, etc. then local installation of JDK will not be enough instead we have to set the Java home variable as well.
JAVA_HOME is an environmental variable that points to the path/location of the file system where the JDK/JRE is installed. It must be configured on every operating system that uses java programming .
This post will provide a detailed guide for setting the java_home variable on the windows operating system. For a profound understanding you have to go through the below-given steps:
Step 1: Download the latest version of JDK
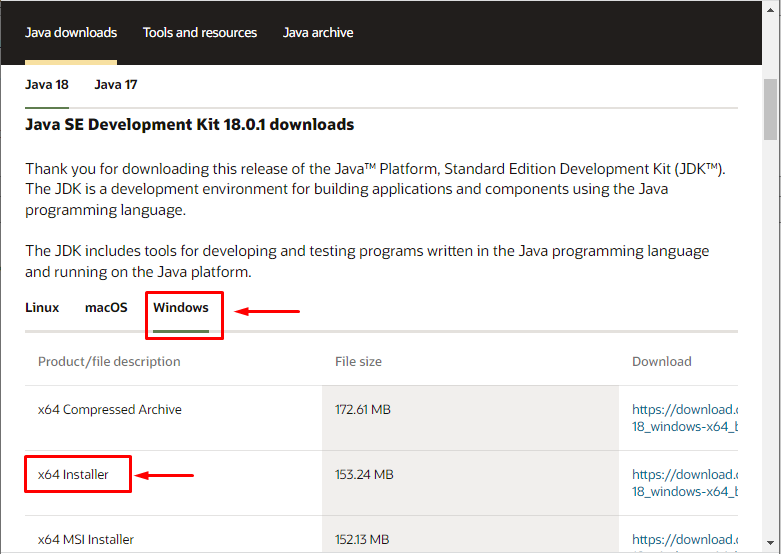
Firstly, you have to download the appropriate/latest version of JDK(acronym of Java Development Kit) for the Windows operating system. To do so, vist “oracle.com” as we did in the below snippet:
Step 2: Install the JDK
Install the JDK from the download file. Installation process is quite simple:
click on downloaded file > allow permissions > click on next button > finally click on the close button to complete the installation.
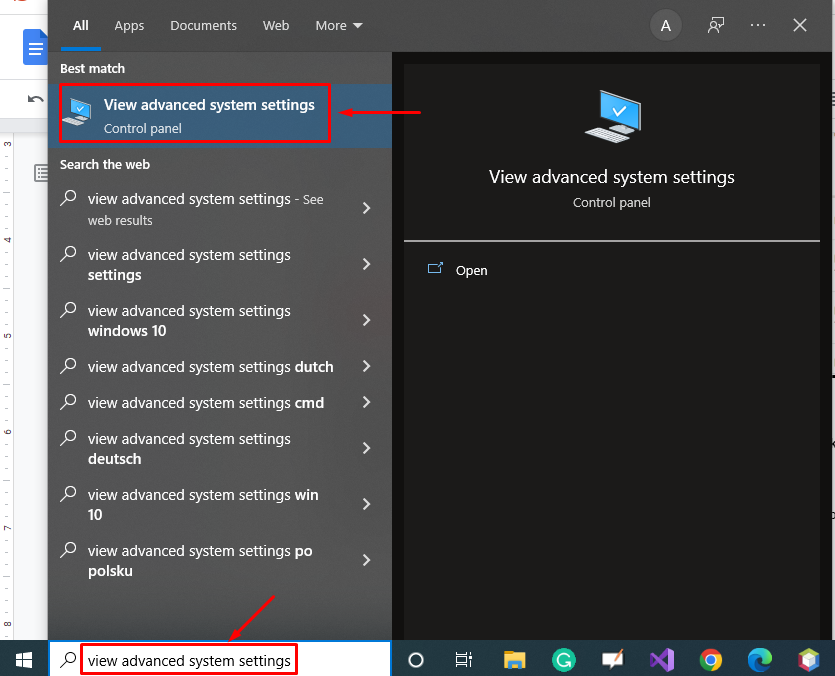
Step 3: Search for the “view advanced system settings”
Search for the “view advanced system settings” in the search bar of your windows operating system as shown in the below snippet:
Step 4: Open “view advanced system settings”
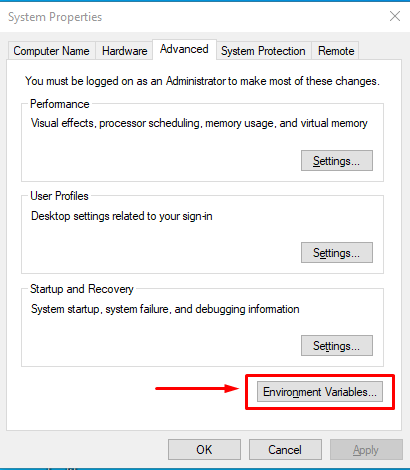
Clicking on the “view advanced system settings” will open the following window:
Click on the Environment Variables as highlighted in the above snippet.
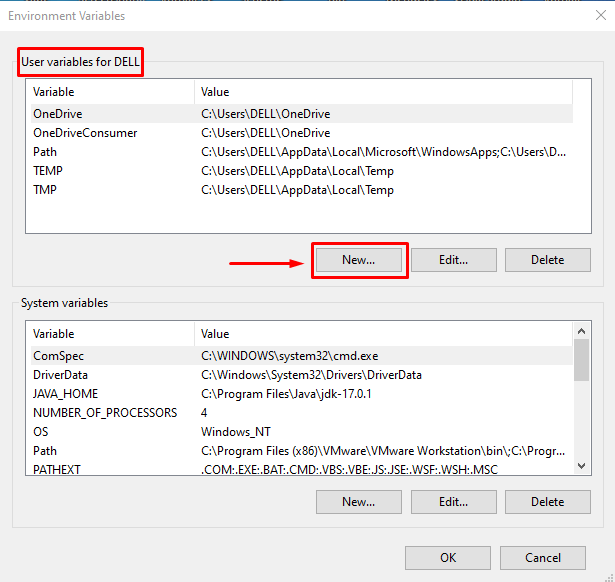
Step 5: Select “User Variables”
Now you have to option “User Variables” and “System Variables”, Select “User Variables” and click on “New”:
Step 6: Type “JAVA_HOME” as the variable name
Clicking on the “New” button will open a new window having two fields “variable name” and “variable value”:
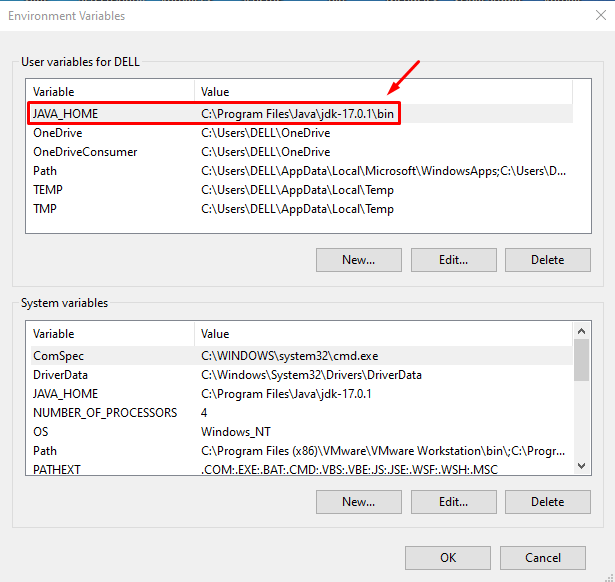
Type “JAVA_HOME” as the variable name and specify the path to JDK as the variable value:
Clicking on the OK button will show the following window:
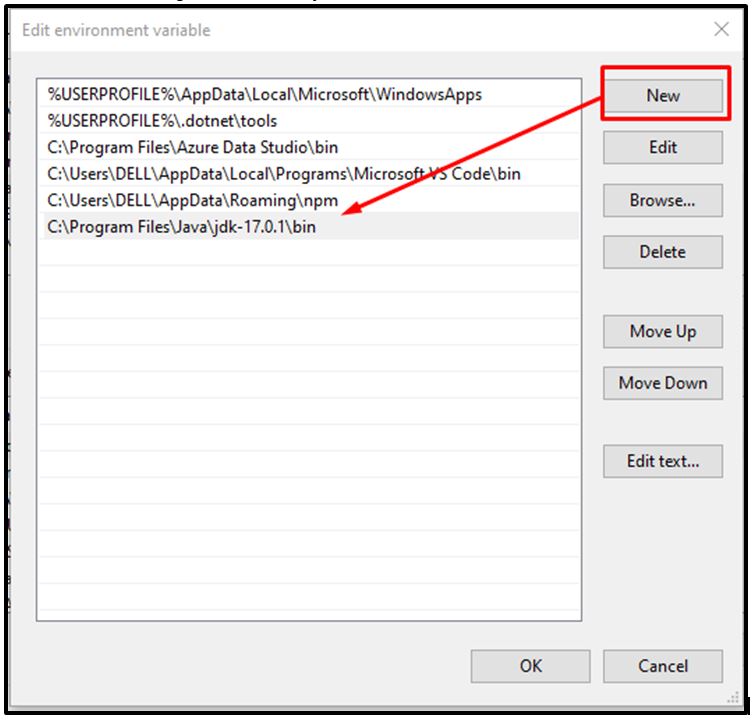
Step 7: Set the location for path variable
Now set the location for path variable, to do so, click on the path variable and add the path to JDK upto bin folder i.e. “C:\Program Files\Java\jdk-17.0.1\bin”:
Press OK.
Step 8: Repeat process for “System Variables”
Now repeat the whole process for the “System Variables” and close the window,
Step 9: Verify “Java_home” variable is set or not
Let’s type the below mentioned command on the command prompt to check whether java is installed on your computer system:
Hit the “Enter” button. It will show the following result:
The above snippet shows which version of java is running on our computer system. Now let’s verify whether the Java_home variable is set on your windows or not, to do so, type the below-given command on the windows command prompt:
If the Java_home variable is appropriately set on your windows operating system then the above-mentioned command will return the path that we specify for the Java_home variable:
Congratulations! You have successfully set the Java_home variable in the Windows operating system.
Conclusion
To set up the Java_home variable, we have to follow the following process/steps: Search for the “view advanced system settings” in the window’s search bar and select it > Click on the Environment Variables > Select “User Variables” and click on “New” button > Type “JAVA_HOME” as the variable name and specify the path to JDK as the variable value > locate the path variable and press OK > repeat the whole process for “System Variables” and press OK. This process will set the Java_home variable on your windows operating system. You can verify it by simply typing the “echo %JAVA_HOME%” on the command prompt.

