Java is a modern, well-liked, general-purpose coding language introduced by Sun Microsystems in 1995. It also supported a multi-threading environment in which many small tasks within an application are executed as threads. Various Java-based programs like Tomcat require the location of the Java Development Kit (JDK) on your system. This direction is provided using the JAVA_HOME which is an environment variable used to point toward the installation directory of JDK.
Here, we will demonstrate the approach to set the JAVA_HOME in Windows.
Prerequisites: Install Java on Windows
JAVA_HOME refers to the directory where the JDK is placed. Prior to setting the JAVA_HOME environment, your system must have JDK. Here, we have added a link to our article:
How to Set JAVA_HOME Environment Variable in Windows?
The environment variables are the space where the information about software and programs are stored such as packages, and program location, and also include Windows program information. It provides the environment in which stored or set programs can interact with the operating system. Follow the below-given guide to set up the “HOME_JAVA” environment variable.
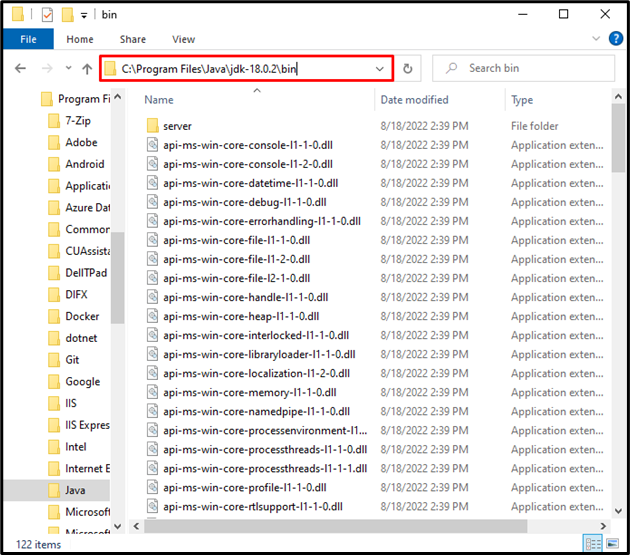
Step 1: Open Java Installation Directory
By default, Java JDK is installed in “Program Files”. If you have changed the installation location, navigate to the directory where the Java and JDK is installed. Then, open the “bin” directory of JDK. After that, copy the path from the “Address” bar. Otherwise, follow the below provided path to access the bin folder:
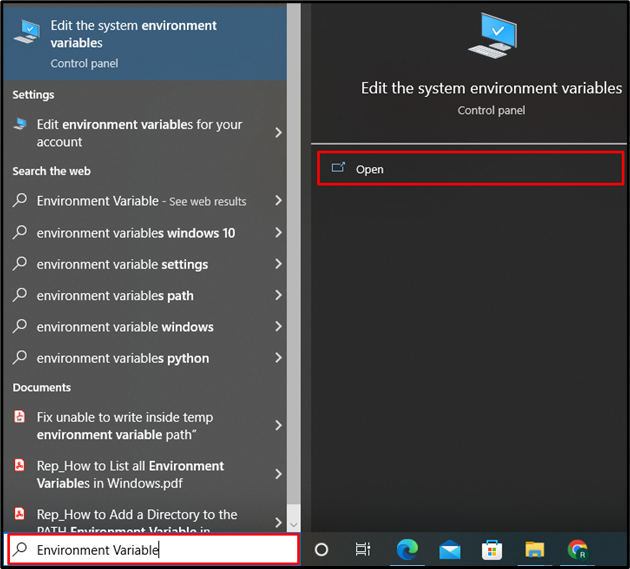
Step 2: Open Environment Variables Settings
Next, make a search for “Environment Variable” in the “Startup” menu and open the displayed setting:
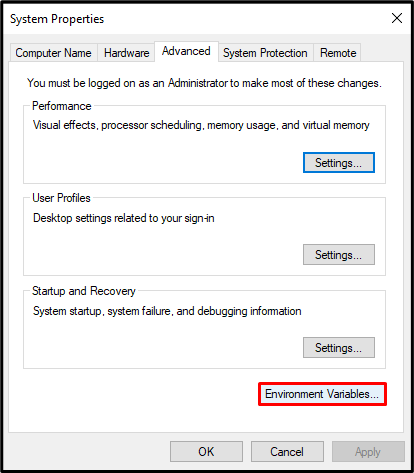
Step 3: Set JAVA_HOME Environment Variables
Click on the “Environment Variables” button to set JAVA_HOME environment variable:
Next, press the “New” button from the “System variables” panel:
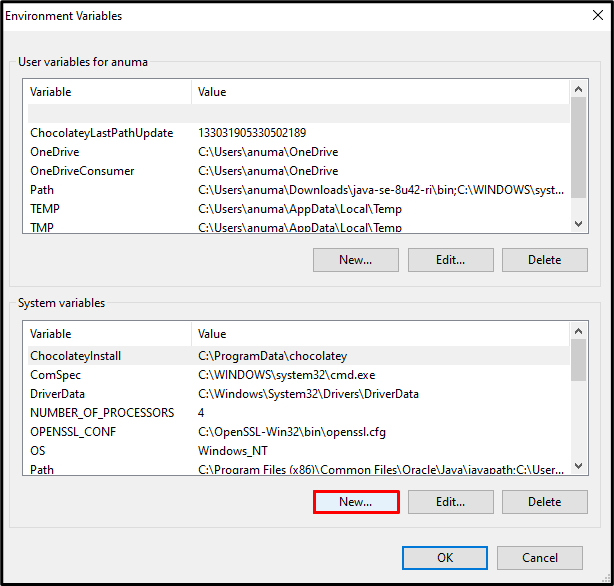
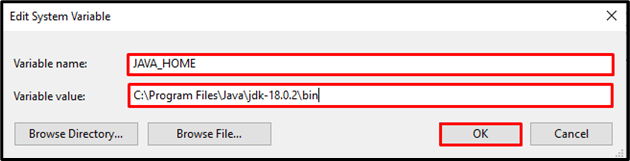
Upon doing so, the “New System Variable” wizard will appear on the screen. Set the “Variable Name” as “JAVA_HOME” and in “Variable value” paste the copied path here. Then, hit the “OK” button:
Step 4: Set Path Environment Variable
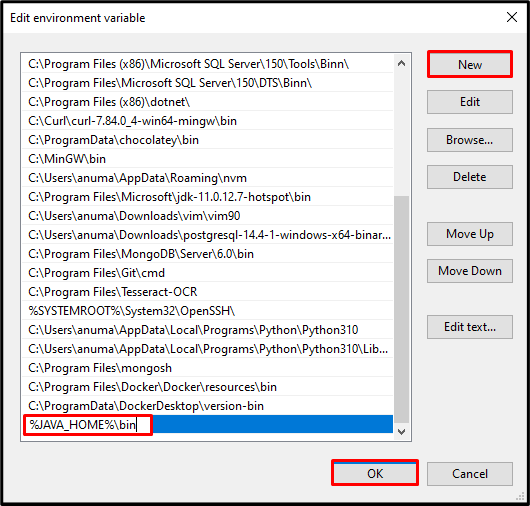
In order to use Java from the Windows command line, set the Path environment variable. To do so, select the “Path” property from the “System variable” panel and press the “Edit” button:

Next, click on the “New” button and type “%HOME_JAVA%\bin” in the displayed field. Then, hit on the “OK”:
Step 5: Verify Setting of Environment Variable
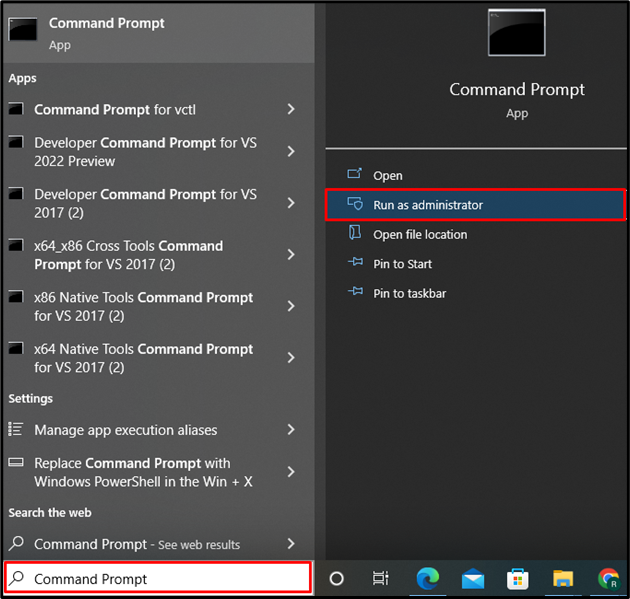
In the next step, verify whether we have successfully set Environment Variable JAVA_HOME or not. For this purpose, first, open the Window Command prompt from the Startup menu:
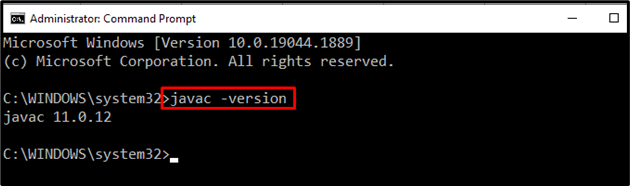
Check out the Java version using provided command:
You can see that we have successfully set the environment variable JAVA_HOME in Windows:
We have learned the method to install java and how to set the environment variable JAVA_HOME in Windows.
Conclusion
To set the JAVA_HOME environment variable, you need to install Java on your system. Next, open the directory where you have installed JDK and copy the “bin” directory path from the “Address” bar. After that, open the Control Panel “Environment Variable” settings and set the new environment variable by clicking on the “New” button, then set the Variable name as “JAVA_HOME” and paste the copied path into the Variable value. In this article, we have demonstrated the technique to add JAVA_HOME to the environment variable in Windows 10.