Since there are several TCP connections involved in HTTP networking, there is often a method involved in the identification of web users. Whether a particular method is suitable is determined by a session token sent by a web server to the user’s browser following successful authentication. A session ID or session token is a string of varying lengths given to a visitor upon their first visit to a site. There are many ways to incorporate a session ID; it can be worked into the URL or the header of the https request received, or stored as a cookie.
Most browser sessions and web applications are susceptible to session ID attacks, though most can be used to hijack just about any system out there.
Session hijacking attacks, or cookie hijacking attacks, steal or imitate a session token to gain access to a system.
There are several different ways to compromise a session token:
- By predicting a weak session token
- Through session sniffing
- By means of client-side attacks (XSS, malicious JavaScript Codes, Trojans, etc.)
- Through man-in-the-middle (MITM) attacks (phishing, etc.)
This article provides a short guide on conducting a pen-testing session to check whether a system is prone to the attacks mentioned above.
Some pre-requisites:
- A predetermined soft-target to perform this test on
- A local machine with an up-to-date version of Kali Linux installed
- A web browser
More specifically, we will be using the Ettercap, Hamster, and Ferret built-in utilities known for their use in conducting MITM attacks.
Fire up Ettercap
First, we will need to gear up for the attack:
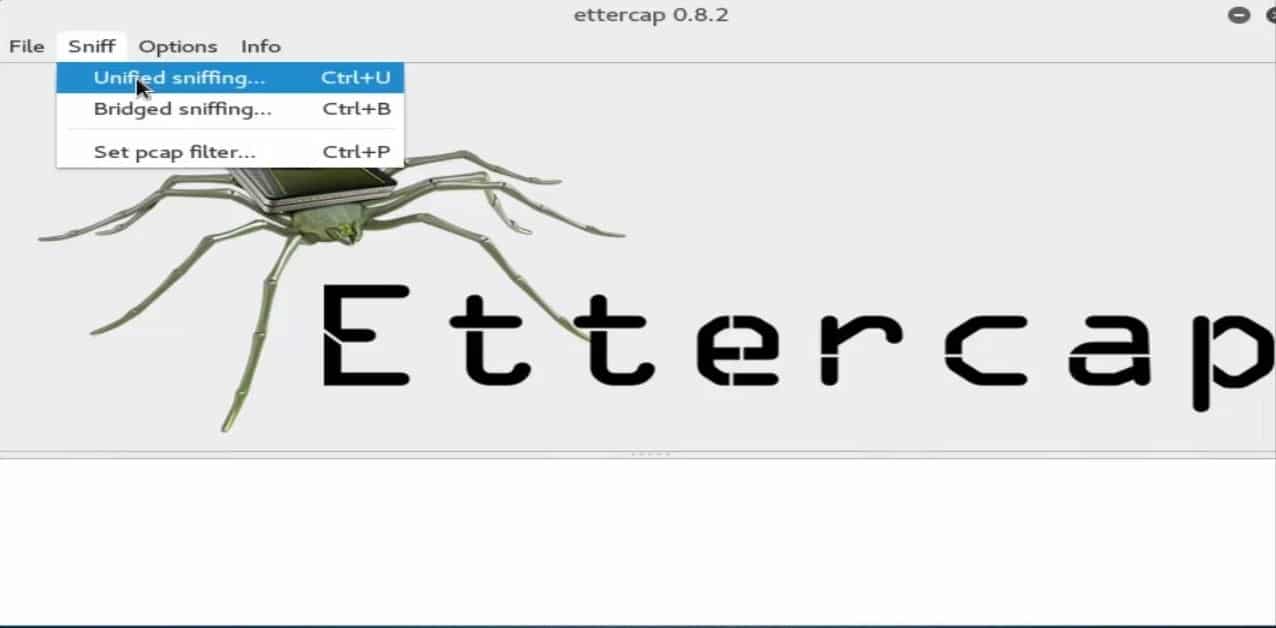
Open up the Ettercap utility in Kali Linux. To work with it in a GUI, open up a terminal and type:
The Ettercap GUI window will be displayed. Go to the menu and select ‘sniff>unisniff,’ as shown in the following window:
Next, open up a new terminal without closing the other one, and type the following command:
After entering the above command, you will see your default network interface. Now, copy it and select it in the Ettercap menu.
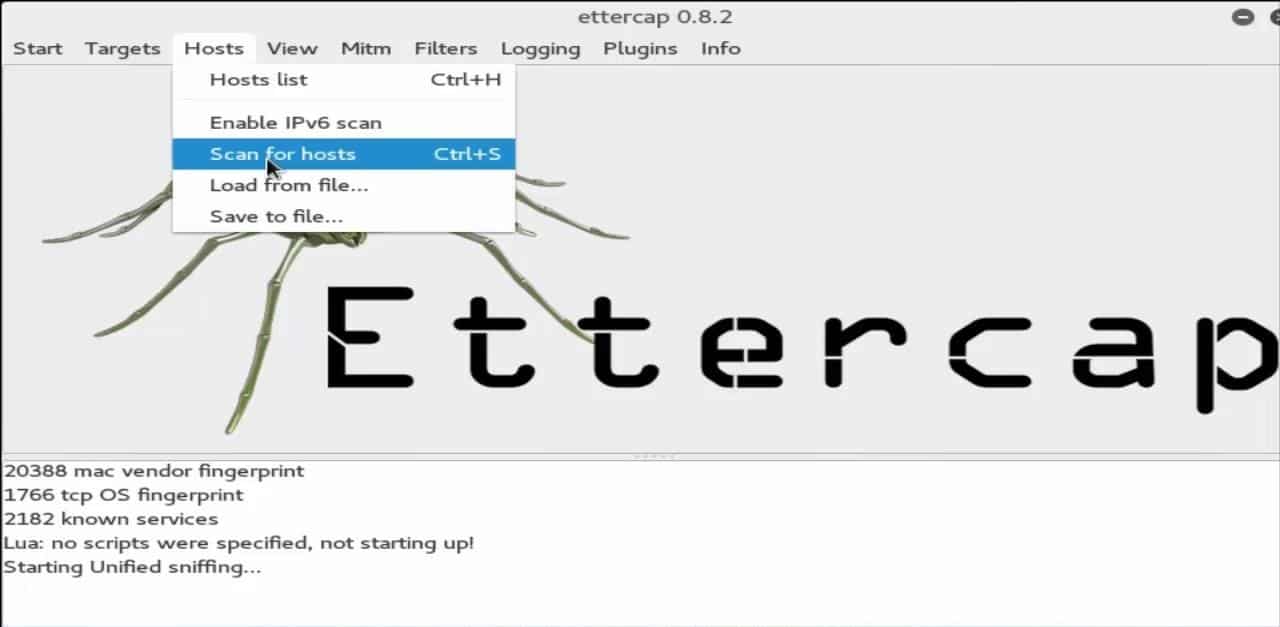
With that done, click the ‘host’ button in the menu and select the ‘scan for host’ option. Then, wait until the scan is finished.
The results will be displayed here. From the submenu, click on the MITM tab and select ‘ARP poisoning.’
Next, instruct the machine using the options tab that has just popped up. Enable the ‘sniff remote network’ option by checking the box next to it.
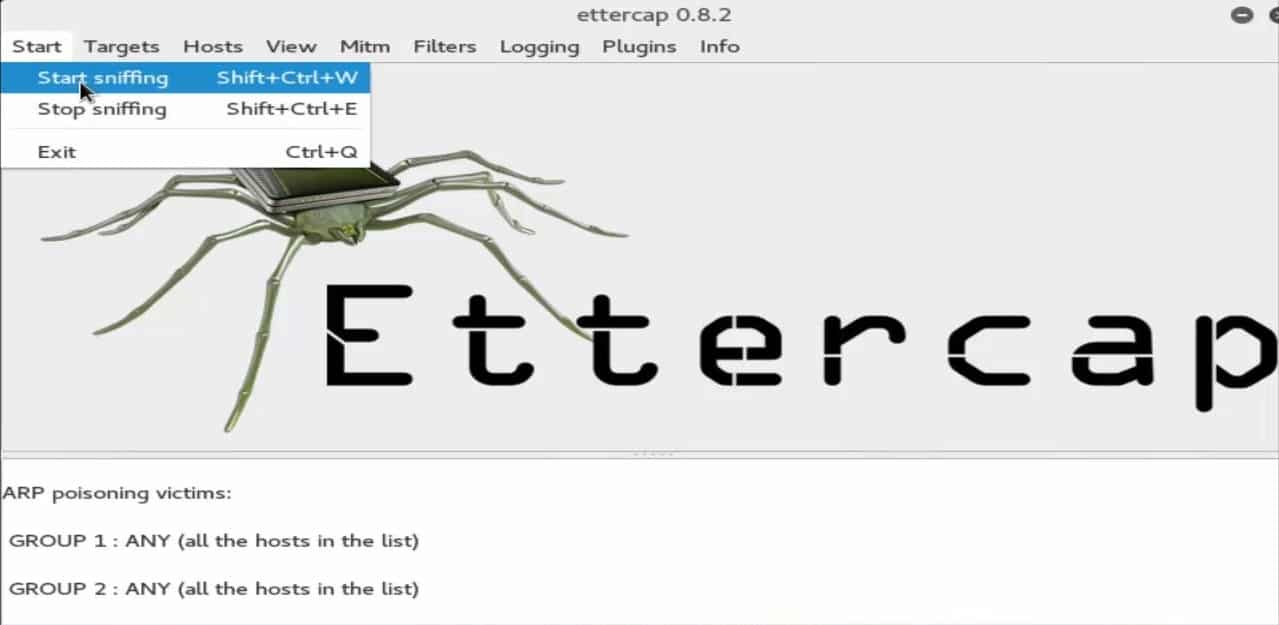
Then, hit the start button from the menu to the attack. Your machine will now engage in sniffing for any systems connected to your remote network.
Now that the ettercap has been primed for the attack, leave it running in the background and proceed to launch the Ferret tool.
Start the Ferret plugin
To launch the Ferret plugin, open up a new terminal and type the following syntax, then hit Enter:
You have now successfully launched the ferret tool, as well. Next, we will minimize this window and fire up the Hamster plugin.
Launch Hamster
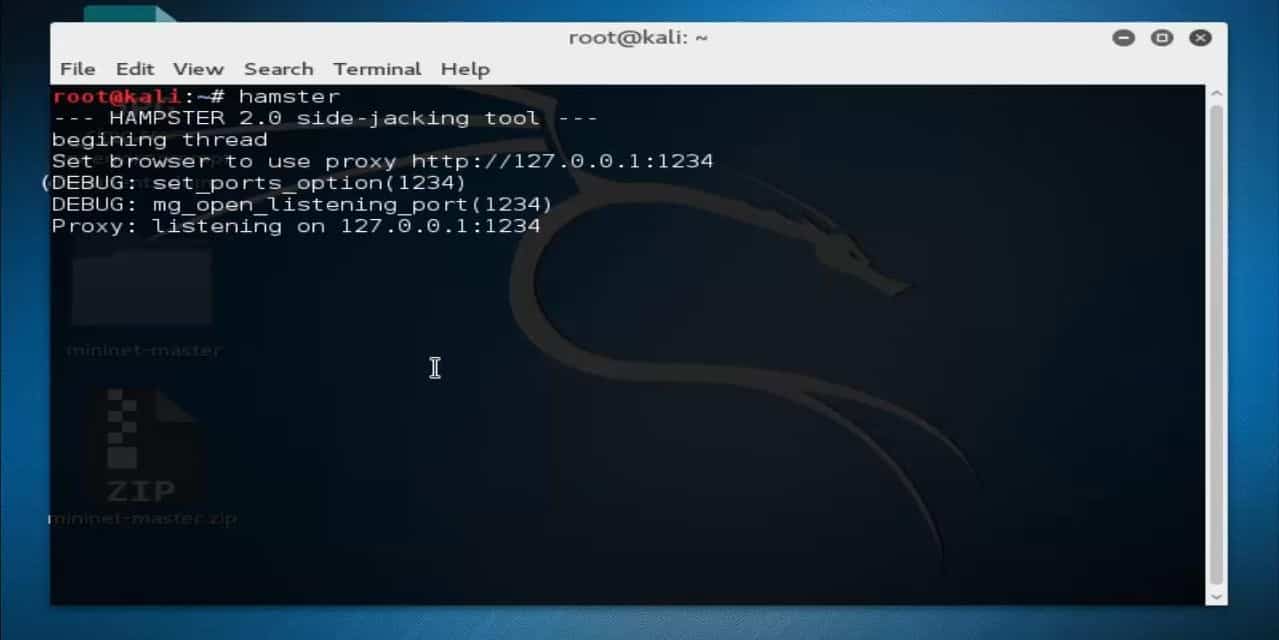
Start Hamster by typing the following into a new command terminal:
This will listen to the loopback IP, which, in our case, is [IP address] and [port number]
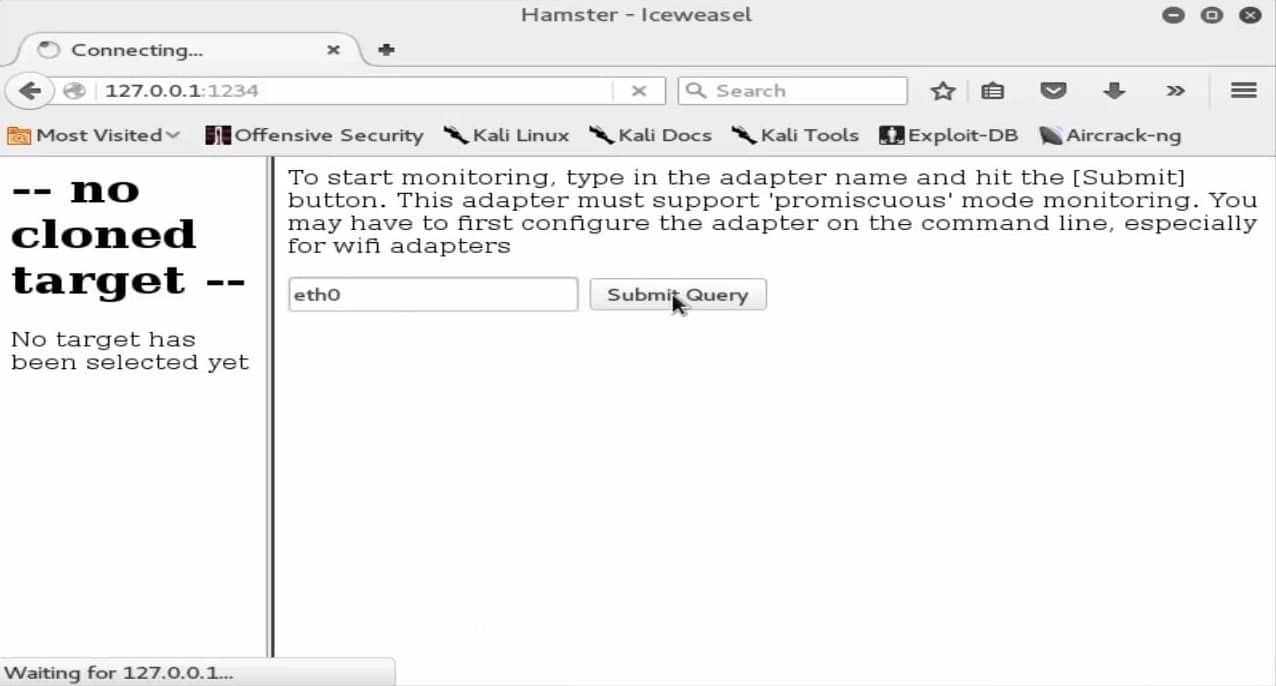
Next, fire up the web browser and type the port number and the loopback IP in its URL terminal to set up the web interface for Hamster:
With the Hamster utility prepared, we must now configure the adapters. Go to the options in the browser’s menu and click on ‘eth0,’ and wait until the browser comes up with some results:
Examine the results carefully once they pop up. You will see a whole bunch of IP addresses, including your own.
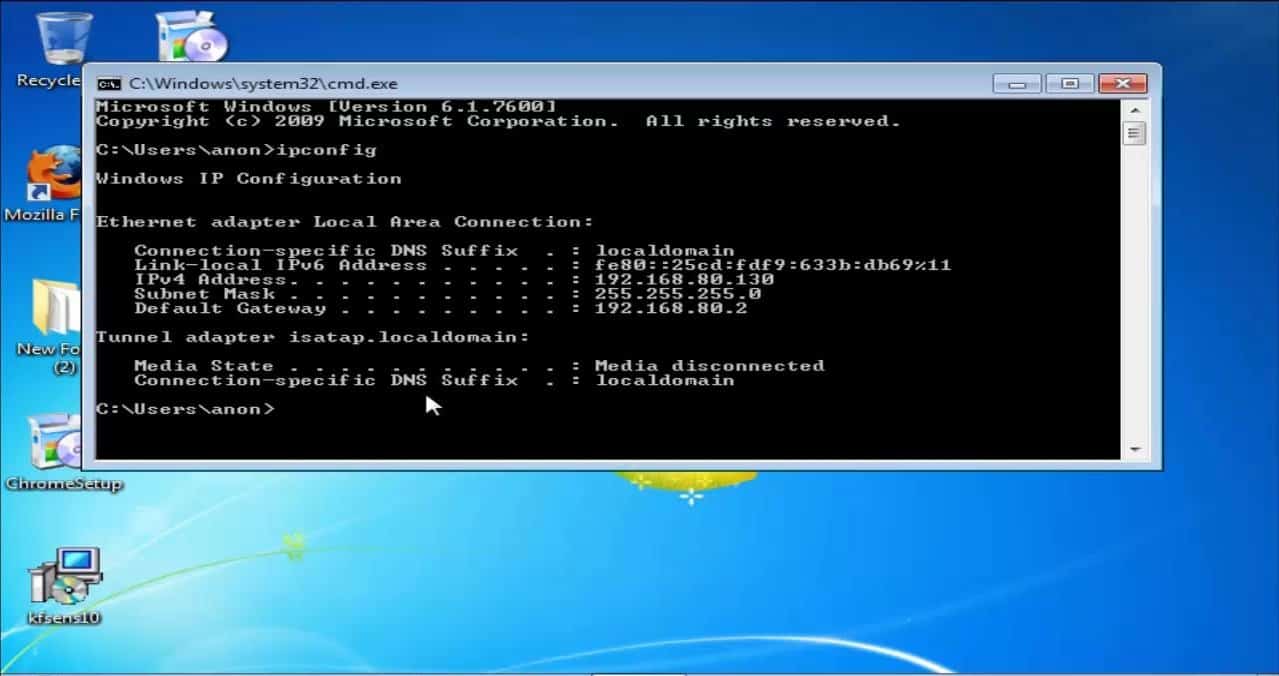
Here, we have designated a local machine (with Windows 7 OS) on our network as our target, and its IP is also displayed in the results that we are shown. Check to see if your target machine’s IP address is detected.
Next, we will select the target IP address in the Hamster web interface. You will be shown the cookies and sessions recorded in the browser.
See the Victim’s Web History
You can click on each of the recorded cookies to see what is going on in the sessions, which websites were accessed, the user’s private chat logs, file transfer history, etc. You can extract a lot of information here, as you are likely to have a lot of cookies.
Mess around and see what you can get your hands on. And remember, everything that you can do on the system that you are pen-testing here, a hacker can do as well, which goes to show how prone a system can be to such simple attacks.
Conclusion
Hopefully, this guide has helped you with conducting your first session ID attack. We will be right back with more follow-ups on the session ID attacks, so keep coming back for more updates and check out the MITM attack-related articles on our blog in the meantime.


