After reading this tutorial, you will be able to carry out speed tests through Pfsense. The techniques explained in this article include general speed tests and specific tests for download and upload speed. I also added examples using other Pfsense speed test features.
This is the most complete Pfsense speed tests tutorial on the internet.
This Pfsense tutorial includes screenshots, making it easy for all users to follow the described steps.
How to run a speed test with Pfsense:
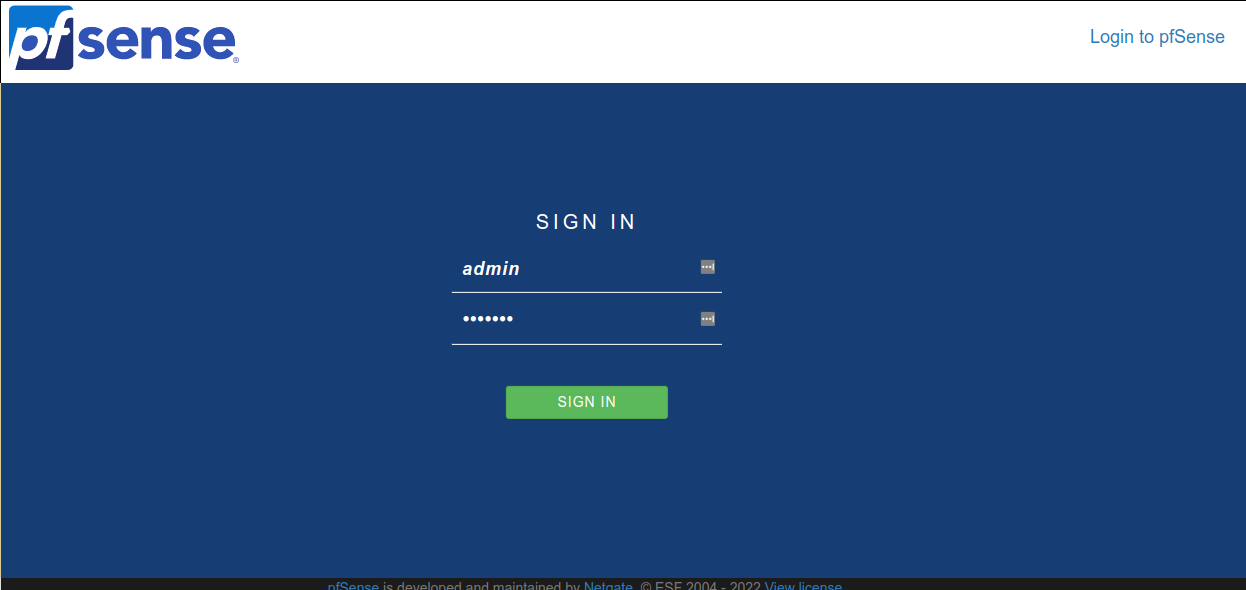
To begin, log in to your Pfsense web interface. If this is the first time you log in to Pfsense, the default user is ‘admin’, and the default password is ‘pfsense’.
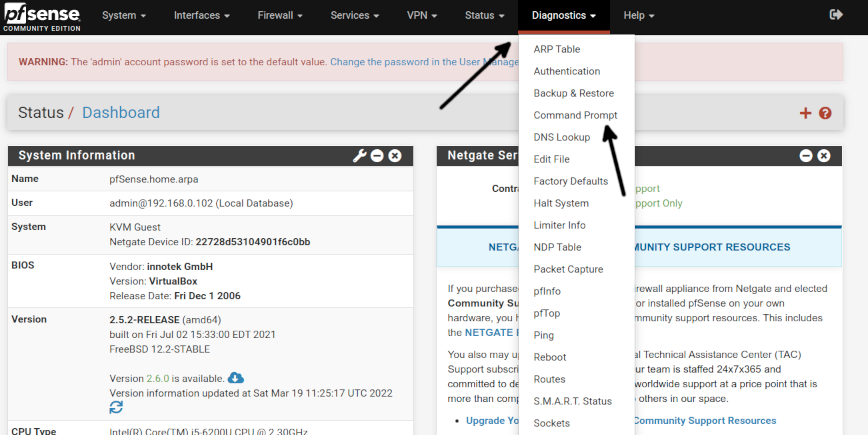
Once in the web interface, press Diagnostics and then press Command Prompt on the top menu.
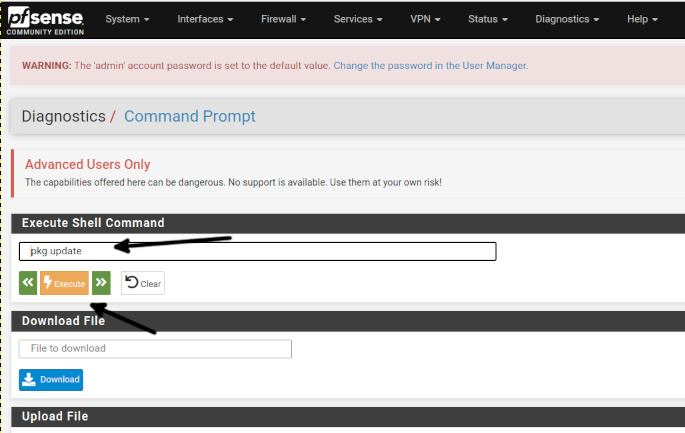
To execute a speed test using Pfsense, first, we need to install a package. Before it, let’s update the repositories to make sure we’ll install the current version. To update the packages repository type and the command shown in the screenshot below in the Execute Shell Command field. Then press the Execute button as shown below.
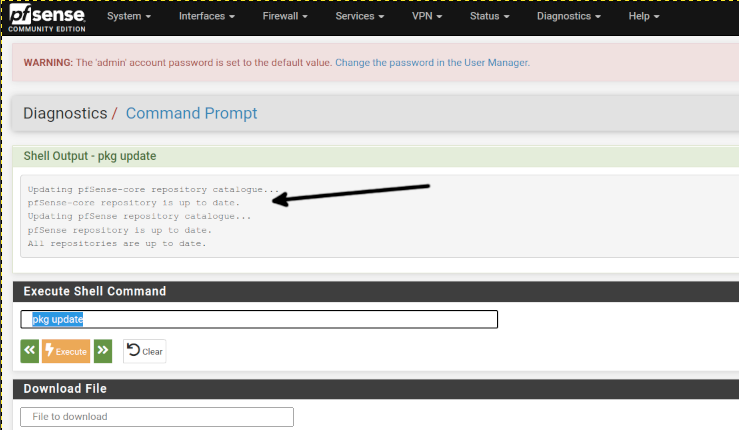
As you can see in the output, the packages repository was updated successfully.
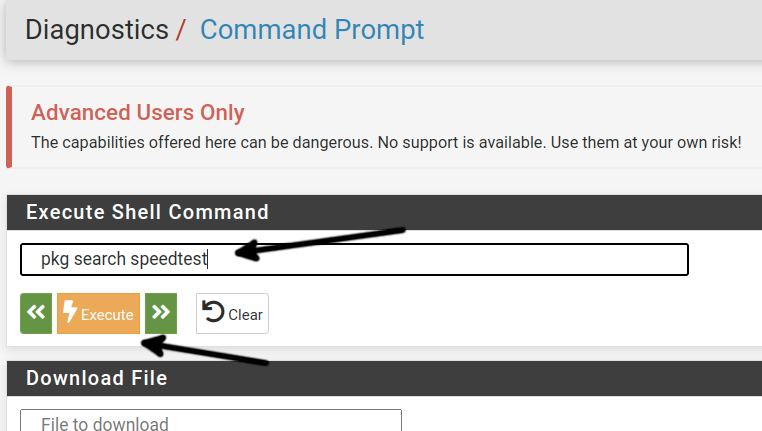
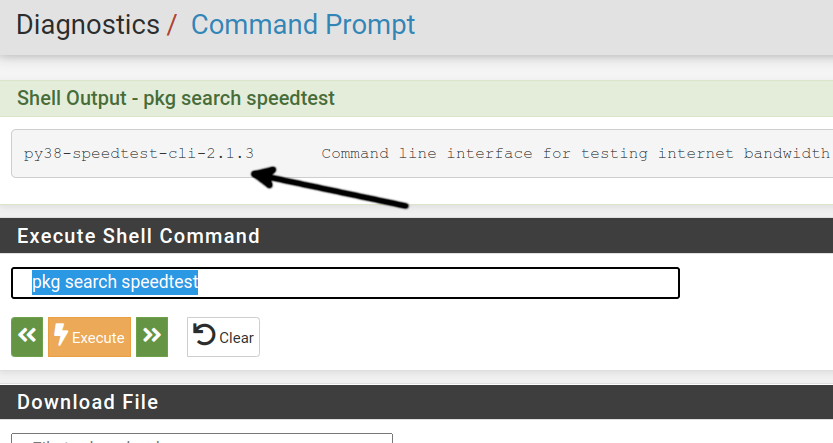
Now let’s search the current speedtest package by running the following command, then press the Execute button.
As you can see, in my case, the current version is py38-speedtest-cli-2.1.3; when you run the pkg search speedtest, the version may be a newer one, just copy it.
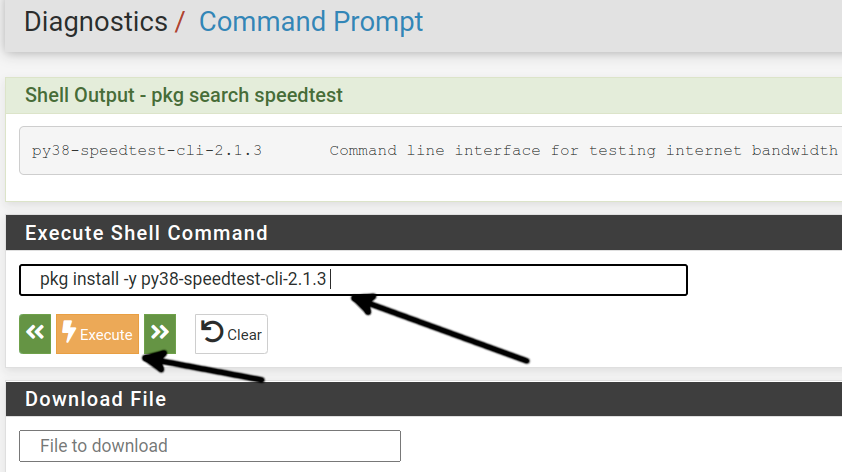
Install the current speedtest package by type the command below and press the Execute button.
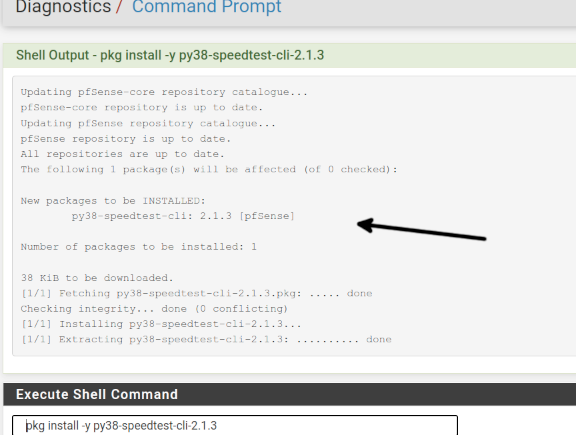
As you can see in the output, the speedtest package was installed properly.
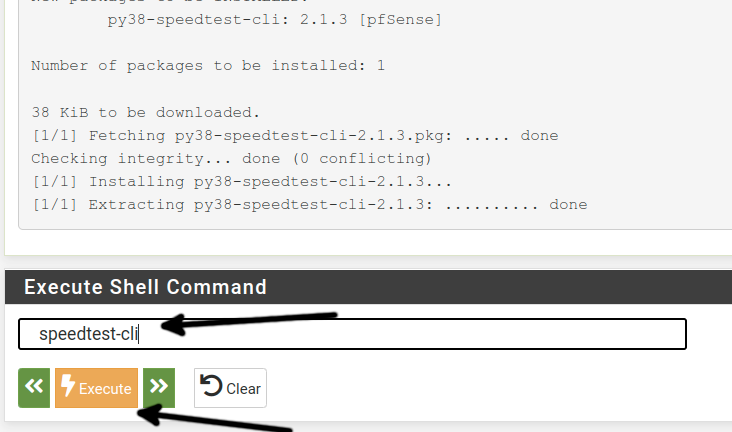
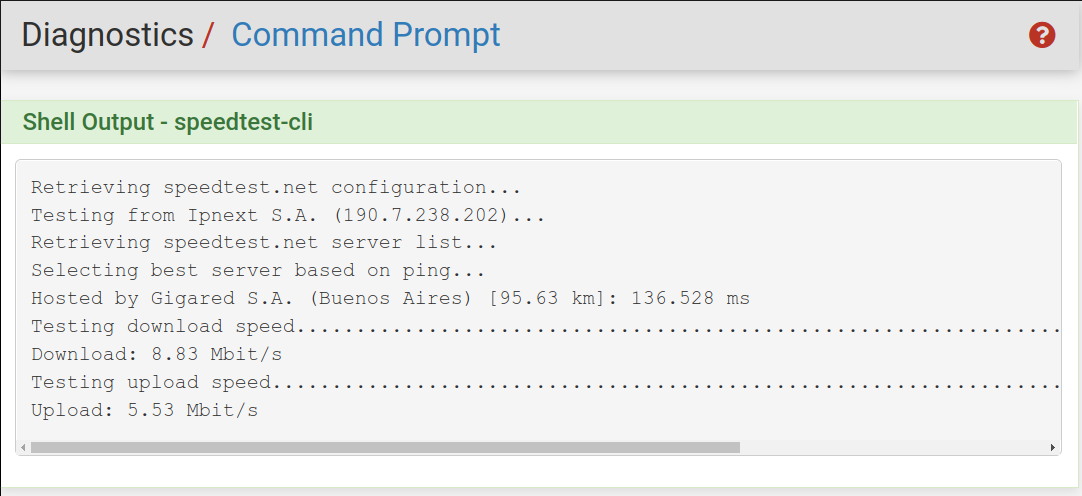
After successfully installing the speedtest, run the command below and press the Execute button.
As you can see in the output, the download speed is 8.83 Mbit (around 1.10 MB).
The upload speed is 5.53 Mbit (around 0.7 MB).
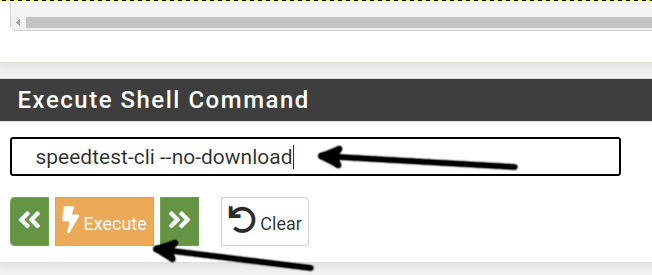
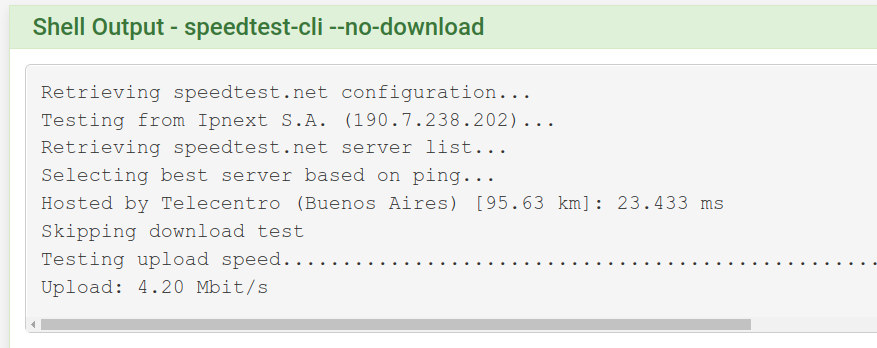
You can do exclusive speed tests, skipping specific analysis. In the example below, I will only test the upload speed by adding the flag shown below. So to only check the upload speed, type the command shown below, then press the Execute button.
As you can see, the download test was skipped, and the output now shows the upload speed is 4.20 Mbit.
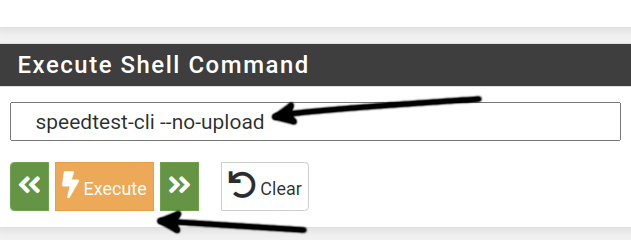
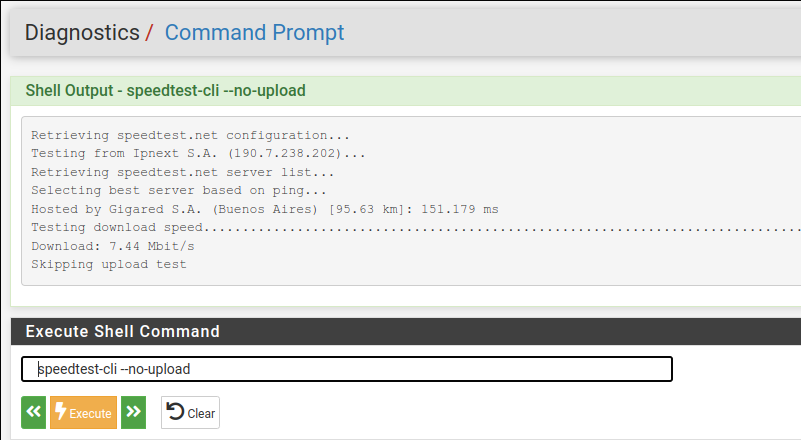
We can do the inverse, checking the download speed only. To do it, type the command shown in the following image and press the Execute button.
As you see, the upload test was skipped, and the download speed is 7.44 Mbit.
Multiple connections are made to measure the speed when we execute regular speed tests.
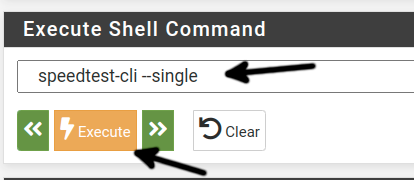
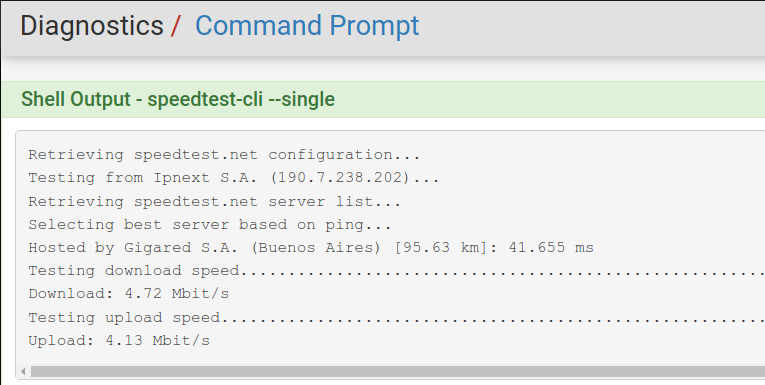
We only instruct Pfsense to establish a single connection in the example below. Type the command shown in the screenshot below and press the Execute button.
While the output does not change, we know that the speed test was done through a server only this time.
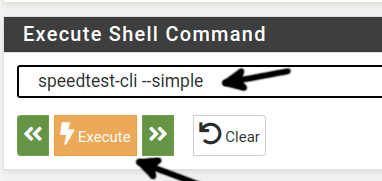
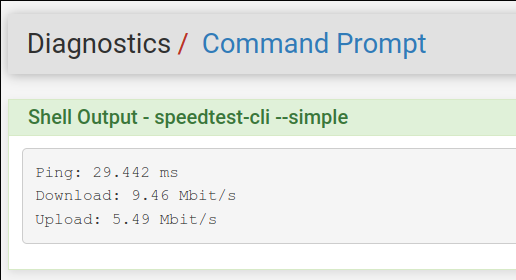
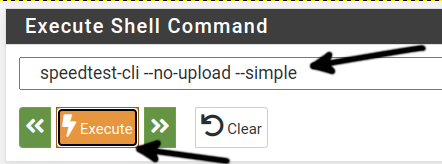
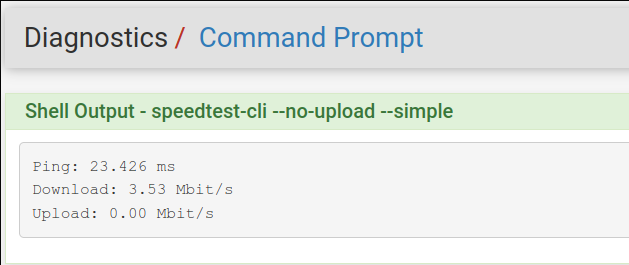
The next command allows us to simplify the output, showing only the relevant information. To do it, just type the command below and press the Execute button.
As you can see, the output is simplified and shows only the important information.
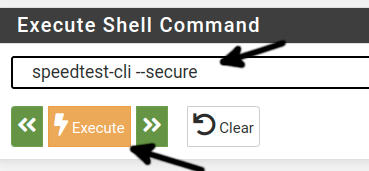
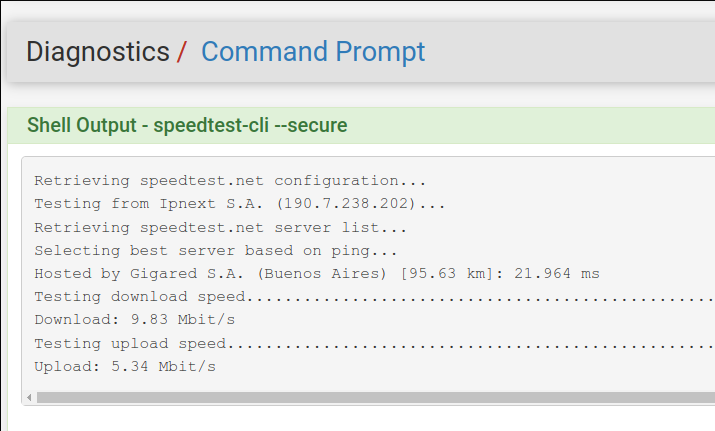
The next example instructs Pfsense to carry out a speed test through a secure protocol, using HTTPS instead of HTTP. Type the command shown below and press the Execute button to execute it.
Like the previous example, the output does not notify the process executed through a secure channel, yet we know the selected protocol.
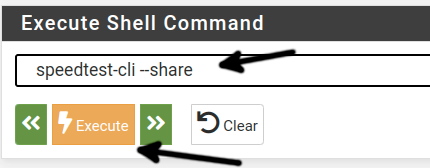
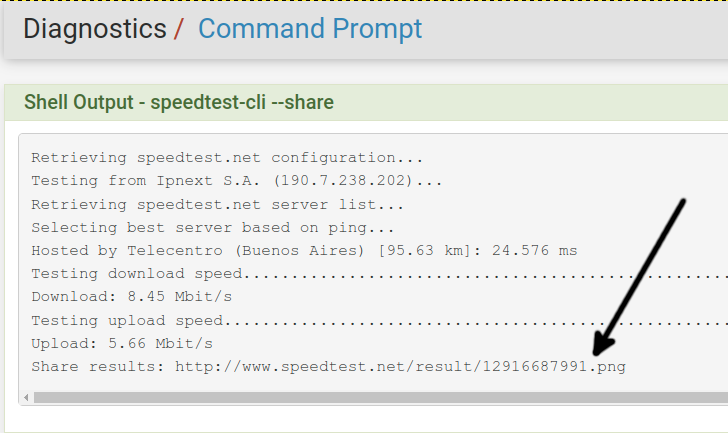
In addition to the results, the following example returns an URL to share the output. To do it, type the command below and press the Execute button.
The output also returns an URL you can use to share your speed test result.
You can combine the flags explained above with a few exceptions; for example, you cannot get a shareable URL if you exclude download or upload tests. We will do a download speed test with a simplified output in the example below. To do it, type the command shown in the screenshot below and press the Execute button.
The output below is simplified and only shows the download speed; the combination of the flag was successful.
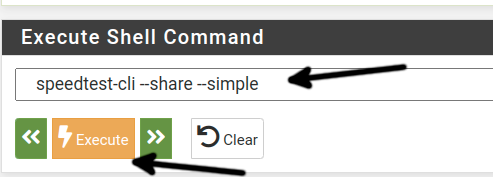
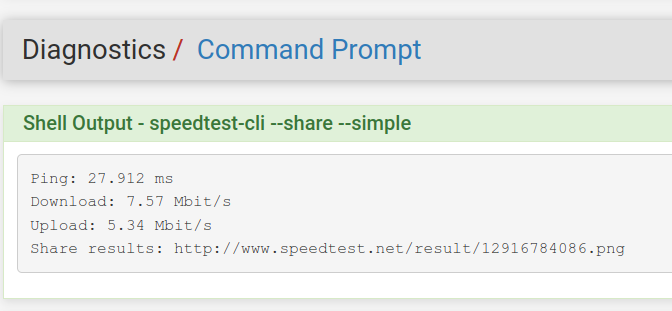
In the last example of this tutorial, I will combine flags to get a simplified result with a link to share. To do it, type the following command and press the Execute button, as shown in the screenshot below.
And as you can see, the output returns a simplified view with a link to share.
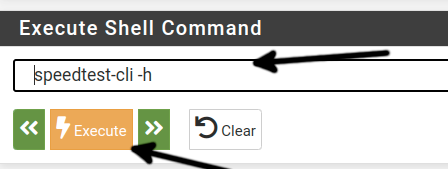
You can learn more Pfsense speed test functionalities by adding the -h flag as shown below.
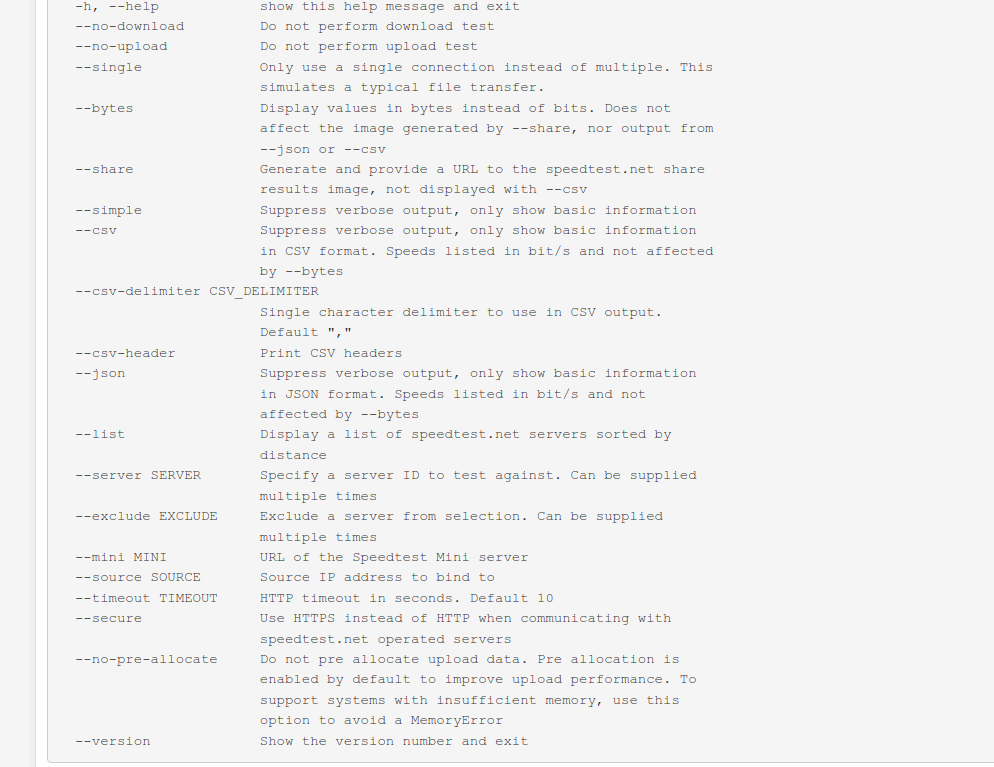
Below, you can see speedtest-cli offers many more features not used in this tutorial, and you can explore them.
Conclusion:
This tutorial shows an additional feature you can integrate to Pfsense to test your connection speed, which is only one of the functionalities you can add among a lot more. Pfsense, a FreeBSD based system, is a great tool to manage and secure your network. It also allows you to create your own firewall rules or integrate IDS (Intrusion Detection Systems) like Snort. Adding this operating system to your network can be extremely useful in diagnostics, security or general networking tasks. The commands you can execute from the Command shell prompt are BSD commands, making it formidable for BSD based operating system users. Pfsense is also free, open-source, and widely supported by the community. There is also commercial support available for companies making it a great alternative for home networks and businesses. Additionally, Pfsense also offers training programs.
Thank you for reading this article showing how to run speed tests with Pfsense. I hope it was useful for you. Keep reading our blog for more Pfsense professional tutorials.

