This article will go through the method to install and run Makefile on Windows.
How to Install make Command on Windows?
To run Makefile on Windows, first, it is required to install the make command line tool. To do so, follow the below-listed steps on your Windows system.
Step 1: Install MinGW Package Manager
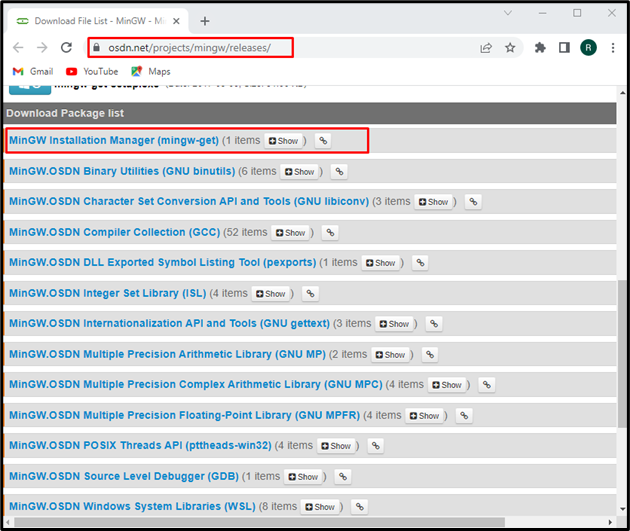
To install the make utility, first, download the MinGW package manager. For this purpose, navigate to the below-provided link and select the package you want to install:
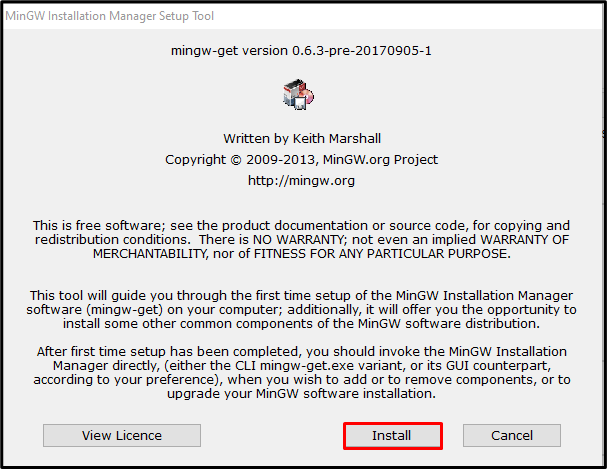
Click on the “Install” button to start the installation of MinGW:
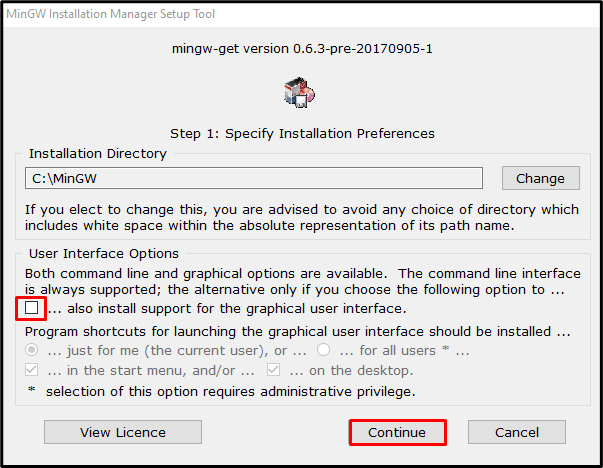
Set the location where you want to install the MinGW package manager, uncheck the graphical user interface installation option, and click on the “Continue” button:
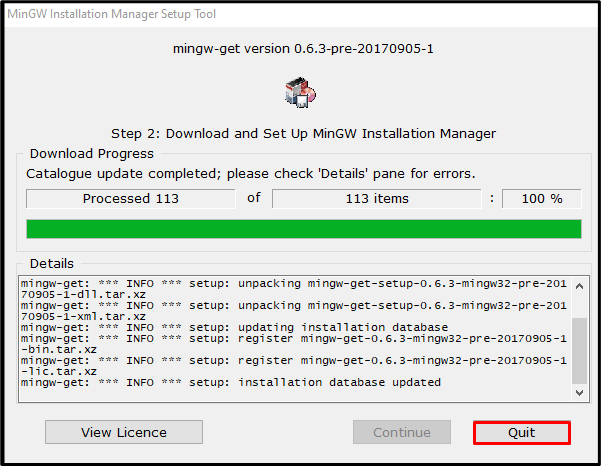
After successfully installing the MinGW package manager, click on the “Quit” button:
Step 2: Set Environment Variables
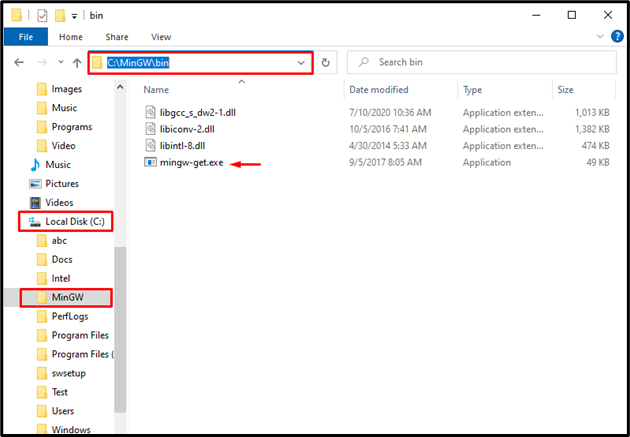
In the next step, go to the “C” drive, open up the “MinGW” folder, and find the “mingw-get.exe” file. Copy the file location as shown below:
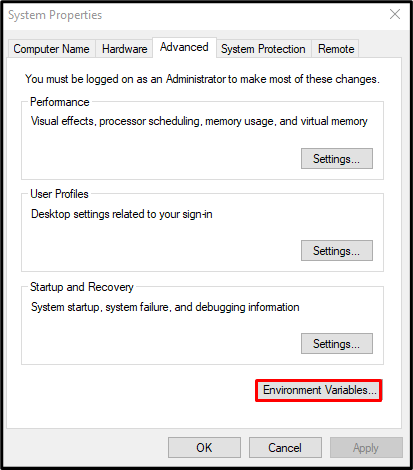
Search for “Environment Variables” in the “Startup” menu and open it:

Click on the “Environment Variables” to set the path in environment variables:
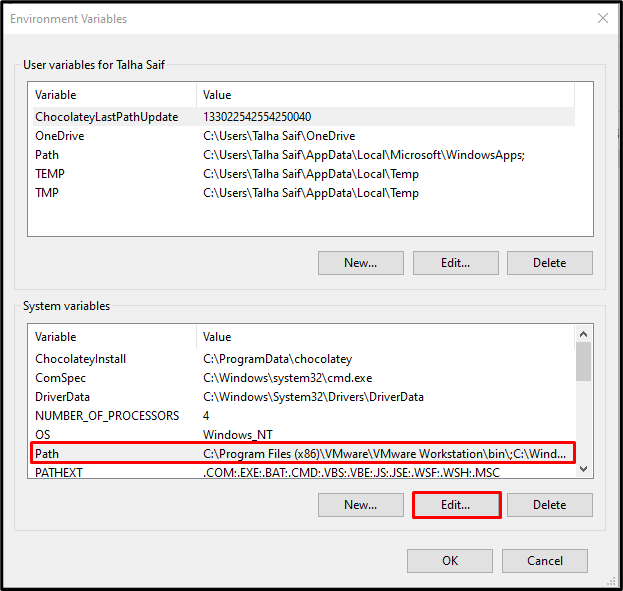
From the “System Variables” panel, select the given “Path”, and click on the “Edit” button:
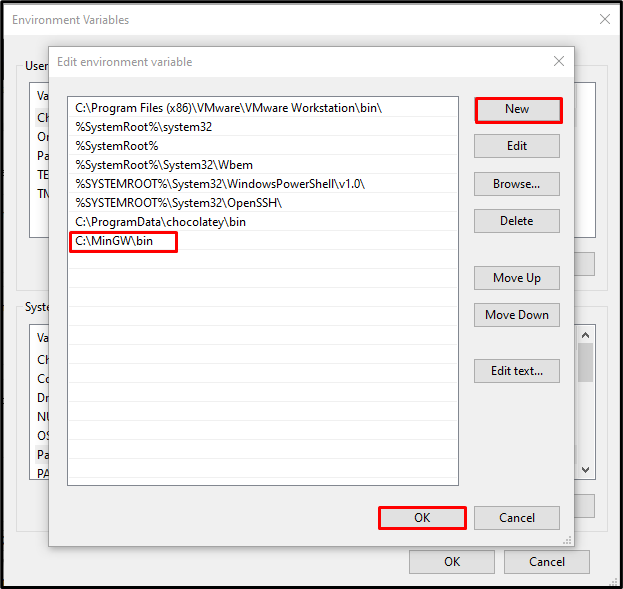
After that, press the “New” button and paste the copied path inside the Path field. Then, hit the “Ok” button:
Step 4: Install make Command
First, search for “CMD” in the “Startup” menu and open up the Command Prompt:
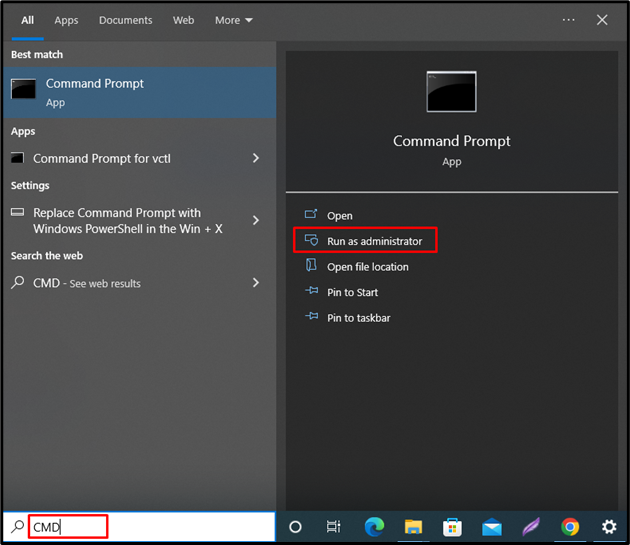
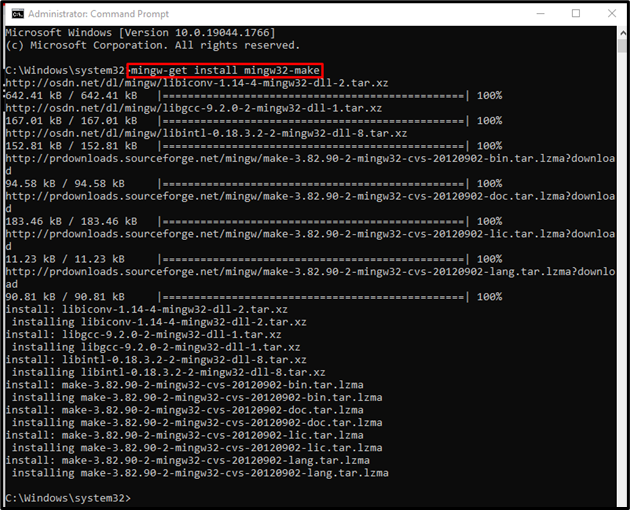
Next, execute the below-provided command to install make on Windows:
Step 5: Verify make Installation
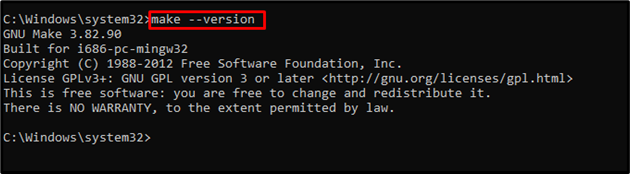
Verify the make command installation by checking its version:
We have successfully installed GNU Make “3.82.90” on Windows:
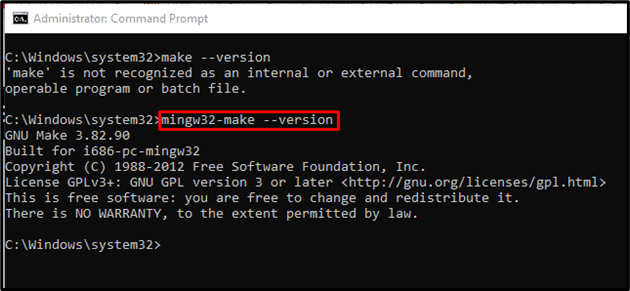
You can see that we are using the “mingw32-make” command instead of “make”. Let’s move ahead to fix it.
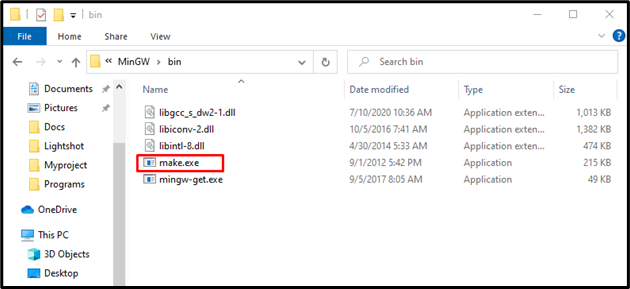
Step 6: Rename mingw32-make.exe File
Go to the “C” directory and open the “MinGW” folder:

After that, open the “bin” folder and locate the “mingw32-make.exe” file:
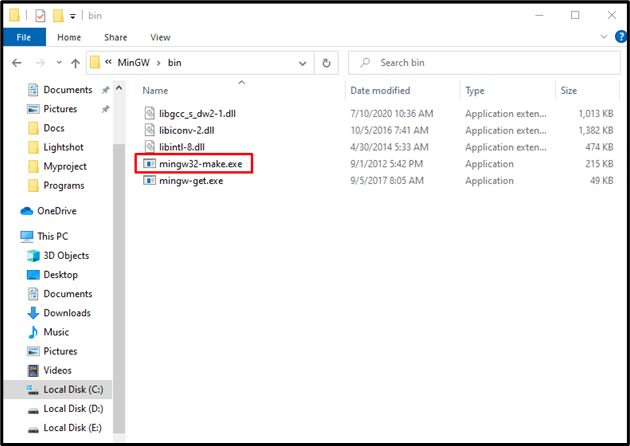
Rename the file name as “make.exe”:
Now, check out the version using the make command:
Till this point, we have installed and configured make in Windows. Let’s move further to create a new Makefile.
How to Create a Makefile in Windows?
Follow the below-mentioned steps to create a simply programmed Makefile in Windows.
Step 1: Create New Folder
First, create a new folder as we have created “Firstproject” on the desktop:

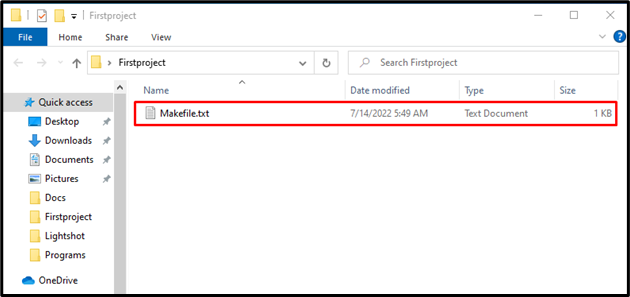
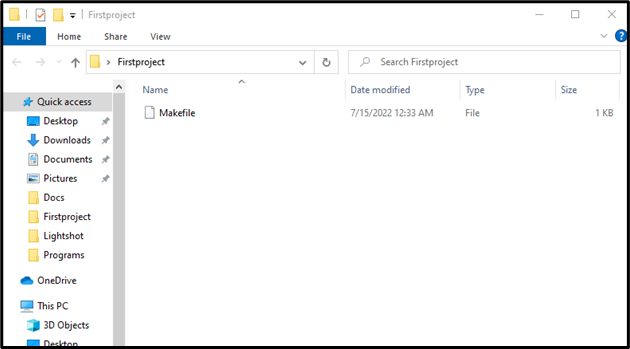
Step 2: Create a MakeFile
Open the newly created folder and create a simple text file with the name “Makefile”:
Paste the below-provided code inside the Makefile and hit “CTRL+S” to save changes:
echo "This is my first Makefile";

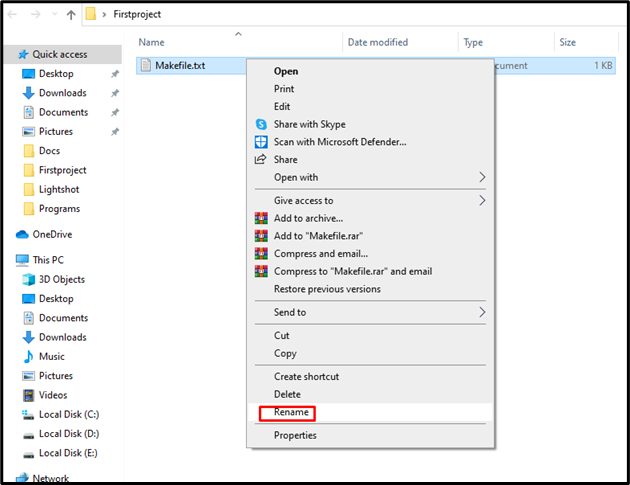
Step 3: Remove .txt Extension
Right-click on the Makefile and select “Rename” from the given option and remove the “.txt” extension. Do not change the file name; only remove the “.txt” extension:
A “Rename” alert message box will be displayed on the screen for confirmation. Hit the “Yes” button:

That’s it! Makefile is created and ready to execute:
Let’s move forward toward the method to run a Makefile in Windows.
How to Run a Makefile in Windows?
Follow the below-given instructions to run a Makefile in Windows.
In the “Startup” menu, search for “CMD” and run Command Prompt as administrator:

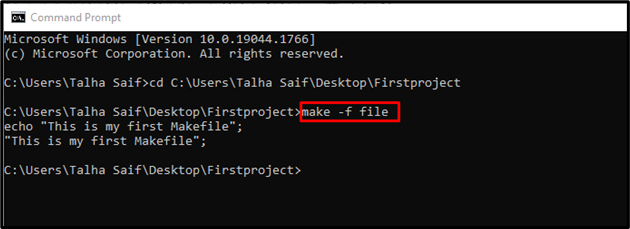
Use the “cd” command along with the Makefile path to move to that specific directory. Then, use the “make” command to run the created Makefile in Windows:
> make
The provided make command will execute the Makefile and display the output on the Command Prompt:

You can also utilize the “-f” option to read any file as a Makefile:
We have effectively demonstrated the method to install the make command and run Makefile in Windows.
Conclusion
Before running a Makefile in Windows, it is required to install the make command first by using the “Mingw-get install mingw32-make” command on the Command Prompt. Then, create a Makefile, remove the “.txt” extension, and use the “make” command to run the specified Makefile in Windows. We have demonstrated the method to install the make command and how to create and run the Makefile in Windows.