
The version of Raspberry Pi I have is Raspberry Pi 3 Model B. It has 40 GPIO pin header and not all of them can be used for interacting with other electronic components. You will have to hook up your electronic components to the right pin number. Otherwise, you won’t be able to interact or control the electronic component connected to your Raspberry Pi. I will refer you to a diagram that you can use to find out which pin to use for what purpose. Don’t worry about it.
In this article, I will make a simple LED blinking project with Raspberry Pi using the GPIO pins. I will show you how to use Python to interact with the GPIO pins of Raspberry Pi. I will use Raspberry Pi 3 Model B for the demonstration as this is what I have. If you’re using another version of Raspberry Pi, then you may have to make necessary changes for it to work. So, let’s get started.
Things You Need:
To successfully build the Raspberry Pi LED blinking project with me, you need,
- A Raspberry Pi 3 single board computer.
- A microSD card with Raspbian OS flashed.
- A micro USB adapter or Android phone charger for powering up Raspberry Pi.
- A computer with internet connectivity and for connecting to the Raspberry Pi remotely.
- A 220Ω or 1KΩ resistor.
- A 5mm or 3mm LED.
- Some male to female connecting wires.
- A breadboard.
Circuit Diagram:
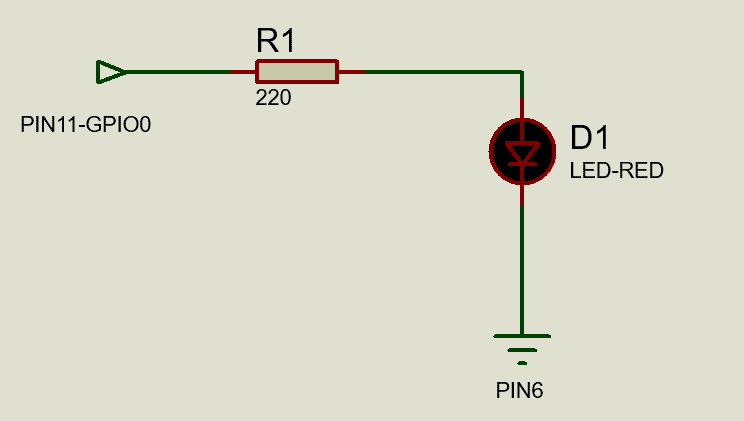
You should connect all the components to your Raspberry Pi 3 as shown in the circuit diagram below.
On breadboard it looks something like this.

Note that I connected one end of the resistor to the GPIO0 which is PIN 11 on Raspberry Pi 3, and one end of the red LED to the GND (ground) pin which is PIN 6 on the Raspberry Pi 3.
Connecting to the Raspberry Pi 3 Remotely:
If you own a Raspberry Pi and use Raspbian, then you most likely have SSH and VNC enabled already. If you’ve followed one of my articles on how to install Raspbian on Raspberry Pi, then you should know how to enable them. If you are in doubt on whether these are enabled, please read the article at (Link of the article Install Raspbian on Raspberry Pi).
If you prefer to work with the command line, then SSH into your Raspberry Pi 3 with the following command:
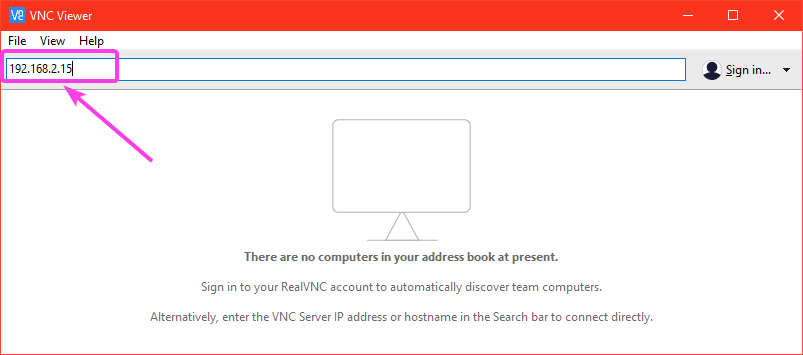
If you prefer to work graphically, use VNC Viewer to connect to your Raspberry Pi 3. Just type in the IP address of your Raspberry Pi and press <Enter>.
Now, type in pi as the username and the password that you set up while installing Raspbian as the password. Then click on OK.
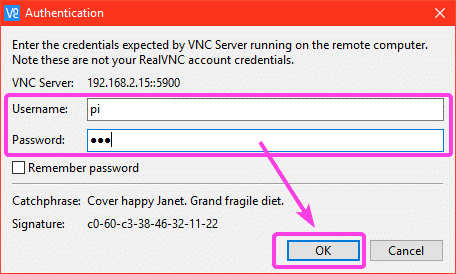
You should be connected.

Writing Codes for the Raspberry Pi Blink LED Project:
First, open up a Terminal (if you’re using VNC Viewer) and create a new file blink.py

Now, open blink.py with a text editor (I will use nano) as follows:

Now, type in the following lines of Python codes and save the file by pressing <Ctrl> + x and then press y followed by <Enter>.
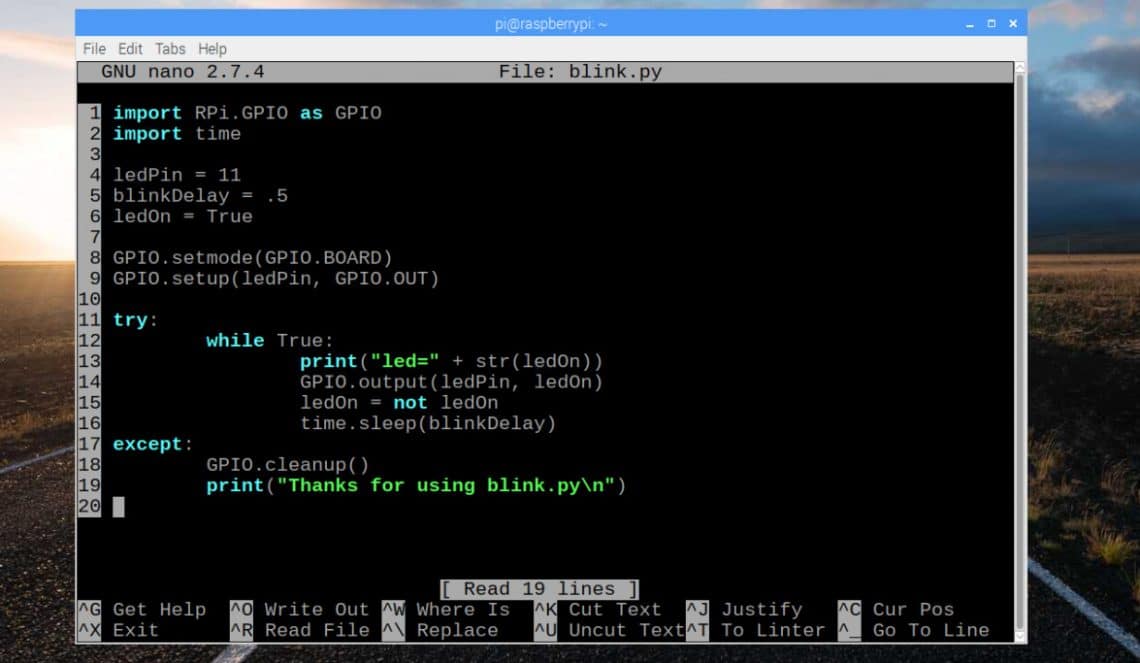
Here, on line 1, I imported the the Python RPi.GPIO from the RPi library to work with the GPIO pins of Raspberry Pi.
On line 2, I imported the Python time and time library.
On line 4-6, I defined 3 variables.
- ledPin variable is set to the pin number 11. This is where the red LED is connected to the Raspberry Pi 3.
- blinkDelay is set to 5, which is 500ms. So, the LED will be on for 500ms and then off for 500ms and again on for 500ms and so on.
- ledOn variable is set to True by default. When it’s True, the LED will be on, when it’s false, the LED will be off. ledOn logic is switched from True to False and False to True every 500ms (as defined in blinkDelay).
Line 9 is used to set up the GPIO pin ledPin which is pin 11 for output using the GPIO.setup() library function. GPIO.setup() accepts two arguments. One is the pin number, and the other is the mode at which this pin will work. In this case, it is GPIO.OUT or output mode. If you want to take inputs, then it should be GPIO.IN.
On line 11-19, a try-except block is used. So, when I stop the Python script, it will print the text Thanks for using blink.py (line 19) instead of error messages. I also made sure the GPIO pin is cleaned up in line 18 with GPIO.cleanup() library function.
The actual code for the Blink project is in line 12-16. Here, an infinite loop is used.
At each iteration of the loop,
- Line 13 prints the status of the LED (whether it’s on or off) depending on logic of the ledOn
- Line 14 uses the output() library function to either turn on or off the LED (in ledPin pin) depending on the logic of ledOn variable.
- Line 15 is used to switch the logic value of ledOn
- Finally, on line 16, sleep() library function is used to keep the LED on or off for blinkDelay time.
Once you’re done writing the code, run blink.py script with the following command:

As you can see, the LED statuses are being displayed every 500ms.

As you can see, the LED is blinking every 500ms.
[Include the video file in files/output.3gp]
If you want to stop the blink.py script, just press <Ctrl> + c.
As you can see, the script execution has stopped.

Raspberry Pi 3 Model B GPIO Pinouts:
You can find the Raspberry Pi 3 Model B GPIO pinouts at https://pi4j.com/1.2/pins/model-3b-rev1.html
Be sure to check it out.
So, that’s how you work with the GPIO pins of Raspberry Pi 3 with Python. Thanks for reading this article.