The script and dependencies must be installed on the user’s computers for them to utilize the developer. Because the dependencies are set up in a virtual environment, it would be useless to share the entire virtual environment because the folder size would be enormous, and there would be a risk of integrity problems.
When this occurs, programmers include a requirements.txt file in the project that contains a list of all the dependencies that have been installed in the virtual environment as well as information on the version that is being utilized. To utilize the program, the borrower or end-user merely needs to set up a virtual environment and install any necessary components. This post will explain how to create the requirements.txt file and install dependencies using it.”
Definition of requirement.txt File in Python
During the development of a specific project, libraries, packages, and modules are typically listed in a requirement.txt file, a type of file in Python. It also keeps track of all the files and programs needed for the project to function or on which it depends. In most cases, your project’s root directory is where the file “requirement.txt” is kept (or is located). The reason why we require this kind of file in our projects is raised here, which is yet another crucial question.
Importance of requirement.txt File in Python
As it resolves nearly all compatibility difficulties, it benefits us in several ways, even when we return our project in the future. If you’ve ever written a project in Python or worked on one, you know that we typically need many packages. However, whenever we worked on a project, we frequently used a certain version of the packages.
Later, the maintainer or package manager might make certain adjustments, and those changes could easily damage your entire application. Consequently, keeping track of each package change would take a lot of time. To avoid unpleasant surprises, it’s critical to keep a record of every package we use when the project is excessively large.
Utilizing a virtual environment is one of the common strategies for dealing with this kind of problem. Since we typically do not need all of these package types while focusing on a particular project, it is important to recognize which one is necessary for each project in order to facilitate reproducibility. There are two primary types of modules and places where Python modules are typically stored.
The following files are typically involved:
-
- The Standard Python Library’s System Packages are a component of it.
- Site packages, often known as third-party packages, which you install with pip.
Virtual Environment for the requirement.txt File in Python
The user’s packages are kept apart from the local (or main) system installation in a virtual environment, which is a kind of artificial or separated workspace. It enables us to build an isolated, “virtual” environment for all Python schemes. This makes it simpler for each project to operate independently of the others, particularly when they have similar requirements. A virtual environment can be created using a variety of packages that are accessible. First, make all right that python and pip are mounted on your system.
>Pip --version
Install virtualenv
Let’s now explore how to install the modules and libraries after the virtual environment for our project has been constructed. With the virtual environment, obtaining all the necessary packages for our project is really simple. Let’s examine how to use “virtualenv.”
It is a particular kind of library that enables the creation and use of virtual environments. You can adhere to the directions provided to install the virtualenv. To install virtualenv, launch the shell prompt on your computer and enter the subsequent command.
Building the Directory for a New Project
Now, in order to prevent unneeded problems, build a new virtual environment within the directory of that project by giving the following command in prompt command.
We only need to activate it at this point in order to use the newly generated virtual environment. The following command must be entered, and the enter key must be pressed to enable this isolated environment.
We have titled our virtual environment “name _of_environment” in our example, so you can check that it has been formed by looking at the prompt to see that the prefix has been updated. Additionally, you may confirm it by navigating to the project folder or the directory where the relatively new directory with the provided name will be created.
Creating the requirement.txt File With the Python Path
It will be helpful to know its contents before creating the requirement.txt file. A requirement.txt file lists every type of standard package and library that is utilized in that specific project. Therefore, while creating any project, no matter how big or small, this requirement.txt file. Our projects become more transportable as a result of it. Several significant issues can be easily avoided with the “requirement.txt” file’s assistance. We can obtain the requirements.txt file from this location. We may use the next command to make the requirement.txt file:
>> requirements.txt
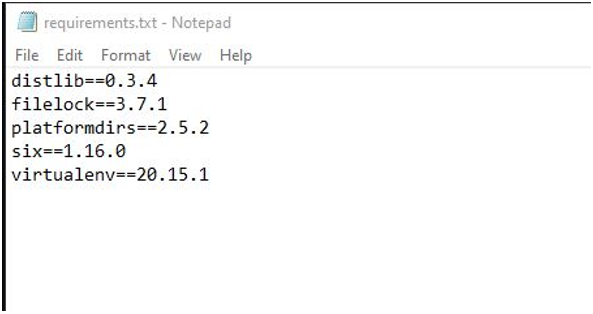
The requirement.txt file opens as the following image is displayed.
Conclusion
Here, we have concluded our article that the requirement.txt file is crucial because it will be used whenever a new user runs the code they downloaded from internet platforms on their PC. There is no necessity for the requirements.txt file name to appear in this file. Use dependencies.txt or another file if you choose. However, requirements.txt is the name given to this file most frequently in conventional development practice.


