Syntax:
As we are familiar with ChatGPT, we know that this platform is owned by the Open AI community and it provides tools, architectures, APIs, and several frameworks which we can utilize in the deployment of our applications and the natural language processing models. Open AI offers the APIs through which we can use any pre-trained AI and NLP models from the Open AI platform and can make them work for our applications like, for example, to give predictions on real-time data. Likewise, GPT4All also provides its users to integrate its pre-trained AI models with different applications.
The GPT4All model is trained on limited data as compared to ChatGPT. It has also some of its performance constraints as compared to ChatGPT but it allows the user to use their private GPT on their local hardware and it doesn’t require any network connections. With the help of this article, we will get to know how we can use the GPT4All models in Python script since GPT4All has the official bindings with Python which means that we can use and integrate the GPT4All models through Python script as well.
It all takes an online command to install the GPT4All for the Python IDE. Then, we may integrate as many AI models as our applications. The command to install this the GPT4All in Python is as shown in the following:
Example 1:
To get started with this example, we need to download and install Python in our systems. The recommended versions of Python are “version 3.7” or the ones that came after this version. Another way to work with Python to avoid the long process of installing the “Python setup” on our systems is using “Google Colab” which is a cloud-based environment for Python. We can run this environment on any web browser and can build the AI and machine learning models. The examples that we will implement here are executed in the Google Colab.
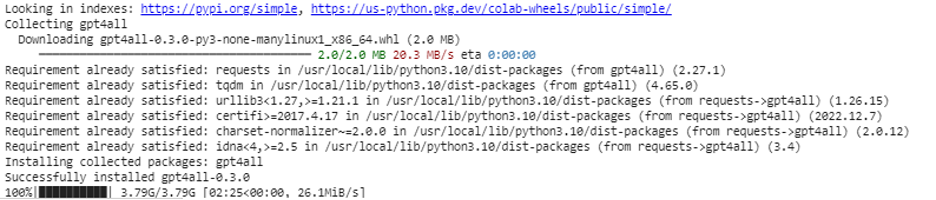
This example covers the method to install the GPT4All in Python and how to use its pre-trained models. We begin by first installing the GPT4All. For that, the command that we previously mentioned is executed. With the execution of the command, the GPT4All along with its packages and frameworks are downloaded and installed.
Now, we move forward. From GPT4All, we import the “GPT4All”. This adds all the pre-trained models from the GPT4All to the project. Now, we may utilize any single model and make it do the predictions for our application. Once we import the GPT4All package, it is now time to call this function and use the GPT4All model which gives the output for the “chat completion”.
In other words, if we ask anything from that model in the input, it returns it in the output. The model that we use here is “ggml-gpt4all-j-v1.3-groovy”. These models are already stored in the GPT4All cache. We can get these models from this link “https://github.com/nomic-ai/gpt4all/tree/main/gpt4all-chat” for manual downloading. If the model is already present in the GPT4All cache, we simply call the name of the model and specify it as input parameters to the “GPT4All()” function. If we manually downloaded it successfully, we pass the path to the folder where the model is located. Since this model is for message completion, the syntax for this model is given as follows:
The messages are a dictionary list and each dictionary should contain a “role” key with a value of the user, system, or assistant, and the “key” content which has the value as the string. In this example, we specify the content as “name three colors” and the role key as “user”.
$messages = [{"role": "user", "content": "Name 3 flowers"}]
After this specification, we call the “chat_completion()” function with the model. The code for this is displayed in the following output:
from gpt4all import GPT4All
model = GPT4All("ggml-gpt4all-j-v1.3-groovy")
messages = [{"role": "user", "content": "Name three colors"}]
model.chat_completion(messages)

After the execution of this example, the model returns three colors as the response to the input.
Example 2:
We cover another example where we discover another method to use the GPT4All in Python. This can be done using the official bindings for the Python which is provided by “Nomic” which is an open-source AI community, and it runs the GPT4All. Using the following command, we integrate “nomic” into our Python console:
Once this is installed, we import the GPT4All from “nomic.gpt4all”. After importing GPT4All, we initialize the GPT4All with the “open()” function. Then, we call the “prompt()” function and pass a prompt to this function. Then, a prompt response is generated based on the prompt that we have given as input to the prompt model.
from nomic.gpt4all import GPT4All
# Initialize the GPT4All model
initiate = GPT4All()
initiate.open()
# Generating a response based on the prompt
model_response = initiate.prompt('write a short story about a computer)
# dispalying the generated response
print(model_response)

The output displays the prompt response from the model that we generated using the pre-trained GPT4All model in Python. If we want to know more about the models and how we can use these models to generate the responses, or in simple words, if we want to gain knowledge about the syntax to generate the responses from these models, we may take further help from the GPT4All technical documentation details.
Conclusion
GPT4All is still striving to obtain performance accuracy. It is run by the nomic AI platform which aims at providing artificially intelligent chatbots to its users on the consumer-grade CPUs since GPT4All works without any network connection and GPUs. This article enlightens us to proficiently use the PyGPT4All in a Python environment and to create an interaction between our applications and the pre-trained GPT4All AI models. We covered two different methods on how to install GPT4All in Python in this guide.