Method 1: Understanding and Utilizing Pydantic’s Data Types in a Weather App
Proficiency in these data types ensures the accurate data validation and boosts reliability in Pydantic projects. We will also find types for URLs, email addresses, and specific string patterns. Imagine that we are developing a weather app that provides the users with accurate temperature forecasts for their selected cities. To achieve this, we utilize Pydantic’s versatile data types for effective data validation. Let’s go into the details:
Importing Pydantic and necessary modules is the basic step to implement any Pydantic project and can be done with the following commands:
!pip install pydantic[email]
# Import Pydantic
from pydantic import BaseModel, EmailStr
from typing import List
In this step, we import the Pydantic library which is essential for defining and validating the data models. We also import the “BaseModel” from Pydantic which is used to create our custom data model, and “EmailStr” for validating the email addresses. Additionally, we import the list from the typing the module to handle the lists of selected cities.
Now comes the definition of the “WeatherPreferences” model. We define a Pydantic data model named “WeatherPreferences” using the “BaseModel” class. This model includes four fields which are temperature (float) that represents the preferred temperature which must be a floating-point number, use_celsius (bool) that represents the user’s choice of temperature scale (Celsius or Fahrenheit) which is stored as a Boolean (True for Celsius, False for Fahrenheit), selected_cities (List[str]) that keeps a list of selected cities for weather tracking. It’s a list of strings and the email_alerts (EmailStr) which stores the user’s email address for weather alerts. It uses Pydantic’s “EmailStr” type for email validation.
temperature: float
use_celsius: bool
selected_cities: List[str]
email_alerts: EmailStr
To gather the user preferences, we define a function called gather_user_preferences() to interact with the user and collect their weather preferences.
print("Welcome to the Weather App!")
print("Please provide your weather preferences.")
We repeatedly use a “while” loop to suggest the user for their preferred temperature. The input is converted to a float. If it’s not a valid float, the user is informed of the error and suggested again.
The next section is gathering the temperature scale preference. In this section of the gather_user_preferences() function, we use another “while” loop to gather the user’s temperature scale preference (Celsius or Fahrenheit). The user’s input is converted to lowercase and drop the whitespace for case-insensitive validation.
If the user enters “c”, the use_celsius is set to True which indicates the Celsius preference. If “f” is entered, it’s set to False for Fahrenheit. If the input is neither “c” nor “f”, an error implication is demonstrated, and the user is recommended again.
try:
temperature = float(input("Enter your preferred temperature (e.g., 25.5): "))
break
except ValueError:
print("Invalid input. Please enter a valid temperature.")
# Validate temperature scale input
while True:
scale = input("Do you prefer Celsius (C) or Fahrenheit (F)? ").strip().lower()
if scale == 'c':
use_celsius = True
break
elif scale == 'f':
use_celsius = False
break
else:
print("Invalid choice. Please enter 'C' for Celsius or 'F' for Fahrenheit.")
In this part of the function for gathering the selected cities, we create an empty list called selected_cities to store the user’s selected cities. Using a “while” loop, we repeatedly suggest the users to enter the cities that they want to track. If the user enters an empty string (presses “Enter” without typing a city name), the loop exits, and we move to the next step. Otherwise, the entered city is added to the list.
while True:
city = input("Enter a city you want to track (or leave empty to finish): ").strip()
if not city:
break
selected_cities.append(city)
The next task is to gather the email address. We use another “while” loop to collect the user’s email address for weather alerts.
The “try” block attempts to validate the email address using Pydantic’s EmailStr.validate(email) method. If the email is in an invalid format, a ValueError is raised and the user is informed of the error and is recommended again.
email = input("Enter your email address for weather alerts: ").strip()
try:
EmailStr.validate(email)
break
except ValueError:
print("Invalid email format. Please enter a valid email address.")
return WeatherPreferences(temperature=temperature, use_celsius=use_celsius, selected_cities=selected_cities, email_alerts=email)
In the main section of the code, the primary function displays the user preferences. We call the gather_user_preferences() function to collect and store all the user preferences in the user_prefs variable.
We then print a summary of the user’s preferences including the chosen temperature, temperature scale, selected cities, and email address for weather alerts.
The full code with the output is as follows:
!pip install pydantic[email]
# Import Pydantic
from pydantic import BaseModel, EmailStr
from typing import List
# Define a Pydantic model to represent weather preferences
class WeatherPreferences(BaseModel):
temperature: float
use_celsius: bool
selected_cities: List[str]
email_alerts: EmailStr
# Gather user inputs
def gather_user_preferences():
print("Welcome to the Weather App!")
print("Please provide your weather preferences.")
# Validate temperature input
while True:
try:
temperature = float(input("Enter your preferred temperature (e.g., 25.5): "))
break
except ValueError:
print("Invalid input. Please enter a valid temperature.")
# Validate temperature scale input
while True:
scale = input("Do you prefer Celsius (C) or Fahrenheit (F)? ").strip().lower()
if scale == 'c':
use_celsius = True
break
elif scale == 'f':
use_celsius = False
break
else:
print("Invalid choice. Please enter 'C' for Celsius or 'F' for Fahrenheit.")
# Gather a list of selected cities
selected_cities = []
while True:
city = input("Enter a city you want to track (or leave empty to finish): ").strip()
if not city:
break
selected_cities.append(city)
# Validate and gather the user's email for alerts
while True:
email = input("Enter your email address for weather alerts: ").strip()
try:
EmailStr.validate(email)
break
except ValueError:
print("Invalid email format. Please enter a valid email address.")
return WeatherPreferences(temperature=temperature, use_celsius=use_celsius, selected_cities=selected_cities, email_alerts=email)
# Main function
if __name__ == "__main__":
user_prefs = gather_user_preferences()
print("\nThank you! Here are your weather preferences:")
print(user_prefs)
print("\nYou will receive weather alerts at", user_prefs.email_alerts)
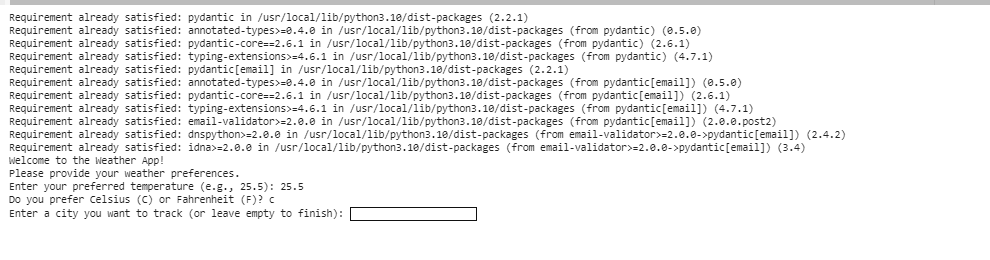
This step-by-step explanation demonstrates how Pydantic’s data types are used to validate and structure the user inputs in a practical example. The code ensures that the user’s preferences are correctly collected and stored, making the application fast and user-friendly.
Method 2: Pydantic’s Various Data Types to Manage the Data in an Employee Management System
Let’s explore another example of using Pydantic’s various data types to manage the data in an employee management system.
To initiate, importing necessary modules is required. We start on by importing the mandatory modules. We import the “BaseModel” from Pydantic to define our data model and list from the typing module to manage the lists of employees.
from pydantic import BaseModel
from typing import List
Then comes defining the employee model. We define a Pydantic data model named “Employee” using the “BaseModel” class. This model represents an employee and includes fields like employee_id (int) which represents the unique employee identifier as an integer, name (str) which stores the employee’s full name as a string, age (int) which represents the employee’s age as an integer, department (str) stores which is the department where the employee works as a string, is_manager (bool) which represents whether the employee is a manager (True) or not (False), and the skills (List[str]) that stores a list of skills that are possessed by the employee as strings.
employee_id: int
name: str
age: int
department: str
is_manager: bool
skills: List[str]
To create an employee database, we create an “EmployeeDatabase” class to manage the employees. This class includes several methods to perform the operations on the employee data like __init__(self) which initializes an empty list to store the employee records, add_employee(self, employee: Employee) which adds an employee to the database, get_employee_by_id(self, employee_id: int) -> Employee which retrieves an employee by their unique ID, get_employees_by_department(self, department: str) -> List[Employee] which returns a list of employees in a specified department, get_managers(self) -> List[Employee] which retrieves a list of managers, and get_employees_with_skill(self, skill: str) -> List[Employee] which retrieves the employees with a specific skill.
def __init__(self):
self.employees = []
def add_employee(self, employee: Employee):
self.employees.append(employee)
def get_employee_by_id(self, employee_id: int) -> Employee:
for emp in self.employees:
if emp.employee_id == employee_id:
return emp
def get_employees_by_department(self, department: str) -> List[Employee]:
return [emp for emp in self.employees if emp.department == department]
def get_managers(self) -> List[Employee]:
return [emp for emp in self.employees if emp.is_manager]
def get_employees_with_skill(self, skill: str) -> List[Employee]:
return [emp for emp in self.employees if skill in emp.skills
Full code with the output:
from pydantic import BaseModel
from typing import List
class Employee(BaseModel):
employee_id: int
name: str
age: int
department: str
is_manager: bool
skills: List[str]
class EmployeeDatabase:
def __init__(self):
self.employees = []
def add_employee(self, employee: Employee):
self.employees.append(employee)
def get_employee_by_id(self, employee_id: int) -> Employee:
for emp in self.employees:
if emp.employee_id == employee_id:
return emp
def get_employees_by_department(self, department: str) -> List[Employee]:
return [emp for emp in self.employees if emp.department == department]
def get_managers(self) -> List[Employee]:
return [emp for emp in self.employees if emp.is_manager]
def get_employees_with_skill(self, skill: str) -> List[Employee]:
return [emp for emp in self.employees if skill in emp.skills]
if __name__ == "__main__":
db = EmployeeDatabase()
# Adding employees
emp1 = Employee(employee_id=1, name="Alice", age=30, department="HR", is_manager=True, skills=["Recruiting", "Communication"])
emp2 = Employee(employee_id=2, name="Bob", age=35, department="Engineering", is_manager=True, skills=["Python", "JavaScript"])
emp3 = Employee(employee_id=3, name="Charlie", age=28, department="Engineering", is_manager=False, skills=["Java", "C++"])
db.add_employee(emp1)
db.add_employee(emp2)
db.add_employee(emp3)
# Retrieving employees
retrieved_emp = db.get_employee_by_id(2)
print("Employee with ID 2:", retrieved_emp)
hr_employees = db.get_employees_by_department("HR")
print("HR Department Employees:", hr_employees)
managers = db.get_managers()
print("Managers:", managers)
python_experts = db.get_employees_with_skill("Python")
print("Python Experts:", python_experts)

To utilize the “Employee” database, we create an instance of the “EmployeeDatabase” in the main section of the code and fill it with employee records. We then use various methods to retrieve a specific employee data based on ID, department, managerial status, and skillset. This demonstrates how Pydantic’s data types can help to structure and validate the data in a real-world scenario such as employee management.
Conclusion
The examples showcased how Pydantic’s data types can be employed in an employee management system and weather forecast app. The detailed explanation covers defining the data model, creating an employee database class, and performing operations on the data. This approach ensures that the employee and weather app data are accurately structured and accessible, making the system efficient and reliable.